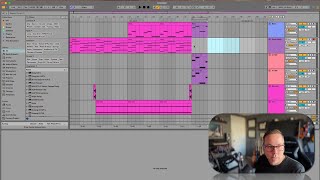
J. Anthony Allen teaches essential Ableton Live 12 shortcuts for faster editing and arrangement. Learn copy, paste, option-click-drag to clone clips, Command+L to toggle looping, and how to create locators with Control-click for quick navigation. He emphasizes memorizing just a handful of high-impact keys rather than overwhelming yourself with every shortcut.
Chapters
Okay, let's talk about our general timeline commands. Now, I'm not a big proponent of memorizing a thousand key commands. You can navigate live almost entirely through key commands now. But I really don't like spending time memorizing key commands. So I try not to give you too many of them. But there are a few that are super, super helpful for navigating live very quickly. So let's go over a few of those as it relates to the arrangement, view and editing. So the first is just kind of what I call our Microsoft Word key commands, right? So if I click on a clip, we can do copy, command C, V or Command V to paste. And if you're on a PC, it's what is it? Alt or control, I can't remember. But C to copy, command V to paste we can option click and drag is my all time favorite thing. That means leave a copy where it was and make a new one. It's like pulling a clone out. I use that all the time. So copy, paste, option, click and drag. Let's talk about looping. If we want to loop a part of the arrangement, we just highlight something. Doesn't matter if it's got a clip on it or not, but whatever we highlight is going to get looped. So command L is going to turn on looping and no matter what I highlighted, tracks are going to play in this loop. Okay, this is our loop brace. We can move that around wherever we want. And lastly, let's do locators. These are little locators. You can see they're tiny little play commands because you can click on them and if I double click on them, it'll start playing from there. But they're great for just leaving yourself little notes while you're working. I use them all the time. As you can see in this track that I just started, I put, you know, maybe a violin solo here and bring that ARP thing back here. So to make one of these locators, we're just going to control, click up here in the timeline and add locator and then say whatever you want to say. This part, whatever. If you want to get rid of it, control, click on that locator again and delete. Or you can just hit delete. So locators are super cool. You can move them around by clicking and dragging on the flag and you can double click on them to start playing from that spot. Cool. Remember that if we select a section of a clip, we can copy from within it and paste. Same thing with audio clips. As long as we paste onto the same kind of clip. So if you're copying from MIDI clip, you need to paste onto a MIDI track. If you are copying from audio clip, you need to paste on a audio track. Unless you want to do the conversion thing, which. Which we went through a bit on the first class in the series. Okay, so those are our kind of main big picture commands. I just want to get in our head right away. Next, let's talk about some things we can do to an audio clip, in particular reversing and a couple other ways we can modify clips.