Ultimate Ableton Live 10: Adding Content
Learn how to add MIDI and audio to Ableton Live 10 tracks. The presenter shows how to create MIDI clips by double-clicking, draw notes, assign instruments like Operator, and consolidate audio with Command-J. Instruments attach to tracks, not clips, and only one can occupy a track at a time.
Chapters
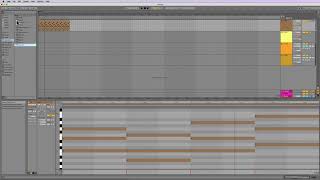
Okay, let's talk about adding content to our session. And by adding content, I'm talking about a couple different ways that this can happen. So we can get content. And by content I'm saying audio or MIDI stuff. Music. Basically we can get that into Ableton in a couple different ways. We can record sound, we can record MIDI data, or we can drag in some sound or MIDI data. And if we drag in MIDI data, we need to or record it. We need to apply an instrument. So in this first video in this section, I want to go over that specific idea. So I have a new session here. And let's just work on a little track throughout this section. So I have two MIDI tracks and two audio tracks, right? If I want to do a MIDI track, if I want to make a MIDI track, I can double click to make a MIDI clip. Now that is new. In Live 10, if you're in Live 9, select something and then go to create insert MIDI clip right there. But if you're in live 10, you can just double click. Then I can look at that and I can draw in some notes. So let's do, let's do a little chord progression here. So let's do a C major chord and then I'm gonna say command D and let's go to an F major chord. But let's move those down an octave. Down an octave. And then let's make this a little longer since we know how to do that. Now let's make this a two bar loop. You can see up there, it updated is showing the loop so we see the same thing over and over. Let's duplicate this and let's take it to start in C major. How about an A minor chord? That almost is. If these chords are tripping you and you don't understand what I'm doing here. That's okay. I'm just building some chords that I think will sound nice. For the sake of example, I have a separate class on how to deal with chords. And you can check that out as well. It's called Music Theory for Electronic Musicians. It's about music theory stuff. Okay, so I have a little chord progression here. It's looping up here and I can hit play and we will hear nothing, right? Because this is a MIDI clip. This is a MIDI track. It's not going to make any sound until I put an instrument on it. So I'm going to go to this instruments tab and these are all my available instruments. Now if you have Live nine, you won't see this wavetable one. If you don't have Live Suite, you won't see a lot of these. So there are three different versions of Live. There's Live Intro, Live Standard and Live Suite. Live Suite is the one that has everything. Live, Standard, you'll see less things here. In Live Intro, you'll see less things yet. So hopefully you have Live Suite. That's what we want to be working on. If you don't have Live Suite, that's okay. There's still a lot you can do with Standard and even Intro. But we can open up any of these. Like, let's go to, I don't know, let's go to Operator. And if I click on the little arrow, I can open it up. And these are a whole bunch of presets, right? So let's look at, I don't know, strings. And here's a string sound. Kind of sounds like a weird keyboard. And it's going to audition it for us. So I can drag that right onto that track. And now I have that instrument down here. Okay, now, important concept here is that that instrument is on the track, not the clip. Any other MIDI clips I put on this track are going to have to use the same instrument. If I want another instrument, put it on a different track. Okay? There can only be one instrument on a track at a time, unless you do some fancy stuff that we'll get to later. But for the most part, only one instrument on a track at a time. So now that we have an instrument, I can hit play. And that sounds terrible. So the reason that must sound terrible is there's some extra notes in this instrument happening. I can open it up with these buttons over here and see what's happening somewhere where tuning things bizarrely. So let's try a different. Let's try a more simple synth like this one. There we go. Pretty right? That's what I was expecting to hear. I put in a really pretty chord progression, and I heard a really ugly chord progression. So what was happening there was a synth can add notes. Some synths can have multiple notes for every note you give it. So there was one. There was some extra notes happening by that synth that didn't sound very good. So now I have another synth on here and I can hear it. I can see more parameters of my synth here and adjust them. We're going to go into how all of this stuff works, how to get into every aspect of our synthesizer we will get to over the course of this Ableton series of classes. So let's not worry about the details in there quite yet. The key point to remember here is that nothing happens on this MIDI track until I put an instrument on it. Audio tracks can. You don't need to put anything extra on the audio track. I can find an audio clip and I can throw that right on an audio track and it'll work. Okay, so what I could do now is zoom in, since I am going to try to make this sound somewhat interesting. Oops. Zoom in a little farther here. Let's put this on beats two and four. We're going kind of fast here, but okay, so what I'm seeing is, remember how we read this timeline up here? This one says bar one, beat one, bar one, beat two, bar one, beat three, bar one, beat four. So I want this clap to happen on two and four. Okay. Now I've got this silence back here. So I'm going to clip that off and then I'm going to just duplicate both of these. Actually, there's an easier way I could do this. Let's do it. I'm going to highlight this whole bar just on this track and I'm going to turn this into one clip. Okay. I'm going to do it with command J. This is called consolidate. It's going to turn that into one clip, including the empty space. The reason I would do that is so that I can turn loop on and then just drag it out. Now that's going to go every two and four. So now I can zoom back out and pull that out for the duration of what I've got here. Cool. Let's go back to the beginning. Okay, so we're starting to get something. One last thing I want to point out in this first video is the first video on this topic is where sound and when sound is generated on a MIDI clip. So let's look at the instrument again. And the way. I just got that back, by the way, we were here and I went over to this tab down here and I did it with shift table tab key. But you can also click on these two tabs down here. So check this out. When you see these dots here, that means MIDI data. Okay. When you see these lines here, that means audio signal. That's what those two symbols mean. So we can see here, we can see MIDI data coming in here, and then it flows through the instrument. And now it's audio signal. If we look at our audio clip, we just see audio signal right away. Okay, MIDI needs to be turned into audio. Okay. Now what that means is that we can put. We can do anything we want to do to the audio after it's converted to audio. Like audio effects, like a delay or a reverb or something like that. And we'll start doing that soon when we talk about effects. But for now, just remember that. Cool. Okay. Before we get started with actually recording some stuff, we need to take a quick look at our preferences and make sure everything is set up correctly. So let's do that next.










