Adobe’s Game-Changing AI Features Coming Soon
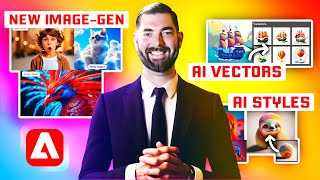
Adobe announced new AI features across Photoshop, Illustrator, Premiere, and Express. Photoshop gets generative fill for compositing and background removal. Premiere can now edit video by text, remove filler words, and enhance speech. The new Firefly Image 2 model supports photorealism and style matching.
Chapters
Adobe Max is this week and so far Adobe's already made a ton of announcements about really cool AI features getting rolled out into their various tools. They've improved Adobe Photoshop's Generative Fill. They've added some really cool new Adobe Illustrator text to Vector models. Adobe Express got some awesome AI updates, and there's a whole new Firefly model which makes insanely realistic images. Now, I could break them all down in my end of week news video, but there's been so many that I felt that it deserved its own video. So I'm going to go ahead and break down the event for you and we're even going to test out some of the cool new updates that they've rolled out. Let's get into it. So they started off the event by talking about some of the really cool Generative Fill tricks that you can use in Photoshop. Now, we've had these for a little bit now, but they never cease to impress me every single time I see them here to direct your eye to the subject. So I'm just making a very rough selection with my nervous hands. There we go. Look at that. Thank you so much. So let's go ahead and play around with it a little bit. First thing I'll do, let's drag in a headshot of myself here. I'm going to go ahead and do a little outline around my face like this, connect it up, click Generative Fill and let's say add Sunglasses. Click Generate. And just like that, I got a sweet pair of shades. It gave me this option, this option, and this option, the third one's probably my favorite. It's also really good at blending multiple images together. Let's go ahead and create a new image here. Now, I've got this large image here and I want to actually blend two images together. So let's pull this interesting image in here. Let me shrink it down a little bit. And I'll also pull this image in here. They've got kind of a similar style, but they're not quite the same. I'm going to bring this one next to this one here. I'm going to delete out a little chunk here in the middle. So we've got that gap. Let's select this little gap here in the middle like this. And let's click down Generative Fill. I'll just click Generate. I'll leave it blank and we get two images that blend into each other pretty naturally. I'm going to go ahead and merge all these layers together. Use my Magic Wand tool to select this outer area here, I'm going to modify my selection a little bit to expand it. So let's expand it by 30 pixels so that it sort of bleeds into the image a little bit here. Let's click Generative Fill and let's fill in the rest of the image for us. And there we go. Now, let's say I want to superimpose my face on this guy. Let's do that real quick. I'm going to grab this image that we created earlier here. I'm going to go ahead and remove the sunglasses and just grab my face. I'll select the whole image. We'll jump over to this one, Paste it in here. Let me transform it so it kind of covers this guy's face a little bit. Bring my opacity down a little bit just so I can line it up a little bit better. And we'll put it right there. And one thing that's really cool now is we've got this new remove background button, so I can click this one while on my layer with my face on it. It'll just cut out the background around my head with just one click. Now, the hair and the guy's face behind me is a little bit funky, so I'm going to go ahead and use my lasso tool here and I'm going to kind of work around my head a little bit up here where all this guy's hair is. Bring it around, overlap on my head just a little bit here. And I've got this funky shape here. But let's just go ahead and click Generative Fill. And let's generate and see what it does with that background. And just like that, it cleaned it up a little bit. I still got a little bit of, I don't know, some hair going on right here. Let's clean that up. I'm going to go ahead and do a blank generative fill again. Click Generate, and that's looking pretty good. Now let's go ahead and clean up where my shirt is here because that's obviously not blending with this guy very well. This time I'm going to go ahead and use the Quick Selection tool. Start selecting this area around here where my shirt is, grab it all, and let's go ahead and do Generative fill one more time and see how it blends it with the rest of the guy's body. And there you go. Some super quick and dirty compositing. The first time I did this exact same process, this was what I got. I liked this version quite a bit better. But unfortunately, as I'm recording this time, this is what I came up with. Doesn't look quite as cool. I'm gonna go ahead and pull in my profile pic here as a new image just to show off one more cool thing. They have this option now to select Subject. If I click on this, it will automatically try to find the main subject of the image. And you can see that it did a pretty good job of mostly finding me. I could use my Quick Selection tool here to kind of clean up the and one quick click and now I've got a cutout of me that I can use however I want. I didn't have to do any sort of painful dragging out my outline to get it either. So Photoshop Generative Fill still pretty impressive, but the most impressive thing that they announced at Adobe Max was actually the features that they added into Adobe Illustrator. And I'm going to tell you about those in just a minute. But before I do, I want to tell you about today's sponsor, Wirestock. If you're not familiar with Wirestock, it's a single platform where you can upload your images, your photos, your drawings, drawings, any artwork that you create, and it will submit it to all of the stock photo websites for you. It'll create titles, it'll create descriptions, it'll create keywords, it'll let the platforms know if it was AI generated. It will do all the work for you. All you have to do is upload the images. And many of the stock photo websites now actually allow you to upload AI generated images. Platforms like Adobe Stock, FreePik, Dreamstime, 123rf and Imago all allow AI generated images. And if you submit your images straight to Wirestock, Wirestock will then submit them to all those platforms for you. And what's even cooler is if you're a premium member of wirestock, you can generate images directly from within wirestock. So if I click on this generate button here, I have the ability to generate images in various styles, various orientations, and even upload images to get a specific style. However, they also have some really cool features like Reimagine. With Reimagine, I can upload any image I want and it will create more images that are similar to that one. For example, let's say this image that I created of a man at a laptop is selling really well on stock photo sites and I want to double down. I want to make more images like this one. To sell, I could simply drag that image into the Reimagine section here. Click the Reimagine button. And just like that, I've got three more images that look very similar to the one that's already doing well. They've also got this really cool image mixer where it will actually blend two images together. So here's a cool, colorful image that I made of Geralt from the Witcher. Let's toss this into box one here. And here's an image of a woman that I made in mid Journey. Let's go ahead and take this other image, drop it up here. And they're two pretty different images. Let's go ahead and click Generate and see what the blend looks like. And from the combination, we get something completely wild and something completely new. Wirestock also has this cool Explore page where you can actually see which images are selling well on other stock photo sites right now and generate more images that are similar. So check out Wirestock IO to start making money off of your AI generated images and use the coupon code MATT20 to get 20% off of your premium membership. Thank you once again to Wirestock for sponsoring this video. Now let's check out some of the cool AI features that they've rolled out into Adobe Illustrator. So one of the cool things that they showed off at the event was that you can upload any image and it will actually figure out the font that's in the image and allow you to write new text and using this new font that it just figured out for you. But by far the coolest feature is the ability to generate vector graphics using text prompts, like they did with this airplane here. So if I jump into Adobe Illustrator, I'm going to go ahead and clear my canvas here. Let's go ahead and create a box. So I'm just going to create a square box like this, and then I'm going to use my selection tool. And you'll notice when I use my selection tool, it brings up this bar that looks very similar to the generative fill bar that we get in Adobe Photoshop. If I click Generate Beta, you can see the prompt. Magical campfire around tents, et cetera, is there. But let's do a wolf walking in the woods and click Generate. I get some options of these cool vector graphics of a wolf walking in the woods. And because these are vectors, every element of this image is easily editable. So I can use my direct selection tool here, select any area of the wolf. Let's say I want to mess with this tail right here. I can come in here and change the color of the tail just like that. Now my Wolf has a blue shadow on its tail. And because it's a vector graphic, that means it's infinitely scalable. I could keep on making this image larger and larger and larger without any loss of image quality. I'm going to go ahead and delete this one, and we'll do another example here. Let's draw another square, use our selection tool, and we'll click Generate Beta again. And over here we have other options. We can do a subject, a scene, an icon, or a pattern. So if I want a repeating pattern of a wolf walking in the woods and I click Generate, I have a few options of wolves with woods. There's that one, there's that one, and there's that one. And just like that, I have an image that repeats. I can drag around, and you can see there's no seams. It's just a repeating image. All right, one last cool thing I want to show you about Adobe Illustrator. I'm going to go ahead and delete this again. We'll create our box here, but they added the ability to match the style of any other image. So I'm going to go ahead and move this to the side and I'm going to pull in an image here. Let me shrink this down a little bit. And I want my new vector graphic to sort of resemble the color scheme and essence of this image. So let's come back over to our square. We'll click Generate. And let's do a woman walking in this city. And let's go ahead and change this to Scene again. And then right here we've got this button called Style Picker. If I click this and then use my little eyedropper tool on this image, I'm telling it to match the style of my new graphic to the style of this image. Now, if I click Generate, I get a woman walking in the city with a similar color scheme. And here's what it looks like when I create a wolf matching this color scheme. And here's another variation and another one. And once again, all of this is editable. I could click on this wolf's ear up here and make it bigger, stretch it out if I want. Everything about this image is editable, as if I had drawn it myself inside of Illustrator. I'm sure you can already imagine all of the use cases for things like logo design and designing graphics for your website or anything like that. Unlike tools like Mid Journey, where you just get what you get, this every little piece is customizable once the image is generated. Now, they also announced that Illustrator, for the Web is available. You can find it over@creative cloud.adobe.com CC Illustrator Create a new file and you have a sort of stripped down version of Illustrator. Now, this doesn't seem to have all the same AI features in it yet, at least not that I could find. So I'm not going to really dive into this, but it's basically a simplified version of the full version of Illustrator. Now, the next set of really cool features that they announced at this event have to do with Adobe Premiere. And if you're a video editor like me, these make Adobe Premiere look pretty dang sexy. Now, if you've ever used a tool like descript where you can edit with the text, they've now added that into Premiere. So you can see in this example here, they select some text from the transcript of the video. They click a little button up at the top, and it adds that section that they highlighted onto their video timeline. They select another area of text from the transcript, press this little button up here, and boom. That's added to the timeline as well. They also showed off that words like and can automatically be detected and removed from the video just in a single click. So check this out. I remember the first time when I painted a mural, it really blew my mind because you hear that those ums the U.S. well, as of today's beta, check it out, we have a new filler word filter, y'. All. Delete, delete all by all. So I remember the first time when I painted a mural, it really blew my mind because another new feature of Adobe Premiere is that they have the enhanced speech added in now. So if you've ever used Adobe Speech Enhancer, which cleans up background noise and makes poor quality mics sound like better quality mics, that is added directly inside of Adobe Premiere. Now, they also showed off some new features in Adobe Express. If you're not familiar with Adobe Express, it's sort of Adobe's answer to Canva. It feels very similar to Canva. They added in some new animations, some new transitions, some really cool new stuff to this Adobe Express platform. You can actually find it by going over to adobe.com express, click on Get Adobe Express Free and you have all sorts of options here in Adobe Express. Now, in my opinion, the coolest thing that they added to Adobe Express is this text to template feature. So if we click into text to Template, we can create an entire design template here with image, text, everything we need, all from a single text prompt. Let's do a flyer for an online training about how to use AI tools include a robot and futuristic graphics. Let's click Generate. And just like that, it created a handful of graphics for me. Now, it didn't seem to find too many with robots, but this is a pretty cool template here. I can click on this template that it created for me, it'll open it up in Adobe Express, and now the whole thing is editable. I can change the text here, future Tools IO Live stream, and then I can actually change some of the fonts here. It recommends some different fonts for me. Go ahead and use that one. And for the background, I wasn't really super happy with what it generated. So let's go ahead and use generative fill. Let's do a futuristic cyberpunk robot. And I'm just going to brush over an area in here for it to fill that in. So we'll go ahead and mask off this area and hopefully it fills it in the way we want it in this area. Let's click Generate. And it made some variations for us, none of them super amazing, but of course, if you continue to play with it, you'll get it more dialed in the way you want it. I could click load more here and get some other variations and eventually I'll find an image that I land on that I really like for this flyer. And then at the end of this keynote, they had their Steve Jobs one more thing moment. But we do have one more thing. The all new Image 2 model. So at this Adobe Max event, they announced that there's now a new Firefly image 2. This is their new and improved Firefly image generation model, and it's available right now over@FireFly.Adobe.com you can just click into the Generate button on the Text to Image tab and generate anything you can imagine, assuming they don't deem it unethical or uses somebody else's likeness or something like that. So let's do a prompt of an old man holding his hands out towards the camera. Let's see how it does with hands. Now, a couple of the images. It got the hands fairly decent, this one. It gave a lot of extra fingers, but I actually wanted to try to get a photorealistic one. I had the content type set on auto. Let's switch it to photo and generate again. And now if you look at these, these are ultra realistic compared to what we used to get with Adobe Firefly. We click on one of these, he's got the right amount of fingers and look at that face. That looks ultra realistic to me. If I saw this on a Stock photo website. I probably wouldn't be able to tell you that that was AI generated other than the fact that these buttons are a little bit far spaced apart. The realism that Firefly is generating with these faces and with these hands is just kind of gotten to a next level here. They're super good. Now they've also added this new feature where you can match the style of an existing image. So I've got this profile pic that I use here. Let's see if we can match the style of this profile pic. Now it's probably not going to match the style exactly, but it'll probably try to match the color scheme pretty closely. I can take this image, drop it right into this, upload your image box here and tell it to generate again. And as you can see, it matched the color scheme and style of my original image that I uploaded. There's also a ton of built in reference images that you can use to match the style of these images. So for example, let's say I want to do acrylic and oil. Let's select this style here. Click Generate. And now we've got this artistic acrylic and oil style painting of a man holding his hands out. Let's switch it back to photo real quick. And if we scroll down here, you can see that there's a new photo settings option. If I open up this photo settings option, I can actually change things like I was controlling a real camera, like the aperture, the shutter speed, the field of view. If I crank the aperture all the way up to F1. Two, this should give me a blurry sort of bokeh background. Let's get rid of our reference image here and click Generate. And we should have the person in focus and a really blurry background. Now it's hard to tell with these three images, but it really kind of stands out in this image here where you've got that blurred out background. Let's do an astronaut. And as I type you can see it's actually suggesting prompts that I can use and it will auto fill them in. But let's do Riding a horse on Mars. The moon is visible behind. I like that prompt. Let's go ahead and use that. Let's leave it on photo style. Let's bring the aperture all the way up so it should show more detail in the background field of view. Let's bring this down so it's more of a wide angle shot. And let's click Generate and see what we get. We've got some fairly decent images of an astronaut riding a horse on Mars. Now this one, they put some plants or bushes or something in the background and the face almost looks more like a monkey than a human. But you know what? I don't believe there's any plants on Mars. Well, Firefly added a new feature in that you can add negative prompts as well. So let's click on exclude from image and let's add plants, greenery, bushes, grass, and a few other keywords that we don't want included in the image. And let's generate one more time. And there we go. We've got some new images and this time there is absolutely no plants showing within the image. In fact, this image is really pretty solid. So there you have it. There's pretty much all of the major announcements that they made at Adobe Max this year. Adobe Firefly has made some huge leaps with Firefly Image 2. And in an upcoming video I'm going to compare Firefly 2 with Dall E3, with stable diffusion XL and with mid journey and we're going to figure out which one does various things better and which use cases you should use each image generator for that'll be in a video coming within the next couple weeks. So if you're not subscribed already, make sure you subscribe to the channel. And if you want to make sure you get notified about that video, click the bell button and that'll ensure that you see that video when it comes up. If you liked this video and you found it helpful, you learned something new, maybe give it a thumbs up. That'll also ensure that you see more videos from me and videos like this one in your YouTube feed. Thank you once again for tuning in. I really, really appreciate you nerding out with me about all of this cool AI stuff. I'm having a blast learning about it, trying it, and showing it off for you so that you can go play with it as well. And if you haven't Already, check out FutureTools IE. This is where I curate all of the cool tools I come across. I'm adding new tools almost every single day. I'm updating the AI news almost every single day. And I've got a free newsletter where I'll keep you up to date in your inbox with all the latest AI news and all the coolest AI tools. You can find it all over at FutureTools I O. So check that out. Thank you so much again for tuning into this video. I really, really appreciate it. Thank you so much to Wirestock for sponsoring this video. You guys rock. Keep coming back for fun AI and tech videos. And I really, really appreciate you. I'll see you guys in the next video. Bye. Bye.










