Code Interpreter - This Changes Everything - First Impressions
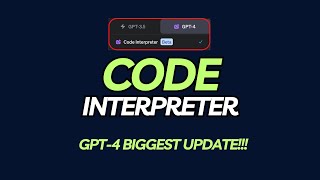
OpenAI's Code Interpreter runs Python inside GPT-4. The presenter walks through data analysis on NYC air quality, image processing with edge detection, and refactoring real Python files with error handling and logging added automatically.
Chapters
The long awaited code interpreter from OpenAI is finally here. It's probably one of the most significant update since the release of four. It's extremely powerful and it can redefine the way we work and interact with ChatGPT. This video is going to be a very first look at Code Interpreter and we will explore some of its capabilities. In this video I'm going to be specifically looking at three different things. First, its ability to analyze data. Second, we are going to be looking at its ability to do some image processing as well as image manipulation. In the third application, we are going to look at how you can integrate this in your own software projects and how this can help you improve your code base. So let's get started. First, let's look at what exactly Code Interpreter is. It's basically a Python interpreter that runs in a sandbox. So essentially you have your own Python environment that runs throughout your session. You can basically have a conversation and the subsequent calls build on top of each other. The great thing is that you can upload your own files for it to analyze and then you can download the results. Code Interpreter is currently available to only paid users. So let me first show you how to enable this. For that go to Settings and then under Beta features, enable Code Interpreter by togging this button. Now let's start another GPT4 session. So you will see the code interpreted listed here. If you click on it then you will notice that you see this small plus sign which appears. You can use this to upload your own files to be used with Code interpreter. Let's first look at a data analysis problem. So I'm going to click on this and then select this data set that I downloaded from Kaggle. This is air quality data set for New York City. So it basically captures the effects of Canadian wildfires on New York City's air quality. It's one of the trending data sets on Kaggle. Right now you need a Kaggle account in order to download this, but let's look at what the data is all about. So there are a number of different columns which represents different measurements that were taken as well as the geographical locations. Let's see if you can use GPT for code interpreter. Now I'm going to be starting with a very simple prompt. Analyze this data set. Let's hit Enter and let's wait for it to work. So in the background it's simply running a Python interpreter to analyze the data set. And here it started giving us some outputs. So initially it's looking at all the different variables that are present. These are basically the column names. It's actually great at figuring out what each variable represents. And then it correctly identified that the message column doesn't have any value. So everything is not a number. Okay, let's see what type of analysis it did. So it looked at the missing values for each of the column. Seems like nothing is missing except the message column. Next, it also computed some descriptive statistics for each of the columns. For example, it says for the name column there are 19 unique pollutants and then there are eight different unique measurement methods. As I said, it's using Python in the back end. So you can click on this show work and we'll show you the Python code that it actually used. So in this case it's using Pandas and creating a data frame. And let's see what some other things we can do. So I said, what are some insights that you can derive from this data set? Explain with plots. It started coming up, coming, coming up with these different products. The first one gives us distribution of pollutants. The second one is distribution of measurement methods. Now it actually is able to automatically derive some insights. So for example, it says the most frequent recorded pollutant in this data set is fine particle matter. And then it gives us the ranking of the other ones. Right. And similar insights from some other distributions as well. It also gives us the average pollution concentration over time. Now, keep in mind, it automatically deduced all of these insights without me telling what to look for. This will make data analysis so much easier. You can simply ask a question and it will generate answers. And the good thing is it can generate these plots. Now, if you right click on these plots, you can save them as an image. Let's see if we can convert this report into a downloadable PDF file. Oh wow. It actually did it. So it gave me a link. Let's click on this link and if I open it, you will see, yeah, it actually has the file. The plots could be rearranged in a better format, but it has everything in there. This is pretty awesome. Okay, one thing I want to highlight that it's doing everything using Python under the hood. So you can look at the code that it's actually using and you can reuse this code in your own work for some other data set. This is pretty neat. This was a very quick look. I'm going to be making a lot more detailed videos with different applications in mind. Okay, next we will look at how to do image manipulation before looking at how to use this in your own workflows to improve your Code base and analyze it as a code reviewer. So watch till the end to see it improve. My project, the code interpreter is available only to paid users at the moment. So first let me show you how you can enable it. So go to Settings and after that go to Beta features and here you will see the code interpreter. So enable it if it's not already enabled on your account. So I uploaded this image that I generated in mid journey. It's a PNG image and then I asked the code interpreter to convert that into a JPEG image and it's able to easily do it. But in this case it will provide you a link which you can click to download the image. Now I asked it write the code for conversion, so it gave me the code that it used to do the conversion. Now you can do simple image manipulation. So for example, here I'm asking it to convert this image into a square image and it was able to easily do it. Just notice that it added and these black spaces at the top and the bottom to make it a square image. Now keep in mind that all the operations that it performs are going to be sequential. So for example, when I asked it to convert the image into a grayscale image, so it converted this square image into the grayscale image. Beyond simple image manipulation, you can also perform some more complex tasks. So for example, in this case I asked it to do edge detection on the image using the canny edge detector. So it specified a very specific algorithm to do it and it's able to do that and the results are pretty great. In the last example, I'm going to show you how you can use code interpreter to improve your existing projects. So I uploaded this file, run local GPT PY and asked code interpreter to explain the code. Now it correctly identifies that it appears to be a command line tool for running a large language model question answering system. And then it gives me the main parts of the code. So there are some import statements as correct. There is a load model function, there's a main function and it's actually able to correctly deduce what is happening inside that main function. This is actually pretty amazing. For example, it says log the types of the device on which the script is being run or whether or not to show the source documents. This is correct. And then it also identified different other components within the main function. So this is pretty neat. It's like you have somebody who is reviewing your own code. I am using the QLIK library to provide command line interface. So it correctly identifies that and then it correctly Identifies the main execution as well. Okay, that's fine so far. Then I asked code interpreter what are some improvements that can be made to the code? Now this is where things gets really interesting. So first it says that it's well structured. However, there are always some potential improvements that can be made to any code. So it's actually pretty polite in its assessment. All right, so let's look at some of the suggestions. Code refactoring so the load function could be refactored for better readability. There are definitely some if else statements which could potentially be simplified or abstracted into smaller helper functions. It's actually correct. Let me show you how the code looks like today. So here's the load function and then there are a bunch of FL statements to select the type of model based on the type of device that you are running this on. Now it also gives me some more suggestions. Remove hard coded parameters. Yes, that's actually an improvement that I'm thinking about. Error handling use of constants. So this is actually the max token can limit and it's recommending to replace it by a constant. Then documentation some logging can be improved and user input validation. Now these are definitely some really good recommendations. So I asked it re implement it with your suggestions. Here is the basic skeleton it came up with. So these are all the import statements. Then it's saying max length. This is basically the constant that it was talking about. And it's recommending to divide the load underscore model function into multiple helper functions. So for example, this specific one is for quantized models and all the code goes in here, actually goes in here. Then load full model. Right. And here is the implementation that is suggesting to do for loadmodel. So basically it replaced everything with a couple of if else statements along with some error handling. This is actually really neat and it could be really helpful in your own projects. Now let's see if it actually understands the correlations between different components. So I asked it create visual representation for the code base and it came up with this, which is a really nice representation of what's actually happening within the code. There is another component of the same code base that I'm calling ingest py. Now I ran a similar analysis and it made very similar recommendations. This code has some parallel optimization and it correctly identified that I'm using two different approaches, so multiprocessing and multi threading. And it says depending on the specific workload and system resources, one approach might be more efficient than the other, which is actually true. And this is something I think I'm going to look at Again, I asked it to reimplement the whole thing and this time it gave me the whole code. So in each of the functions that it created, these are actually existing functions, but it added error handling in it and here is a summary of what it did. So it added error handling and logging, then additional command line option for specifying the source and persistent directory and doc string for each function to explain what it does. These are some really good changes, right? And then I simply asked it to provide more detailed comments. So it basically went ahead and commented almost each line of the code. Now, since it's not really changing the functionality, the code seems to be working fine, which actually is pretty great. So with the code interpreter now you are able to upload your own documents and analyze them right inside GPT4. So what are my first impressions? Well, I think this is really a game changer. It will change the way we work and interact specifically for data analysis and programming. Now keep in mind it's not perfect. It will still make some mistakes, but overall it's great to see the direction where this is heading. I will be making more detailed videos to cover capabilities and applications of code interpreter. I hope you found this video useful. If you did, consider liking the video if you and subscribing to the channel for similar content. Thanks for watching and see you in the next one.










