Create Talking AI Avatar for FREE - Step-by-step guide (Spoiler: No D-ID studio)
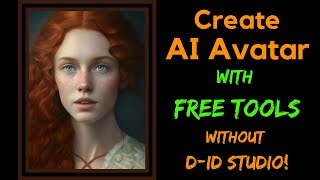
LARRUZ shows how to build a talking AI avatar without paid tools. Generate a face with Midjourney, convert it to 3D video with Apex Converter, add speech from 11 Labs, then sync them with Wave2Lip. The whole thing stays free using open-source alternatives.
Questions this video answers
March 8, 2023
output_video (output_video.mp4)
input_audio.wave (WAV format)
20 seconds maximum
Limited to 4,480p in the interactive demo
Chapters
Welcome to the prompt engineering channel. Learn how to create digital avatars like me with open source and absolutely free tools.
In this video I'll teach you how to create your own digital avatars using open source tools. And guess what? You don't need to spend a penny on expensive softwares like DID or any other paid tools. I'll walk you through a four step process that's super easy to follow. We will use Midjourney or any of the other feeder free alternatives to create an image. Then we will convert this to a 3D animation. Next we will use 11 labs to convert text to speech. So this text can be written by ChatGPT or you can create your own. And we will combine and we will combine it all to create a talking avatar using an awesome open sourced and free tool. Plus we have got a bonus tip at the end so don't miss it. So follow along and create your very own free digital avatar. So let's go. So step one, we need an image for our digital avatar. Here I'm using Midjourney. But you can use any of the other AI image generator or even if you have your own images, you can use those. So this is the prompt that I'm using. I will put this in the video description. Now this is the image that I actually selected based on the previous generations. So for example, here are four images and out of those I selected this one. Now one thing you want to be careful about is you want to make sure that your avatar or your image has the mouth open and the teeth are showing. This is going to be critical. And when we animate this. So keep that in mind. So let me store this image. So I'm going to right click on it. Save image as I will store this image. Okay, so step two, we want to add some motion to an image. So for this we'll be using this face service called the Apex Converter. This will add a 3D movement to our image. So click upload, select the image and then there are a whole bunch of options. I have a detailed video coming up on this, so I'm going to put a link to that video. But basically there are a couple of options that we are interested in. So first is the length of animation. So duration. For example, we want to select the maximum. In this case that's six seconds. And you see that it already started animating our image, right? The next one is the type of animation that you want, right? So for example, if I click horizontal, it simply move the image horizontally. But I like this tall circle. So select either tall, circle or vertical. Maybe actually vertical might be better. Okay, so let's select vertical. Then what you want to do is come here. Click this Share. Now we are going to store this as an MP4 file. So essentially what happened here was it converted our 2D image into a 3D video. So click save. I'm going to name it as an output output underscore video. And you need to make sure that the file name is output underscore video because we will need this specific file name. Okay, so click save. That will save our video and I can actually play this. So let me open this up and here's the file. Right. So now we have two assets. First was the image and the second is the video. And okay, so step three, now we need some audio that we want to use in our digital avatar. So for that we will be using 11 labs. I have already made a video on it. So I'm going to put the link to that video. So it's going to be somewhere at the top. It's a text to speech converter. So when you need an account, once you log in, you will see a screen like this. So here you can type in, type in your text and. And here you can select different voices. For example, I used this in one of my videos before. And you can also select different settings for the audio. Let's see, this is going to be my text. So. Welcome to prompt engineering channel. Learn how to create digital avatars like me with open source and absolutely free tools. Subscribe to the channel and hit that notification button for more awesome button for more awesome content. Probably it's going to sound better with this 11 apps. Okay, so in order to generate the speech, all you need to do is simply click generate and let's wait for it. Okay, so it seems like generated the audio. So let's play this.
Welcome to the prompt engineering channel. Learn how to create digital avatars like me with open source and absolutely free tools. Subscribe to the channel and hit that notification button for more awesome content.
Okay, so let's download this. So I'm going to store it in the same folder but I want to and label this as a input audio. Need to change this MP3 format to wave. So let's select all and let's change this to wave. Okay, click save so that will download our audio. So that completes our step three. Just make sure at the end of step three you have two files. One is input_audio.wave and the second file is output_video mp4. Now in step four we are going to put both of them together. So in step number four we are going to be putting everything together. We will combine both the audio and the video. One option is to use tools such as did. DID is a paid tool and it can be pretty expensive. I have a video on it if you guys are interested. Check that out in this video. Instead we are going to be using this tool called wave to lip. It's an open source model that is available on GitHub. So I'm going to put a link to this in the description of the video. So the Wave 2 lip model basically takes a video without sound and an audio and then lip sync the videos to the audio. So and that is the reason why in step number two converted converted our static image into a 3D video. Now if you check out the links right here, they have provided the link to the paper which is actually a fascinating read. So if you are interested, check this out. This is a great read and there is a wealth of knowledge in it. Now the great thing about this is you can actually download the source code. So everything is available here and you can rent it locally. But they have provided two online environments where you can test it. So one is this interactive demo and the other one is a Google Colab that you can use for your own data set. This interactive demo is limited in terms of how long the video can be and Google Collab you can do any length you want. So I'm going to walk you through both the process. The interactive demo is the easiest one, so let's click on this. All right, so here's the interactive demo. You'll notice there they're saying that if you run this locally you can attempt to lip sync higher resolution and longer videos. In this interactive demo there's limit of 20 seconds, but if you run it locally you will be able to actually use this on a higher duration videos. So our test audio is around 11 seconds. So it will work perfectly on that. So now first you need to select the video file. So here is our video file and then you need to select your audio file. They don't have to be exactly the same length. So in this case our video file is at around 6 seconds long, whereas our audio file is around 11 seconds long. So it doesn't matter if they are not of the same length. Then you need to click on sync this pair. So here are results.
Welcome to the prompt engineering channel. Learn how to create digital avatars like me with open source and absolutely free tools. Subscribe to the channel and Hit that notification button for more awesome content.
Just a couple of things to note. It's an interactive demo, so the Results are limited to 4,480p resolution. Right. If you run it locally, you can get a high resolution video and then it's cropped at to maximum of 20 seconds. A pretty good job of syncing the lips and the audio. And it looks a lot more natural, like there are definitely no eye movements because our input video didn't have any eye movements. But if you look at it, there is like minute movement of the cheeks as well. So I think it's, it's pretty natural. And you will notice that because of our step number two, where we converted this image into a 3D video, it seems to have more natural movements as well, like movements of the head that you would expect. Okay, let me download this file. We are going to do one bonus step that I'm calling step number five. But before that, I also want to show you how can you run this demo on a much larger file using the Google Colab. But if you're not interested and just skip ahead to the next section. All right, so we're going to be using this updated Google Colab. Click on this. Now, if you are not familiar with Google Colab, it's actually an environment provided by Google where you can run different machine learning models, right? So you need to do a couple of steps. First come here. Change the runtime environment. Make sure the GPU is selected. Okay, so click Save. Then come here and hit Connect. So there are different code blocks that you need to run. So anything that has this play button, that's a code block. So let's say, let's first click on this play button that will install the wave 2 clip model. So it will ask you to run it and it give us this warning and just click run. Anyway, so it's basically starts downloading all the required Python files as well as like all the libraries that are needed and it will start installing them. So this process will take a few seconds. Just be patient with this. Now when a code block runs execution, you will see this green check mark. Now let's go and click on the second play button. So this will ask us to actually upload our files, right? So this is the input underscore audio and input underscore video, click Open. It will upload both files. So this is done uploading. One thing you will notice is there's a table of contents and each step that you are in, it actually shows the corresponding documentation. So that's pretty nice. Next, we will run the Wave 2 lift model on our video and audio. So click this play button again and it starts executing the code. So this will take a minute or so. Okay, so the execution of this block is complete. Now let's go to the third one that's basically going to play our synced video. So click on this. All right, so here's the video. Let's see what the results look like.
Welcome to the prompt engineering channel. Learn how to create digital avatars like me with open source and absolutely free tools. Subscribe to the channel and hit that notification button for more awesome content.
Okay, so this seems to be very similar to what we just saw with the interactive demo. Next, we want to download the files. So just run this and it will download it locally. Right? That's our downloaded file. Just play it to make sure that it works.
Welcome to the prompt engineering channel.
Okay, all right, this works. I'm not going to play it again. Let's close this. Okay, next you want to run this number five. So it's basically deletes all the files from your Google Drive because you already have it downloaded to your computer. There are some other code blocks that you can run. These are different variations of the model play around with. But I'm not going to do that. The output resolution is 483, but you can use, let's say tools like Topaz Lab to actually improve its output resolution. So it you can take it to Full HD or even 4K resolution from that. One last step that I'm going to do which will help us with the resolution is running through running it through a thin plate spline model. So in one of my previous videos I showed this model, I'll put a link to the video. Basically the idea is you take an image, you have a video and you want to animate that image using this video. Right. So it's a sort of defect. So what we're going to do is we are going to select our output image. Sorry, output video. Right? So this is our output video and then we are going to select our original image, right. And just recreate this. I have.
Welcome to the prompt engineering channel.
Sorry. Like I have found that it actually helps in improving the resolution of the output. Right. So our input image is going to be the original image that was created with Mid Journey. Our driving video is the video that we just created. Then simply click submit. All right. This will take a few minutes. So here is our outcome. It works on face detection, so that's why it cropped the video. But let's download this. So click download and I'm going to save this as an output. All right, so here is our final output. This is from the model, so you see the lips are a little bit blurred. And this one is from the final step, the template spine method. The difference may not be noticeable, but I like to run it through this final step. I hope you found the video helpful. If you did, please consider subscribing and turn on the bell notification button. Thanks for watching. See you in the next one.










