DRAG YOUR OWN GAN - RUN IT LOCALLY!
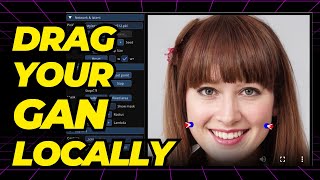
LARRUZ shows how to run DragGAN locally or on Google Colab. You draw blue and red points on an image to move parts of it around, then adjust iterations and masks to refine the result. The unofficial implementation works on pretrained models of faces, cats, horses, and churches, though custom images sometimes have inversion artifacts.
Chapters
Photoshop is about to get a whole lot crazier. You can simply select a couple of points to define the rotation of the face and the model takes care of the rest. This is simply crazy. A few days ago I showed you this demo of drag gain where you can manipulate images just by clicking a few points on the image and then let it do the magic. This takes photo editing possibilities to the next level. Now you can simply do image manipulation using drag and drop. However, the code for this paper is not available yet. This is supposed to be released sometime in June, but there are already a few open source projects which are trying to replicate their results. In this video I'm going to be showing you one such project. Now, here is one such project who are trying to implement the same technique. Their GitHub repo already has around 3,000 stars, which is pretty good. Now keep in mind, this is the online demo and implementation of the Drag Gantt paper, which is the interactive point based manipulation on Generative Image Manifold. However, this is not the official release. The app or GUI that they're using looks a little different than the original implementation, but it kind of gives you an idea of what you can expect. So for example, in this case you can simply select a couple of points on the image and then it moves this blue point in the direction of the red point. In this video I'm going to show you how you can run this both on a Google Colab as well as on your own machine if you have powerful enough gpu. So let's first look at what are our options. So one is the free Google Colab demo and the other one is local deployment. We are going to start with Google Colab demo first. Once you open the Google Colab, just make sure that you go and save this file. So you can save it in your own drive or you can save it to your GitHub account. So I created a version of it on my Google Drive. Now, before running it, we need to change the runtime environment. So make sure that Python 3 is selected and then for the hardware accelerator you want to use a gpu. So in this case you're going to have access to T4 GPU. All right, so next simply click save. So there are simply two code blocks. The first one simply clones the repo and then set up some system path and using the requirements Txt file, it will download and install all the required packages and then it will simply set up a Grid View app. The next code block starts the Gradio app and launches it. So let's execute this code one by one. Okay, so we ran the first block and it downloaded all the required packages as well as the model files. Next, we are going to simply run the Gradio app. Okay, perfect. So now our graduate app is running. So what I'm going to do is there is actually a link that I'm going to copy. Okay, so the demo is up and running and let's see how it works. So I'm going to first quickly go over the some of the hints and tutorials they have provided. So, first of all, it's unofficial implementation of the paper, so don't expect the same performance. Now, you can draw a mask around a specific region of the image. So, for example, if you want to have to move like a certain part of the face or another object, we could do that. But in my experimentation, it doesn't seem to work great. The second part is that set up at least one pair of handle points and target, right? So we're going to select, let's say, a point and then the target location we want to move then. So the handle point is going to be represented by blue color. The target point is going to be represented by red color. Now, you can select more than one pair, so we'll look at a few examples. Now, as a part of this demo, you can even upload your own images, but there are a few things that you need to be aware of. So they're saying that it can take up to a minute for your actual image to load or to upload, and then it might be slightly different because of some processing they are doing on top of it. So we will play around with how you can actually upload your own image in a bit. Now, in terms of models, so they have multiple models loaded here. The first one is specifically for human faces. Then there is one for cats, there's one for church and horses and some other models as well. Now let's look at a couple of examples. So I'm going to go and click on this setup handle point. This is the one that seems to work the best. So what you do is you simply select a point on the image. So, for example, I'm going to select the lip, right? And it will put a blue point on it. Okay. Next if I click on it, so it will put a red point. So this is going to be the target point, essentially where we want to move this blue point to. So I'm going to click it somewhere here. Now, we need to set the maximum iterations, so let's start with 20 and see if it does anything. So simply click on drag it. Right. For some reason, it started showing this blank screen with the weighted sign over here. Right. But you can see the progress over here. So this is going through the first iteration. Now it's in the second iteration. Right. And depending on how many iterations you have selected, it will go through all of them or maybe where it thinks that it reached the optimal performance. Right. So I'll just wait for it to finish and then we'll be back. Okay, this is awesome. Now the process is complete. You can see initially her motor was closed, and now you can even see the teeth. Now it will generate a couple of files. So the first one is the output image, for some reason still puts these points on it, I think I wish, like, they would remove that. And here is the video of the whole process. This is pretty neat. Okay, so let's play this again. Now, the great thing is that this is very localized. So the movement is actually happening just around the mouth and chin region. But the results looks very natural. So this is awesome. Okay, A couple of other things that if you click on the new image, so it automatically generates a new image for you. So, for example, here's another one. Or maybe we click on another one. Okay, let's actually experiment with putting two points. So what I'm going to do is I'm going to put a point here, and then let's try to close the lip and I think one more point. So here and here. Okay, so now we have two pairs, and maybe let's move it to 25. Okay. Next time after this, we will look at another model, and then I'm going to show you how you can upload your own image. So let's click on drag it and let's wait for the results. Okay, so here are our results. I think I should have ran it for some more iterations, but here's the output video. This is how it looks like. Right. So it's actually changing the face. Right. Then it's definitely getting closer. You can see the lower teeth in the first image, like in the start, but now those are not visible. And the great thing is actually kind of preserved the shape of the teeth and everything. So this is pretty nice. All right. If you want to upload your image, you can simply click on here and then drag and drop your image. We're going to look at this, but let's look at one more model. So, as I said, there are multiple models. So for example, let me check out this cats model. Okay, so we have the cat here, and I'm going to go back to the setup handle points, and let's see if we can make the CAD sit. So I'm gonna click the initial point here and maybe bring it down to here. All right, so in this case, I move the max iteration to 50 and let's see what the results are going to look like after 50 iterations. Okay. So unfortunately for this specific model, it did not really work. It's not really changing anything. The face of the cat is still at the same point, so maybe I should actually select a point somewhere else. Okay, so actually selected another cat image, and here are the results. So just keep paying attention to the occlusion because one of the ears as well as part of the cat face is not visible. But if you run this model, what it does is it not only moves the face. I think I could have used some more iterations, but also it kind of knows what a cat looks like. So the ear is not deformed at all. Okay. I just love playing with cats. So this is simply amazing. I actually ran this for 100 iterations, and now here are the results. Look at the initial image again. One of the ears is not visible at all. Partially. The face is also occluded. And here is what it does. So it not only moves the face, but also fills those missing pieces. So you can see here. Now the ear is actually clearly visible, and even the face, the missing part has been added. There's a gap here. So it's not that it's actually deformed, and the results looks pretty amazing to me. Okay, I think we have seen enough of the demos. Next, I'm going to try to upload my own image and see whether this is going to work or not. Now, keep in mind, according to them, it's going to take up to a minute or so for you to upload an image and to process it. If you're running it locally, it might be a different story. So I'm going to be selecting the human face data set again and then simply upload an image with human face. So here is one. It's an AI generated image. So let's see how well this can actually rotate the image. Okay. One mistake that I made, I was in the draw a mask region, but they recommend that you actually upload an image from a setup handle point panel. Right. So I clicked on this and then uploaded an image. And according to their description, as I said, it's going to take up to a minute or so. Okay, so here's the uploaded image. It seems to have been deformed a lot because of the GAN inversion. So maybe I will try another image. Okay, I don't even want to show the picture because it's so deformed and it will give you nightmares. I think this one is specifically ready for uploading your own images at the moment, but the images that they have, it's very capable in terms of what you can do with those. Uploading your own images might work on the local installation, so let's look at that now. The great thing about this is that you can directly install it as a python package. So for example, if you have conda installed, so simply create a condo environment and you need to use Python 3.7, then activate 10 environment and then you can simply install it using PIP install and Draggan. Right? You probably will need to install a few dependencies, specifically Pytorch if you're running it on a gpu. And there is this new beta version as well that you can play around with. Now once you have the installation done, you can simply fire it up using Python M and Dragon Web and It also supports Mac 1 and M1 and M2 MacBooks. So for that case you will have to pass on this device flag with MPS and if you want to run it on a cpu, so you can do that as well. But if you want to directly install it from the GitHub repo, so that is also possible, simply clone the repo, go to that directory and then again create the virtual environment using conda, install all the requirements from using pip, install the requirements txt, and in order to run it in this case you're going to be using Python, then the corresponding radio app with the corresponding keys or flags and that should work. Okay, so it was a quick video on how you can run drag can in Google Collab and potentially on your own hardware. I hope you found this video useful. It opens up a whole bunch of possibilities and in the words of a wise man, what a time to be alive. Hope you liked the video. If you found it useful, consider subscribing to the channel and like the video that helps with the algorithm. Thanks for watching and see you in the next one.










