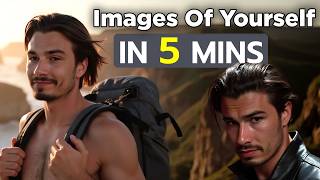
Igor walks through training a custom Flux image model on Replicate with your own photos. You need 10+ images, a Replicate account, and about 20 to 30 minutes. The whole thing costs just a few dollars.
Questions this video answers
At least 10 images.
About 30 minutes total; ~25 minutes for training.
Somewhere between $3 and $5 (per training); single-digit cents per generation.
A $10 coupon/credit for Replicate (via a linked friend's video).
Around 20 to 25 minutes.
Chapters
In today's video, I'll be showing you how to generate ultra realistic images of yourself or your loved ones by training your very own custom AI image generation model. And I'm making this video now because this workflow has become so simple that anybody can do it. All you need is at least 10 pictures of yourself or somebody else. And 30 minutes of your time, 25 minutes of those are training the model. That's how simple this is. Somewhere between three and five dollars to spend. But at the time of this recording, there is actually a $10 coupon code that will allow you to do this completely free, for free. More on that soon. But just know as of now you won't need any money to follow along with this tutorial and create your very own custom AI model. So we'll be starting out with this website that you can access for a link in the description. If anything changes over time, I would update that link in the description. There's also a second alternative here with file AI, but I'll stick with this Replicate site. And first things first, what you'll need to do here is create an account and connect billing details. This does cost around 2 to $3 to train and in generating images will cost cost single digit cents every single time. But here's the kicker. There's a YouTube video by a friend of the channel, Matt Wolf, in which he gave you a $10 credit to replicate. So if you just go to the video that I'll also link below, you can go to this link in his Description and get $10 for free with your replicate account. So you can try this completely for free. And there you go. I got my $10 credit and now I'm ready to train my very own model. Now that we're logged in and we have some credits in our account, we are ready to prepare the training data. And what that looks like is very simple. You just need a folder with a variety of images of yourself yourself. It needs to be at least 10 images and they need to be named in a way that they include your name and here are a few examples. So as you can see, these are quite emotionally loaded. And that's because I want to be using this model for my YouTube thumbnails, which should be emotionally loaded. And this is important. You need to think backwards from whatever your purpose for the model is and give it images of you in those situations. Meaning if you want to generate yourself in high fashion campaigns, a bunch of selfies won't cut it. The golden rule of AI also applies here. Trash in trash out. So these screenshots from my various videos I reckon will work very well because it is the type of image that I want to generate with the model. Okay, as of naming, there is this wonderful function on Mac. I'm sure there's a great way to do this on Window too. You can bulk rename like. So whether you do this manually one by one or in bulk, make sure the name of the subject is present in every single file that you upload, because this will help the model recognize that, hey, these are images of Igor. And when I ask it later on for images of Igor, it will know what I mean. Okay, now that we have a folder with 20 images, I can simply zip, compress this like so, compress training data. And now I can upload this file to replicate. And that's it. That's all the preparation. We have an account with some credits in it. We prepared our training data, so now we can go ahead and fill out some of these things. And me and the team actually went here and tried a bunch of different settings and we came to the conclusion that the defaults are, are actually really excellent and you just want to stick to them for most common use cases. So here in the destination, I'm going to say create a new model. I'm going to call this the Igor generator and I'll make it private. I don't want to make this publicly accessible. My input images. Well, you might have guessed it, but. Well, if I click this upload button, I can simply give it the zip file of the training data. There you go. The trigger word is the name that I told you about before. I want images of me to be produced whenever I say generate a photo of each Igor. So my trigger word is going to be my first name and then everything else in here you want to keep on the default setting at the bottom, just click Create Training. If you alternatively would be using follow over here. It's the same thing. And there it is. It's already using replicate GPUs in the cloud to train my very own model. So this does take around 20 to 25 minutes. You can take a little walk or go do something else, or you can use the magic of video editing. Okay, and there we have it. Our custom model has been fully trained and we are ready to use it. We'll do that by simply clicking this button that says Run trained model. And now I can include my prompts here. While I could certainly write this manually, I found it to be really useful to have a prompt generator handy. Matter of fact, I Even created a GPT that generates prompts with my name in it because we use the so often for thumbnails I'll just use my preset here, but I will leave the formula to the prompt that generates me prompts like this. In the description below you can simply copy paste this and have a prompt generator of your own. But in this situation I will simply copy paste this over and here is the important part I want to be mentioning. Dynamic portrait of Igor because that's what we set this up to do. And down here we have a few more things that are relatively intuitive. Aspect ratio let's just go with a YouTube thumbnail aspect ratio of 16:9. Everything else I will leave on default except of the number of the image outputs. I I just wanted to output four images at a time instead of just one. Rest here is good to go as default. Although some of these things can be useful as you start getting a little more advanced like fixing the seep to keep consistency amongst your generations. But that goes beyond the scope of this tutorial because all we'll do here is we'll click run and there you go, four images of me. And as you can see it has this expressive nature in the face and I just have to say some of these are hit or miss and there you go. Oh my God, this is wild. But it is representing the prompt and an image of me. So I think this one is actually quite close. And also noticed how it replicates the background, right? You have this wall, you have the little flame. Oh that I forgot to turn on. Way better. All of that reflects in the final images. So it's really important what kind of training images you pick because all of a sudden the microphone appears in my generations, although I didn't talk about it in the prompt and that is it a really simple process that everyone can do. Leave a comment below to share what you will be training your model with. And if you care to learn about some productive use cases of this technology like using it for E commerce or product photography, check out this week's episode of my AI Music and News show that will go more in depth on how to use this your advantage. All right, I'll see you soon.