How To Use Runway Gen-3 Alpha - (Runway Gen-3 Tutorial) - Gen 3 Alpha Guide
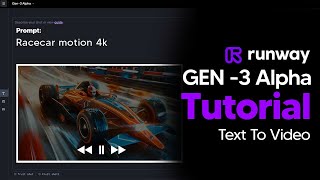
LARRUZ walks through Runway Gen-3 Alpha from scratch. Learn how credits work, write prompts that actually work, copy seeds to repeat results, and use a taxonomy of camera shots, lighting, and movement types to describe what you want.
Questions this video answers
10 credits per second
5 credits per second
625 credits, approximately 60–62 seconds of Gen-3 Alpha footage per month
825 credits remaining
5 seconds per generation
Chapters
So Runways Gen 3 Alpha is here. And this video is going to give you the complete rundown on absolutely everything you're going to need to know to become a pro in just a few minutes. So without wasting any more time, let's take a look at how you can generate videos with remarkable accuracy. Now, before we go ahead and generate anything, you want to go ahead to the top right hand corner and you want to check your credits. You can see here that we have 825 credits remaining. Gen 2 uses 5 credits per second of video generated, and Gen 3 Alpha uses 10 credits per second of video generated generated. So what you're currently looking at here is 825 credits that I have. But if you're on the normal plan, which is $12 a month, you usually start with 625 credits, which is around 60 seconds of footage that you can generate. So just be aware that you get 60 seconds of footage if you're on the $12 a month plan. For example, right here, you can see that at 12amonth, you get 62 seconds of Gen 3 Alpha every single month. Of course, with a better plan you do get more seconds, but it's just smart to know this before you start generating away, because your credits will go down. So now that you're on the main page here, what you want to do and what I would suggest you do is come to this little filter here and change this down to 5 seconds. This is because when you first generate your prompts, you're likely going to get them wrong and you're going to need some refining. What you don't want to do is you don't want to burn through your credits immediately. And that way you run out of your credits. You and you won't be able to get any more prompts without being able to refine them. So just make sure you do the five second option.
That way you'll be able to test.
Out twice as many prompts whilst still having the same amount of credits. So now, because Gen 3 Alpha was trained on such a rich text description.
What you need to do is you.
Need to make sure that you describe your prompt in as much detail as possible. If you don't do this, the prompt isn't going to be as good. So what I'm going to do is I'm going to show you guys two different prompts and how my different descriptions change the outputs. So I'm firstly going to put this on five seconds. And the difference between these two is that generations for five seconds take around 60 seconds to generate and generations for 10 seconds take around 90 seconds to generate. The more detailed you can make the prompt, the more this is going to be better. So for example, I'm just going to make a very simple, simple prompt. I'm just literally going to type in fruit sitting on a table in the jungle. Then I'm going to go ahead and click Generate. You can see right now, now Gen 3 Alpha is generating this stuff and I can, if I want, I can enable desktop notifications to understand when my generations are complete. Now what I could do as well is I'm going to give myself a much bigger description in terms of the generation. So I'm going to go ahead and paste this in. And you can see here, establishing wide shot, various fruit sitting on a table in the jungle.
The camera captures the vibrant green foliage.
And exotic flora surrounding the table. Diffuse lighting, yada yada yada. You get the gist very, very incredible in terms of the description. Now I'm going to go ahead and click generate and then I'm going to show you guys the difference between the two and some really cool features that you can do when using runways. Gen 3 Alpha. Interestingly enough, this actually didn't go to plan. You can see my very simplistic prompt which was fruit sitting on a table in the jungle actually resulted in a much better prompt compared to the one that was over descriptive.
I do believe that this was because.
It was an establishing wide shot which is actually usually used for describing landmarks and scenes, which isn't always accurate for close ups. Probably the better description would have been something like a macro shot, like a close up on the fruits. Either way you can see the differences between the two. This is the first one with the very basic prompt right here. You can see that this is what the fruits look like in the jungle. This is absolutely incredible in terms of the quality and coherence of the footage. The only thing is I, I didn't describe which fruits there were. So if you want to get really specific, I'm guessing that's something you could do. Maybe bananas, maybe apples, maybe oranges, whatever your fancy. Now this was the second shot right here. You can see that there aren't even any fruits in this video, but it does seem like a shot that is much more cinematic and much more establishing.
That establishes the environment.
So you can see here that the first word establishing shot established the environment that we're going to be in and kind of sets the scene mood for, for this entire video. So that might be something that you find useful and later on in the video, I'll show you guys all of the different ways that you can direct your prompts and the videos and examples so you know exactly what words to use when you're trying to describe exactly what you're going to do. Now, once you have your generations done, you can do many different things. For example, right here you can click Reuse the settings and then if you click Reuse like this, you can see it reloads everything and you are able to once again run this prompt if.
You simply liked it.
What you can also do right here is you can click See full prompt. So for example, if we scroll down.
To here and we click See full.
Prompt, you can then see the entire prompt and it shows you exactly what that prompt is and all of the different things.
You can also see that it has.
More specific details that allow you to once again use this in other projects. So, for example, we can see that the seed is here, and if we copy this seed, this is now copied to our clipboard. So now we have the same seed that we can use if we want.
To use this similar shot environment.
So if we click of this and if we go into the Settings tab on the left hand side, you can see that we can go down to here and we can actually paste in our seed and there is going to be that seed that we could use once again. So that's going to be something that makes our prompt a lot similar to the previous one in terms of the style, the coherence and the way that it was shot. So this is something that is really useful if you're trying to generate some kind of consistency between your works. Another button that you might want to click depending on your work. If you're sharing this to Twitter, you might want to click. Or you might want to not click Remove watermark or Keep watermark, depending on where you're sharing this. You can see here that this is a button that you can add or delete depending on what you want. I would say if you're using this for professional projects, don't forget to just click this button off because of course.
This is going to generate it without it as of course, don't forget to.
Right hand click here and click Download your video.
This is going to easily allow you.
To download video in 720p with remarkable accuracy. Now, something that Runway didn't actually mention.
That I find really cool is the Custom presets tab.
So if we hover over here on the custom presets and we click this area right here, you can see that.
We have a custom presets area.
Basically what this is, is this just allows you to have custom prompts that are basically already set. So, so if you manage to find.
A prompt that you really like, you.
Just want to click Create new, then whatever you want to call your prompt.
I could call it the fruit shot.
So I'm going to type in. So, for example, if I find a prompt that I really like, I could go ahead and type in the fruit shot, and I could keep it the fruit shot. And then, of course, for the prompt, I could type in the box here, I could simply just, you know, copy and paste something. And then I could click Create. So I'm going to put Fruit shot one here, and then I'm going to click Create. So now I've got fruit shot one. So when I come into the box here, you can see that if I delete this area, and then all I need to do now is I go to my custom presets area, and let's say I'm using this all the time, I can easily come over to here, Click Apply, and then that prompt is immediately there.
This is really cool.
If I'm in a certain project that's generating consistent characters, and I want to be able to just change different things, such as various fruits, maybe to various chairs. And that way you're not going to have to change the entire prompt in its entirety every single time. This is just a neat way for you to save time and continue on with your workload. So now let's take a look at some of Runway's specific words and things that we should use if we want to make this even better. There are many different ways and many.
Different styles that you can use, so let's take a look. In this section, we'll explore various camera styles, lighting techniques, and movement types, and textiles to enhance your video projects, starting with the low angle. Low angle shots are taken from below the subject, making the subject appear larger and more imposing. These are useful for emphasizing power, dominance, and importance. High angle shots are taken from above the subject looking down, making the subject appear more vulnerable. This is useful for conveying vulnerability, insignificance, and defeat. Overhead shots are taken directly above the subject, providing a bird's eye view. This is useful for mapping out scenes, showing spatial relationships, and providing context. FPV stands for first person view, and this simulates the perspective of the character, putting the audience in the character's shoes. These are useful for immersive experiences, action scenes, and POV storytelling. Handheld shots are captured with a Handheld camera Creating a shaky and a raw look. This is useful for realism, intensity and creating a documentary feel. Wide angle shots capture a broad view of the scene, including more of the surroundings. This is useful for establishing shots, landscapes and large group scenes. Close up shots focus tightly on the subject, often showing just the face or.
A specific detail and these are useful.
For highlighting emotions, details and important elements. Macro shots or macro cinematography are extreme close ups, revealing tiny details not visible to the naked eye. This is useful for nature documentaries, scientific visuals and showcasing intricate details. Over the shoulder shots are shots taken from behind the character, showing their perspective. This is useful for conversations, character interactions and creating a sense of perspective. Tracking these are shots that follow these subjects as they move, maintaining a consistent frame. This is useful for following characters and dynamic storytelling. Establishing wide Establishing wide shots. Set the scene, showing the setting and the context for the action. This is actually useful for introducing locations, providing context and setting the tone. 50 millimeter lens shots taken with a 50 millimeter lens have a natural perspective similar to human vision. This is useful for a natural look, balanced framing and versatile shooting. Snorri Cam Snorry cam shots attach the camera to the actor, keeping them in the frame while the background moves. This is useful for intense, disorientating effects and immersive perspectives. Realistic Documentary this style mimics the look of documentaries, focusing on the realism and authenticity. Useful for real life stories, nature interviews and factual content. Camcorder this is replicating the look of home videos with a raw and unpolished feel. This is useful for nostalgia, personal stories and casual footage. Now let's move on to the lighting styles. Diffused lighting is soft and even reducing hard shadows. It's often used to create a gentle, flattering effect on the subject. This is useful for portrait photography, product shots and creating a calm atmosphere. Here we have the silhouette. The silhouette is where the silhouette lighting places the light source behind the subjects, creating a dark outline with a bright background, highlighting the subject's shape. Lens flare occurs when light hits the camera lens directly, creating a streak of light or an array of light spots, adding a dramatic effect. This is useful for action scenes, dreamy sequences or adding a cinematic touch. Back lighting illuminates the subject from behind, creating a rim of light around the edges and separating the subject from the background. This is useful for portraits, highlighting outlines and creating depth. Side lighting hits the subject from one side and creates strong shadows and highlights, which emphasizes texture and depth. This is useful for creating drama, emphasizing textures and adding dimensionality. Gel lighting uses colored gels placed over lights to cast specific hues, adding mood or thematic elements to a scene. And this is useful for music videos, theatrical scenes or creating a certain mood. Venetian lighting simulates the effect of light filtering through blinds, creating a pattern of light and shadow that can add drama and intrigue. This is useful for noir films, dramatic scenes and creating tension. Now let's look at the movement speeds. Movement speeds such as dynamic motion captures, fast paced and fluid movements conveying energy and excitement. This is useful for action sequences, sports videos and energetic scenes. Slow motion stretches the time of the action, emphasizing details and allowing viewers to set intricate movements more clearly. This is useful for dramatic moments, showcasing details and emotional scenes. Then we have hyperspeed. Hyperspeed dramatically speeds up the action. Often used to condense time or show rapid progressions. This is useful for time lapse sequences, fast paced scenes and showing rapid changes. Here we have the timelapse. Time lapse compiles images taken over a long period into a short sequence, so showing the gradual changes quickly like sunset or a cityscape. This is useful for nature documentaries, urban growth and showing the passage of time. Now let's look at how the movement types actual. Now let's look at how movement types can actually change things. Grows is where the subject expands inside, symbolizing the growth or increasing importance. This is useful for visualizing ideas, growth and emphasis. Here we have emerges. The subject gradually appears from the background suggesting revelation or discovery. This is useful for introducing new elements, surprise, reveals and discovery themes. Here we have explodes. The subject bursts apart energetically. Often used for dramatic or impactful scenes. This is useful for action scenes, dramatic effects and sudden changes. Here we have ascends. The subject moves upwards conveying elevation, success or transcendence. This is useful for inspirational movements, achieving goals and uplifting themes. Although in this case it seems a bit eerie. Undulates. This is where the subject moves in a wave like pattern creating a rhythmic and flowing effect. This is useful for abstract visuals, natural movements and creating a calming effect. This is where we have warps. The subject distorts in shapes. Often used to convey a sense of surrealism or transformation. This is useful for sci fi themes, dream sequences or surreal visuals. Here we have transforms the the subject changes from one form to another which symbolizes metamorphosis or evolution. This is useful for character development, narrative progression and showcasing change. Here we have ripples. This is where the subject moves in concentric waves like a drop in water, suggesting spreading influence or impact. This is useful for spreading ideas, impact visuals and thematic elements. Here we have shatters. The subject breaks into pieces indicating destruction or sudden change. This is useful for dramatic events, conflict scenes and impactful moments. Here we have Unfolds the subject opens up or spreads out, often used to reveal new information or aspects. This is really useful for reveals, storytelling and gradual introduction. Here we have Vortex and this is where the subject spirals inwards or outwards and creates a dynamic, intense visual effect. This is particularly useful for intense scenes, chaotic moments and dynamic visuals. Now let's look at some of these styles and aesthetics that you can use to set your scene. I Of course we have Moody A style that uses low key lighting and deep shadows to create a somber or intense atmosphere. This is useful for drama, horror and emotional scenes. Here we have Cinematic this is where cinematic style mimics the look of high quality films with dramatic lighting, widescreen framing and a polished finish. Use these for high production value storytelling and creating immersive experiences. Here we have Iridescent Iridescent aesthetics feature shimmering colors that change with the angle of view, adding a magical or surreal quality. This is useful for surreal fantasy scenes, magical effects and surreal visuals. Home Video VHS this style mimics the look of old VHS recordings with grainy footage with low resolution and have a nostalgic feel. This is useful for nostalgia, retro themes and personal storytelling. Glitchcore Glitchcore Aesthetics Use digital errors and artifacts like pixelation, color, distortion and frame skipping to create a chaotic, chaotic and edgy look. This is useful for edgy themes, digital art and avant garde projects. Now let's take a look at some of the text styles that Runway has and it truly does excel in this area.
If we take a look at Bold.
This text is thick and it is strong and it emphasizes important words or phrases. Use these for headlines, emphasis and making certain statements. Graffiti Graffiti text mimics the look of street art with expressive, often colorful lettering that adds a rebellious urban vibe. Use these for urban themes, useful projects and street culture. Neon Neon text looks like glowing signs often used for vibrant retro or nightlife aesthetic. This is useful for nightlife scenes, retro themes and eye catching visuals. This is Varsity Text Varsity text resembles the blocky serified letters found on sports jerseys, evoking high school spirit and athleticism. This is useful for sports themes, school events and team branding. And lastly we have embroidery Embroidery text looks like stitch fabric adding a tactile handmade feel. And lastly we have embroidery and lastly we have embroidery. Embroidery text looks like stitch fabric adding a tactile handmade feel to the text. This is useful for handmade projects, handmade aesthetics and adding texture.
Now you can see here that My original prompt didn't actually go that well. That's because it was pretty basic. If you are someone that is struggling and you're not able to write down all of this stuff, that's no problem. This is a complete beginner's guide. What I have in the Description is a ChatGPT custom GPT. And you'll basically be able to take your simple prompts as I have here. So just copy this. Then essentially, once you paste it into the GPT, as you can see I've done there, it manages to give you this really, really nice one that it's a much longer description based on exactly what's going on. Someone on Twitter created this GPT, which is basically a description of everything that Runway says you should do.
And.
And of course, it allows you to have a lot more control over your scene. So you can see here in this second shot that I actually got in a lot more description. This is a lot more accurate and representative of what I would want. Now, hopefully you guys enjoyed this entire tutorial. If there's anything left, don't forget to leave in the comment section below, and I'll see you guys in the next one.










