I Found an Unknown AI Business with Massive Potential!
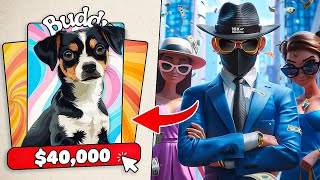
LARRUZ walks through selling custom pet-themed mouse pads on Etsy using AI-generated art and Printify. One seller made over $40,000 in revenue and now earns around $900 a month. The tutorial covers niche research, design in Canva, connecting Printify, and setting prices to hit roughly $13 profit per $20 sale.
Questions this video answers
Over $40,000 in revenue.
About $900 per month.
Around $400 per month.
Amount 100; Radius 10; Reduce Noise 100.
Retail price $20 → approximately $13 profit.
Chapters
I'm not going to waste your time. This boring listing sells custom mouse pads. It has made over $40,000 in revenue and now earns around $900 per month. So in the next few minutes I will show you how to overtake this listing by starting a business that looks more professional and attracts more customers. Custom mouse pads are really popular right now and if we check the competition using Alura, we'll see a high search volume with little competition. Plus it's being searched all year round just as you can see now. If we search for that on Etsy, we'll find many bestsellers and various options in this niche family Related mouse pads, pets related mouse pads or even those with just a custom text. All of these are making hundreds, even thousands of dollars. I've noticed that pet related listings are doing really well and what really caught my eye was this best seller right here. It makes around four $400 per month, but the way they personalize the mouse pads really stands out. It starts with the customer selecting a preferred background and after choosing the background and submitting the pet's image, they turn it into a cartoon and blend it with the background to create this cool looking design which in my opinion is more appealing than just printing the pet's image as it is. So right now I will show you how to build a similar listing from start, start to finish. And make sure to keep watching because I've got a great idea to stand out and attract more customers. Now to start building our listing, we'll need mockups showcasing the final product and our own background collection. Like this one, we must also include a personalization option that allows customers to choose their preferred background starting with the backgrounds. There are many websites where you can download similar images for free from for example, if you visit freepik.com and search for Groovy wallpaper, then go to Filters and select Free, you'll get a huge collection of free images that you can use. But what if I told you that all the images on the screen were created using AI? In fact, it took me just five minutes to generate them in midjourney. Here are some of the prompts I've Retro Groovy Hippie pattern with orange flowers on a green background Pink and blue pastel swirl Pattern vector Flat illustration simple paw print pattern Vector illustration Flat design simple line art pattern featuring lily flowers on a green background so after creating the background images, I headed to Canva, started a new design and began designing the first listing image that features the background collection. So at the top I've Added a headline that says choose your favorite background. Underneath that, I've added six background options to pick from and below each one I've included the number. I've also given each background a unique name like Cotton Candy, Sunny, Spiral and Mint Whirls. I believe this will set us apart from competitors who only use numbers. But we still need to find a way to stand out even more. And this is where I came up with the idea to provide more customization options. Along with selecting a background, people can now add different accessories like hats, glasses and more. So now we have the first part of our listing ready and can move to creating the mockup images. Images let's imagine you've got an order with this image, this background and this accessory. I'm going to show you right now how to combine everything to create a cool looking design. Okay, so first open Photoshop and create a new document using the dimensions shown on the screen. If you don't have Photoshop, you can use Photopea and follow along with me. So after creating the template, upload the chosen background image and ensure it fits nicely within the frame. After that, upload the pet's photo and use the the select and Mask option to separate the pet from the background. Now bring the isolated image back to your design template and position it in the right place. So at this point you are ready to start adding effects. Start by selecting your layer, then go to Image Adjustments and choose Shadows and Highlights. In our case the image is a bit too dark, so let's increase the shadow slider to brighten it up. After that we will apply the oil painting filter and here you can see the settings I'm using. And as you can see, the image has started to look much cooler after that effect. Okay, now go to the Filter menu again and select the Smart Sharpen Filter. Set the amount to 100, the radius to 10 and reduce noise to 100. Then press OK. This filter will sharpen your image and boost the overall details. Finally, go to the Filter menu again and choose Filter Gallery. Open the Brush Strokes folder and select the Accented Edges Filter. This will make your image select stand out more by adding glowing lines. So you are actually pretty much done at this point. As you can see, this is where we started and this is how the image looks now after the adjustments we've made. So now we only have a few things left to do like adding the name and accessories and adjusting the overall look if needed. And once that's done, you can export your design and it will be ready to use. So right now we have everything we need and we're ready to build our Etsy listing. First, you need to sign up for Printify, the print on demand service we will use to turn our designs into physical mouse pads and ship them to customers. After signing up, you need to connect your Etsy store by clicking here and then add a new store. And once it's successfully connected, we'll open the product catalog and search for mouse pads. And as you can see, Printify offers a wide selection of mouse pads with various options. I'm personally going to go with this rectangular one right here. Start by uploading your mockup image and make sure your design fits the print area correctly. And if you click here on Preview, you can see what the actual product will look like. So now click on Save Product to move on to the last step. On this page you can edit your listing details like the title and description. However, I'm not going to make any changes here because I prefer to do that directly on Etsy. Now scroll down to the pricing section and set your pricing by adjusting the retail price. For example, if you sell your mousepad for $20, you can see that you'll make around $13 in profit. After setting up your pricing, scroll down to the publishing settings and make sure to turn on the Hide in store option. This will save your product to drafts, allowing you to finish setting up your listing on Etsy. Alright, so now hit the Publish button. This means if you go to your E dashboard, you'll find the product listed under Drafts. So in this final step we will finish setting up the listing completely. Starting with the title, ensure it includes SEO optimized keywords to help people discover your listing. The best approach is to look at the best sellers to see what keywords they are using and then use this information to craft your own title. Then under Photos, upload the listing images you've created previously or any new mockups you'd like to include for the description. It's the same idea as the title. Check similar listings and try to come up with something unique for your product. I've honestly used ChatGPT to generate my description and it looks amazing. Now let's add the option for customers to select their preferred background and accessories. Scroll down to where it says variations and click on Add variations. Then click on create your own and name it background. So now under options, start adding your background choices. In my case, I've added the number and name for each one. Then click on Done and then add variations again. But this time I'm going to name it accessories and do the same thing by adding all the options. Finally, click on Done, then Apply. And just like that, your personalization options are are ready to use. One more thing we have to do is let customers enter their pets names. We can do this by going to Personalization and clicking on Add Personalization. In this field, tell the customers what you need. In my case, I need the pet's name. And just like that, this option is now added to your listing. So you are pretty much done at this point. All you need to do now is hit the Publish button and just like that, your listing is ready to start accepting accepting orders. So now after customers fill in the required information and purchase your listing, all orders will be automatically sent to Printify. All you need to do then is repeat the steps you've learned in this video and fulfill the order inside Printify.










