I Started A Clothing Business With AI Only!! (A Step-by-Step Guide)
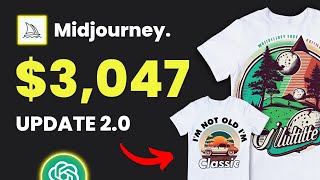
LARRUZ walks through launching a clothing brand using only AI tools. Use Merch Informer to spot trending designs, generate artwork with Midjourney, upscale images, remove backgrounds, then upload to print-on-demand sites and promote on social media.
Chapters
After the success of the first Midjourney video, today I'll show you how to use it to start a professional clothing business. I'm sure you've seen a lot of videos like this on YouTube, but I can confidently tell you that this one will be different. You'll learn how to find winning designs with low competition, how to analyze data, and how to choose the best one based on numbers. Then we'll use Midjourney to generate high quality designs and and show you how to modify them for the best results. You'll also learn the most effective ways to sell your products, especially if you're on a tight budget. And stay tuned until the end, because I'll reveal some techniques to boost your sales and get the most out of your designs. The video is packed with valuable information, so I want you to take it seriously and start taking action right away. And when you're done with your first design, share it with me on my Discord server to tell you my opinion and give you any tips if needed. To join my Discord, use the link in the description box. So to get started with this side hustle, you need first to find designs that have the potential to make sales. And your decision should be based on numbers and data or you'll end up wasting your time and money. There are many ways to find those designs, but if I had to suggest one tool, it would be Merch Informer because it includes pretty much everything you need to get started. But of course you can choose any other tool you like. So once you've started your free trial, this is how your dashboard should look like. And as you can see on the left hand side, there are many tools that we can use to find and analyze good selling designs. Now I'm not claiming to be the master of finding winning products, I'm just showing you how I do it. Let's start with the movers and Shakers Tool Movers and shakers say that the bsr, which stands for best Seller rank, is going down. And if the product's best seller rank is low, it means it's selling well. Here you can see the products that went down the most. This means the design might be a current trend or is about to go viral. Just take your time looking for designs you like and be careful not to pick designs from trademark companies like Disney, for example. Another tool you can use to find products is the trend Tracker. This tool will show you what designs are popular. Right now. If we look at this one, we can see that the sales rank chart is consistent and the BSR seems very good. And again, you can also spend some time looking for designs. I won't be able to go over all of the tools because the video will be too long. But if you're just starting out, using the tools I've explained will be enough to get your first sale. Once you've chosen the designs you like, you can move on to step two, which is analyzing the products. And this is an essential step because it gives you data to decide if you really want to choose this product or not. Let's use this product as an example. As you can see, the product is in the sports niche and is made for people who like hockey. The first thing we'll do is make sure that we can use this phrase in our design. So to do that, just copy the main words and go to the Trademark Alerts tool. Paste the text here, click Save, and then click on Check Trademarks. Wait a few minutes, and if everything is fine, a green check mark will show up. And this means you can use the phrase in your design without any problems. The next step is to look at your competition, and you can do that by using the Competition Checker tool. Just put your keywords in this box and click on Search. Now you can see how many products have the same design and how many have a bsr. And on the right, it gave us an A, which is the highest score. So A is best, followed by B, C, etc. If you got an F, don't choose the design and find another one. And when you scroll down, it'll show you the best sellers. As you can see, this one has 23 estimated sales and the second one has 15, which is also not bad. So in my opinion, this product might be a good start. But remember that your goal is not to copy what other people have done you. You only use this strategy to get ideas and collect information. Now all you have to do is repeat the process for each design, and when you're done, you can move on to the most fun part, which is creating the actual design using Midjourney. And for those who don't know how Midjourney works, it's an AI text to image generator. So you can simply type anything you want and the bot will turn it into an image. And keep in mind that in order to use the images commercially, you must have a paid midjourney plan. But before you start making the design in midjourney, you need to understand your design elements. This will help you pick the right words when typing the prompt. Let's use my product as an example, so as you can see, the main part of the design is the hockey helmet, and I could also see a vintage style being used. So once you have a clear idea, head off and open midjourney to generate the design. Start by typing forward slash and then imagine. After that you can describe the design you want to make. Looking at the prompt I wrote, you can see that I used the design's main keywords and added additional ones such as cartoon style and white background. And if you're wondering why I put white background, it's because it makes it much easier to extract the design from the background later on. But don't be afraid to try different keywords and be creative, because this is what will make you stand out in the end. So, as you can see, this is how the image came out. After that, I saved the design and moved on to the next step, which was improving the quality. Improving the design quality will help you deliver products that look professional. And this will reduce refunds and negative reviews. Let me show you how easy that is by using AI Image Upscaler. So basically, this tool will take your generated image and upscale it up to 800 100% without losing the image quality. First, click on Upscale Image now and then choose the image you want to enhance. When the image has finished uploading, three options will appear. If you click the first option, 2x, the image will be enlarged twice, 4x 4 times and 8x 8 times. I usually go with the second option, which is more than enough for a T shirt design. And when it's done, you'll notice a big difference in the image quality. So if we zoom in to compare, you'll see a massive improvement. Now all you need to do is click on download to save the image. Let's try another design so you can better understand the concept. In this one we have a classic car, which means the overall design style should also match this old vintage vibe. So again, I've included all related keywords in the prompt and this is how the design came out. Once your design is ready, head to AI Image Upscaler to improve the quality. After that, click on Download to save your image and you'll be ready to move on to the next step. You can find the AI Image Upscaler link in the description box below this video. So now the only step left is adding the final touches to the design and making it ready to print. Start by removing the background from your generated image. After that you need to add the design phrase. And if you get stuck in this step, you can get inspiration from your competitors listings and then Use your creativity to create something unique and I recommend starting this side hustle, focusing on a specific niche or focusing on trending designs in different niches. But you might have been wondering all the time how to sell the finished product. Well, if you're starting with a small budget, I don't think there's a better way than print on demand. Using this business model you won't have to worry about printing and shipping the products to your customers as that will all be done by third party companies. But with this method the company will take a percentage your order so it's possible that your profit won't be very high. But I still think this is a great way to get started. Here on the screen are my favorite websites to list and sell print on demand products and most of them have the same process. You simply upload the design, choose the product type, add product information and publish. And you can fully rely on organic traffic with these platforms as millions of people visit their websites every month. I suggest that you also use the power of social media to promote your products. This could be by posting on Pinterest, TikTok and any other platform. And as I've promised, here are some great ways to maximize your results and get the most out of your designs. 1. Use the same design on multiple products. So instead of just putting the design on T shirts, you can also put it on hoodies, stickers, phone cases, wall art, etc. Make multiple copies of your design. If you look at the one I made, you can see that I can easily make two more designs from it. Just think outside the box and be creative. 3. Post your designs on many different websites, not just one. By doing this, you increase your chances of making more sales and find out which website could work best for you. And remember that anything you start in your life is like a small snowball at the top of a mountain. It'll start small, but as it rolls over it will get bigger and bigger and that represents the experience you'll gain during the journey. I hope you like this video. If you have any questions, let me know in the comments below or message me on Instagram and I'll do my best to answer. Thanks for watching and stay tuned for what comes next.










