MidJourney Cheat Codes - Advanced Prompting Guide
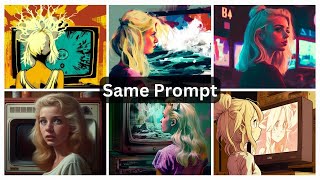
Matt Wolfe walks through MidJourney's advanced parameters: stylize, quality, chaos, seed, and weighting. He shows how tweaking each one changes the same prompt, then points you to the MidJourney gallery and a GitHub cheat codes repo full of style modifiers to copy.
Questions this video answers
0 to 1000
0.25 up to 5.25 (default 1)
0 to 100
2023
Use double-colon with a numeric weight, e.g., "wolf::5" or "wolf::5 deer::1"
Chapters
All right, so check this out. All of these images were basically made with the same prompt, just changing one little thing. This image, this image, this image, this image, this image, this image, this one, this one, this image, this image, this image, this image, this image, this image, this image, this, this, this, and this. We're all using pretty much the exact same prompt. I just tweaked one little word in each prompt to get each one of those little variations. And by the end of this video, you're going to know how to do that too. And I can't wait to show it all to you. So let's dive in. He what's up, Matt Wolfe here. In my last video about midjourney, I really dove into how to set up Mid Journey and how to do all sorts of cool things with prompting. In this video, I want to dive even deeper and show you some even more advanced techniques to really, really dial in what you can do. I also came across this awesome, awesome resource that's essentially like the cheat codes for Mid Journey. It's a giant guide of all sorts of potential prompts that you can try. It's like the game Genie for Mid Journey prompting. Stick around to the end of the video and I will show you how to get access. Now, as a reminder, we will be generating all of this inside of Discord. So you will need to have a Discord account. If you don't know how to do that or you don't have one yet, make sure you watch my first Mid Journey video because that's going to walk you through how to get that all set up. When you get into Discord, type slash settings, hit Enter and it'll give you some options for settings. We want to make sure that mid journey version 4 is on tend to get the best images out of Mid Journey 4, in my opinion. And you want to make sure you have Remix mode on. So before you get started, make sure that you've got those settings turned on if you want to replicate some of the stuff that I do in this video. So first off, let's talk about some of the additional parameters that you can use inside of Mid Journey to really get the images dialed into exactly what you're looking for. So first of all, let's talk about the stylize parameter. At the end of one of your prompts, you can add a dash, dash s and a number between 0 and 1000. Now, this is specifically for mid journey version 4. If you're using mid journey version 3 or one of the earlier ones, the parameter range is actually Different. But since we're talking About Mid Journey 4 here, you're going to use the number 0 through 1000. Now, the lower the stylized number, the. The lower the S number, the more closely your image is going to represent the prompt that you actually put in. Closer to a thousand you get, the more Mid Journey is going to add its own little style and flare to it. To show this off, what I'm going to do is I'm going to do a prompt, and then I'm going to show you it at three different style settings, and I'm going to use the same prompt and the same seed for each one. And you can see how the stylize parameter affects the images in each one. So let's go ahead and do imagine a wolf in the forest looking into the camera with a deer in the background. Now, because I want to make sure that these are all the same seed each time, I'm going to go dash, dash, seed, and then I'm going to do the seed. Let's go 2023. And to get the stylized, I'm going to go dash, dash, s. And let's try it at a style of zero, meaning it should get as close to the prompt as it can without adding its own mid journey flair into it. And let's see what it generates. All right, so here's what it came up with. We've got a wolf in the front looking into the camera with a deer in the background. This one kind of looks more like a wolf deer. Now, let's go ahead and use the exact same prompt and the exact same seed, but let's bump it up to 500. So a wolf in the forest looking into the camera with the deer in the background seed 2023. And then style will go five. So right in the middle. All right, so now we can see the difference. You can see it added a little bit more of that mid journey look to it that people are used to. So let's go ahead and do it one more time, but this time we'll use an S of 1000. So let's go imagine I'm going to paste this back in, and I'm going to change the S number here to 1,000. All right, so here it is with the S of 1000, you can tell it's still a similar composition. Mid Journey kind of added a little bit more of its own flair to it. So let's look at all three of them back to back. Now. So here's stylization of zero. Stylization of 500. Stylization of 1,000. All right, let's try one more prompt just to get an example. This time, let's go a blonde woman from the 70s looking at a retro television. And let's go seed 2023. Just so we're using the same seed all the time here. Let's do a stylization of zero and run this. Right. So here's what it came up with with the stylization of zero. And here's the same prompt with a stylization of 500. And here's the same prompt with a stylization of a thousand. So you can see it's all the same seed. The higher that S number, the more Mid Journey kind of tries to add its own flair to it and style it the way it wants to style it. So if you really want to impact how close it gets to the actual prompt that you put in, you can add a little S score to the end. Now, the next one I want to talk about is quality, which you would use the parameter Q on. And this is basically how long Mid Journey is going to bake your image for, how long it's going to continue to process for. And it can run from 0.25 all the way up to 5.25. It's going to take about the quarter of the time, but it's going to be about a quarter of the quality. 5. It'll probably take about five times the amount of time, you know, theoretically be about five times the quality. But it sometimes sort of over bakes it and gives you funky images when you go too far. In my opinion, it seems like the one or two is about the sweet spot for quality. So let's test some of these exact same prompts. This time I'm going to do Imagine, and I'm going to do a wolf in the forest looking into the camera with a deer in the background. Seed 2023. Instead of an S score, let's play with the Q score. Now, let's start with a q of 0.25. This is the lowest quality setting, and let's see what it generates. There's not a whole lot of detail in the background. The trees aren't super detailed, things like that. You can sort of get some very artistic looks if you bring down the quality and just don't have it cook for as long. This one, the wolf almost looks like it's floating in the air. This one almost looks like it's trying to be a cross between a wolf and a deer. And let's go ahead and bump it all the way to the top and go. Imagine wolf in the forest. Look at the camera. Exact same thing. This time, let's do a Q score, quality score of 2. Okay, so here's the same image with a q score of 2. You could really, really see the difference in detail. So this is the Q score of 2. This is the Q score of 0.25. So you can see this one's a little undercooked, so to speak. And this one is starting to get just about right now. By default, if you don't put a Q score in there, it defaults to one, and one usually looks pretty dang good as well. I usually go with a q score of 1 or 2, unless I'm trying to get a real artistic look. Then I might do a lower Q score of something like 0.25 or 5 to get a look of not fully processed. All right, let's try this one more time with our other image prompt. A blonde woman from the 70s looking at a retro television. Let's start with a q. Let's go 0.5 this time. So this is the quality of 0.5. And pay attention to the top left and the bottom right. You'll notice the. Look at the shadows on the face here. Look at some of the shadows on the face here. What's going on on the TV in the background? This is 0.5. Now if I show you this is 0.1. You can see the details on the face start to change. There's more detail on the TV in the background. More detail on the face here. More going on in the TV in the background here at a Q score of 1. And this is a Q of 2, which didn't really seem to make too big of an impact. Pretty much kind of the same detail as we saw on the Q1 as we see on the Q2 here. So, you know, going any higher than this, we're probably not even going to get a whole lot more out of it. Now, the next parameter I want to talk about is the chaos score. It is using the letter C in the same way we've been doing the other stuff. So let me show you what this looks like. Let me grab my previous prompt here, just so we're kind of getting a direct comparison. And let's go imagine. And then once again, a wolf in the forest, blah, blah, blah. And let's do a chaos score of zero once again. This is another parameter that's going to kind of affect how much artistic license mid journey takes with the prompt. Right. The Lower the chaos score. The more sort of standard is going to try to look. The higher the chaos score, the more sort of crazy it's going to try to make the image. So let's go ahead and do a chaos score of zero. And the chaos score can be anywhere from a zero to a 100. So we'll do a chaos score of zero. Let's try a chaos score of 50. A chaos score of 100. So here's what it comes up with. A chaos parameter of zero. Pretty standard looking what we expect and what we've seen from some of our other images already. Here's what it looks like with a chaos score of 50. You could tell that the colors are kind of starting to change. The funky thing going on with this deer that's supposed to be in the background, a little bit more crazy looking. And then here's the chaos score of 100 on this image. Not a huge difference between 50 and 100 if we're being perfectly honest. A little change in some of the details in the tree. Wolf is starting to have like moose looking legs, but not a big, big difference. So here's what we get when we set the C to 0. Pretty much the same images we've seen before already. Here's what it looks like when we set the C to 50. Now it's starting to get a little bit more stylized here. They look completely different. When I set the chaos score to a different color. We're getting pretty much completely different color spectrums. And then here's what it looks like with a C of 100. So here's 50, here's 100. Images are slightly different, but it's not a whole heck of a lot more chaotic between 50 and 100. All right, so the last parameter that I want to talk about before we get into the really cool cheat codes and awesome prompt is the weight of things inside of your image. Now this is something that's really cool that I actually haven't seen a lot of people talking about with mid journey. But you can actually weight certain things in the image. So let's go back to our original wolf prompt here and I'll show you what waiting does when I mess with this. So I'm going to copy this same prompt and let's paste it in here. And so we've got a wolf in the forest looking to the camera with a deer in the background. Now let's say I want the wolf to be much more prominent than the deer. I can put and I can give a weight that I want that wolf to be. So if I put a weight of five here and then I want the deer to be a much lower weight. I want the deer to really not have much focus in the image. I could put colon, colon and one with this. The deer wolf should be five times more prominent than the deer. So just adding that weighting and nothing else. Let's see what happens. All right, so check this out. It's pretty much an entirely different image from what we did before. In fact, the deer isn't even visible in it. It pretty much waited it out because of the five to one ratio that I did. So let's go ahead and do this exact same prompt again with the exact same seed. But let's swap the weighting. Let's change the wolf to a one and the deer to a five, and let's see how that affects things. But check this out. Now it made pretty much a completely different image. The wolf is pretty much not even visible anymore because of the waiting, and the deer is the main piece of the image with the exact same prompt. So this time, let's give the wolf a weight of two and the deer the weight of three to make sure that the deer is a little bit more prominent and see how this affects things. Time. It kind of tried to blend the wolf and the deer together, and we got sort of a wolf deer hybrid looking thing in some of these images. Now, one other thing about the weighting that I want to show you is let's go ahead and grab our other image prompt that we've been messing with here, and let's paste this one in, and you can actually do weights for entire segments of your prompt. So we've got a blonde woman from the 70s looking at a retro television. So if I put a bracket around blonde woman here and I give this a weight of three, and then I could put put a retro television a weight of two, it should give the blonde woman more prominence over the retro television. So let's see what happens with this one. So there you go. You can see that the woman is a little bit more prominent than tv. This one, it kind of got real creative and put the woman's head inside the tv, right? So let's see what happens when we flip those. So I'll make the blonde woman A2 and the retro television A3. So this time around, it made the television more prominent. And in most of these pictures, it actually pushed the blonde woman into the tv. This one made her looking at the tv, but the TV is definitely very prominent in this image. So not only can you wait certain words, you can actually weight certain chunks of your prompt as well to make them more prominent or less prominent. And so those are some parameters that you can mess with inside of Mid Journey to get it closer to what you're looking for. You can mess with the stylize the S, and the lower the number it is, the closer it'll get to the prompt. The higher the number it is. The. The more Mid Journey is going to put its own flair on. It can mess with the quality score, the Q of it. The lower the number, the less processing is going to do, and the. The less polished it's going to look. The higher the number, the more processing it does on it, and the more it tries to add detail to the image. There's the Chaos score, the C. The lower the score, the less chaotic the image is going to be. The higher the score, the more chaotic it is. Then there's the weighting, which you can weight individual words or you can wait individual sections of your prompt. All right, so now what I want to show you is some really cool ways to get inspiration for more prompts. And there's two resources that I want to show you. The first one might seem fairly obvious, but I doubt many people think of it. And that's the actual Mid Journey Gallery. So pretty much anybody can get access to this Mid Journey gallery here. Just go to midjourney.comshow recent, and you can see some images that people have generated recently. This is totally free. It's open. You don't even have to log in to see it. If I hover over these, you can see the prompt that somebody is using to get that image. So that'll give you some inspiration for some prompts. So, for example, this one, the God of Avarice in the style of Ryu Takamasa. And then it's, you know, got a bunch of artist names that I'm not going to try to pronounce. Well, you can try some of those artist names and see what kind of art you get. This one here, double Exposure of Avarice, Economy, Starry Night, and then another name I'm not going to try to pronounce. You can go and copy this prompt here and test it inside of Mid Journey with your own sort of image and use some of these additional things at the end to get the prompt that you want. Now, this doesn't tell you some of the stuff we just talked about, some of the parameters, right? If I click on these three dots, it actually doesn't let me. If I go to the free gallery here. So I can't actually see that. But if you do have a Mid journey paid account, and unfortunately this is only in the paid version, you actually get access to the same feed. If I refresh this, you'll see it's going to be the same images that I was just looking at on this page here. But when I hover over it, these three dots are clickable. If you have a Mid Journey account, I can hover over this one right here. This has a bird's eye view of a multi layered wooden shanty town. Multicolored awnings and penance, lots of walkway and then it cuts off. If you're on the free version, you couldn't see the rest of it. You also don't get to see any extra parameters that they would have added into it. In the paid version I can click on these three dots and come up here to copy. And they have copy prompt and copy full command. Now if I copy the prompt, let me show you what it just copied. I'll paste it into a notepad here. It copied in the whole prompt. Bird's eye view of a multi layered wooden shanty. Blah blah blah blah blah. All of this stuff that you can actually experiment with. Hyper detailed photorealistic, a bunch of different artist names. So that's the entire prompt that you can use. Now if I come back over here on this same image, click the three dots and copy the full command and then paste this into notepad. I'll paste it right below. You can see that it actually shows all the additional commands that were added in. So they're using version four at a quality setting of two. So you actually want to copy the command and not necessarily the prompt if you're going to get some inspiration this way because it will give you that extra little detail of what they did with it. Let me just look at one more example here. Here's another really cool, artistic, colorful image. So if I come to the three dots here inside of the Mid Journey account and I come up to copy and copy the full command and I paste this into a notepad here you can see Consumed by Envy. Gorgeous, stunning, vibrant digital art by Yo Nago and Ken Price. Midjourney version four aspect ratio two. Three chaos of 50. The style score of 1000. So they're pretty much telling midjourney, get creative with this prompt. So that's one way to find inspiration. Let's talk about the cheat codes. This is the coolest resource I've found or Mid Journey. And a lot of the stuff that I talked about in the last video you can actually find here. So there's this GitHub repository and there's this long link here. I'll make sure I pasted in the description below the video here. And these are all midjourney for styles that you can mess with. If I come in here and I click on themes, let's open this in a new tab here. You can see there's all sections here. So realism slash, abstraction. Open this up. Here's what happens when you use the prompt realistic. Here's photorealistic. Here's surrealism. Dreamlike, otherworldly, wonderland, abstract fantasy. These are all little cheat codes, little additions that you can add to the end of the prompt to get these various styles. So let's go ahead and add wonderland. So let's go back to our mid journey here. So here's what I get when I type in a blonde woman looking at a tv. Wonderland style. Let's try dreamlike and see what happens. Let's try imagine a dreamlike image of a blonde woman staring at a television. And here's what we get when we type a dreamlike image of a woman staring at a television. I would argue that some of these are more nightmare like, but that's what it comes up with. So let's jump back over to our cheat codes here. Here's surrealism. Let's see what that looks like. So here's what that prompt gener surrealism, image of a blonde woman staring at a tv. And there are all sorts of different styles that you can try here. I have is only looking at the realism, abstraction. So if we click here, you've got retro, modern. You can see, you can try retro. You could try cyberpunk, rustic modern, futuristic. Let's try cyberpunk. A cyberpunk of a woman staring at a tv. And here's what that generated. You definitely get the cyberpunk vibes now. Sci fi styles that you can try. We've got some outer space styles that you can mess around around with. These are all things that you can add to the beginning or the end of your prompt to get different images. Lots of cool stuff to try inside. Labyrinth architecture and manufactured. So you know, steampunk, that might be another interesting one to try here. All right, so here's our steampunk blonde woman staring at a tv. Biomes and landscapes. You know, you could try tropical deep sea, waterfalls, various seasons and weather, lightning, tornadoes, various holiday themed images. Time of day you can mess with morning and midday and afternoon to try to get different Lighting, dusk, night, midnight, twilight, dawn. Music styles. Add groovy to it. See what comes out. Add funky, disco, post punk, rave, vaporware. In my last video we talked about synthwave, chill wave. Let's see what happens if we add chill wave. Here's what you get with the chill wave prompt added in brake, core, cargo, punk, Spongle. I don't even know what that means, but you can try Spongle. Hey, let's try Spongle. So here's what we get when we type the word spongle into our prompt. So now I'm curious. Apparently Spongel is a music group. Good to know. Various cartoon styles that we can try. Marvel Comics, cartoon, anime, anime, core, manga, Kawaii. Let's add anime core in and see what happens. Here's what we get when I add anime core into it. An anime core. Image of a blonde woman staring at a tv. We've got different colors and crystals and things that you can try. Crystal core, sparkle core, rainbow core, pastel wave, pastel punk, neon punk, glow fi, glow wave, light core. These are all different prompts that you can add to get just totally different styles with every image. Let's try rainbow core. And here's what that prompt generated. That's definitely rainbow. So many cool styles to try. Mood based themes, Warm core, lovecore, happy core, gloomcore. All sorts of stuff in here. Other themes, Gourmet, miniature world, mlg. This is just looking at the styles, so check this out. Let's click on TV and movies. Coming back to this front page here, these are more prompts that you could add in here. So TV shows, you can add TV show, Teletubbies, Rick and Morty style, Simpson style, Family Guy style, Adventure time, Star Trek movies. You've got Fantasia, Tron, saw Godzilla. Let's see what happens if I do it in the style of Tron. Blonde woman staring at a TV in the style of Tron. And here's what we get when we do it in the style of Tron. Let's close out of this. You've got structural modifications. You can see different styles of knots that you could add into the image. Zigzag styles, Deflate, inflate, biflected, hollow, bowed. All some fun stuff to experiment with. These are all different styles and this is literally just scratching the surface. So check out special effects and shaders here. Open this one up. We've got various styles of reflections that you can add to your prompts. Various styles of parallax. Let's try Nagalif. I don't know If I'm saying that right, an anaglyph image of a. A blonde woman staring at a tv. And here's what it gave us. Totally different style for pretty much the same prompt. Got different types of distortion. Look at this. You can make faces look like they're exploding or morphing. Interlaced, Matic special effects. Add some chromatic aberrations or displacement. Various additional stylization that you can do. Shaders and post processing that you can add to it. Like ray traced. Let's take a look at perspective. Some different like views and angles that you can take on your photo. So top views, side view, satellite views, view from an airplane, aerial views, close ups, extreme close up, centered shots, selfie, first person field of view. These are all different perspectives that you can play with. There's different angles you can mess with. Low angle, high angle, various perspectives. Panini projection. Never heard of that one. Let's try adding that to our prompt and see what happens. A blonde woman looking at a tv. Panini projection. I thought that was a sandwich. This is what we got with our Panini projection. We messed around with some isometric in my last video, miniature faking. This is a really, really cool style here. You can try some stuff with that aerial perspective. Something to play with with some different landscape type photos. Try doing the landscape from an aerial perspective instead of the normal perspective. We've got some object and animal ideas that you can mess with. You know, fungi, sea life, microscopic objects, instruments. Like I said, this is just cheat code after cheat code after cheat code of prompting here, check out materials here. So under materials you've got various solids that ad. Look at this. And each one of these has subcategories. You know, meteorites. Let's go plastic and foam. Look at this. Lego style, non Newtonian fluids and polymers, slime and putty. Add flubber to your prompt and see what kind of images it comes up with. Powders and particulates, add some smoke, add some powder. You can really, really get dialed in with some of these additional prompts. Lighting. There's definitely some cool stuff you can do with lighting. So types of lights. You've got fluorescent lighting, plasma globe, ultraviolet. Got lighting, illuminated illumination, cinematic lighting, moody lighting, studio lighting, volumetric lighting, split lighting, nightclub lighting, light pollution. Let's see what happens when I add nightclub lighting to my prompt. Here's what we get when we add nightclub lighting to the blonde woman staring at her tv. You've got intangibles. Mess with various emotions. You know, happy, angelic, weak, strong, durable, powerful. Work with Symbols Mess with geometry 2D shapes 3D shapes 4D hyper shapes dimensionality 0D through 5D 0 dimensional, 1 dimensional, 2 dimensional, 3 dimensional, 4 dimensional, 5 dimensional. All stuff to play with. You've got various multiverse and over dimensional options. Some really, really cool stuff that you can try. Extra dimensional, excessively dimensional parallel universe. Look at this. This is all little extra things that you can add to your prompt to get really cool styles. You get the idea. This rabbit hole goes very, very deep and I could make a video that was four hours long about all the various prompts that you can use. This is the ultimate cheat code. This is the game Genie, if you will to get Mid Journey just right. And between this video and the last video I made on Mid Journey, you should be pretty much a prompt engineer by now, a prompting expert in Mid Journey and get almost any image you could possibly imagine. Now if you love tools like Mid Journey and like all the various AI tools and chat, GPT and all that kind of stuff, make sure that you check out Future Tools. Future Tools is the website that I built to curate all of the cool tools that I come across. I review about 20 tools every single day, pick my favorite tools, put them on this website and categorize them and tag them so that they're easy to find. Let's say you really love generative art. Come up here, click on Generative art. You'll find 78 different tools that all deal with generative art. Very, very cool site. I really think you're going to like it. If you haven't visited already, also check out our newsletter. I've got the Future Tools newsletter if you go to FutureTools IE newsletter. It's a weekly newsletter that I send out every single Friday. It includes five cool tools out of the hundred plus that I look at every week. I pick the top five of the week. I share three news articles from the week, three cool YouTube videos that I think you should watch, and one way to make money using an AI tool. And I send that email every Friday. You're going to want to be on that list. We're at about 2,000 subscribers right now and I would love to share that stuff with you every single week. It's all available for you over at FutureTools IO. Thank you so much for tuning in. Hopefully you got a lot out of this video and you learned a lot more about Mid Journey and some of the really, really cool stuff that you can do with Mid Journey. If you haven't already, make sure you like this video and press the little subscribe button. Because what I do is I find really cool tools and I go and I make videos about the cool tools and I show them off and I act like an excited, nerdy little kid who loves cool Internet tools. And if you like more videos like this where I nerd out about cool Internet tools, make sure you're subscribed to this channel and I'll keep doing that for you. Thanks so much for tuning in. See you guys in the next video. Sam.










