Midjourney Tricks: Consistent Character Design V4/5
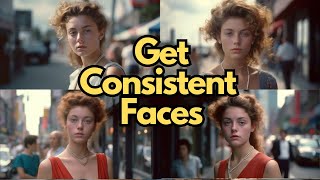
LARRUZ shows how to generate consistent characters in Midjourney v4 and v5 by extracting a seed from your base image, then re-running the prompt with that seed to create variations. Change the setting, pose, outfit color, or motion while keeping the character recognizable across all outputs.
Chapters
In this video, I will teach you how to create consistent looking characters in Mid Journey. This technique will work both in version 4 and version 5 and simply relies on a base image and the corresponding seed. So let's get started. So for this technique to work, we need two different things. First is the base image that we will use as a starting point. And the second is the seed associated with that base image. In this case, we're going to be working with mid journey version 5, but same techniques will apply in version 4 as well. If you want to switch between different models, you can go to the settings. Now I'm using Mid Journey version four, so I'm going to click on Mid Journey version five. That will set the default model to version five. So here's the prompt that we're going to be using to create our base image. So the prompt is 1980s street style photo of a young woman, diamonds dress, white shot, natural lighting, Soho and shot on Vista 200 4K with an aspect ratio of 16 by 9. Now you want to be as specific as possible during your initial prompt. In this case, I define a specific error or time and then the location as well as the type of camera to use. Okay, so I had to reroll it a couple of times. You want to make sure that you select a picture in which the face is clearly visible. Okay, I think I like this one. The face is clearly visible and that's the kind of picture that you want. Right. So I had to reroll it once more. Now the next step is you can upscale this image, but we need the corresponding seed. So first go here to add reactions and then you will see this envelope sign. If not, then you can look up for more and look it up. Right. So in version 5 you need to do it on the grid of four images. In version 4, I think you need to do this on a single image. So in this case what we're going to do is we are going to click on this envelope, right? And it will add this envelope sign to it and it will send me the seed. So after clicking on it, I actually got a direct message with the seed of the image grid. Okay, so we need to copy this. Now you want to upscale the this second image, the one that you chose. Right. So I'm going to click on this. So here's the upscale image. Now what you want to do is you want to click on it, then right click on it and then simply copy image link. Now we will rewrite our prompt. So slash imagine and the prompt is going to have three Components. First is the link that we just copied. Right. Next is going to be the original prompt. So we're going to copy that. And the third component is the seed that we got. So I'm going to go to my direct messages and here is the seed. So I will copy this, go back to my prompt, and in order to add the seed, you need to type dash, dash, seed and then paste the number that we just copied. Okay, that's, that's a scene seed is basically a starting point for an image. So all these images are generated from a random starting point and the seed defines which starting point is going to use. Now when you run this command, it will show the original image. This absolutely fine. It's still waiting to start the process. Okay, so here is the result. If you look at these images, they look pretty similar and they are consistent, right? Especially these three ones. The fourth one is a little different, but the first three do look very similar. Now they are not going to be exactly the same. There are going to be variations, but you will still see some consistency. Okay, now I think this is a good starting point. Now we can actually go ahead and start modifying our prompt. So now I'm going to copy this updated prompt with those three components. The base image, original prompt, and then the seed and we can start playing around with the prompt. Now let's say instead of SoHo, I'm going to say at the beach and let's see if you get consistent character or not. So keep in mind that this will also work on cartoon characters or anything else that you want, not just human faces. And in for this video we are using Mid journey, but I have another video. If you want to create consistent characters using stable diffusion. The approach is a little different in that case. But I'm going to put a link to that video if you don't want to use midjourney, rather you want to use a stable diffusion. Okay, so here are our results. There seem to be a boardwalk in the background and I think they look pretty similar to our initial image. So for reference, this was the initial image that we chose or image very similar to this. And now we have our character at the beach or I guess like walking, and it looks pretty similar. Okay, now let's try to change the posture in the Cayman. In this case the character is standing. So we are going to say sitting on a bench. Right. So now as you see, we are adding more things to our prompt and you want to make small, small changes, not really abrupt changes that will really change the whole image. Right. But let's see if we can change the posture. We can even play on our play around with the whole body. Although like I have found that that seems to create some challenges for Mid Journey. Okay, so here are the results. In this case. I think the first and the third image seems to be similar to our original images. And so let's look at these two and I think first and third, second and fourth image, they look very different. But again like out of four you are able to run to get like a couple of those very similar or consistent to your original image. So I think that's, that's still a win. Okay, next we will change the posture. So in this case, rather than sitting on the bench, I said running. Right. And after this test we'll see whether we can modify the dress color, the type of the dress as well. So that's going to be our last test. Now while this is running, you can actually add some more details. For example, you can define the ethnicity of your character. That will give it a specific, very specific look. Some people have suggested the user names for your characters. I haven't played around with that in Mid Journey, but that seems to work pretty good if you are using stable diffusion based models. So here are the results. I think it seems to be working. There's definitely like a running post trait here here. Maybe this is more like standing these two, but the consistency is still there. Like not exactly the same, but I think they're pretty consistent still. Okay, last test. So I'm trying to change the color of the dress and let's see what the outcome is going to look like. As I said before, this approach will work both in version four and version five. Okay. It is creating images with red dress. So that's pretty nice. Okay, this is excellent. So you see you can easily control the type of dress that your character is wearing. I think the consistency still remains there. So for example, these two images were pretty consistent. Maybe this one as well. This one looks a little bit different, but again as I said, if you get a couple of those out of four, so it's still a win, win situation. I hope this video was useful. If you have any questions or comments, please put them in the comment section. Thanks for watching. See you in the next one.










