SadTalker: Bring Your Image to Life with Audio | Audio to Animation
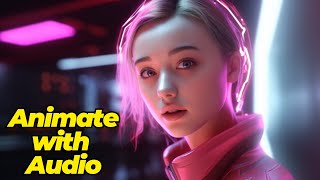
LARRUZ walks through SadTalker, an open-source tool that animates still images to match audio. Upload a photo and voice file to Google Colab or Hugging Face Spaces, tweak settings like face enhancement and crop mode, and get back an MP4 of a talking avatar. Longer audio produces more natural head movement and blinking.
Questions this video answers
June 12, 2023.
Tesla T4 GPU with around 16 gigabytes of memory.
GFPGAN (referred to as a face enhancer/face GAN).
It does not allow commercial usage; intended for personal research or non-commercial purposes.
Free Google Colab, Hugging Face Spaces, Replicate.com demo, and an Automatic1111 extension (not recommended by presenter).
Chapters
In this video I'm going to show you how you can create your own talking avatars just by providing an audio and an image. We are going to be using an open source project called Sad Talker, which is an excellent alternative to something like DID Studio because you can run this on your local machine for absolutely free. The great thing about this project is there are multiple options where you can run this. So there is a free Google Colab, free Hugging Face spaces. You can also add this as an extension in your automatic 1111 as well as there is a free replicate.com demo. I will walk you through some of these options as well as show you how you can further improve the results generated by Sad Talker. So first let's look at the free Hugging Face spaces. This is a free demo running on Hugging Face. The interface looks very similar to what you can expect when you run this as an extension in your automatic 1111 setup. Now personally I do not recommend this to run locally because when you run this as a part of automatic 11.11, it does detect some malicious code. So it may not be something serious, but I tend to avoid it. So I will show you how to run it on Hugging Face. Google Collab and Replicate on Hugging Face. They have provided a number of different demos that you can look at. So let's look at the first demo and they also have different settings for these demos. This is really helpful in order to understand. Now if you are not running the demo and you want to upload your image, so simply click on this to upload your image and. And then you can also upload your own audio here. Now they also have an option that you can provide a text and use the same demo to generate audio based on the text and then that audio is going to be used to animate your images. Alternatively, you can use something like 11 labs which can convert your text into audio. Back to our Hugging Face demo. So first you need to upload an image, then a corresponding audio and then you have different options that you can select for this demo. They have uploaded this image and they're using a pre processor with Crop, which means that it will simply focus on the face and that's why you see just the face of the subject in the final video. The second option that they have selected is with still mode, so that reduces the amount of movements generated in the output video. Now let's look at the output of the Sat Talker. Now the results are pretty good. The movements of the face and lips were pretty nice and natural. You probably noticed there were no eye movements or blinkings. That can happen in longer videos. So it's just a three second clip. But if you have a longer, let's say audio, then you will see that there are natural looking eye blinkings in the resultant video. We are going to look at a couple of examples and you probably also notice the quality of the output video is not great. So you can use actually this setting with GFP Gan as face enhancer. So that will improve the quality and result of your faces. Now here is another video or another demo which actually does that. So in this case it's using the full. So that means whatever image you provide, it will use it as a fold. It's not going to crop. Then the amount of head movements and the movements are reduced as well as it's using a face enhancer. So let's first listen to the audio. So that's the provided audio. And using this audio plus the image, here is the results that you would expect. Nobody knows us getting the car, all right, so it's not bad at all. Now here's the clip that you saw in the beginning of the video. If you notice here you actually observe a lot of head movements and this is because we are allowing head movements in the image as well. As you will see blinking eyes because it's a much longer video. So what I have noticed is that if you add a longer audio, the result is going to have eye blinkings as well and more natural responses. Next, I want to show you how to run this inside Google Colab. So simply click on this, go to the Google Colab, make sure that you go and create a copy in your own drive. Next, simply go to runtime and make sure that GPU is selected as hardware accelerator. Now let's quickly go over the code of what is happening in here. First you are simply looking at what type of GPU is being used. So if you are in the free plan, you will have access to a Tesla T4 GPU which has around 16 gigabytes of memory. So the second block of code actually installs all the required packages, including Python as well as the packages required to run Sat Docker. Now this step is going to take a while, so be patient. After that, the next block of code is actually downloading the required model files. Now the next part of code is the one that actually takes care of the images that is being uploaded as well as the audio. So if you go here and look at your Google Colab, you will see this Sat talker package that is being downloaded within that you will see the examples folder. Now if you look here, this code is referencing to the Source underscore image folder within the example folders. So within the Source image folder they have provided a whole bunch of different images that are that you can use as an example. So let's try to open one of them. For example, here is the one that is provided. We can also look at some other images. So here is another one. Now if you want to upload your own image, you will need to upload the image into this folder. And the way you do it is you simply right Click on the SourceImage folder, then click upload and here you can upload whatever image you want. So for example, I have this test image, I'm going to upload it in there. Now you can see this test image being uploaded. So here's the test image. Now we also need our audio file. So for that we're going to be using this other folder driven Underscore audio. They already have a few examples that you can use. But if you were to provide your own audio, we'll follow a very similar process. So right click on it, click upload and then select the audio that you want to use. So let's say in this case I want to use this specific audio. So here is the uploaded audio that we just selected. Now keep in mind that since it's a free Google collab, so this is going to take a while to run all to run in terms of installing all the dependencies and downloading all the models. Okay, so once we run the next block of code, you will see this drop down menu where you can select what image do you want to use. So for example, here's one image, here's the other one. Right? But I'm going to go and select our test image and that's going to be loaded. So you'll see the test image is loaded here. Next we need to define the path of our audio. So in this case our audio is called Set Talk Underscore audio. So I'm going to just replace it here, right? And then we are all set to run this code. Now in terms of the flags that you are providing to the actual inference PY code are very similar to what we saw in the Sat Docker demo in here. So here we had different options in terms of preprocessor and then whether we want to use this face enhancer again or not. And also the still mode. So these are all the same things. If you see here, dash still, so you won't have a still Mode video. So that means you want to reduce the number of movements that you will see in the resultant video in terms of the pre processors. So this specific case is using the full preprocessor and we're using the enhanced facer in the form of the gan. Now we can simply run this block of code. This is going to take a while depending on how long your audio is. If your audio is short, so it's going to be quicker. If it's too long, it's going to be longer. And at the same time I would actually recommend everybody to look at their resources usage. So for example, here is the GPU RAM usage. When it starts the rendering process you see that the RAM usage went up. You can toggle it in and out from here. Now the great thing about this code is you can actually run exactly the same code on your local machine. So you don't really need something like automatic 1111 to be installed in order to run this. Now another great feature of this specific code is that you can convert this into an API. So essentially you can be running this somewhere and create an API on top of it where you simply provide the audio as well as the image and the result is going to be animated avatar. Just keep in mind that the current license does not allow for commercial usage. So according to them, this repository can only be used for personal research or non commercial commercial purposes. One more thing I wanted to mention is that this specific image was created in mid journey but you can replace it with your own image. So it generated the results and it stored it in this video file. So let's look at it where it is. So here's the results folder and within that we actually see this MPP4 file. So what I'm going to do is I'm going to click on download and download this file. You run the last block of code, you will get a preview of what it's going to look like. Here are the results. When we allow for head movements and eye blinking in this video, I'm going to show you how you can create your own talking avatars just by providing an audio and an image. We are going to. I actually like this version better. I wish they had some sort of a way in which you could control the amount of movements because sometimes you see that the head is moving just way too much and it looks a bit cartoonish. But this Google Collab version also looks pretty good. Although I think it would be helpful if there were movements and blinking for some reason for this specific video. I don't get it. As I said in the beginning, Set Talker is an excellent alternative to something like DID Studio. You don't really have to pay anything. You can create as many videos as you like and the results are pretty decent at the end. I want to show you this one more project Sad Talker video, Lip Sync, which is trying to improve the quality of the results that you get from Sad Talker. So for example, let's have a look at this video that is generated out of Sat Talker. Now if in this case, your case, if you notice the lips movement is not really natural, so I'm going to turn off the audio. But if you look at the lips movement, it definitely looks unnatural. However, this specific work adds a lot more natural lip movements. So let's have a look at this video. Now as you can see both the lip movement as well as the head and eye movement. So this is an improved version of Satalker. If there is interest, I will create a more detailed video on this. Again, when I was running Sat Talker locally, my antivirus flagged some of the files. Your mileage might vary, but I would recommend you can check it out using the Google Collab or Hugging Face Spaces. I hope you like this video. Consider subscribing to the channel. Thanks for watching and see you in the next one.










