This AI Video Went Viral - Here's How To Make It
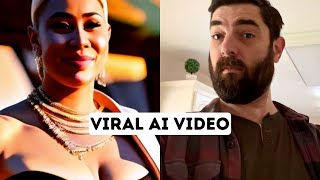
This content was created by LARRUZ. This content was uploaded by LARRUZ. This is a YouTube tutorial titled "This AI Video Went Viral - Here's How To Make It" (created 2023-06-12). It is a how-to walkthrough by the channel host (labeled SPEAKER A) demonstrating how they recreated a viral AI-transformed selfie video using Runway ML Gen1, DaVinci Resolve, 11 Labs (for voices), and Motion Array (for music). The transcript is a step-by-step guide covering recording and splitting clips to meet Runway's 15s limit, selecting reference images/styles, generating multiple renders (noting ~10 min render times and credit costs), assembling clips and audio in DaVinci Resolve, common artifacts (funky fingers, head-shape issues), and cost/credit considerations. The excerpt also includes lines from SPEAKER B used as example voice clips and final tips (call to action to tag the creator and visit FutureTools.io).
Questions this video answers
15 seconds
29 seconds
About 10 minutes per render
Over 1.7 million views
$25 total (a $15/month plan plus an additional $10 in credits)
Chapters
All right, so maybe you've seen this video that's been circulating all over Twitter that the CEO of Runway shared. It has over 1.7 million views on it, and it's pretty impressive. Check it out. A long, long time ago, at Lady Winterbottom's lovely tea party, which is in.
The smoking ruins and ashes of New York City, a fierce woman ain't playing no games and is out to kick some butts against the unimaginable, brutal, merciless.
And scary lobby boy of the delightful Grand Budapest Hotel.
Hi. And everything seems doomed and lost until.
A super handsome man arises, the true hero and great mastermind behind all of this. So I thought this video was pretty cool, and I really wanted to see if I can recreate it. And in the process of trying to recreate it, might as well show you as well. So, earlier today, I made this video of me walking around my house and snapping my fingers. Now, I don't really think I need to give you a tutorial on how to do this. This is just a selfie shot using an iPhone with me walking around my house and snapping every once in a while. So the first thing I to do is I need to count how many times I snap, so I know how many scene the video is going to start with. Just me on camera normally, and it's going to end with me on camera normally. So I need to count how many videos I need to make for the in between each snap.
Five.
All right, so I need five scenes, and then I'll have my original face at the beginning and end with five scenes in between. This one originally had 1, 2, 3, 4, 5, 6, 7 different scenes. Mine's only going to have five, but it'll give you the same idea. So in order to do this, we're going to use Runway ML and we're going to use their Gen1 tool. Now, in order to recreate exactly what he did, you are going to need to be on one of their paid plans. And we're going to log into our Runway account here, and we're going to click on Gen 1 video to video. So we want to upload our video, but One thing about Gen 1 is it will only do 15 seconds of the video. The video I just showed you was 29 seconds. So I need to split it into two videos and do the front half of the video and then the back half of the video. So in order to do that, I am going to jump into DaVinci Resolve, which is a totally free video editing software, works on both Mac and PC. I'm going to go ahead and create a new project here and pull my video in that I just created, set it to the proper frame rate and then I'm going to bring it down onto my timeline here. You can actually see all my various snaps. So there's one new scene, two new scenes, three new scenes, four new scenes, five scenes. And then the beginning and end here will be back to my original face. So we're going to generate five scenes in between. And then right at the 15 second mark, we'll cut this right here. And then I'm just going to render out just this first 15 seconds here. It ends right on a snap. So we'll call this snap video part one. Go ahead and render this out real quick. And then I want to make another 15 second video and I'm going to let it overlap a little bit. So we'll go ahead and do this clip here, which is about a 12 second clip. So we'll have our initial 15 second clip and then we'll have a 12 second clip with a little bit of overlap here. Go ahead and render this out as part two. And now we've got our two clips. Minimize DaVinci Resolve because we're going to need to piece this back together in DaVinci resolve later. And I'm going to go ahead and pull part one in, which is our first 15 second video. And I'm not going to use the exact same scenes. We'll try to pick some different ones. So I think I want to start with a samurai warrior. So let's go ahead and find an image of a samurai that we can use. So here's a cool samurai image. Let's see what happens when we use something like this. This. I'm going to go ahead and upload this image over here as our reference image. We'll select that we can actually preview styles. Let's go ahead and preview styles. So before we even generate it, we can kind of see how it's going to look. I'd say this one over here on the left looks pretty decent. So let's go ahead and generate with that. Well, that's generating. I'm going to pick my second image that we're going to use to sample. Let's do some sort of superhero. Let's look for a picture of Homelander. This image might work well. So we can try this one. I want to have a female in there as well because this original one, he did have a female in there. I'm going to use this image of Lady Gaga here, because why not? I'm going to use an image of an astronaut, and then just for fun, let's end with an image of Thanos, because, you know, it's a snap. So we'll go ahead and use this photo here. All right, so here's what our samurai video looks like. You can see it's going to be the samurai for the entire 15 seconds, but we're going to chop it up in editing in a minute here. So now I'm going to go repeat this same process with this video with all those other images that I downloaded, so I can save it by coming up here, clicking on this little download button, and then it downloaded the file to my computer. All right, so I generated a bunch of different styles for the Homelander picture. I'm thinking this top left one is probably the best looking. So let's go ahead and generate with that one. Here's what my Lady Gaga styles look like. I did generate quite a few until I found one that looked fairly decent. We'll see how this one comes out. All right, so we have our Lady Gaga clip. So far, the they all look pretty good. The thing that I have the biggest issue with with all these videos is that the fingers kind of look funky, but I think I'm going to live with that. For the sake of speed on this tutorial, if I spent a little more time messing with this steed and generating more iterations, I can probably get that a little bit better. But the goal is to show you how this was done and not necessarily to get it perfect. So what I need to do next is I need to upload our Part two video. So I'm going to drag and drop this second one over and I'm going to run it two more times. One with this astronaut image here and one with this Thanos image here. All right, I finally got my astronaut video, which is a little funky. It's probably my least favorite. It's probably the least coherent out of all the ones. You can see how the head kind of changes shape a little bit. But every time I generate one of these 12 second videos, it literally takes like 10 minutes to render. So I'm going to stick with this one just for the demonstration purposes. Just know you can do better than this. But also keep in mind that every time you generate one, it does take a good, like 10 minutes to render and it just burns away credits. So I'm going to go ahead and do the last style, which is my Thanos style. So I'm going to go ahead and upload the Thanos image. Let's go ahead and preview some styles. Let's generate some more. Not bad, but they don't really look like Thanos. I'm just going to go ahead and use this one. It's close enough because it's going to match the shape of my head. It's not going to change it to a Thanos shape. So we'll go ahead and just work with this one. All right. And we've got our final video. That is Thanos. Ish. So now I'm going to download this and we're going to pull them all into DaVinci resolve and sort of overlap them in the proper way. So I'll pull all these video clips in that I just created. I'm going to pull them all onto my timeline here. Let me just kind of make some more room for myself, starting with the Samurai in the beginning. And one thing I did notice is that Runway claims that it can do up to 15 seconds. And I gave it an exactly 15 second clip, but it actually cut it at 14.2 seconds, so it didn't quite get to that full 15. So just one thing to be aware of when you're messing with this. So I've got Thanos, I've got a Homelander, and then I've got the Lady Gaga clip that I'll pull in over here. And then I need two more tracks, but this time I'm going to line it up with the end. It's going to end with the astronaut clip here and the Thanos clip up here. So now I've got all of my clips and all I have to do is sort of change them on the snap here. I'm going to zoom in on my timeline so I could kind of better match it up. The first clip is going to be me, so I time it with the snap like that. And then I want it to go to the Samurai first. So we'll time this up right here. Get rid of our Homelander. Get rid of our Lady Gaga. And now we have me, Samurai. And then it's got to be Homelander for the rest until we get to Lady Gaga here on this snap. So now we've got Samurai, Homelander. Zoom up a little bit. Lady Gaga. And now we're working with our astronaut here. And this is sort of a problem because it didn't get the whole clip. It didn't take our full 15 seconds like it was supposed to. We have a bit of a gap here that I got to figure out. Maybe if I just Cut these frames out. Maybe it won't be noticeable. Let's see here. Yeah, so I just cut the frames out and it's not really even noticeable. So then I'm going to go ahead and move ahead to our last shot, which is going to be our Thanos. So we'll cut out Thanos here. And then now you can see we've got all of our clips and they're all lined up. So it goes from me to Samurai to Homelander to Lady Gaga to Astronaut and then finally to Thanos. And then it's going to end back on me right here on this snap when I do a cut. And I'm going to get rid of Thanos and the astronaut and then back to me. Now, these don't actually fill the full frame here, so I'm going to just go ahead and cut in on all of these slightly and do a little bit of cleanup here. You can see there's a little bit of a border on the edge. So I do want to zoom it in just very, very slightly. 1.02 I'm going to go ahead and set that same zoom for all of my clips here. Just to make it easy. I'm going to go ahead and just select everything else and then set my same zoom across all of it. Now I'm going to get rid of some of this overlap just because we don't need it. And then just to make it simple and easy to see what I'm doing, bring them all down to the same timeline. I can go ahead and delete empty tracks. And now we've got our full on video here. Now, in this other video, they do have some music and they do have some voiceover a long, long time ago at Lady Winterbottom's lovely tea party, which is basically to do that, you would just use 11 labs. And then the music you just grab from like a stock music site so we can go ahead and get an audio like this.
With AI, you can be anyone you want to be.
There's all sorts of voices in the voice library. So let's say we want an accent for someone that's male, older, and let's sample some of these here.
You've got to be careful if you don't know where you're going because you might not get there.
So that one pretty decent. For that first clip, let's go ahead and add that voice. For our second clip of Homelander. Pretty much any sort of American accent would work.
If you smile when no one else is around, you really mean it.
Go Ahead and add this mark is voice for our second clip. Let's go. Female Young Kindness is more important than wisdom. And the recognition of this is the beginning of wisdom. We'll add this Myra voice for our third one so we can generate a sound like this.
With AI you can be anyone you want to be.
Then we'll go ahead and add a voice for a Homelander.
Like a superhero ready to defend justice.
Or a pop star making the next hot club anthem. Maybe even someone who explores worlds no one else has seen.
AI has the potential to be good or evil. It just depends on how we choose to use it.
All right, so I generated a bunch of different voice clips with various voices from 11 labs. Now I'm going to go ahead and download them all and let's go ahead and pull all these audio files into our video here. Go ahead and give myself some more room on my timeline. Our first audio clip will go right here.
With AI you can be anyone you want to be.
Now these voices aren't perfect, but these are good enough for demonstration. You can definitely play around with it and spend more time on it to get exactly what you're looking for.
Like a superhero ready to defend justice.
Or a pop star making the next hot club anthem. Maybe even someone who explores worlds no one else has seen.
AI has the potential to be good or evil. It just depends on how we choose to use it.
All right, so now I've got all of my video clips, I've got some sound bites of speaking, and now I just want to add a little bit of music behind it to pull it all together. So for that I personally have a subscription to an account called Motion Array. No, this is not sponsored by them. This is just the tool I tend to use because it has music, it has sound effects, it has stock videos, it has stock images, it has presets for DaVinci Resolve, has templates for DaVinci Resolve. So I just have a Motion Array account because it's got so much of the stuff that I use. So let's go ahead and look up some royalty free music. All right, here's a good clip for the Samurai one. I'm going to pull this in down below. Start it right when the samurai starts. Actually get a little bit more granular with this. So it starts right on the snap. Basically do a little slight fade in on it like so with AI you can be gotta bring the audio down a little bit. Bring it down to negative 15 on this one.
With AI you can be anyone you want to be like.
And Then the music's gonna change with each snap. So I'm gonna go and find another song that goes well with it, and then I'll show you the end result here in a minute. All right, so I've gone ahead and lined up all the music for it. And then one final step. I'm gonna add a little bit of sound effects over our spaceman here, because I think it might be cool to have some, like, breathing sou while it's showing the spaceman. So let's see what I can come up with. So I found this sound effect here preview, which I think will sound pretty good behind this video there. So let's go ahead and put that in, and that should tie it all together. I'll just bring these little audio clips down into a new track here. All right, and my whole video is done. So let's take a peek at this.
With AI you can be anyone you want to be. Like a superhero ready to defend justice.
Or a pop star making the next hot club anthem. Maybe even someone who explores worlds no one else has seen.
AI has the potential to be good or evil. It just depends on how we choose to use it.
Now, going back to this original video that we looked at on Twitter, his are a little bit more coherent. I mean, the faces look a lot cleaner. The backgrounds look a lot cleaner. If I had to guess, I would say that when he made this video, he probably generated so many different videos over and over and over again until he got the perfect one. But I wanted to show you a demo of exactly how they did it. Now, if I'm being totally honest, it's quite an expensive process to get this exact same thing if you wanted to do it yourself. My video is less than 30 seconds long, but I had to generate a bunch of different clips in Runway. In order to generate the amount of clips that I needed, I had to be on their $15 a month plan, and I had to buy another $10 worth of. So I spent $25 on Runway to make this video. Plus, to get the audio and the speaking, I use my 11 Labs account, which is another $5 a month. But I use this for a lot of other stuff, so that's sort of a cost I would have incurred anyway. And then to get my background music, I use my Motion Array account, which, as you can see, I pay 30 bucks a month for now, I use Motion Array, and I use 11 labs for a lot of other stuff. Runway I use from time to time. I've messed around with the Gen 2 a little bit and the Gen 1 a little bit. But just making this one 30 second video used up all of my monthly credits, plus I had to add additional credits on top of it. So the costs add up and most of the costs would come in Runway because again, they're sort of sunk costs in my other services. I use them anyway. But the Runway cost really kind of will eat at you pretty quickly because this video circulating and it's got 1.7 million views and I was really impressed with it. I wanted to dive a little bit deeper and figure out exactly how this was made. And you just watched the process. The only difference was they probably spent a hell of a lot more time on it. So hopefully you enjoyed this tutorial. Thank you so much for tuning in. If you use this strategy and this video helped you and you make something with it and you post it on Twitter, make sure you tag me in it because I'd love to see what you create and retweet some of my favorite ones. And also don't forget to check out Future Tools where I curate all the cool AI tools that I come across and keep you up to date on all the latest AI news. You can find it all over at FutureTools IO. Thanks again for tuning in. Really appreciate you. Don't forget to like and subscribe. See you guys later. Bye Bye.










