Use AI To Turn Images Into Videos!
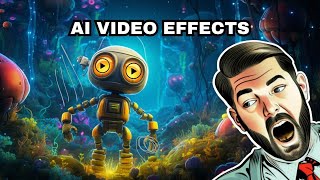
LARRUZ walks through turning AI images into videos using Midjourney for generation, Runway Gen-2 for animation, Kyber for styling, and DaVinci Resolve for compositing. He chains Runway generations by seeding each with the previous frame to extend length, and shows how to layer effects like camera shake and character swaps using Wonder Studio.
Questions this video answers
About 4 seconds.
Use the final frame (screenshot) of a Gen-2 output as the image prompt for the next generation, repeating to morph/lengthen the sequence.
8 seconds.
About 37 seconds.
Motion scale ≈ 0.543; Speed scale ≈ 310.
Chapters
In this video, we're going to have some fun. I want to experiment with a handful of different AI generation tools to make videos like the one that you're seeing on the screen right now. And I'll also show you how I made this video where I turned myself into a robot by pulling a picture frame over myself. There's a handful of cool tools that I haven't really played with on video recently, like Midjourney's new panning feature, Runway's Gen 2 image to video feature. And we can also play with some cool effects with Kyber. We'll pull it all together into a single video using DaVinci Resolve and see what we come up with. So to start, let's jump generate an image in mid journey here. Imagine a friendly robot in a colorful alien world. Let's go. Aspect ratio 16,9 to give it the wider image. So here's what we got. I really do like these images. I like this bottom right one a lot. Let's create an animation out of this. So I'm going to go ahead and upscale number four here, but then let's pan to the left on this. I'm going to click the left arrow. I'm going to use the same prompt and just see what we get out of it. And here's our versions where it scrolled left and it added another little robot to it. I think this top left one the best. Let's go ahead and upscale number one here. Then I want to pan left one more time, but I don't want it to keep adding robots. So I'm just going to get rid of that part and call this a colorful alien world with beautiful plant life. Now we've got our four wide images. I think I like this one the best. Let's go ahead and upscale number four here. And here's our image. And let's go ahead and start playing around with it in some of these other tools. So the first tool I want to experiment with here is Runways New Gen 2. It says text to video, but they now actually give you an option to upload an image here. What I'm going to do is I'm going to go ahead and take our original image here with just the first generation with just the original robot. So we can go ahead and drag and drop it right here. We've got our image prompt. I'm going to leave this prompt completely blank. Let's just see what Runway does with it. And we'll click generate. And here's the video it generated. It generated a little four Second clip of our robot moving around here, which is pretty cool. But there's one other little trick that I learned from William Lampkin here on Twitter. I mean, X or whatever you call it these days. He used Gen2 and then used the last frame of the Gen2 output as the image prompt for the next generation, so that each video just sort of morphed into the next video. So I'd like to give that a try and see if we can generate a video a little bit longer than four seconds. So I'm going to open this video up here in my video player. I'm going to go all the way to the final frame here of the video, and then I'm going to take a screenshot of this full frame image here. We'll go ahead and delete our original image here, upload a new image, and this time I'm going to drag my screenshot into this one and use this as the initial starting image. I'm going to click generate one more time. And now we got this one where our robot moves a little bit more. Let's just see how it looks if I pull them together in DaVinci resolve here. Now, one of the reasons I always like to show off this stuff using DaVinci Resolve is because DaVinci Resolve works on a PC, it works on a Mac, and it's free to use. You can just download it for free. I'll take both Vid one and Vid two here. Here's our first video. Here's our second video. So you can see we've kind of got a longer video now. Now, if I wanted, I can do one more time here and take a screenshot of this final frame. So we'll go full screen with this new video too. We'll go all the way to our final frame here where our little dude's looking off to the side. And then we'll take a screenshot of this full image here. And then we'll go ahead and pull this one in as our starting image for our third round here. And now we wait. Did it do? And now we have our third video of our robot starting to look a little bit less like a robot as time goes by. But this will be fine for our purposes. Let's go ahead and save this video. Let's go ahead and pull vid three into DaVinci resolve here. And theoretically, they should line up pretty well and transition into each other. You can see with each subsequent generation, the quality kind of gets a little bit worse. I probably should have been upscaling each initial image and starting with the upscaled version to get a better version of it. But what I'm gonna do is I'm gonna take this whole sequence here. I'm gonna create a new compound clipped out of it, and then I'm actually gonna duplicate it at the very end. And then up under speed change, I'm gonna reverse it. So now it's actually gonna kind of go back where it came from. And the reason I did that is now I want it to pan a little bit so I'm gon. And then remember, I've got this full image of our initial robot here. I want it to pan to the left and now move over to this screen here. So I'm going to bring this in and overlap it. I'm going to go to this last frame in my second clip here. I'm going to bring down our opacity a little bit so I can see what's behind it. And now I'm going to use this image here. And I'm going to do my best to line up our robots. So if I zoom this in, move our position over to the left here. We're now pretty dang close. So now I'm going to move this out of the way, bring my opacity back up on this original clip. And now when it transitions, it should just sort of freeze on the robot there like that. But I also want it to pan over to the other image. So let's go ahead and add a keyframe to start here under our transform keyframe. Go all the way to the right of our image here, and we'll change our position. So now that this other robot is on the screen, so now it's going to come out of this video, and boom, scroll over, pan over to this robot. And now we can do some fun work with this image here. So I'll go. Go full screen on this guy, and we'll take a screenshot of this one now. Now let's pull this image into Kyber and have some fun with that one. I'm going to create a video here. Begin with initial image, and we'll pull our screenshot of our robot over on this side in. Let's continue to the prompt. A video of a friendly robot in a colorful alien world. And let's do in the style of 3D rendering. We'll go to video settings. Let's have it do this part for eight seconds. We'll have it zoom in. While it's doing it, make sure we have show initial image in the first Frame that way it should be fairly seamless. Let's click on preview frames here and let's go ahead and use this top left one and create our video. And here's what we got out of this one. So we'll go ahead and download this video. We could pull this one into DaVinci Resolve. Now I'm going to overlap it a little bit here and here's what it does. Once it finishes its pan, it gets here and then it starts to do this crazy thing. So now we have a 37 second video. I'm going to add adjustment clip over this entire stretch here of video and then I'm going to keyframe this adjustment clip so that there's a slow zoom out. So what I'm going to do is I'm going to add a keyframe at the very end of this video here and then I'm going to come to the very beginning of this video, add another keyframe. But I'm going to zoom in a little bit on it and then maybe position them over to one side a little bit like this. And that's just going to give it a little bit more of an effect. So you can see the whole time it's going through these various transitions. It's kind of doing this slow zoom out effect. And even when it starts to go in reverse, it's going to continue that same zoom out effect that it's been doing the whole time. Now to finish this whole thing off, I'm going to add a couple little effects to it. So I'm going to go to effects here and I'm going to add an adjustment clip and I'm going to stretch this adjustment clip across the entire length of the video. Now anything I do to this adjustment clip is going to affect the entire video and I want to go to filters and I want to add a little bit of a camera shake to make it look like a camera is sort of being held while shooting this. And click on search. I can type camera and you get this camera shake. I can add that to this layer. Now the whole video has this like little shake to it, but the shake's a little too intense. So I'm going to come here to effects. I'm going to bring down the motion scale a bit and the speed scale a little bit. So the motion scale of about 0.543 and a speed scale of about 310 seems to have a natural handheld look to it in my opinion. And then I want to add one more effect to the top here. Let's Add one more adjustment. Adjustment clip up here on track five, stretch it across the whole thing. And then I'm going to add this little DSLR effect. It's got these little camera overlays on the bottom. And here's the finished product. I just love taking all of these different tools and mixing them together. Taking Midjourney and using Midjourney's pan feature, and then using Gen2 to get an animation, and then using the final frame of a video, plugging it back into Gen 2 to get that animation to further move along, and then taking a screenshot from that video and throwing it into Kyber and getting a different style of video. I think pulling all of these tools together is one of the most fun ways to use them and one of the ways that we can get really, really creative with some of our video making. Now, here's another video that I made that went sort of viral on Twitter, and it actually spun off a handful of other people trying to recreate it, where I take this picture frame and I move it over my body here. And as I move the picture frame down, I slowly turn myself into a robot, finally dropping the whole thing. I become a robot, and then I turn around and walk out of my office as a robot. Now, I don't think this video is that well done. I could have done it a lot better if I spent more time on it, but people seem to like it on social media. Here's another version from Eric, AKA Enigmatic E, where he recreated the same effect, but, you know, totally went up to me. It did it to a whole other level, improving on the effect that I did here. And then here's another one that I came across from Andres Tamashiro, where he managed to replicate the same effect as well, adding some cool flash effects into it and accomplishing the same thing. So pretty cool to see other people taking this idea and running with it. So here's how I did it. I recorded this video of me in my office here, where I had this picture frame and I just went through and did all the stuff that I was doing with it. I put it over my head. If you watch my video, there's a little glitch because it got stuck around my arms and I had to, like, fix it. That's why you see a little blip in my original video where it gets stuck on my arms, and then I walk out of my office. Then what I did was I took that exact video and I came over to Wonder Studio here and created a new project in Wonder Studio, added that video by uploading it over here, putting my video in the timeline, and then when it goes to pick the actor, you click, click, scan frame for actors here. And then you can see it actually found me in the image. And then you open this little slot here to pick your character. I picked the desert bot here, assigned him to my actor, and then rendered out the video. Once I rendered out the video, I had a video that looked like this, where it's pretty much the exact same video as before, but this time I'm a robot in the whole video instead of me in the whole video. So I have two videos, this one and this one. I pulled both Those videos into DaVinci resolve and overlaid them over each other so that the video underneath is the video of. Of the robot. So if I disable this video track, you'll see that underneath this video track is the robot video. And then the video that's on top this video, too, is the me video. Now, there are probably better ways to do this, but here's how I did it. I actually keyframed a crop on it. So if I click this little, like, diamond button on my timeline here, you can see each one of these dots is a new keyframe. So I put this over my head, I start to move it down. You can see I start my cropping keyframe right here. I do a crop top right here. And at. As I move the frame down the keyframe right here, you'll want. You can see my crop top keyframe here start to move as I move this down. So it's basically taking the top video and slowly cropping the top off and moving it down. So as I move the picture frame down, I am just making sure that the key frame of this top is moving down with the picture frame. So it's essentially revealing the video below it as I crop it down. And it doesn't look super great around my hands. If I bring my opacity down a little bit on this top layer, you can actually see the layer below it. So you can see as I crop down, it's just hiding more and more of the top layer here. I actually had to bring the crop back up because the picture frame was going up a little bit. And then as the picture frame starts to fall again, I had to bring the crop back down. But you can see the picture frame goes sideways right in here, and the crop isn't following it because I'm just cropping straight down. But it happens so fast that you barely even notice it. But if you watch as I press play, you'll notice that this crop just moves down with the picture frame. So I can even show you that right here. Here's the pict, just the robot, but the crop is all the way up. If I move this crop down, you'll see me again. So all I'm doing is just animating this crop and moving the crop down with my picture frame and just adding a keyframe each time. That's the whole process. So there you have it. There's a couple fun little visual effects you can do with your AI generated images with your video footage tools like Wonder Dynamics, Kyber Gen 2 Midjourney. I just love blending them all together and pulling things together and making fun little creative ideas. Hopefully you got some ideas out of this video. This was just fun for me to make. I wanted to show off some cool things that I've been experimenting with, you know, hopefully give you some inspiration, give you some ideas of some cool visual effects to try for some of your future fun videos. If you like this kind of stuff, check out FeatureTools IO. This is where I curate all of the coolest AI tools that I come across. Keep the news up to date all the time. And also I've got a free newsletter where every single Friday I will share just a handful of coolest tools and just the most notable AI news that I come across. You can find it all over at FutureTools IE and join the free newsletter. Thank you so much for watching. I hope you found this fun little experimental nerd out fest enjoyable to watch. I'm probably gonna nerd out over more tools like this and experiment and play around on camera in the future. Maybe even do some of this stuff on live stream where I just screw around live. If you want to do that and hang out live while we mess around with some tools, let me know. Maybe that's something we'll make happen over on the YouTube channel. Once again, thank you so much for hanging out. I really, really appreciate you. I'll see you guys in the next video. Bye Bye.










