10 Steps to Growing Most of Your Own Food (In Less Than 10 Hours A Week)
This content was created by Victor Justin Rhodes. This content was uploaded by Victor Justin Rhodes. This is a YouTube how-to video titled "10 Steps to Growing Most of Your Own Food (In Less Than 10 Hours A Week)" (created 2022-01-18). The content is a first-person instructional monologue by homesteader Justin Rhodes (with occasional mentions of his wife and children) presenting a 10-step system to produce most household food while working under 10 hours per week. Topics covered include goal-setting and limitations, garden design and zoning, using chickens to prep beds (Chickshaw and chicken tractor), simple greenhouses/cold frames, soil blocking/seed starting, soil testing and amendments (broadforking, lime), transplanting into mulched beds, maintenance (fertilizer, pest treatments), harvesting/eating seasonally, and preserving or distributing excess. The video also offers show-notes, tool lists, and downloadable plans referenced in the description.
Chapters
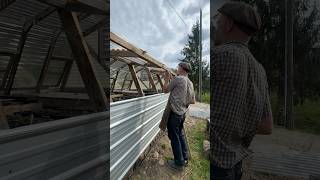
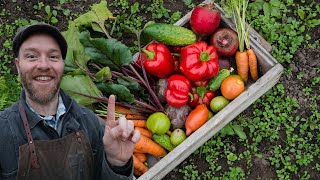
This summer I was able to grow 75% of my own food in just 100 days working less than 10 hours a week. In this video, I'm going to show you how I did it. Look, I'll show you some of the stuff that I grew just right here behind me on the banister curing: butternut squash, pumpkins, some cucumbers left over. Those are coming out of season, but we've still got some left. Ooh, acorn squash, that stuff will last forever just on the counter. Zucchini. My wife makes a mean Italian zucchini, and there's a lot more where all this came from. And during the last 3 weeks of my 100 Days Challenge, I was able to eat 75% of the food that I was eating from the land. And that's not because I couldn't have ate 100%, it was just because I like my coconut ice cream, my tea from India, my salt and pepper, that kind of thing. Sometimes it's even hard for me to believe just how much we were able to accomplish in such a short amount of time. Look, don't believe me? Hey, I documented every bit of it on my YouTube channel at Justin Rhodes. Look, check it out, 100 videos, one for each day, and we're still going. In this video, I'm going to give you 10 steps I used so that you too can grow most of your own food working less than 10 hours a week. From dreaming big or planning huge all the way to preserving your own food. Look, this is some zucchini we dehydrated. It tastes awesome this way. Oh, and my wife's favorite, tomato leathers, or we should call them maybe tomato strips. Maybe that's a better name. But anyway, this is stuff that we can eat throughout the winter and cherish our garden all year round. I'll teach you the stunts I use to make this dream a reality for you. Let's jump right in. Step number 1 is identify some goals and limitations. Now maybe this is not the most fun, or maybe it is. You get to dream and think about things, but it, it's an essential part. This is the planning part. The first thing you want to do is get some paper. We're gonna do some writing and planning on it. First up, a blank piece of paper with the word goals written on it. G-O-A-L-S. Next, you want to write down some of your goals on that piece of paper. Let me go over some of these examples for you. Some are great goals and some are maybe not so great. Let me give you an example. 50 meat chickens. That's a perfect goal. Notice I didn't just say meat chickens. I said 50. It means I did it or I didn't. It's a concrete, specific number. Those are always the best kind of goals. This next goal is okay, but it could be better. I said I wanted bucket loads of tomatoes. Well, it would be better if I said how many bucket loads and when. And we might say, I want one bucket load of tomatoes while they're in season. Once you know how much tomatoes you need, you can sort of work backwards. You can call your seed company or farm store and say, well, how many seeds should I plant in order to get this amount of pounds? Okay, if you don't have a farm store and you have to order online, you can call and talk to the company you're ordering it from, or you could just ask Mr. Google Pants. He'll probably tell you. They also tell you how much spacing you should give those tomatoes in your garden. And you see, then you're going to plan your garden according to that. I've wrote down some other goals: lettuce, spinach, Swiss chard. Again, that's not a great goal. You should put amounts if you can. Same thing with cucumbers. This is where you want to dream big. Write down all the goals, even if you know you can't do them all. We're going to get to that and how to prioritize when we start talking about limitations. If you're not sure what your goal should be, let me give you some help. Let me give you a couple of hints. Grow what you like. If you don't like it, you're not gonna maintain it. Grow something like pumpkins. I love pumpkins, and we all know this turns into pumpkin pie. And be more specific and think, oh, how many pumpkin pies would I like? 8? Maybe just 1 for Thanksgiving, maybe just 1 for Christmas. Well then, how many pumpkins do I need? But always then grow a little bit more than you think because you're gonna have some failure and you won't be too disappointed. I did this with my turkeys perfectly. I want a turkey for Thanksgiving and I want a turkey for Christmas and it would be nice if I could have turkey once a month throughout the year. Well, I didn't do this quite perfect. I didn't buy quite enough. I bought 14 turkeys. I knew I would lose some. We're at down to about 10, so I still have plenty enough for Thanksgiving and Christmas and some throughout the year. Sure, I didn't make my goal of having one for every month, but that's going to be okay. We still have more than what I absolutely needed and wanted, which was one for each holiday. Another great approach is think about what is the most expensive. This is a frozen chicken, so that, that tends to be very expensive in the store. Good free-range pastured organic eggs are expensive in the store. What else is expensive that you could tackle that could help you when we begin to prioritize what we should grow and when we should grow it. Now we've talked about our goals, let's talk about our limitations. This is not as fun, but this is really where we can excel in creativity. What are some of the limitations? Let's write them down. Well, a mean old neighbor. What about a road so close to the house? What if we have a small growing area? What about family difficulties? Or what if we have a big fat tree where we'd like to have a garden? This is the hard part. You have all these goals, but the reality sets in and you have some realities. This is where we have to get creative. This is where we have to get disciplined. Go to your goals list and begin to prioritize. Say, "Oh, based on expenses and what I like to eat, I should probably prioritize chickens and these types of vegetables." And actually, for this entire system that I'm gonna talk to you about, I'm gonna highly suggest chickens and annual vegetables. And once you have that, you don't have to be so overwhelmed. You might have 100 things on this goal list, but your yard might be small, you might have a mean old neighbor. You just have to then say, I'm going to do what I can within these limits. Number 1, I'm going to get some chickens. Number 2, I'm just going to grow this garden bed that's just 10 by 12. And so what are my favorite vegetables that I can put in that area, and how intensely can I do it, keeping things flowing through. Once you have your goals and limitations, you can begin going into the design process. Stage 2: Design. Look, you don't need anything fancy for this. I suggest a blank piece of paper. You don't even have to have it this big, just a normal piece of paper. This is my yard. I'm drawing this right here. Here's my house, here's the yard. Let's pretend that's all you had. This is an aerial shot. I've got my house, I've got my walkway, There's the road, that's a cutoff, that's a boundary, that's a limitation. Also, the space is a limitation, so I say, "Hey, I'm gonna be smart. I'm gonna encompass this whole area in annual garden, and I'm gonna let chickens have the whole area." And then I'm gradually, as the season goes, I'm gonna plant a little bit, close the chickens off to it, and eventually the chickens will be just in the middle. So then you can begin to say, "Hey, I'll do a garden bed here." I'll do a garden bed here, here, what will I plant here? Because you can't plant everything all at once. Everything has a season. In the spring you're going to be planting stuff like spinach and lettuce and kale and collards, those kinds of things. In the summer it's more like squash and pumpkins and cucumbers. And then the fall, again, you kind of repeat. You go back to like the cabbages, the broccoli, the spinach, the lettuces, the kale, the collards, those kinds of things. And that's in our cold temperate region in most of North America, but it's going to vary depending on where you are, so you'll need to look that up. I highly suggest a seed planting guide like, like Burpee's. They've got an online seed planting guide. So does the Farmer's Almanac. Just type in Ask Mr. Google Pants for online seed planting guide, and usually you can put in your zip code and get specific plant dates for specific vegetables in your area. You want to think about placement when you draw that map. I'm going to suggest the most highly visited things closer to your house. That's a permaculture concept called zoning. So your high-intense things like your kitchen garden, your herb garden, and even your chickens, if it's socially acceptable for you to put them close by because you're going to visit them often, I would suggest putting your crop gardens a little further out. You don't visit them as much. Maybe you've had the chickens on them, they've prepped the area, and you move them out, and then you plant in there. And you really can— in my system, walk away and come back at harvest. So those don't need to be as close to the house because it's not as intensely, uh, worked. Just remember this: it's a lot easier to make a mistake on paper than it is in real life. So make the mistakes, don't be afraid, just do. Step number 3 is prep a garden area with chickens. Behind me, these chickens are tilling fertilizing, spreading mulch, debugging, all kinds of useful things in here. They're getting a lot of food off the land. They're prepping my garden area. I don't have to. This is a huge key in working less than 10 hours a week and growing most of your food on the homestead. Obviously you need to have chickens. This is a general rule of thumb: one chicken can till 50 square feet in 4 to 8 weeks. So you do the math. How many chickens you have, how much area do you want to till? You also are going to need the electric poultry net or some type of mobile barrier because you want to move the chickens onto this, let them do their job, and then move them out. Another thing you need are mobile chicken coops. I like this right here, is my Chickshaw. It's great for if you have 12 to maybe 50 birds into this thing, and maybe you're running a 600 to a 1,200 square foot garden area, even up to 1,700 square foot I've done with these guys. Another mobile option for you is the chicken tractor. Maybe you're on a smaller scale, maybe you only have 3 or 4 hens, maybe you only have a small garden bed you want to work. Just use my chicken tractor. It's 40 inches by 8 feet. The chicken tractor will hold 4 inside, but you could put in as many as 12 if it's their coop. And I've conveniently made a door on that chicken tractor so you can use it as that. It can be a coop or a chicken tractor. Let me explain how the Chickshaw works. You— it's called a Chickshaw because it's a play off the name of rickshaw. You move it just like that. You pick up on the handle and move it out. It's got these big wheels. The chickens can get under there for shade. You can also go over wild terrain, and it's really not that hard to move because all the weight goes across those wheels and you're just up top just lifting a little bit and rolling it. Sure, if you get some wild and crazy stuff like this, it might be a little harder, but you can really go up some steep hills, over creeks, or through really tall grass. As for the chicken tractor, you'd want to use it if you're just moving it around the yard. You just slide it along. I've made it so that you can hook up to either end of it and you just slide it along. It's got some PVC underneath it to make it a little easier. You wouldn't want to go any far distance or over any wild terrains. Chicken tractor if you have a smaller garden, smaller flock. Chickshaw if you have a bigger flock, bigger garden, or wild crazy terrains. Generally, if you leave chickens in an area long enough, they'll till it. So if you need something done fast, you're going to need to tighten that up. People will email me and say, "Hey, my chickens aren't tilling it fast enough." I say, "Get more chickens or tighten up the area." All right, I got my assistant here with me, Mr. Brown, my youngest. Hopefully he'll cooperate. But behind me is step number 4. I call it the slap-together greenhouse. Slap together something, if it's not the greenhouse, the cold frame for growing seeds, starting seeds in soil blocks. We'll get to that in a minute, the next stage. But growing up plants is key because you can be growing up your crops while your chickens are on the till job prepping your garden. Yeah, hey, I don't know if that's gonna work with you, uh, touching the mic. Quick story on this slap-together greenhouse: we went and bought like the $2,000 kit for this nice mobile Elliott Coleman planned greenhouse, which nothing wrong with that, but we went and got it. I knew it was going to take us a long time to put together, and spring was upon us. We had to hurry, so I said let's just slap together something. We went to the old barn, just grabbed some scrap lumber just some scrap windows, seriously scrap plastic, everything, and put that together in one morning. Beautiful One was sick. I did that with a babysitter who has no experience on this. It really wasn't that difficult. And now if I had to do it again, I would not buy that fancy greenhouse. I would have just slapped together this A-frame behind me. So let me tell you a little bit more about it and how it was built. It's scrap lumber. If you don't have scrap lumber in an old barn or something like that, You can find it on Craigslist. You could go to construction sites. Actually, the A-frames were together that I used, but those came from a construction site. Those were saved from the dumpster. Also, the glass windows, those were saved from a reconstruction project. You can find those for free on Craigslist. Sometimes in your area you might have a Freecycle group online. For the plastic, guys, you could just use 6mm plastic. I had some leftover from this $90 greenhouse that it did not work out. My boys, they just pretty much looked at it and it collapsed. For the joints, you just use joint braces to support it. For the front, it's just held together with the actual glass frames. If I didn't have that on the back, I didn't have glass frames, so I used plastic. So I just supported it with just a 2x4 going across. It's just really simple and literally slapped together. On the inside, I had to learn the hard way, and I put I put my seeds up on top of upside-down buckets on just some wood for shelf, right? Well, I didn't think the mice could get up that because they can't climb the plastic, but guess what? They can jump that high. That miracle mouse was jumping up on that bucket, and so to prevent that from happening, I ended up getting metal sawhorses, greasing the bottom of them, and that totally worked. Kept away the Miracle Mouse, and we're all happy and good. Step number 5 is soil blocking, or at least starting seeds in some sort of soil block. Doesn't necessarily have to be soil block technically, it could be wrapped in plastic. I just like soil block because it doesn't involve anything but just straight up potting soil. There's no plastic, there's no biodegradable— even biodegradable paper can be a pain in the butt. It's just so easy. Sure, it's a little harder in the beginning, But over the long run, I think it's easier when you transplant, and it's definitely better for the environment. What you need to soil block is a soil blocker. I like the 2-inch soil block. If you want to get real technical, if you're going to do more market gardening or mass production, you might want to get the 3/4-inch soil block and then what you call block up to the 2-inch block, and then get an even bigger one, the 4-inch block. But I won't need to go into that for this video. For the sake of this video, let's go with the 2-inch soil blocker. I've used it all season, I've been just fine. You'll need a little hand spade shovel for stirring around the potting mix. That leads us to the next step. You gotta have some potting mix and a place to mix it. I like the Miller Manufacturing rubber feed pans, the huge ones. And then what else do you need? Oh, some wooden trays. You can do-it-yourself wooden trays. These are the Elliot Coleman specified size. If you need that, I would suggest Elliot Coleman's book, The New Organic Grower, or Four Seasons Garden. And I think that's it. Now, how do you do it? Well, you dump your potting soil. I like the Coco Loco. You dump it into your feed pan, or you could do this in a wheelbarrow or some kind of plastic tray or something like that. Dump some soil in there, moisten it until it's moist enough. This is going to take some practice because every— all soil is different. It might take more water with some and less with others. So Put your soil in there, water it down, stir it in, try to make a block. And if you make a block and it's too crumbly, it's not wet enough. If you make a block and it's too like mushy and like not wanting to even stand up, it's too wet. If it's too wet, you just add more soil. If it's too dry, you just add more water. That's all there is to it. It's not rocket science. And you just have to get used to it and just get your hands dirty and just try. If you are not perfect, it's fine. We've had chidlers make these, it's fine. If they're a little crumbly, if they're over wet, it's okay. It really is. It's that moisture that holds the block together initially. Some people say, "Well, how do you hold it together?" Well, it's that moisture, and then once the plants start growing, it's the roots. So once you've got your mixture about right, go ahead and pile some up more than the height of your soil blocker, so maybe about 4 inches, because you want this to be really compact. I've done that there. I can see it's a little mushy in some areas and a little drier in some, so I'm gonna mix it in a little bit better. Okay, then you just compress it down, and then I like to do a— whatever you want to call this— just pivoting back and forth, going down all the way to the flat, and then be careful pulling it up. You don't want it to suction out. And there it is. See, I missed, I missed one, so I'll go ahead and get that corner, get it in. And then I'm making sure I have all 4. If that didn't work, I could also do this. That's another method, is to pour it in there with your shovel. Okay, just put it in there real compact, and that's done. Put it up on your tray that is perfectly made for this. You squeeze down on the trigger and at the same time lifting up on your soil blocks. That, my friend, is more of an art than a science, but you'll get the hang of it. Like I said, you can mess it up a little bit and it'll be okay. You go all the way across, I believe you can fit 9 on here. But I've also noticed that Elliot doesn't use these sides anymore. He just uses these, just the bottoms, and I can see that's fine. Notice I have one opening here so it's easier to get in here. After my seed has grown, I can go in like this and transplant it. It's a little harder to do that if you have to dig down and over. After you've got your tray of soil blocks, go ahead and plant your seeds in there one at a time in each block. Listen, don't cover it up. It's going to be in the protection of the greenhouse. You want oxygen to get to the seed. It may sound weird, but put it right on top of the soil. Oxygen gets to it, moisture gets to it, and you have a better chance of germination. Take your tray, put it in your protected area of your greenhouse, and then water it continually. What keeps the block together at first is the moisture, and plus your seed needs the moisture. Make sure you water it. It's easier if you can keep it moist than to have to rehydrate it. I like to use a fog-it nozzle because you can't just go in there and spray it all down, or you're gonna wash away the seed or even the block. So 1/2 gallon per minute fog-it nozzle, and it just sprays a mist. Once they get a little older and roots get established, you can use more of a gentle rain type nozzle. Oh, and by the way, there's going to be a link in the show notes for all these tools I'm using, so be sure to check that out. There's plans for how to build my Chickshaw chicken tractor, and then all these tools like where can you get the soil blocker, etc. Step number 6, and probably the most important, is treating the soil. As your chickens are in there and working the ground, sure, they're adding to it, they're adding fertilizer, they're improving it, They're breaking stuff down, adding organic matter, increasing the level of topsoil. But as your chickens are in there preparing the garden area, maybe towards the end of it or even early on, go ahead and take a soil test. All you need for a soil test is a stainless steel probe, a bucket, and someplace to send your soil test. I sent my soil test to a private person this year. You get a little bit more information. It's Woods End Laboratory. It's also more organic amendment recommendations, but you can also go with our free soil test, probably from your state agriculture department. I know North Carolina has that. I don't know if your state has it, but probably. You'll want to go ahead and call them or look up on the website, figure out who you're going to go with, with your soil test, and follow their instructions. But let me explain how to do it. You get your soil test probe, you go into where you want to test for a garden area, You take about 15 samples, and to take a sample, you take that probe, drive it into the ground about 4 to 6 inches. Hopefully you can just step on it and drive it in. If you need to, get a rubber mallet and drive it in. Hopefully you don't have that kind of compaction, but if you do, it's okay. You're going to increase your soil and improve it over time. So after you've drove it in, you pull it out, you take the middle part, not the top or the very bottom. So take about the middle 4 inches, or it may depend on your particular soil test lab. So get the instructions from them for sure, and that's it. It's really not that hard. They send you results within a couple of weeks, and they'll even make recommendations, or you can hire a professional to help you with recommendations. For us, it's going to recommend things like lime, so we're always putting that down. When the chickens are towards the end, you want to go ahead and spread that soil amendment onto the ground, and they'll stir it in for you. Otherwise, you've got to do it. Otherwise, you've got to get a fork and stir it in a little bit. Another thing you can do for the soil is broadfork. It goes deep down into the soil, aerates it, gets it more water without any damage, without the damage of what a tiller would do of turning it. To do a broadfork, you put it in an area that you want to do in front, and then you want to work backwards because you don't want to step on the area that you've just broadforked. Jump on it to give an initial jolt into the ground to get it established, and then pivot if you need to from side to side to drive it as far into the ground as possible, and then hop off of it, bend it down, lifting up the soil, not turning it, and then move back another 6 inches and do it again. You can go even closer if you want. You can go in even further depending on your time. Another thing you can do is, as your chickens create bare ground— nature is modest. She wants to be covered up, and if you don't cover her up, she will, and it'll be wild and crazy weeds. She's a wild dresser. So you do it with mulch. So as they are tilling, bring in mulch. I have a, I have a source for wood chips. You may have a source for wood chips or leaves or straw. Keep that ground covered. Pile up the mulch. The chickens will spread it. It's okay. We'll talk about how to transplant in that mulch on our next step. Step number 7: transplanting. See behind me? See how this area has been totally prepped by the chickens? There's no weeds in here, they've fertilized it, we've got our mulch down, we've mineralized it. Hopefully you've had some plants started in your greenhouse and you've timed it right so that now that the chickens are moved out, you have some plants that are ready to go and it's time to transplant. You grab your tray of plants, you bring them up, and what's important when you're planting into deep mulch is that you dig down into the mulch. You don't actually plant your plants in the mulch, but you plant below it into the soil. So move some of the mulch out of the way, dig into the earth, plant your plant there. I like to also support it, give it a little boost with some vermicomposting. You could do something like that. It's not necessary, but lately we've been having bugs attack, so I've been amping up the strength. It's a little stressful when you transplant. You want to make sure your plants are watered, and preferably even before you transplant them into the ground, water them in their trays, then transplant them. If you didn't do that, that's fine, just water them after you transplant them. You might want to watch them for the first few days to let them get established. It's a stressful process for them, so help them out as much as you can. For rows inside my area, I do the Elliot Coleman suggestion: 42-inch wide bed with a foot in between. So to measure that out, I just take two wooden stakes and drive them into the ground on each side of the garden. And then I tie a string from one stake to the next, and that gives me a straight line across. Okay, so then I have a line for planting my produce according to how far it is apart. Like kale is something like 18 inches apart, so I would plant it 18 inches along that string. It would be a straight line. And so then let's say you do 18-inch rows, so then I would move over 18 inches. I would measure out 18 inches from those stakes and then move those stakes. And then for the next move, you account for how much is left in the garden bed, measure on out through there, consider the area for your path, which I do a foot, you could do 2 feet, and then measure on out to where you would plant your next one. Basically, that's how I mark my rows, but you can do it any way you like. The most important thing is just to get out there and do something. Doesn't matter if it's perfectly straight, nature is very forgiving. You might not like my system of marking rows, there's plenty of ways. I just encourage you just to get up and do something. Each thing you grow will have planting recommendations. You might have taken that into consideration at first when you decided how big or how much you can plant and the amount of garden space you have, etc. And now you want to reference that again as you plant them out. You want to know how far they need to be, how far the rows need to be apart, and then how far the plants need to be apart in each row. The 8th step is maintaining those plants. Now that you got them in the ground, you might want to fertilize them, give them a boost. I learned this nifty trick from David the Good. It's a cool stunt. He's pretty much the Superman of the soil. Go ahead and urinate in a bucket. Yes, it's completely sterile. Put it in your watering can, fill it up with water. You want to dilute that urine with water, and that is nature's fertilizer. Put that on your plants. You can do that up to once a week. That should help. Like I said, I also use vermicomposting in there. That should help. Also, there's one more thing. This area that we've planted is pretty much weed-free. There's a little bit coming up there. The cool thing about transplanting— this is why it's going to save you so much time— is that these are ahead of the weeds. You're really not going to have to weed these. These are going to get up tall. They're going to beat out the weeds, no problem. But let's say you had to plant in here and there were a lot of weeds. Well, you could line either side of these plants, of this plant row, with cardboard and then put mulch down on top of that. The cardboard serves as a weed barrier, and that mulch will retain moisture, continue to break down, give you more organic matter, but it'll also, you know, encourage worms. It also helps with the weed barrier issue. And sure, it's a lot— it's more work up front, but it's a lot less work throughout the season. The other thing I recommend is Shackley Basic H if you're having a problem with bugs. We planted a fall crop garden earlier and bugs just attacked it. I guess they were too stressed out when they were transplanted, and we should have been spraying that. We've done our second batch of fall crop, sprayed the Basic H about every third day or so— should do it every morning— and we haven't had nearly the problems. That Basic H is totally friendly, eco-friendly, you-friendly. You could actually Drink some of it. I don't think you want to do that. I'm not recommending that, but that's how safe it is. Stage 9, this is what it's all about. Time to eat. Now before we get into that, I want us to start thinking about our meals a little bit different. We have to stop thinking, "Oh, what do I want?" That mindset of being able to go to the grocery store and getting whatever you want, to "What do I want that's in my yard that's ready?" Look, I've got some things to use as an example. Let's go over and think of all the different ways to eat this stuff. So these are some things that are in season right now on my farm. Let's look at the various things and think of all the different meals. Let's say we have spaghetti squash. My wife makes a mean Tex-Mex out of this. It's filled with beef. It's just awesome. There's another thing. You can use this as an alternative to noodles, so a spaghetti type of meal. Then we have zucchini. Looks like a club. Some of them can get really big. Ideally, you want to harvest them a little a little smaller than this. Rebecca, the beautiful one, my wife, makes a wonderful Italian zucchini. She also makes zucchini boats. It's where you cut this in half, dig out the middle, and just fill it with this awesome Italian awesomeness, like grass-fed beef and all kinds of different cheeses and Italian spices. It's just great. I guess we like Italian zucchini. Well, this happens to be an Italian zucchini. But another idea, go to Mr. Google Pants. You got a lot of zucchini, who doesn't? And say, what are some ideas for zucchini? You'll have hundreds of ideas. Next, we have the cucumber that lasts 3 weeks. I was happy to eat these for lunch. You can cut these up and put some cream cheese in the middle of them. There's all different kinds of ideas you can do with just straight-up cucumbers. Oh, we've had them on the side as a breakfast item. Butternut squash, my favorite. I like to make a butternut squash pie, similar to pumpkin pie, but it's crustless. It's sweetened with honey. It's got a lot of cream in it. It's amazing. You can also make soup out of this, all different kinds of things. Of course, the pumpkin, but it's not just for pumpkin pie. Again, you can make soup and all kinds of different dishes out of that. And here's some acorn squash. This stuff, this and the butternut squash, will sit on your counter. I've had a butternut squash sit in an unfinished room of our house for a year. This stuff will store amazingly. And for the acorn squash, Cut it in half, bake it upside down, I think an hour-ish, 350 degrees, then put it back over, put some maple syrup in there and butter. It's so good. So just remember and just be willing to change your mindset about eating, about what is available, what can I easily grow on this land, and adapt accordingly. It's not always easy, and I'm not saying you have to do it 100%. I didn't. In the last 3 weeks, I still had my Coconut Bliss ice cream. I still had my tea and salt and pepper and things like that. And you can too. We don't want to go crazy. We want to pace ourselves. But just remember, this stuff is very healthy. The things that you can grow on your farm— meat, animal fats, vegetables, fruits— these are the things that are very healthy for us. And not only are they just healthy to eat, you're also getting a workout when you go and do your garden. So that's healthy too, because you need to eat good food and have exercise, and doing a garden and growing your own food puts that all together. The 10th step is dealing with the excess. If you've ever grown anything, you know you're probably going to grow more than what you need, hopefully. Now look, one of the things I do with excess is this right here. Look, look right down here. I've got a bucket there. We're never going to be able to eat all that. That's a lot of food for chickens. You can also give it away or sell it, or do like a lot of people and save it. You can can, you can freeze, look, you can dehydrate. Remember our zucchini and tomato? We're like dehydrating kings and queens over here. With saving it, we have the possibility to eat from our garden all winter long. It's awesome. Those are the 10 steps of growing most of your food on less than 10 hours a week. I hope you enjoyed it, but I want to recap. Some of the things that make that possible are using chickens to prepare your garden bed, and at the same time growing up seeds into plants that are then big enough to be— to overpower any weeds that the chickens didn't get. Then of course you move the chickens out and you transplant your plants. Then another key trick to this is you're using mulch to suppress weeds, and that will save you time in the long run. Sure, it might be a little more investment in the beginning, but it saves you much time over the long haul. Also, you're learning and you're adapting your mind to eat what is on your land. You're changing your mindset. This is our biggest limitation in creativity between our two ears, our own brain. And you're storing in some type of fashion so that you can save your harvest so that you're not wasting any and you can eat it throughout the winter. I hope you enjoyed that. The key to that is you've learned something. Now go and do it. Now I've got a bonus for you guys in the show notes for this video. Here's what it includes. It includes what I talked about today, pretty much the notes, including where I bought that stuff, exactly what I used. I know it's hard to remember. This has been a long video, but that note will recap it and you can actually download it and print it out. All you're going to do is join my email list and you get a whole bunch of other free stuff just by doing that. So it's just loaded. Oh, you'll get the— you saw the Chicken Tractor and the Chickshaw in this video. I'll give you the step-by-step downloadable plans for both those mobile chicken coops. So please go and check that out. I wish you the best of luck.
More from Justin

If I had to start my Homestead all over again, it could only pick one animal…