Beginner Guide to Raising Chickens (in the Front Yard)
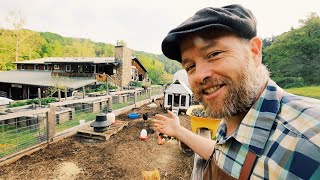
In this conversational tutorial, Victor Justin Rhodes walks viewers through the essentials of starting a small backyard chicken flock. He begins by discussing how many chickens to keep and the space each bird needs, then demonstrates a portable "porta brooder" built from a 40‑gallon Rubbermaid container, covering dimensions, ventilation, bedding (8‑inch pine shavings), heat lamp usage, and temperature cues. Rhodes shares a "magic water" recipe (garlic, apple cider vinegar, honey) and a fermented starter feed method to boost chick immunity. He explains the importance of grit, shows how to construct a simple dirt‑trap feeder to keep water and feed clean, and details predator protection using a guard goose and wire‑mesh fencing. The video also covers transitioning chicks to an outdoor run, coop design (movable "Chickshaw" with deep bedding), and practical tips for feeding, waterers, and maintaining hygiene. Throughout, he emphasizes a relaxed, hands‑on approach, acknowledges expected chick losses, and encourages viewers to enjoy the process.
Chapters
Henry had a little 3 AM jaunt last night, so I'm gonna give Mom a little break. Hopefully he'll cooperate with me as I do this video. Lily, let's go let the chicks out. Hey Henry, I believe this is the first time I was doing chores together. This keeps him happy though, change of scenery. He is getting easier by the day. He's just growing up. His belly's bigger. He can go longer without his mama. Hey, what's the matter with you? You don't want to go up? First, you got to get your chicks. So you want— I, I don't know, make it easy on you. Dual-purpose breed, these are the best egg layers, these are the best workers. Rhode Island Red, Black Australorp, Barred Plymouth Rock. You want to hold them for me? Yeah, thank you. You can get those at a hatchery like McMurray Hatchery. That's who we use. Let's spread this on the ground for the big ladies, and then we'll start feeding everybody starter feed. When you mix your flock, we just like to feed everybody starter feed, and that's okay. It's just a little higher in protein. It won't hurt the big ladies. Are you still on the show? Are you, are you still on the show sticking out that tongue? So you got to decide how many you need. A good chicken like that will give you about, uh, 3 eggs a week. So, uh, 4, is that right, will give you a dozen? Is that right? Yeah, 4 chickens will give you a dozen. So you could go from there. Think about space. So once they're grown, you have them in a— let's say you have them in a deep bedded run like this, wood chips and railings here, you're going to need at least 3 square foot per bird. Now that's not that much, most of you probably have that. If you had like a 4x8 and that's all you had, that'd be 10. Now when you scale it down like that, it doesn't work as if they were bigger in here because they could spread out more. I wouldn't have 10 in there permanently, I would probably maybe have half that, 5. So if you have a smaller area like that if that's all you had, a 4x8. You're gonna do— and you could do 10, just make sure you have deep bedding. It's just going to be more intense adding, uh, the deep bedding. That's not that much space, is it? So we've decided how many we need, how much space we need for them. Let's go ahead, get our chicks here. I'm gonna cut to it. I'm assuming you're probably not going to get more than 24. Uh, you're probably not getting 60 or 80 like me, or 100. You're probably not that crazy chicken lady. Assuming you're getting 6 to 24, I have a video I did a while back on how to set up a brooder with a, like, a 2-foot by 4-foot bin. You guys watch that. I'll deal with everything here while you're watching that, and then we'll cut back and we'll, we'll teach the out— the, the grown-up setting. In this video, I'm going to show you guys how to set up a brooder. Look, I've got it going. I'm going to cover two things. One, all the supplies that you need, and then how to set it all up. So yeah, I've turned my heat lamp off for a second because it's so much better lighting like this and it won't kill them. It might actually be a little warm for them, but so it won't hurt to take a little break. We're in— we're inside, so we're at room temperature. They are in our dining room so that way we can keep track of them. Well, let's talk about this first thing. This is the brooder. I like to call it the porta brooder. This is the big box that you contain them in. I contain them in— I use a Rubbermaid. This is a 40-gallon. It's probably 2 feet by 4 feet. And remember, you can put 4 chicks per square foot up to 3 weeks. So do that math, that's, uh, 8 square feet in here. So that'll be about 32 chicks till they're about 3 weeks old, till they transition outside. The reason I call this a porta brooder, and if you want, you could get the similar thing, a 40-gallon thing. I drilled holes into the side so I could put the roof on. There's a little plastic roof back here that I could put it out on for transport, and then that way they can still get air. Also at night, as they get a little older, I don't do the heat lamp. I'll actually, uh, put— leave them in there and put that lid on at night, and maybe that gives them some warmth or some security. And then that way they can still breathe out of these holes to make it portable. And the reason I would have it to be portable is ideally I would take them out during the day Right here, you take them out into my yard. I have built this door so that this can open and shut. And the way I did that is I sawzalled a hole into the side of it, and then I used these scrap wood on either side as washers for the bolts to go through and as places to mount hinges. Stay in there, little buddy. And that way I can open and shut this It hinges, and it's real nice. I'll shut it, of course, while they're in here. And if I were to take them outside, the other thing I would build is a little ramp to get them out into the grass, and then I would have an encaged area here, okay? Preferably caged roof too, so nothing from the air can get them. And that way they could get out in nature. They would, um, be out day one with mama in the grass eating all kinds of stuff. So the second thing I'll cover is, well, the location of this thing. It's by the light. There's a natural light right there and has the indoor lighting, so it's nice. I would turn everything off at night and they would have the natural sleep cycle there. Um, next I'll talk about is the shavings. This is pine shavings, okay? You don't want to use like hay or, or straw because the manure doesn't fall all the way down and can get on them. So use pine shavings. Some people maybe worry about the aroma of it, but there's plenty of open here, they're getting a lot of ventilation, so I've never had any problems with that. Next we could cover, I guess we could cover the heat lamp. They value heat more than anything else. They'll make sure they get warm before anything else, so they would actually starve and thirst to death before they would get cold. So they like it about 90 degrees at first. Because I'm in at room temperature and it's spring and we aren't running our air yet, it's probably— it's pretty warm in here, so they're okay, especially the first few minutes. The way you can tell— I would know these guys were cold if they started cuddling up together. And in fact, because now they've spread out a little bit more since I've turned that light off, I'm thinking that light might be too much because if they're cuddling up together, it's too cold. And if they're, they're going around or staying away from the heat lamp and maybe they're being a little lethargic type thing, then it could be too hot. You don't have to get crazy scientific about it or worry too much about it. You could do a temperature, you could take a temperature down here, but I think your main problem is going to be them getting cold. And see, that's not happening. So that heat lamp would come into play if you were putting them out down in a garage or something like that. This shaving is in 8 inches. I like to do at least 8 inches, that way I don't have to change it out. They'll scratch and peck and work that manure in there, and you shouldn't have to change it out throughout. Then the next most important things are this— what— the waterer and the feeder. I love to use these quart jar fittings for the waterer and the feeder. It's an attachment you can buy. I'll leave the links to all this, guys, so you can relax. Just relax. I'll leave the links to this in the description below. I put— I do what you call magic water, what I like to call magic water, in this quart water for the first few rounds. And that is per half gallon. So I take a half gallon jar, fill it with 2 cloves of smashed garlic. You can see the little garlic particles floating around in there. Maybe— what? Oh, beautiful one says pressed garlic. Excuse me, 2 pressed garlic cloves, 2 tablespoons apple cider vinegar, and 1/2 cup of honey, and that's in a 1/2 gallon. And so then I took it from the 1/2 gallon jar and poured it into this quart jar, and that way I'll have 2 cycles of it. When this one runs out, I'll fill it up. And yeah, of course you put water in it. I'm sorry, Beauty's back there keeping me straight. She's saying, yeah, after you put the mix of the apple cider vinegar, the honey, and the garlic, you, you then pour water into it. Of course, I like to do warm water. Well, you need to do warm water so you can mix that honey in. Okay, that's the water. Now this feed is special because, well, not only— it's an attachment feeder too, and this, this will accommodate these birds easy enough. And if you need to, you could get 2 or upgrade. I'm assuming you're not gonna— I'm assuming I'm talking to people who are getting 36 birds or less in this situation. I have fermented this feed, and this is what that looks like, guys. I just put the dry feed in there. You need to get a starter feed, preferably organic or non-GMO, but put your starter feed in a food-grade bucket like this and then pour water over it about 4 inches. What you want to happen is that there's no air get to that feed, and that's what allows it to ferment. And it's just, it's going to help them boost their immune system. Same thing with this magic water, it helps boost their immune system, just gets them off to a really good start. This also lets their feed go further. I mean, it'll increase the efficiency by 15%. So what I would do— I've already done it today— but what I would do is get a scoop of this, and preferably you're gonna let this soak for 3 days before you need it. And if you don't have 3 days, you could put some fermented something or another in there, like pickle juice or kraut juice, something like that, just to speed up that process. And I'm just— I've got this screener, a stainless steel screener. I've let the water drain out, and then I would just pour this into the feed pan. And notice I didn't let it— this is set up to be an automatic feeder, and that works well for dry feeds, but it would not work too well for a fermented feed. Let's talk about our grit now. Grit is little tiny rocks. I like to go down to the creek and get creek sand and small rocks, especially creek sand for these little guys. See, these dinos don't have a stomach. They have what you call a gizzard. So they swallow their food and then a muscle inside of them grinds up that food with rocks. You also notice they don't have teeth. Okay, they will grind that. This helps them digest it. We've just put it in this little tiny bowl there. I've already seen them going into it and getting it. And now you'll notice that this is on something special, and this, this was a game changer for me. Putting it on, putting the feeder and the water on this, let's call it a dirt trap. Was a game changer because look, they otherwise— they, they're out here on the, on the 1/2-inch wire mesh getting their water and food, and they're not tracking this shaving into the water and food. If you just put this— the water and the feeder out on this shaving, they're going to track that stuff into it. So when they hop up on here, when they, when they hop up on this trap the shavings fall down. You can see them on just one day, how many have fallen down in there, and manure. So it goes a long way to keeping this clean. If you don't have this, I'll tell you how to make it here in a second, but if you don't have it, just use a cardboard box. That helps. Now to make this, I just got a half-inch wire mesh hardware cloth— hardware cloth, depends on who you're talking to what they call it. I'll leave a link to it. And I stapled it onto this homemade frame out of wood I just got on the farm. This is like a 1-inch by 2-inch. This is like a 2x2. It's fine, just scrap it together. And I sized it according to my pan. I think it's a 4-quart pan. And, um, I just dug that pan in there. See, if this were the area I was going for, I would have just dug it out, and then I put that pan in there, and then I would cover it up with this food trap and then put the feed and the water on there. That thing's just awesome. I just can't say enough about that. I think we're almost done here, guys. I think I'll speak about one more thing. This is in the open, and that's cool if you don't have chidlers, and that's cool until they get about 3 weeks— or not even 3 weeks old. It won't be long before they are jumping up here, and that's fine if they want to get up here and look out and have some dinner with us. That's nice. You like that? You like eating dinner with us? Sure they do. But the problem is they end up perching like this. Yeah, holy chicken squat, on your kitchen floor. And that's not good. That's misdirected, and that's a pain in the butt to clean up, especially if you have chidlers. And even more so, they get really bold and they hop down, and you got little dinos running all over your kitchen floor. And that's not so much of a problem except there's manure everybody, and somebody might get stepped on. The other thing about it being open, especially if you have chiddlers, is that they'll come and play with it. Gideon, he'll throw this mulch into the water, he'll grab these. If we let Gideon grab one of these, it would be like a Mice and Men, you know, he would have good intentions but he would actually kill it. He'd kill this thing, okay, just out of being overly friendly and overly excited. So to fix that, I created this crate to go over— a crate, I guess. And I don't know what you call this thing, but I sized it. It's just custom sized. It didn't take that long to make. It's half-inch wire mesh on a frame. Okay, there's two— there's two bars going across to hold it up, and there's two bars at the end to complete the frame, and then two bars on the side. I just measured it and cut it to size, and then that way the dinos jump— don't jump out, and the chiddlers don't grab in. And it's the best of both worlds, and everybody's safe and everybody's happy. Now when you go to put them in, whether you're getting them out of a box out of the U.S. Postal Service, or you're bringing in from an incubator, whatever the reason, you want to bring them in one at a time. Let's pretend we're doing that. So I would bring, bring this little guy in. Isn't it fun to hold these guys? It's so fun. Give them a little dip in the waterer so they know where it is and so they get their drink. Now little chicks can go 2 or 3 days Well, 72 hours without food, but once they get food and water, they have to drink. Look, look at them pecking at each other. Okay, they do peck at each other. You guys heard of it called the pecking order, and that kind of pecking is fine if they're taking somebody down. That somebody is sick, okay? And that's their natural way of strengthening their species, strengthening their flock, okay? The strongest survive. And you can either separate that one out— you certainly wouldn't want to breed that one again because you want strong genetics, especially if you're breeding. And you could separate it out if you want and see if it will get better. We actually did that with one a little bit earlier. Don't be worried about losses. I'm— well, I mean, a crazy amount of losses, like over 10%, you know, under that it's going to be expected. We actually lost a guy, a guy or gal, that something was wrapped around their leg as they hatched and it cut off that circulation. And by the time we saw it and when we got them out of the incubator We treated it. We treated— there was an infection, so we treated it with peroxide and then put some homemade salve on it. But the little thing didn't make it. We did put it aside in a cardboard box right here, and you could do that. Otherwise, they're going to take each other down. And just see if it recovers, and if not, just let nature take its course. Oh, if you really want to get saucy, give them some natural feeds. That's just some food scraps from our our kitchen. It would probably help— it would help if I broke it up. Mama hen would be breaking it up for them. So break it up real fine and they'll really enjoy that. It could be any, any food scraps from your kitchen. Eggs— look, look how I'm picking at it. Eggs, lettuce. And if you don't have anything like that, or broccoli head would probably be really good, go out into the grass and just pick them some grass or clover. And they'll really appreciate it. Is it absolutely necessary? No, they've got their complete diet in that grain setup, but this is certainly a plus. It will go a long way to keeping them healthy and happy. So that's really it. Just, just remember, probably the most important thing is just relax, take a deep breath, have fun with it. They are very resilient. Sure, you may lose some, and it's to be expected, and it's okay to be sad about it, but just keep on going. They're in much better care than they would have been in some other conventional farm or something like that. So just remember that you're doing a good service for them, for the species, and for your family. So just sit back, relax, do your best, and enjoy. You guys back? He's getting a little finicky. It's only been like a split second for me, but, uh, here, you want to, uh, here, let's try I'm gonna have to hold him there while you go like this. Okay, I think he needs his mama. Okay, go try. We'll try for a second. Go ahead. You like that? Okay, that cheered him up a little bit. Let's see if we can, uh, finish this. Okay, so this crate right here This is for transporting chickens, chicks, chicks. In this case, you want to do it at night just like we did. We did this last night. So you put them in the crate. If you have other chicks, you can introduce them. These guys are 3 weeks old. The, the big people are getting along with them just fine. If you have No other chickens. Still do it at night, that way they're cooped up in at night and then they automatically know how to get where home is that next night. Let's let these chicks and chickens out and then I'll talk to you about this system that you guys could put them in. All right, you want to get them out? Yeah, this has got to be trimmed down a little bit. It's swollen with the, uh, with the humidity. Lily, lift up on this. Yeah, there you go. There you go. Ready? Okay, let's free the birds. That's scary. That's scary. That's around. All the adults came out. I actually like them to come out on their own, and then they are not disoriented. They're all huddled back there together, staying warm. Goose is flapping. The goose is a protector. The goose will protect these guys from, uh, mainly hawks. Are you gonna be okay, Henry? I'll set up my talk right here to explain this, and then I'll run around with the camera and get the shots to go over that top. You think that's okay? You think that'll work? Once you're taking your chickens outside, we're assuming in this case you've just got a small flock. You've got maybe a garden. Chickens and gardens go great next to each other, by the way. Come on, Mr. Brown, come on, stay focused. Why don't we get you on little animals? You got the pigs, you got the luchadors, you got the sea monsters. You want to put your chickens next to the garden, as close to the house as possible, because you visit them so much. If it's socially acceptable or you don't care, put them in the front yard like me. We've got them in a permanent fence. Until then though, we— for the longest time, we just had them in Premier 1 electric poultry netting. It took us a long time to really make sure this is where we want them to be permanently. But if you're going to build a permanent fence, maybe you're sure you know where the chickens are going to go You sure where you're gonna have some permanent gardens. We did cattle panels framed with cedar wood, and then we did— this is record interruptions— then we did, uh, 1/2-inch wire mesh buried down 6 inches below the fencing. Hey, get in! Can you get in? Get in, get in, get in! That's your fencing for your shelter. You saw me move a— that's the Pretty Shaw. I have the plans for what you call the Chickshaw. You can prettify— hey, get in! Every time you do that, I have to stop, and that's the longer it's going to take for us to go to the sea monsters. That's the coop, Chickshaw. I'll leave the plans for it. You can prettify it if you want like that, but I have a very basic, and that'll hold up to 30 birds. Certainly be fine for 6. So they got to have that coop, and the reason that's good is because you can move it around. They poop every night, it drops down into this wooden— this, this deep bedding. You can You can spread the love. You can spread the holy squat love. Hey, get in. Stop. You keep— get in. You keep doing that, and every time you do that, I stop for about 30 seconds. So if you stop, we'll be out there. We've already been out there 2 minutes earlier. Okay, the rooster's enough distraction. Speaking of a holy chicken squat, don't— promise me, don't put your birds in just one run, bare ground. They're gonna eat all the grass. There's gonna be nothing left. They're gonna poop there and it becomes evil chicken poo. The earth doesn't absorb it, it's waste. Get them some wood chips, something like that. You know, this is in our, uh, our herb garden, but it would maybe look like that when it's first started. They move it around, they poop on it, they stir it. That turns it into compost. You can see there's compost underneath it already. It's been a year for us in here having about 8 inches of wood chips, so it's time for us to add more. We've already harvested most of the compost and put it on our beds. Chickens feed the gardens, the gardens feed the chickens. How's he doing, Josiah? All right? Yeah. Okay, you need a waterer. We like the 5-gallon vacuum seal waterer for starting off. I mean, you can try the automatic waterer for chickens or something like that, but that thing's tried and true, basic, gets you started. Uh, we like the Premier One King Feeder. You can just put all your feed in there and they just eat it, and you don't necessarily have to fill that up every day. We like to put the water and the feeder on a pallet, so if the chicken— you know, the chickens are scratching mulch, uh, it's up elevated so the mulch doesn't get in the water. Also, the chickens jump up onto the pallet and some of their dirt on their feet falls off, and it doesn't get in the water. If you're feeling saucy, usually they find one for themselves. You could get them a bin of dirt for a dust bath. Chickens don't take baths. They like to wallow in the dirt. They usually find a place to do it in the run. And then if you're feeling really saucy, I've got free choice kelp, oregano. Oh, grit. No, you definitely have to do grit, which is what I like to call rooster teeth. It's small rocks that they can eat and it helps them break down their food inside what you call their gizzard. Helps them break down that food. You've done really good. All right, but I think it might be mama time, huh? See if she's awake. If not, maybe we'll push through. Here's your mama. He's been a good sport. He's been having fun. Should have gotten this earlier, my apron. We are back. Henry, he was like going to sleep as soon as he started nursing. He's in his happy place, asleep, belly full. Look who's come out, the chicks. You see, nobody's picking on them, not even the guard goose. I see Lily didn't listen to me though. Lily, get me a bucket of, uh, starter feed please. As much as you can carry. She put it there, but the big ladies knock it down and eat it. No, no, Lily, Lily, I was thinking we'd fill this up. Help Lily and get a whole bucket of starter feed up here. They got it, they got us our starter feed. It's one of the easiest solutions for mixing flocks. Because, uh, the hens can eat grower, they can eat layer, but they can also eat starter. And the little guys though, they need the grower, so that's why we do that. That is my small-scale beginner 101 how-to chicken run. It's really not that hard. We try to make it too hard. But if you got any more questions, I'm going live with Marjorie Wildcraft from the Grow Network Sunday at 6 PM. It's totally free. It's a summit. Uh, she's promoting her new book But the summit is totally free. You guys can come along. We're going to do a brief teaching. She's going to read briefly from her book. And then we're going to do Q&A. So I'd love to see you guys there live. Totally free. I'm going to leave the link for that down in the description. There are other speakers. I encourage you to check them out. One of them is Dave Asprey, the Bulletproof Coffee guy. Also the guy with which book I showed you yesterday, Fast This Way. That I'm following. So, cool guy, other speakers in there. I would encourage you guys to check it out. Link in the description.
More from Justin

If I had to start my Homestead all over again, it could only pick one animal…