Finally, A Pig Stye that Doesn’t Stink + Gives Compost
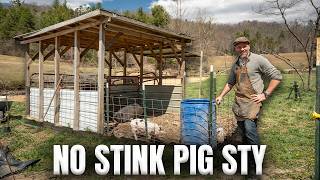
Victor Justin Rhodes builds the Pigport, a 185-square-foot portable pig shelter that uses wood chips layered with manure to eliminate odor and create compost. The deep-bedding system works because pigs aerate the carbon and nitrogen mix as they move around. He walks through the full DIY build, feeding setup, and how to move the whole structure to till garden beds.
Chapters
Key to the no-stink pigsty? Super simple. There's their manure. There's some wood chips. Most folks raise pigs in pigsties that are just full of mud. I got news for you, as Greg Judy would say, that's not mud, that's manure. Happy day! In this video, I'm showcasing my Pigport, which not only stinks, it's tiny— 185 square feet, could be in your backyard— it also generates compost. Found out about this deep bedding concept for pigs when my mentor Joel Salatin taught about the Piggerator in his book You Can Farm.
So they're digging for the corn that's buried down in here, and they've already— they've already come across here.
Yeah, and for those that don't know, you do do a layer of corn as you add wood chips throughout.
So you can touch that, or you can smell it. Oh yeah, then touch it. See, it's warm.
Yeah, it's warm.
The Pigs, of course, they start, they start at the top and they return it and get lower and return and get lower. So now they're, they're working down. So what we did, we started here with little pigs and let the little pigs go down as deep as they could go. Then we brought up the big boys. They're going at it and they're going on. So it's kind of a leader-follower. You can see the corn he's eating. If you come around here, you can see the corn he's eating right down in there.
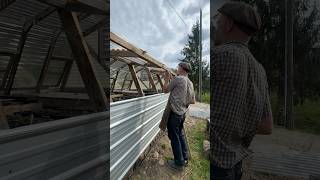
Joel's doing hundreds of pigs, market farm. I'm a homestead, under 5 pigs. How can I do this on a small scale? So I literally got a carport. It doesn't take much room, y'all. That structure there, 12 by 20, it's a carport. Half of it is designated to the pigs, the other half is for storing stuff to deal with the pigs and wood chips. All right, let me give you a quick tour of the carport. 12 by 20 foot carport. All we did, we took one side of it, so it's a 10 by 12 foot area. Cattle panels, straight up cattle panels, zip tied. Tin, one 4-foot piece of tin zip tied to the cattle panels, secured with T-posts. Guys, for real, T-posts. 1, 2, 3, 4 on each side. On this side, guys, this whole cattle panel is removable. Cut the zip ties, pull out the T-posts, distribute the material pretty easily. It worked fantastic. I named it the Pig Port because it was a carport turned into a pig structure. And I proved that just anybody— I mean, you have a carport, you can have pigs in your backyard. But over time I realized, hey, I should have something that's mobile that I could also use as a pig tractor. That I could move around to different places if I wanted to. And that just any old person could actually build from lumber for less of a price, make it more affordable. And that's when— well, we still call it the Pigport. The port is now meaning— it now means portable instead of carport. You get the idea. Pigport. We're going to break down the Pigport in just a minute, take measurements, teach you how to build this thing. But first, how does the wood chips work? Like the no-stink component. Guys, it's windy. We're going to keep going with this, though, or we're never going to get this done. So excuse the wind. Okay. First step, wood, wood chips, dry under shelter, preferably open. If you cannot afford it, then just grab some, do a tarp. But tarp, the wood chips sweat and they don't stay completely dry. This is better because they can air out. And you could build a really cheap one with just some tin, just putting some tin, just laying it on the wood chips even. But it's really not that, that hard to build one of these. And I made this so that this lean-to can be an extension off of the pig port, and it could actually go on either side. So theoretically, I could have it extend over these piglets. I could have another one over there to store feed. And so it's just really versatile. But the key wood chips, have them near your pigs. So have it to where a dump truck can get in here or you and your, your wood chipper delivery, however you're getting in here, keep it covered. That keeps it dry. If the wood chips get moist, they can't absorb. They're to absorb the urine and poop. And if they're already saturated like a soaking sponge, they're not going to take any more. I've got my wood chips there. I've covered them. I've thrown them down. Look, there's some wet spots over there. Especially if you smell something, you have mismanagement. Pigs have a bad reputation to stink, but that's because people just mismanage them. Pigsties are classic. They just keep them in an area just like that. Maybe they even do that, T-posts and wire, hog panels, and they never move them and they just let— no wonder they get parasites. No wonder you have to shoot them up with all kinds of things. But in this way, this is a sanitizer. It covers their manure. And eventually when you get enough manure and wood chips, you get a critical mass. And that's your combo for making compost, a nitrogen and then a carbon. And then you need air, which the pigs are turning it and stirring it. And then water, which in this case they get some water or you could spray it with a hose. And the last thing about managing compost or wood chips is keeping it contained. So you'll see for the most part in my pig port shed— you could do this with shed, you could do this with carport— I have it contained. I'm using tin on the inside. I'm using cattle panels out here to hold the tin up, and that allows me to create a deep bedding. This gets deeper and deeper, and I don't remove it until I've moved the pigs out and have a critical mass for making compost. Wood chips is just one of three components for raising animals in a small confinement. Well, we've talked about the restraint too and keeping them in, so I guess there's four. The other one is feed. How are we going to take care of them with feed? We feed two different ways. For adult pigs, we want to ration their feed. We feed in feed pans. I got these 3-gallon tubs. I use the tubs because I feed a lot of liquid sometimes. I've got skim milk in here, oat broth. I don't know what else liquid. Could feed this scraps on the bedding, but I don't want to lose it a lot, and I don't want it to fall in his manure either. So— oh yeah, look, some rotten cheese, acorn squash peels. I'm going to give him a little bit of grain just to give him his daily ration. He needs about 4 to 6 pounds of food a day. That'll help deliquify that that drink too. So if he spills it, it'll still be kind of absorbed. He's so anxious to get it, he's probably gonna knock it over. So I'm gonna get this food incorporated more into this liquid. All right, when you get that pan in, that's when you can get the other one out without getting eaten alive. I've had it originally where you have a step into here. It's just too hard because this is a retaining wall for deep bedding. So in some instances, I just have to do it this way, or I could climb over. So it's hard to have a door in there and a retaining wall. You take the old dirty pan out right after you put in the new one. You clean it out. These rubber ones are harder to clean than plastic, but the pigs break the plastic ones. So it's give or take. Best to leave it in the sun. Nature sanitizer sanitizes this for tomorrow's feeding. The second option is an auto feeder, and that's when you've got piglets and you want them to eat all they can because you're raising them up for meat. Or in this case, I have piglets and mom who's nursing. You want the nursing mom to get all she can eat. So that works great. You put an auto feeder in there and she and the babies can get all they want to eat. Bring out a bucket out here every day, and probably to where I could start bringing two. And notice I've put it on the edge and I've put a ratchet strap around it. Otherwise, you know, she don't have the internet, she's out here in a small confinement, she's gonna get bored, she's gonna push that up. I put a ratchet strap around it to secure it, and I also made it to where I don't have to go in there. Why you want to go in there? Why you want to go in there with the poop bombs in there and the pigs nibbling on you? Just put everything to the side. Just with— that leads me to part number 2: water. How are you going to take care of their water? Let's back up and look at this. These 50-gallon waterers, I'm gonna fill it up while we talk about this. Why not? This is a 1/2-inch threaded female— see, you bored, honey? That's a 1/2-inch threaded female union fitting. Scare me there. You take that fitting and then you put a pig nipple water in it. I get those from Hog Slat. By the way, you can get the union fitting from Lowe's or Home Depot, any hardware store. Water only comes out when they do this. Otherwise, if you put water in a trough, the pigs are just gonna wallow in it, step in it, bite the edge of it and sling it around. This keeps it so clean. You don't have to teach them to it. If you're scared and you're introducing this type of water system to your pigs, put a little peanut butter on the end and they'll find it quicker. But they will find it. Like I said, they don't have the internet, they've got nothing to do but explore this territory. 50-gallon, uh, food safe, because you, you know, you don't want this to have had chemicals in it. Usually find these on Craigslist or Facebook Marketplace. If you can't find them there, you can find them at uline.com. It's, it's a company that sells all kinds of this kind of stuff. As far as placing this thing, you definitely want to have it next to the garden. I like pigs next to crop garden, which are bigger gardens. That way I can throw in the waste, the weeds, the extra produce. I could grow things for the pigs and easily throw it over there to them. And what they don't eat goes into the deep bedding and composts. And then move, move the pigs over, have access to the compost, and the compost is right there next to the garden. The biggest benefit to the mobile— well, I mean, besides being able to move it to wherever you want, is You can build up your bedding. We have hinges here for a gate. You see how bedding is building up in Beefcake's stall. Cool thing about these gates is you remove them and then you can just move the shed and you have your piled material ready to be turned and dealt with or moved and made into compost. You don't have to muck it out, so to speak. You just move the shed and then you can have more easily— easy access to it. Last summer, we learned that this pig port could actually be used as a tractor. Pig tractor. We could put this over where we want to garden and have the pigs till for us. Oh, Papa! Papa, they got out! That looks great, doesn't it? Now let's get to the heart of how this works, and then I'm going to show you how it's built. So first, how it works. We have a 10-foot by 12-foot frame. That's enough for 2 to 4 growing piglets. We have our lean-to shed that could be put on any side, but it's for covering up wood chips. We have here on the ends optional gates so that we can keep them in the pig port at all times. The reason I didn't right now is because she, she just had piglets. She just had like 7 piglets in here. They needed a little bit more room than just half of this pig port. You see, I also have a divider for them right now. I have another gate right smack dab in the middle, and that's because I want to keep Beefcake, our breeding male, our boar, away. He doesn't need to be getting all you can eat. He's not going to hurt the— well, he might accidentally hurt the babies laying on one. So that's one reason to keep them off. The other is we don't want him eating all you can eat. Mom needs to eat all she can eat. Piglets need to— so it just opens up everything. But to make this bigger, all I did was put in T-posts in the ground and pig panels, and that's enough to hold in the material enough, and it made it that much bigger. Theoretically, I could do that to the other side, and Pigport's and Beefcake's paddock could be bigger, or I could be raising a batch of piglets over here and a batch of piglets over there. There's a lot of different options with this, but for the most part, I like to keep them under the shed. It keeps all the wood chips under it. In control, dry, and keeps the pigs out of the elements, out of the, you know, burning sun, out of the, the, the, the snow, the rain. And this is open enough so that they still get wind, they still get sunshine. You know, the sun's going through there, and at some point everything does get exposed to the sun. It doesn't have to be this tall. I mean, it could be this, this little. but you want to be able to throw produce in there from the garden. You want to be able to come and feed your pigs. I spoke about this a little earlier, but to confine the product of wood chips, we have this frame every— it's probably every 2 and a half, maybe it's every 3 feet, and then a cattle panel. So there's 3 layers to it, and then a tin, and it's just simply holes in the tin, zip tie— no, actually it's screwed. It's, uh, it's roof screwed into the wooden panels. That tin keeps the material from coming out. It doesn't necessarily, um, it doesn't give you much strength, but that's where the, the cow panel comes in and then the wooden structures. I do not have the plans for this yet. They are coming. Homestead Builds Volume 2. I think it's the very next plans we're working on, so hopefully they aren't too far away. But until then, like if I have a member text me or whatnot and say, how do you build this? Well, I just go out there and take measurements. So that's what I'm gonna do right now with y'all, and pictures. So we're going to do that via video. Well, like I said, it's 10 feet wide inside to inside, it's 12 feet long. And one thing I probably should have talked about Well, we'll talk about it now. We got these skids, two 2x6s laid on their side, and they're attached. We attach the frame with— what are these called? L-brackets. It's called L-brackets. And this metal, this would probably be your most difficult unless you're a welder, then this won't be difficult. Otherwise, you're going to have to have it made. This skid plate, this metal skid plate, I actually get— you can get the instructions from Polyface Designs. The book, that's from my mentor Joel Salatin's, and this has got a chain that gets welded to it. And actually, the pull bar is right here while we're talking about it. You'll have to get these instructions at Polyface Builds. There's a link to it right down below this video. But you have this massive pull bar and you have attachments on either end. The pull bar goes across and it It causes— if you were just to, you know, run a chain to there and from there to there and you have this triangle, you're going to pull these legs inward. This pull bar helps the legs keep pulling straight. Then on the bottom, I have decking board, a 1x6 deck, plastic decking board that serves two purposes. It keeps our cedar lumber— we've used cedar, well, I mean, this we I think we just use hardwood off the farm. That'll work. And mostly under the shelter. But these bottom ones, I'd use cedar, rot resistant. And this plastic plate, two things: helps keep the board from rotting— even cedar rots over time— and makes this skidding easier. When it's a plastic surface, it skids easier. They extend a little further, I think a foot on each side. So this is probably 14 feet. Yeah, so you're gonna have to get a 16-footer. This is so you guys can build this yourself. So from on top of the I try to make this as simple as possible. My buddy and co-author Chris Slattery will make this even more streamlined by the time we get it into a book. Yep, 8 feet. That's how I like to build. That's— it could be shorter, right? It could maybe be a foot shorter, but boards come in 8-foot lengths. Uh, so we got 8 feet. The roof is flat. It's not pitched at all. And I thought, maybe should I pitch it? No, because there— where do you get any level ground? All ground is, even in Florida, is not quite level. So water is going to run off of it some way or the other. You could pitch it if you want to direct your water in a certain way. Say you wanted to do rain barrel collection for your pig waterer, you would want the water to run a certain way, and you want to put gutters on it. Yeah, these are 3 feet on center apart. We have a brace board, a 14-foot brace board going across. Our roof is 14 feet long and it sticks out wider. Let's see how much it sticks out. Less than a foot. So let's measure this. I know I like this. I know this is not my first go at this. This has been re— redone a number of times. It's 12 feet. Next, we did a 52-inch cattle panel, whatever a cattle panel is. And then one thing I should note, I first tried the poor man's way and just did T-posts across too. When confining them with panels, it's so much— just get, just buy the 10-foot tarter gate at Tractor Supply, because when you want to go move this thing, all you got to do is hinge that thing out and then move, as opposed to removing T-posts or moving your walls. Long end to long end. 43 inches, and I have one on every post. I also noticed I have a cross— well, I have a crossboard here so that it supports the roof. Notice how the 8-foot post goes up into the frame of the roof and that the roof is sitting on this crossboard. 18 inches. Trusses are 18 inches on center for the lean-to. Wow, we got a break in the wind here. I did a Simpson bracket that just holds up the 2x4. I would do 8-footers here. I would do 8-foot that way and 8-foot across. So your two center boards are going to be 7-foot-9, right? I only did one center support. It doesn't need a lot. This is temporary because what happens when I want to move this thing, I need to be able to easily get that off. So I just unscrew out of the Simpson bracket. The Simpson's brackets stay. Unscrew that. This is just literally a 2x4 with a couple of screws in the end of it. Okay, this one I did slope because I didn't want any water running into the pig port, so I did slope it away. And I think for homestead builds, we'll put a hinge bolt in here, and you'll probably be able to tuck this thing away and, and move it. Now, if you want the husbandry aspect of things on how to raise piglets I got a special video for you guys. It's free. Uh, it's how to raise piglets from— how to raise pigs from piglet to the plate. It's at abundantpermaculture.com/pigs. I'll leave the link for that down in the description. Totally free. Go enjoy it. Happy day.
More from Justin


If I had to start my Homestead all over again, it could only pick one animal…