How to Raise 2 Pigs in a Tiny Backyard (10’X20’)
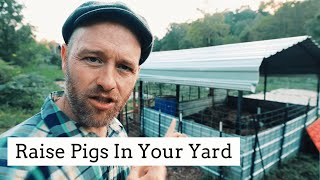
Victor Justin Rhodes shows how to raise two feeder pigs in a 10-by-20-foot space using a carport-style shelter. The setup uses deep bedding with wood chips that composts into usable soil, and covers feeding, water systems, fencing, and what to expect from pork yield.
Chapters
I'm going to show you how to get started with 2 pigs, raise them in a 10 by 12 foot area for the entire time, no stink. Absolutely small spaces, sneak. Your neighbors might not even know it's not a carport. Get you a carport, slap together some walls, raise these pigs, find you some wood chips somewhere. Here's my video. On how to do it. This is how you easily get started with pigs. First, start with a feeder pig. That means you're just gonna buy it after it's been weaned, usually about 2 months old, and you're gonna raise it till the fall, winter, depending on when you bought that. You're just gonna keep it 4-ish, 5-ish months and then harvest it. So that's a great way to start. To find that, I think a great source is the Livestock Conservancy. Go on there, it's an online site. Then go to pigs, then go for those who are selling feeder pigs. You're gonna need to feed that pig. Have a commercial feed mix available. Don't get fancy just starting off trying to make your own feeds or whatnot. Just get a commercial premix. We use Reedy Fork Organic. It's 16%. We use a soy-free. We're just, uh, have some reactions to soy, so we're staying away from that. But I'd say a 16% pre-mix pig swine feed would be great to get you started. Account for feeding that pig. They say for every month it is old, you feed it a pound of food. So a 3-month-old pig is going to eat 3 pounds of food a day. I've taken a little further and added a pound, so 3— our 3-month-old pig is going to eat 4 pounds a day. A pig could eat a lot more than that, but I found that they do well on that, and they will eat a lot if you let them. And at the homestead level, I don't see why it doesn't make sense just to conserve that and ration that out. Depending on how many pigs you have, it might make sense to buy it by the tote. It can be a lot cheaper if you buy it by the tote. Tote meaning 1,000 pounds or 2,000 pounds. It's a lot cheaper, say, if you go with Reedy Fork Organic Farm and buy the 2,000— it's like, I want to say, over 25% savings just for buying it in just one big bag. You have to do your math because you want to use it before it's 3 months old. Because it's been ground, it's going to start losing a lot of its nutrients after the 3-month period. Now you want to think about transporting them. Hopefully the farmer will transport them for you, but if you have to get them, I encourage transporting them in— we've done it in the back of a minivan inside this large dog crate inside plastic— inside that crate we had plastic Rubbermaid tubs. Use wood shavings as a bedding, at least 8 inches, because they're gonna poop and pee. You don't want them laying in their own poop and pee, so put on wood shavings. If you're going more than 6 hours, you're gonna want to stop at the 6-hour point and give them some feed and water. You can do that with the same feeders you're gonna use at home. Which is like a rigid plastic— hold on, right here. Well, this is kind of a big one for, uh, for starting out. This is 6.5 gallon. That's better for like these big old guys back here. These guys are probably almost 300 pounds. Uh, get you something like this. This is a Little Giant. I'll leave, I'll leave the resources to all the stuff I use in the show notes. But yeah, that works great for giving them water, giving them feed. Heck, we, when we first got our guinea hogs, we put them feed in this water in this for the first few days. So you get them in there. Now you're gonna want some water. I love the 55-gallon drum system. You can see my video on how I made this water. If you guys want to make that water, you can see the video on how it's done inside this package. Now for a health maintenance and boost, the apple cider vinegar guys say Give them 6— it would be about 6 cups of apple cider vinegar and 1 full water drum. So it won't hurt to give them that, and I'll just give them a health boost. And you can actually do that throughout their lifetime. It will not hurt. Now you'll need a physical holding for the pigs. You could use something like this, a pig port, where we just converted a carport into a pig port. Took half of it, put them on deep bedding. There you go. That'd be great for piglets. That'd be great just to raise them. All the way to the end on. You could use a stall. This is a classic holding area for me receiving animals. It's just a stall downstairs. I've got 8 inches of bedding. I probably got 12 inches by now, but I started with 8 inches of bedding, dry hay, wood chips. You want to use mostly wood chips. Hay gets soppy and wet with urine, and that's no good. You'll be able to sleep at night because they physically cannot get out. There are walls you can set up a place to train them to electric fence. We did it right there. You can come in every day with a bucket, train them to recognize you and a bucket. Before you know it, they'll hear you coming and they'll come to the door. I wouldn't necessarily suggest, uh, well, I mean, you could use a garage if you had to. You still need to use deep bedding. Deep bedding doesn't break down as good on a concrete floor. It's better if it can be an earthen floor. You add that deep bedding and the earth helps you begin breaking down that deep bedding. Doesn't happen so much on concrete. If you don't have any of that, you could go as simple as Jordan Green's operation. Check it out. Oh, pasture piglets, 2 months old.
Yeah, they're 7-9 weeks old, and, uh, they were weaned off their sows last week, put out here in our weaning pen. And so they're, uh, you know, away from mom and exploring the, uh, the party life together.
So tell us about this system then. They've been weaned from mom, they seem happy. Yeah, so it's been more than a few days.
Yeah, so this is the only fence that we will use with pigs that is not electrified. Okay, because when you bring them here, they are not interested in learning anything about electric fence. They just want to run and try to find mom again. So we, uh, we'll use this hog panel. Yeah, and then we just set up a pen like this, what was what we would call a 3x3. So this is 3 panels to a side. Um, just hammer some rebar stakes in the ground, zip tie them up here, and this is enough to, uh, to hold these little, uh, guys in as they're getting weaned.
Okay.
And we can, you know, this is very portable. We can break it down, we can set it up in any different field.
Yeah.
Um, depending on where we want to have, have our weaning activities go on. So sometimes it'll be here, other times it might be on the total other side of the farm. We want to move them we'll just set up a new area there above them, open up the panel, scoot them through, close it back up, break down the old paddock.
Okay.
Yeah.
So you got an auto feeder here, and it's on a— this is movable by a tractor forklift. Yep. Got your water there together.
Yep. So this is just one unit that we can pick up, move wherever we need to. This is, uh, 80 gallons of water that, you know, this will last them a week if it's full. So it flows out into the side pockets there. A lot of what we do is, you know, finding equipment that's either free or cheap and then figuring out how to, how to use it. So this is a feeder that someone just gave us, and we just, you know, made a lid to put over top, keep the water off. And, uh, yeah, about half full of feed right now.
These little piglets have these shelters. What are these shelters?
These are actually calf hutches, um, from a dairy. So this is what's called a group hutch, and this would be used for 3 to 5 dairy calves.
Okay.
And, um, you know, we had some friends that they had some extra of these, they just gave them to us.
Nice.
And that's one of the things I like about pigs is it's a great enterprise to repurpose other stuff. So this isn't something I would go out and buy for piglets because these are about $800 a piece brand new. But if someone's going to give them to me, sure, we'll use them. And it's a, it's a great shelter for young pigs because it's, you know, enclosed on 3.5 sides, has a nice roof on it. And it gives them a lot of protection from the weather when they're, you know, when they're in this state of stress in the weaning pen.
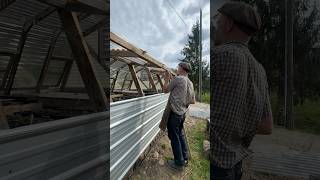
Okay, so yeah, that's just some, uh, I guess they're cattle panels, pig panels set up with rebar posts. Totally simple. Like, guys, pigs for everyone. They're really not that difficult. It really doesn't take much to raise them. Now I like to hold the pigs once I first get them for about a week. You're going to want to have plenty of deep bedding on hand. I really like wood chips, so hopefully you have a wood chip source nearby. Hopefully you can keep that dry, keep that under a shed. We use half of our carport here, our pig port, for storing wood shavings. We converted part of it into— that part into a sheep shelter temporarily, so we kept our wood chips covered under a tarp and that worked pretty good. So at least it's better if you can have them under open and they can breathe But if you absolutely have to, put a tarp. Your wood chips on top are just going to be a little bit moist, so you won't be able to use those. But you want to have plenty of dry bedding, and wood chips works the best. I keep them up for a week to train them to an electric fence and train them to a bucket. To train them to a bucket, you just bring their food to them every day in a bucket, and they'll naturally get trained to you. And then if you feel confident enough, uh, at the end of that week, you could probably— especially if they're American guinea hog, they were super easy to train— you could lead them almost anywhere with that bucket. With these guys, they're a little more sporadic, so we grabbed a pig port. We learned— or not a pig port, a pig board. And you get one guy, gal, to go behind them with this pig board. This works beautifully. It works good with chickens too, by the way. The other guy leading with a bucket, and I think you can do it. Otherwise, you could set up a temporary lane. Training them to electric fence, you basically just put— if you're going to put them in, uh, netting like this, you just put a piece of netting in there. Uh, the Premier 1 gate works for training them to netting. All right, big guy trained. Why? If you're going to use wire like Joel Salatin or Cliff Davis, put a small strip of wire electrified inside their pen for at least 2-3 days till they, you know, get curious, touch it, get shocked, and then they won't do it out in the field. Now it's time to move them to their place. Maybe they're going out to pasture and they're going to be rotated in pasture. Maybe they're going to forest. Going to be rotated through the forest. Maybe they're— maybe they're— your pig port wasn't ready, like in our case, and they're gonna go to the pig port. I mean, guys, this would be awesome because you could start them there and end them there, uh, and not worry about all this training stuff. To move them, we moved them in a little, uh, lawn trailer. Another way is if it's not further than this and they are trained to a fence, because that's where they're going to go, then make a temporary lane with your fence. Another way is you've trained them to a bucket lead them with the bucket. Somebody follow with a pig board. Another way, if they are trained to electric fence— one time we moved our pigs, these kind of guys, from right here clear across the farm, way up there, to get them in the forest. You know what we did? We picked up one of these nets. Well, we picked up the— yeah, one of these nets, and we got about 7 people and we surrounded them with this net. And just kind of walked it. So there you go, you got— you, you've trained them that first week. This is so fun. You'll realize probably as soon as you get them day one, it's a lot easier than you thought it was going to be. I know that's how I felt. Check out the other videos in this package to see what do you do then, but that gets you started. We'll talk more later about how to then either move them around in gardens, move around in forest, or move them around in pasture. In this video, I'm going to show you the system, the pig port. Now, it doesn't have to be exactly a pig port. You can be inspired by this and alter this and make it happen. The basic concepts are there. I'm going to show you this system that doesn't stink, and at the end of it will give you at least 8 cubic yards of compost, and it doesn't take much room, y'all. That structure there, 12 by 20, it's a carport. Half of it is designated to the pigs, the other half is for storing stuff to deal with the pigs and wood chips. All right, let me give you a quick tour of the carport. 12 by 20 foot carport. All we did, we took one side of it, so it's a 10 by 12 foot area. Cattle panels, straight up cattle panels, zip tied at 10 1 4-foot piece of tin zip tied to the cattle panels, secured with T-posts. Guys, for real, T-posts. 1, 2, 3, 4 on each side. On this side, guys, this whole cattle panel is removable. Cut the zip ties, pull out the T-posts, distribute the material pretty easily. We— I had Jason, my friend, install these gutters. To keep rain from— on the other side, rain would fall down actually in it because this is not sitting level. And so it diverts the rain. Sure, you could have the— so another T-post here, one here right in the middle. So we just had the support of the post, one T-post there, one T-post there. This area actually we set up for sheep, but when we didn't have sheep in here, we actually had this out, this, uh, this cattle panel and we stored wood chips in there. It's best if you can store wood chips under a shelter, and then they can adequately better dry off. When we had sheep in here, we had our wood chips stored over here underneath the tarp, and we'd move them over here, let them dry out for, you know, more, and then throw them in. You could theoretically store basically all the wood chips you would need on this empty side. Anything else you would need too feed pans, trash cans, anything like that. They have a 50-gallon water drinking safe barrel in here for them to drink, and that's it. Feed pans, that's it. That's a really simple system. You could build this, uh, yourself or go with a carport kit and just add the cattle panels, the tin, and the T-posts. Really semi-permanent. This could move. It would take a bit, but it could move. It's not like in concrete or anything, or even secure. The only secure— I should show you the door. So the door has been locked shut because it needed some repairs, but we basically built a wooden frame here, had a latch. We did screw the wooden frame into the metal there, and we had it open from the top and the bottom, so it's two separate doors. So you could just open the top and go in and the material wouldn't fall out. You could open the bottom, uh, if you need to. Like, if we're going to take them on a walk, I would open the bottom and we would take them on a walk around the farm, get them some exercise. That's the pig port, guys. Okay, shelter from the rain and sun. I love the carport idea because you get protection from the direct sun and rain, but you have the openness so that enough sunshine can get in there throughout the day, and eventually it touches the entire floor, therefore sanitizing it and giving your pigs vitamin C. So if you're going to raise something in other than a carport, I would open up the sides as much as possible. It also allows the pigs to see out, catch a breeze, breeze to come through, and just kind of, you know, keep things fresh. I added gutters to divert the water because what I found, it was falling down And because the carport isn't actually even, water would actually come in to the sides on the mulch. And guys, you'll know, you'll need to know, you got to keep that mulch dry. So I put gutters on there. I had my carpenter put gutters on there, and we diverted the water off. You could— a lot of people told me to— why don't you put that into a rain barrel that provides the water for the pigs? You could. They drink so little, I only have to fill up this 55-gallon drum like every 2 weeks. And if you did a rain barrel system, that would fill up in one rain event. And you have to have a good overflow. So that fills up and then you have overflow, and I just didn't want to risk my carbon, my bedding, getting wet. Other shelter ideas would be home frame built. You could build this cheaper out of wood and tin or scrap tin or something like that. You could put them in a stall, you could put them in a barn. I would just recommend opening up as much as possible Sunroofs would not be a bad idea to let some natural sunlight get in there on that bedding and keeping it open to a breeze just to keep fresh air in there. The second critical piece is dry bedding. You don't want your pigs, if they're in one spot, sitting in their own manure or urine. You don't want a bedding that's wet, so you got to keep it dry, mainly doing that by providing fresh wood chips. I like wood chips. There are other things you could use— wood shavings, sawdust would be great. Sawdust, which they, they really absorb the nitrogen load, the manure, poop, and if somehow it were to get wet. Now the bedding isn't just to keep them dry, it's to keep them healthy. That bedding mixes with their manure and pee, absorbs it, begins to actually break it down as in a composting system, making it safer. So if you get a smell in your system, it's probably because it got wet. It's probably because it got too many— too much urine, too much manure for the amount of carbon. So you just need to add carbon. I found wood chips to be the best. I sourced them from my local public works company. You could ask Mr. Google Pants for your city's public works, see if they'll drop off wood chips, or you can go pick them up. We've had a power company drop off before. I've just seen them working, you know, I've stopped them and I said, hey, why don't you just drop off some wood chips? One, I made it really easy for them to do it. We're sitting— that's the road right up there above Jonah, my son. And here's the carport, and here's where we— they've dropped the wood chips. So I made it really easy for them. Um, you can also make your own from— we're about to do that. We're about to hire a crew to bring out a wood chipper and chip our own wood chips. You could chip your own from a lot of branches and trees that we have cut down to clear forest to create some pastures. Now, if you need some help Sourcing wood chips— my friend Randy Kleiman wrote a great article on many different ways to find wood chips. I'll link that in the show notes. Now, how much do you need? This is a 10 by 12 area. That's 2 pigs. They're growing up to be 300 pounds. That's plenty of room for them, guys. 10 by 12, that's 120 square feet. Fill that up a foot with, uh, I put down some logs. You could do logs. That's basically a filler, then you don't have to use so many wood chips. And then put in wood chips. If you have some going compost but not finished compost, put that in there. I did that. I had a 4 cubic yard compost pile going. It had already inoculated, already heated up. I put it in the bottom of this thing. And general rule of thumb, a 10 by 12, uh, 1 foot deep is 4 cubic yards of material. So I started out with 4 cubic yards. You could have just done wood chips and logs if you didn't already have an inoculated pile. Of compost. And then every day I went in and I added wood chips every single day on their manure. You'll notice if they have a clean environment, which this is, the pigs will poop and pee in one area. And they did, they chose that corner right there. And we would just go in and add the wood chips on top of that. Now, doesn't that cause it to build up? Yeah, it did build up, but it was a massive compost pile in the corner. The more bulk material you have, the more likely it is to compost and break down, and that's a good thing. Now, wouldn't it get hot? I guess if you got your compost really hot, like 160, you might be alarmed. Keep it— keep a temperature gauge out there, a composting thermometer out there, big long probe, and just test it. Ours never got over 110, and even in the heat of the summer here in North Carolina, humid, 95 probably feels like 100 with humidity. Uh, it didn't— the compost, it doesn't stay hot on the surface unless it's super extra hot. And if that's the case, add more carbon. You have too much nitrogen if it's getting too hot. So at the end of it, I only added probably another foot of material, so another 4 cubic yards of compost, give or take. And they're coming on the end, guys. So I raised them here for 5 months inside of that. Got them at 2 months, raised them to 7 months. Only, uh, so 8 cubic yards of material, that's a lot. I mean, that's 2 truckloads, but it's not impossible. Even if you have to pay for that, $60 a load, $120 for a, for a living area for your pigs. And don't forget, they're manuring and peeing on that, which then in turn, they're going to leave you with 8 cubic yards of compost. It's best to keep wood chips dry under a shelter. That's why this carport was amazing, because you put the pigs on one side and you have the wood chips on the other. It's best if wood chips are covered. They absolutely have to be covered. They cannot get wet. And it's best though if they're not like directly covered with the tarp. Say if you have them under a shelter, they can breathe. They let off, uh, their liquid, and that evaporates. But if you can't— I did put wood chips under a tarp, silage tarp, not a leaky cheap tarp you get at Lowe's or something. Get a silage tarp. I get mine at Johnny Seeds, and they're UV resistant, great. And we put the wood— we covered the wood chips, and you can see right now it's open because we don't expect any rain. So if possible, leave it open until you expect rain. It's going to rain, come cover it up. If you're gone and working all day, just cover it when— and it'll be okay. The moisture rises to the top, but the moisture rose to the top on these wood chips and I just spread them out here to let them dry for a day, and they dried in a day. So the moisture goes to the top with the tarp, it can't release because there's tarp. Just don't plan on using the top, uh, spread it out and just use what's below. And that worked good, especially if you don't have the coverage, because that can kind of be an exp— expensive, which a tarp is not as much. Now let's talk sanitation and health. Because we aren't moving the pigs— that's nature's sanitizer, moving the pigs, uh, 5 to 12, every 5 to 12 days and not returning for 80 days— because we're not moving them, we have to use what Joel Salatin calls the carbonaceous diaper. So again, just, I can't emphasize this enough, dry carbon material. I also fed them in feed pans instead of putting it directly on the area, because they have such a small area. What if it got onto their manure? What if it got into their pee? That's not great for them. Feed them in feed pans. Always had an extra so that they're eating with this one. I have this other one cleaned out and getting sanitized by the sun, nature's sanitizer. This is an easy trick. I put about a half a cup of apple cider vinegar in their feed every day. You could do about 6 cups of apple cider vinegar inside of a 55-gallon waterer drum to keep your pigs healthy. In an acute case, you would want to— like if your pigs are looking sickly or not eating or lethargic— 50% apple cider vinegar, 50% water, free choice. So you would do that in a bowl if you needed to. Another thing we did is provide charcoal. We had a brush pile we burnt that didn't burn all the way. The wood was charred on the outside of the brush, and we put that in there, and they would gnaw on that charcoal. Charcoal is good for them because What charcoal is from wood is minerals. It's 100% of the minerals that the tree has dug up and the minerals of the tree, and it's absolutely amazing for them. If you have straight-up charcoal, you can feed them that. They'll eat it by the chunks, or you could give them it burnt on a brush. Oh, and another thing I provided every day was a kelp. They probably ate almost a scoop of that a day, maybe a cup of that a day. Or did you spill it? Did you spill it? Let's talk a wallow. I didn't give them a wallow. This is a wet place for the pigs to wallow in. Naturally they want that because pigs don't sweat and that helps keep them cool. This keeps them cool. That's one reason we have shade from the sun, so that's enough to keep them cool. But, uh, it also protects them from mosquitoes or other bees or other biting insects. They don't absolutely have to have it. They will be happier. So you can't provide a wallow in there because you can't get your bedding wet. But what you can do, if you can, provide fresh manure. Not only is that a little bit of a snack for them, they get the amino acids in it that they can't develop that the cow can. That's actually good for them. It's disgusting, I know, but it's actually good for them. But they can at least— they will mostly wallow in it. And then that manure is also a nitrogen source for the the carbon that they're on and helps break down. So it's actually absolutely beautiful system there. And no, it doesn't attract flies because the pigs either eat it or wallow it and it's gone. And this system didn't attract flies, by the way. If you're seeing that you're giving them so much food scraps they can't eat it all, then slow down on that. Give them what they can eat in a day. We ration food in here. Uh, general rule of thumb, a pound a day of food for every month that is old, and that's commercial grain. I found you could double or even triple that if you're feeding them scraps. Now you want to get them exercise. So how are you going to do that? One way I did that was throw squashes or pumpkins in there, and they push it around and they try to figure out how to eat it, and it just is a sport for them to try to eat it. They're moving around. You can throw branches in them— in there to— for them to play with, a ball, a heavy rock. These are things they can push out. A branch, guys, branches. Even better if it's burnt and has charcoal on it because they can gnaw on it for the charcoal and push it around and give them something to do. And if you're feeling really saucy, you can take them on walks. That's a lot of fun. Lead them with a bucket, and if you can, get you a pig port. See that red one down there? I mean a pig board. And somebody direct them from behind with that, and you lead them with a bucket, and it can be a lot of fun to see them roam and exercise around the farm. Lastly, you got to strategically place your pig port or your pig shelter, whatever you're going to use. I placed mine, one, near the road where we could get wood chips dropped. Again, Jonah's at the road, there's where we're dropping the wood chips. But two, when that material is done and it's composted, it needs to go to the garden. So that's— it's right here. The gardens are there and there. It's at the very corner of our big half an acre, maybe a third of an acre garden system. So we can more— and it's at the uphill too, guys. So I wheelbarrow it or haul it downhill to put it on the gardens. So overall, the system has been absolutely amazing. Think about it, guys, 2 pigs and 240 square feet. They're only taking up half of that. Um, you could do— it only took me 5 months. I bought these guys' feeder 2 months. So technically, you could do more than even 2 batches a year. But 2 pigs, they're gonna say 200 pounds each in the freezer, that's 400 pounds. Say pork's valued at $10 a pound, what is that, $4,000 to $8,000, guys? And then one round, you got your bedding, you got 8 cubic yards of compost. How much is that worth in your area times 2? Even more. So this absolutely amazing system doesn't stink. You end up with compost. It's so much— even though it's still confined, it's so much better than the conventional confinement, which is on concrete, even smaller, probably not getting nearly as much food or attention that you're giving them. So overall, this is a great system. I like to think this is pigs for everyone's system. No more excuses, no more it stinks, no more pigs tear it up, no more pigs need a lot of space. No, that's our answer. I hope you enjoyed that. Those were two chapters from my course Permaculture Pigs. You can find out more about that at permaculturepigs.com, but this is actually put up on YouTube for free as a collaboration with Homesteaders of America. They want to get a lot of information out there right now as more and more people are urgently trying to grow their own food. So hopefully that was helpful. Hopefully that will get more pigs into people's hands. Pigs for everyone, right? Pigs for everyone. Can you say it with me? Pigs for everyone. So go out there and do it. You got no excuse. That system, it doesn't stink. You don't need a lot of space. Just do it. If you enjoyed this video, maybe you enjoy more videos from the Homesteaders of of America. They put together this collaboration where many creators like me have put in their two cents on how to grow all different kinds of things— pigs, vegetables, chickens. I encourage you to check it out. I'll leave a link down to the playlist. Homesteaders of America YouTube channel has created a playlist for all these videos. Check out those down below. I'll leave the description there.
More from Justin


If I had to start my Homestead all over again, it could only pick one animal…