How to Raise Chickens 12 Stages of Success
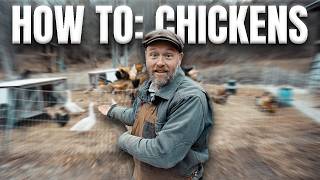
This content was created by Victor Justin Rhodes. This content was uploaded by Victor Justin Rhodes. This is a YouTube tutorial titled "How to Raise Chickens 12 Stages of Success" (created 2025-03-16). It is a single-presenter, step-by-step instructional guide for backyard chicken keeping that walks through a staged timeline (preparation, ordering chicks, brooder setup, coop options like Chickshaw models, deep-bedding vs rotation management, feeding transitions and brands, predator protection, hardening off, first eggs, replacing and butchering older hens). The speaker gives practical tips (e.g., McMurray Hatchery, Premier 1 hover brooders, New Country Organic feed), offers a free printable 12-stage PDF linked in the description, and promotes a forthcoming book with more detail.
Chapters
Eggs are expensive and you want food security for your family. In this video, I'm showing you the 12 stages for raising your own chickens from chick all the way to the plate. 12-stage timeline PDF that accompanies this video, link in the description. It's free. Stage 1: Know your why. Chickens aren't just for eggs. You can put them to work on the homestead. They can save you money. You can earn money with them. You can have food security, connect to your food source, or have something something positive to do together as a family. Knowing your why will help you get through the hard times when you're sick of letting them out in the morning or putting them up at night. Remember your why. Stage 2: Preparing. There are 5 steps in this process. Step 1: I would get 4 chickens for every dozen eggs you need a week. How many dozen eggs do you need a week? 1, 2? If just 1, just get 4 chickens. That's going to give you more than it doesn't during peak times. But it sort of balances out when they— when you have lulls, say in the winter, and it allows for chicken loss. Step 2: order your birds from McMurray Hatchery. You could do that now, but don't have them shipped now. You can select a ship date. Don't get crazy. Don't be ordering chickens while it's still cold in March. Have them come about your last possible frost date. Order hardy dual-purpose egg-laying breeds like Rhode Island Red, Black Australorp, or Barred Plymouth Rock. And when ordering your chicks, you can opt out of vaccines and antibiotics. You don't need that. You're in this backyard flock. They got plenty of air, sunshine, greens. In 20 years, we've never done it and we've had no problems. If it were me, I would opt out of those things. I don't want to eat those things. And we are what we eat and we're going to eventually— we're eating these chickens' eggs and then we're going to eventually eat them. Optional. Order a rooster if you like. If you want an alarm clock, if you want to complete the social structure. Definitely don't order if you're in a neighborhood or if it's illegal where you are. You want to be secret. You want to keep them safe. Don't order a rooster. It's going to alert everybody to you. You don't need them for laying eggs. Those ladies produce eggs with or without roosters. Roosters fertilize. If you, if you want to breed your own chickens and hatch your own eggs, then yeah, you're going to need a rooster. Also optional, but highly recommended, a guard goose. Here, hiss at him behind me. That guard goose is just watching me. And you have to order 2. There's a 2 minimum, and that's okay. You could split them up into 2 different flocks, get them when you get your chicks, or they can be together here. And we like the Ebdon or the Roman Tufted guard goose females. Step 3, set up the brooder. You can get my book Homestead Builds. It'll tell you exactly how to set up a quick brooder depending on how many chicks you're going to get. But basically you're going to need fine pine shavings for deep bedding inside it. You're going to need 1 square foot per 4 chicks up to 3 weeks old. You're going to need a hover brooder from Premier 1 to keep those chicks safely warm. The heat lamps can be dangerous. A food trap. It's— I do a wooden frame with a wire mesh over it. And then I lay a— set a feeder and a waterer on that so the chicks can get up on that. The shavings fall through, dirt falls through, and then they can get their food and water. Step 4, build your coop. I have another video where I talk about the 5 different coops I have, so I won't get into that. You could get the plans for any of those coops at homesteadbuilds.com. Get my book. And then for here though, think about this. If you're going to have less than 12 chickens, consider the chicken tractor. It's only 40 inches by 8 feet long. If you're going to get 12 to a couple of dozen chickens, get the Chickshaw Mini-Me in the background, uh, back there. Or if you're in a yard and you want it to be pretty, or an HOA, you could get the Pretty Shawl, which is the same, same size as the Mini-Me. It's a 4-foot by 4-foot, but it's pretty. Lastly, if you're going to go all out, be the crazy chicken lady, you want 30 up to 36 birds, Chickshaw 5.0. And I won't tell anybody, you could actually fit a lot more than that. We're just officially rating it at that for the weight on the wheels, but I've seen as many as 60 or more getting that thing. Official recommendation, 36 birds in the Chickshaw 5.0. These, these coops, everything's mobile. All you got to do to clean out a coop In this situation, it's move it. Have it in an area. They poop, half their manure comes out at night. You move it to a different spot. You clean the coop. Step 5, decide how you're going to manage the posse. You have two choices: deep bedding or rotation. Right here behind me, the chicks are on deep bedding. That means they're going to stay in one spot making compost. Put them next to a garden. You know, you could throw the garden waste into them. You can put down wood chips. And the chickens manure on that, scratch that. It rains, they're scratching and aerating it. Those are your 4 ingredients: nitrogen, carbon, air, and water. That makes compost. They're on deep bedding. It absorbs their manure, making it sanitary. And then in the end, it makes compost. And so you just go in there, you rake, you rake your top layer off, grab the compost underneath, and if they're next to a garden or something, you put the compost directly on the garden. Your second option is rotation. So if you got the chicken tractor, you're moving it around every day, around in a yard or pasture. If you've gotten one of the ChickShaws, you put an electric net around it, you move it around. You could move it around every day. They eat more grass, they eat more bugs, you save money on feed, but at least Move them every 1 to 2 weeks before they completely decimate the area and don't return to that area until it's recovered. So deep bedding or rotation. Stage 3, 2 weeks before arrival. Get prepared. Make sure you have all your brooders set up. Order your chicken feed or go pick it up. We like New Country Organic. Poultry starter feed for getting going. Be sure in your brooder to use fine pine shavings. And I would say put it 3 to 4 inches deep to give you a good base to start off with. You'll sprinkle it on later daily and it'll get deeper and deeper. Don't worry about changing it out till they're gone and, and, and away. The deeper it gets, you'll see that that mixing with the manure and, and the shavings begins to create warmth and will help keep those chicks warm. Stage 4: Arrival day. They come in the post office. They're gonna call pretty early. We've had calls as early as the 5 o'clock hour. You'll answer the phone, you'll hear the chicks in the background chirping, and they'll say, you can come pick up your chicks. And you can pick them up even before the post office is closed. You just have to go into like the PO area, knock on some door. You'll hear your chicks, follow the noise, and They'll hand you your chicks. They'll be in a box. You take these guys home. Oops, I forgot to mention, before you leave for the post office, turn on your heater in your brooder. That's going to be their number one priority and get warm. Go ahead and get that warm while you're on your way to the post office. That way when you get back, it's nice and warm. You could also make your, what I call magic water before you go. You could do it before or after, it doesn't matter. Just make it before you put the chicks in. Half gallon of warm water, 1/4 cup of honey, 2 cloves pressed, 2 tablespoons apple cider vinegar. Mix that into that warm water. You do warm water so the honey will mix in. That will give them an immune boost as they come. I just serve that to them one time. When that's out, I just start regular water. But anyway, we've, we've, we've started our heat. We've gotten our magic water ready. We're on our way to the post office. We pick them up, we come back, we dip their beaks in the water one by one. Just to give them a drink. They have never had any food or drink in their life. Put them under the heat source— not to the food, to the heat source. They'll figure out— they'll be lively and vibrant, but you're showing them, here's the water, here's the heat source, and they'll figure out their food on their own. If there's more than 10% dead on arrival— it's normal for some, it's a stressful adventure for them— I'd call the hatchery and see what they can do for you. We've had 100 arrive before, all dead, and The hatchery took the responsibility, took it up with the post office and sent us more. Stage 5, week 1 in the brooder. Just check on them regularly, at least once, certainly once, preferably twice a day. Give them a sprinkling of shavings every day. We'd go in there with our Tractor Supply fine pine shavings and just sprinkle it in. Stay on top of it. Definitely add sprinkle. You're not adding enough if it smells. If you get an ammonia or any kind of stinky smell, Where you have smell, you have mismanagement. And you need to either add more deep bedding, in this case, the brooder where they're staying put has to be deep bedding, or in an adult situation, deep bedding or move them. That'll cure all smells. Stage 6, week number 2, we're just accommodating growth here. We might see ourselves putting in more fine pine shavings to keep up with them. You might notice that, hey, they're running out of food and I only wanna do this chore once a day. You need to bring in bigger feeders, bigger waters or more feeders or waters, or simply just do chores twice a day. But who wants to do that? Stage 7, week 3, we're going to harden these chicks off. So the first half of the week, I would turn off your heat source at night. We're hardening them off for the big bad world they're about to go into. But hopefully you're not going to give them an extra challenge and you've waited till your last possible frost set so they aren't going out into the frost. Okay, there's little chicks. The, the second half of week 3, turn off the heat completely. You've got to get them ready for the outside. So then they'll be ready for this next stage. Stage 8, this is one of the funnest days as a chicken tender. We're graduating these birds outside. Now I have enough chicks, it makes sense to I have a chicken tractor, keep my 30 or up to 30 or so in this chicken tractor, move them around on grass, keep them extra protection. Like at that little age, even a crow will eat them. So I run them in this chicken tractor, they get the grass, but they aren't completely— it's a bit of a nursery. They aren't completely exposed. So I move this chicken tractor around daily inside of electric net as another extra protection. If you don't have that electric net or you're just doing chicken tractor because you're just raising a few birds, you can move it around. You're going to be a little more at risk. I mean, you could take the extra step, get the poultry net, get you some extra predator protection, but if you just absolutely can't, run them in chicken tractor. Just make sure if there's any undulation in the ground that you, you know, where if there's like an undulation in the ground, and there's a chick can get out or a predator could reach in and grab or get a foothold and dig themselves in, block it with a rock, a board, something like that. Stage 9, 6 to 8 weeks old, is if you're going to just go straight to a chickshaw as opposed to transitioning them through a chicken tractor nursery. If you only want to do the chickshaw and you don't want to do the nursery stage in the chicken tractor, you don't want to build two coops right away, wait till the chicks are about 3, uh, 6 to 8 weeks old. You can keep them in the brooder longer and, and then set them out in the chickshaw because— and then do it at night. They're sleepy, they're tired. You put them in there, they wake up in the morning, they come out and they realize that's home. They come back. You might have to train them. They might come back underneath the coop for a few days. You might have to manually go out there and pick them up and put them in there and train them for a few days. But putting them out at an older age helps them keep inside of this poultry net. It's got these little meshes that if the chicks are too little, they'll just walk right through it. And two, they're a little older and contend with the predators more. Guard goose helps. Tube man helps. It's like the new scarecrow. You know the tube man? He's looking, you know, he's trying to get you to look, come buy a used car, right? Well, you can buy those on Amazon and they're wildly effective for protecting your chicks against aerial predators. Also, at 8 weeks old, you can switch from starter feed to grower feed. You don't have to. If you still have starter feed, just continue on that, finish it out. The only difference is grower feed is, is more crumbly and starter feed is more fine. It's been ground up. So it's the same thing. It's just a little easier managing grower feed because it's crumbly. You don't end up with any kind of powder, anything like that. And that's another thing, you definitely don't need medicated feed. We actually avoid that. I mean, if you're raising them naturally like I'm suggesting, they won't need it. Do you want to eat that medication? I don't want to eat that medication. None of it will need it. 5 to 10 months old. Woo! Do the chicken laying egg dance because you're gonna get your first egg. It's gonna be a little tiny egg, and that's okay. You're gonna be so excited, you're gonna go get that, you're gonna run inside, you're gonna want to cook that. You might crack that egg open, they're not even a yolk in there, okay? This is all normal. They start laying little eggs at first, and that's okay, and that's normal. But it's gonna— you'll never have another first again, so really enjoy it. Take a picture, whatever you got to do. That is fun. At this point, we can switch to layer feed. Is it the end of the world if you still have some grower feed? No. Finish it out. Grower feed has more protein. The big chicks are going to benefit from that. It's going to be totally okay. What layer feed has in it is a bit of calcium. Okay. And it helps strengthen their eggs. So it's a bit more of a rounded feed for adult hens. Stage 11, at 2-year mark, that springtime from 2 years ago when you got the chicks. Order more chicks to replace these guys to accommodate for losses. Order more to accommodate growth. Maybe you want more. And order to replace the fat lady hens. Stage 12, 2.5 years. It's, it's, it was that 2 years in the spring. Come fall, 2.5 years. Cold the old ladies. Nancy Hen, you aren't doing her any favors by keeping her long. She's, she's bred to go a certain length, be happy and productive for a certain time. Beware of the geriatric hen. They're going to slow down egg production by like half. I guess we have an extra stage here. Stage 13, maker's dozen. Eat these old ladies. You got to cook them low and slow. They're going to be tough. They're not like the chicken we buy in the store. The chicken we buy in the store or meat chickens we grow, we're harvesting them at a young age, like 8 weeks old. Okay, but these guys, they're going to be tough. Low and slow. Get them in a pot of water, throw in some vegetables if you like. Get that water up to boiling, turn it down, cook it for 3 to 6 hours until you can take a fork and scrape that meat and it just fall off the bone. Then that's ready. It's ready for a chicken and dumpling. It's ready for any kind of chicken soup. It's ready for shredded chicken tacos. Just enjoy the fruit of your labor. She's fed you all along in eggs, been happy and productive. Now she's feeding you in a different way through her meat, and you can be energized to continue on and strengthen her species by having a wonderful experience and continually growing chickens. Free PDF. You don't have to scramble and take notes. It's printable. Link down in the description on all these stages. You can reference it throughout the year. And if you're seeing this by March 23rd, when you get the PDF, you'll be entered onto our waiting list. We're launching a book that is going to go into detail of all these different stages, step-by-step instructions on how to get this stuff done and help you raise your own chickens. Happy day.
More from Justin



If I had to start my Homestead all over again, it could only pick one animal…