How to become a Speedcuber
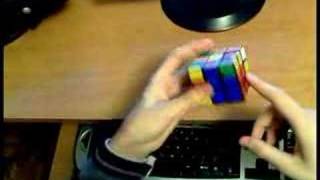
Learn the Fridrich method, the standard speedcubing technique that gets you to 20-30 second solves. The video walks through each stage: keyhole shortcuts, 2-look OLL, F2L pairing, then PLL and full OLL. It covers cube setup, lubrication, timing software, and where to find the speedcubing community.
Chapters
Many people ask me for tips on how to get faster. This video will sort of try to answer that, but maybe in a little more indirect way. One of the biggest problems I see is that people don't know what the next step for them is in order to become faster. They don't know what to search for. The material is out there, but there's nothing that links it all together. It is just disconnected and spread out all over the internet. So then they usually end up studying methods that may be a little too advanced for them, and naturally they get stuck. And discouraged. In this video, I'm going to talk about the most common methods to solve the cube, with an emphasis on the most common one, which is the Fridrich method. I'm going to try and walk you through all the things you should learn in order to get to the full Fridrich method and even beyond. Then later on, I'm going to talk about special cubes, some programs that you may find useful, I'll touch on lubrication, and finally I'll give you some useful links. So we start with the beginner's method. All the beginner's methods are basically the same. You first build a cross, then you put in these 4 corners that I've already filled in, then you put in these 4 middle edges, and then you do corner and edge permutation and orientation all separately on the last layer to finish the cube. So the, the problem with the beginner's method is that to insert an edge into the middle there is a very long algorithm. Something like that. That's at least 8 moves or something. So the first advancement is to learn the keyhole method, which is a very quick way to make this much faster. So the keyhole method, the idea— I'm just quickly gonna go over it— is that you're gonna do, instead of 4 corners right after the cross, you're only gonna do 3 corners, and then you're gonna leave one alone, and we call this the keyhole. Now, to insert, for example, this edge into here, What we're going to do— see, the problem is that if I just insert that edge really quickly in there, I'm going to pop out the corner. So the idea of the keyhole is that first you bring that keyhole in there, then you do that really quick insertion of the edge, and then you bring the keyhole back. So, for example— so yeah, that's pretty much it. So for example, this edge has to come here, First, I align the keyhole into that spot, then I put the edge in there, and then I bring the keyhole back where it was. The last cornering you would do just like you would do with normal beginner's method. The next thing you should look into after is the 2-look OLL. By OLL, I mean orientation of the last layer. Now, the beginner's method varies a lot in this stage, so I don't exactly know which way you're doing it right now, But the 2-look OLL goes like this: first you want to make sure that you orient all the edges. By orient, I mean make yellow, basically. So we see that these two edges are oriented because they're yellow. These two, you first orient them, and then that was basically the first look. And then in the second look, you're going to orient all the corners using just one algorithm. There's only 7 cases, so there's only 7 algorithms you have to learn. So this one, for example, is like this. So that's the Tula CoLL. After learning the Tula CoLL, you should go to learning the F2L. The F2L comes in right after you build the cross. So in the Beginner's Method, you put in the corner and then you put the edge. In the F2L, you put in the corner and the edge at the same time into each 4 of these slots. Now I have 3 F2L videos that you might want to check out. So basically, just to illustrate. I just filled in the entire slot. These two have to come there, alright? These two in there, and these two in there. And this is what we call a TOLL. This is very important, and all your, all your success is going to stem from this step. It is the most important step in speedcubing. The F2L. After learning F2L, or at least a little bit of F2L, you should go into learning the PLLs, or the Permutation of Last Layer. That means that you do the entire last layer after orienting it in one step, and that will fin— uh, leave the cube finished. Only after you've learned most of the PLLs should you go on to the OLLs, which is the Orientation of the Last Layer. That means that it replaces the Tulu PLL. That means that instead of doing the Tulu PLL, you do the entire orientation in one step. So, this case, like that. And that will just leave you with a permutation, which you have to do after that, and that will solve the cube. After you've learned the OLLs and the PLLs, you basically know the entire Fridrich method, and you should be averaging around 20 or 30 seconds, no problem. Now I'm gonna show you some more advanced techniques. For example, the extended cross. In competitions, you have 15 seconds pre-inspection time. That means that you have 15 seconds to pre-plan your cross so that when the timer starts ticking, you can right away do the cross from your memory. Some people like to do the cross plus one F2L pair. They pre-plan this and then they call it the extended cross. Another thing you can do is to learn some multi-slotting techniques, which means that instead of putting in just one F2L pair, you're gonna be putting in two F2L pairs at the same time. You can only do this to select few number of cases or it becomes a little too inefficient, but still in some cases it's very useful. Another thing is use of empty slots. For example, this slot is empty, so to place in this pair here, we can use the fact that it's empty to our advantage. Instead of doing the normal algorithm, which is like 10 or something moves, you can do something like this to solve it. Considerably less number of moves. Now I'd like to quickly mention some other different methods. For example, a well-known method is Petrus method, in which instead of building a cross, you build a 2x2x2 block. Like this, then you extend that block to a 2x2x3 block, like this, and then you hold the cube like that, and you use these two layers to do lots of other useful stuff. Its advantage is that it uses less number of moves than the Fridrich method, but I would still argue that the Fridrich method is better. I haven't tried the Petrus method too much though, so— but anyway, I think Fridrich method is better. Another method that is slowly becoming pretty popular is the Roux method, which I have a link to in the video description, and I can't even go into it. It's very different from Fridrich method, but some people are getting very good times with it, so you might as well check it out. Too, if you feel like it. The next thing I want to mention are the DIY cubes, or the do-it-yourself cubes. These are cubes especially made for speedcubing. Main difference is that you can pop the center off, just like that, comes off. You take a screwdriver, there's a very small screw in there, you just attach it on the cube. It's very useful. DIY cubes also move much better, they will decrease your times considerably. You can't get these in normal stores, you have to buy them through the internet. I'm giving you links in the video description. They cost $7 or something, so if you're getting serious about your speed, you might consider getting one of these. I think they will help you out. One more thing is lubrication. Here I have a silicone spray, which you can get in any store, really, I think, any hardware store. You take your cube, You adjust, you take out an edge, the cube should fall apart after you wiggle a little, and just spread all the pieces on the table, take the silicone spray, spray all the sides that don't have stickers on them, obviously, and wait a couple of hours, reassemble the cube, and it should be much smoother, it should move much faster, it will help you out a lot. Alright, next. As you're solving the cube, you generally want to time yourself. You should not be using your watch for this. You should download some programs that do this. The one I use is called the JNetCube. It's, uh, I'm giving the link in the description. It's a timer. You hit the spacebar, it starts the timer. You hit the spacebar again, it stops the timer. It gives you average of 12 solves. It does all the good stuff that you want. It's a very popular program. Another thing that some people use is Stackmat. It's a device you put your hands in it. As you lift your hands to solve the cube, it will start a timer. As you put them back, it will stop the timer and give you your time. You can use that as well. You can get those on the same sites that you can get your DIY cubes on. They generally cost a little more, but if you want to get them, you might, you may. I don't use them. And that's pretty much it. Lastly, I want to share a link with you. It's a speedcubing forum. Www.speedsolving.com. You can come there, you can ask speedcubers questions, you can discuss speedcubing, stuff like that. And that's pretty much it. So that's just some of the things that you should know about if you want to get into cubing a little more. And feel free to ask me questions in the comments, comment on the video. I know I went a little too fast on some parts, but I wanted to keep this within one video, so I apologize for that. You might have to watch some parts again. See you until next time.
More from Andrej

Skill Issue: Andrej Karpathy on Code Agents, AutoResearch, and the Loopy Era of AI






Andrej Karpathy: Tesla AI, Self-Driving, Optimus, Aliens, and AGI | Lex Fridman Podcast #333