How to solve a Rubik's Cube
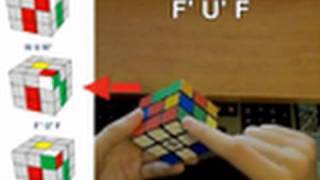
In this 30‑minute solo tutorial, the presenter walks a complete beginner through a systematic 7‑step method for solving a standard 3×3 Rubik’s Cube. The video begins with a physical disassembly of the cube to illustrate its anatomy – a fixed core, 12 unique edge pieces, and 8 unique corner pieces – and explains why the center faces never move. It then introduces the standard notation (R, L, U, D, F, B, primes for counter‑clockwise turns, and 2‑turns) and provides a printable reference. The core of the tutorial is a step‑by‑step guide: (1) forming the white cross by positioning the four white‑edge pieces; (2) inserting the four white corners using three case‑specific algorithms (R U R’, F’ U’ F, R U2 R’ U’ R U R’); (3) solving the middle‑layer edges with two algorithms depending on whether the target slot is front or back; (4) orienting the last‑layer edges using pattern‑based f‑algorithms; (5) orienting the last‑layer corners with the R U R’ U R U2 R’ cycle applied up to three times; (6) permuting the last‑layer corners by detecting “headlights” and applying R’ F R’ B2 R F’ R’ B2 R2; (7) permuting the last‑layer edges with a single algorithm (R U’ R U R U R U’ R’ U’ R2) repeated as needed. Throughout, the instructor offers practical tips for handling special cases (flipped edges, twisted corners, unsolvable configurations) and encourages practice, linking to a “How to Become a Speedcuber” overview, a printable webpage, and navigation timestamps. The tutorial concludes with a full example solve, reinforcing the eight core algorithms the learner must memorize.
Chapters
Hello! In this video, I will show you how you can solve the famous Rubik's Cube. I've been solving the Rubik's Cube for more than 2 years now, and I can solve one in about 17 seconds. With the method that I'm going to teach you now, you will be able to solve one in about 3 to 5 minutes, but after 1 or 2 weeks of practice, you can easily get down to around a minute. I also have many, many more videos on the Rubik's Cube, and if you decide at any point that you would like to get faster, watch my video called "How to Become Speedcuber." That gives you a grand overview of the exciting journey ahead of you. One more thing before we start. The beginner's method that I am about to teach you consists of 7 steps, and at the very end of the video there's also an example solve. You can jump to any of these points by using the navigation links that I have set up in the video description. Also in the video description you will find a link to a webpage that contains the entire method and can be printed out for your reference. So let's get right to it. First we have to make some very important observations about the Rubik's Cube. And at this point, it is best to take one apart and show you exactly how it works. You can do this by twisting a face 45 degrees like this and popping an edge out. The cube then falls apart. You can see that I have separated the cube into 3 piles, and this is no coincidence. The cube is made up of essentially only 3 kinds of parts. In the middle of the Rubik's Cube, we have what we call the center core. Positioned around this core, we have several pieces, and there are only two types: the edge pieces and the corner pieces. There are exactly 12 edge pieces. They all look the same, except that every one of them has two stickers of different colors. Similarly, we have 8 corner pieces, every one of them the same except that all of them have three different stickers on it. Together, these pieces arranged around the core make up the Rubik's Cube. So, some interesting things to note. First, notice that the centers on a Rubik's Cube don't move with respect to each other because they are fixed on this rigid core. What this means in a Rubik's Cube is essentially that these centers stay fixed and we only move the pieces around, the corners and the edges, and we move them around these centers. It also means that the centers tell you the color of that face. So this is the red face because the center is red. This will be the green face, orange face, etc., once the cube is solved. The most important thing to understand though is that every one of these pieces is unique. So for example, there is only a single blue-yellow edge piece, and every one of these pieces has a unique position that it belongs to. This one is blue-yellow, so it belongs in between the blue and the yellow center. S— same thing goes for corners. This is the blue-yellow-red corner, and it belongs between the blue, yellow, and the red center. There. Some color combinations are even missing. For example, there is no blue-green edge because blue and green are on the opposite sides of the core, so there's no edge in between them. But our task is essentially to make sure that every single piece ends up in its correct position around the center core. And when we achieve this task for every one of these 20 pieces, the key will be solved. So you're given a scrambled mess. How do you solve this thing? Well, I mentioned that there are 7 steps to solving the Rubik's Cube. The first step is called the cross. Remember that our ultimate goal is to solve all 20 pieces of the Rubik's Cube. In this first step, we'll solve the first 4 pieces. More specifically, we will solve the 4 edges that contain a white sticker. There's the white-blue edge, white-orange edge, white-green edge, and the white-red edge. So I've completed the cross on this particular cube. You can see that all the 4 edges that contain a white sticker are in their correct solved positions. So for example, the white-blue edge is in between the white and the blue center where it belongs. This is our goal. This step is completed intuitively, and you should be able to solve these 4 edges after a little bit of practice. I will give you a couple of examples though that may help you out a bit. So let's solve a cross on this cube. First of all, let's solve this white-red edge because it's very easy to solve. For example, in this case, it has to come here between the white and red center. You can just turn it like that, and that solves it. Um, when you have edges that have white pointing to the bottom, that's usually very easy to solve as well, like this white-blue edge. All you do is rotate the bottom layer until the color matches the center, so blue and blue, and rotate it twice so it comes to the top. Edges that are in the middle, like this white-green edge, are also very easy to solve. So it has to come here between the white and the green center, and the way I like to look at it is that it basically needs to replace this red-yellow edge that currently occupies the position. So what you do is rotate this top layer Now replace your white-green edge with that red-yellow edge, and now rotate the center again to fix the colors the way they were before. This last edge here, the white-orange, this is a pretty hard case when white points to you and it's on the top here or on the bottom here. But what you want to do basically is just turn the front side first, and now it's a middle edge, so it has to come here and needs to replace this green-orange. So just turn it replace it, and turn it back, and the cross is solved. The second cube here, so I notice that this white-orange edge is already paired up with the orange center here, so just that to solve it. Next we have a white-blue edge here, it needs to come here between the white and blue center, so it needs to replace the red-yellow, so turn it, replace, turn back. Here we have a white pointing to the bottom. It's already aligned with the green, so just turn it twice to solve it. Our last edge is here in the correct position but incorrectly flipped. What you do is you just turn the front to make it a middle edge, and now it needs to come here, so replace and move back, and that solves the cross. Now, if you did not like all that thinking that we did in the first step, you will be happy to find out that from now on everything will be much more mechanical. In step 2, we will solve 4 more pieces. We will solve the 4 corners that contain a white sticker. So we have 1, 2, 3, 4 corners that contain a white sticker. After you complete this step, your cube will look something like this. You can see that doing this will basically complete the entire first layer. Okay, from now on until the very end of the solve, we will always keep our cross on the bottom. So rotate your cube so that the cross is on the bottom and keep it there for the rest of the solve. So we will solve all 4 of our corners one at a time. First, you want to look in the top layer here for a corner that has a white sticker. So for example, this blue-red-white corner is one such corner. Because it contains a white sticker. Now identify the position that this corner has to go to. This is a blue-red-white corner, so it has to go here, between the blue, red, and the white center, right there. So now rotate this top layer until your corner is above the position that it belongs to. So it's above it here. Now we will solve this corner to its correct position using one of three algorithms. We have a different algorithm for every possible way that the white sticker on this corner can face. It can basically face to the left, to the right like in this case, or it can be here on the top. In our case, the white sticker points to the right. To solve it, rotate the right side clockwise, then the up face clockwise, and finally the right face counterclockwise. As you can see, that will solve your corner. Now, we need to be able to somehow write down these sequences of moves that we call algorithms. For this particular sequence, speedcubers would write it as R U R'. We simply give a letter to every one of the 6 faces of the Rubik's Cube. The right face is R because R is the first letter of right. Similarly, the up face is U. We then also have the down face, the D, the front face, F, the back face, B, and the left face, or L. Now, if we are to rotate a face clockwise, we simply put down that face's letter. For counterclockwise turns, we simply append a prime. So our counterclockwise turn of the right face was simply denoted as R'. So instead of saying the full thing: right face clockwise, up face clockwise, right face counterclockwise, I can just say R U R'. If you ever get stuck with the notation somehow, check the notation page that I linked to in the video description. So we have solved the first one of our 4 corners. Let's solve more. Again, look in the top layer for a corner that contains a white sticker. So here we go: white, red, green. Identify where that corner needs to go. It needs to come here, between the red, green, and the white center, right there. So rotate the top layer until it's above where it needs to go. Since the white points to the left this time, the solution is: F counterclockwise, U counterclockwise, F clockwise. Or F' U' F. As you can see, that solves the corner. Let's solve more. Here we are, another corner on the top layer that contains a white, white orange green. It needs to come here, so it's already above where it needs to go. When the white points to the top, the solution is R U2. If you have a, something like U2, so letter followed by 2, that simply means that turn that face twice. It doesn't matter if it's clockwise or counterclockwise, that's the same thing. Then we have R', U', R U R'. As you can see, that solves the corner. Now let's— where's our last corner? As you can see, the last corner that contains the white is not located on the top, and this can sometimes happen because those corners can get stuck in the bottom layer. Just like here, the corner is in its correct position but incorrectly twisted. So to correct this problem, just hold the cube like this and apply the first algorithm, for example, R U R'. That essentially inserts a random corner from the top here in here, and it makes this one come out to the top. And now you can solve it the correct way. White points to the top. The solution is R U2 R'. U', and notice that all of these moves until now basically just reduced that case of white pointing to the top to the case of white pointing to the right, and now we can do R U R' to solve it, and we have completed the entire first layer. So we have completed the first layer and we can now move on to step 3. In step 3, we will solve 4 more pieces. We will solve all the edges that do not contain a yellow sticker. And there are exactly 4 such edges: the blue-red, the green-red, blue-orange, and orange-green edge. They all essentially belong to the middle layer here. After you solve these 4 edges, you will have completed the first 2 layers, and the cube will look something like this. This step works almost exactly like step 2 that we just did. In step 2, we were finding corners in the top layer and solving them to their correct positions one by one. In this step, we will be finding edges that don't have a yellow sticker in the top layer and solving them to their correct positions again, one by one. So here's how we do it. Find an edge in the top layer that does not have the yellow sticker. So for example, this blue-red edge. Identify the position where it needs to go. It has to come here, between the blue and the red center, right there. Now turn the top layer until the edge matches with the center on the side. So like here, red with red. And now hold the cube so that the edge is on the right, right side here. Now instead of having 3 cases, we only have 2 cases this time. The edge will either need to go to the front here, like in our case, or it will have to go to this position in the back. If it needs to go to the front like we have in our case, hold the cube like this and do R' U' R' U' R' U R U' U R. That will solve that edge. And now proceed in exactly the same way. So find again an edge that does not have yellow sticker, for example this green-red edge. Now align it on the side with its center, so red with red again, and hold the cube so that the edge is on the right. In this case, it needs to go to the back here, between the green and the red center. To shoot this edge to the back, Perform the following algorithm: R U R U R U' R' U' R'. That will solve that edge. Again, look for another edge in the top layer, green-orange. Align it on the side with its center, so orange with orange match. Hold the cube like this with the edge on the right. And we need to shoot it to the front between the green and the orange center. So it needs to come here to the front. The algorithm is R' U' R' U' R' U R U R. That will solve that edge. Look for another edge. As you can see, we don't have any more edges on the top that do not contain a white— a yellow sticker. That is because again we can have edges that are stuck. In their correct positions but incorrectly flipped. To correct this, again, just pretend that you want to insert, for example, this edge in there. So just hold it like this and perform the first algorithm: R', U', R', U', R', U, R, U, R. That inserted that edge here, and the blue-orange edge was popped out to the top here. So now, just solve it normally. Align it on the side, hold the cube so that it's on the right, and it needs to go to the back. So we have R U R U R U' R' U' R', and that will solve the edge incorrectly. And we have completed the first two layers. All that remains is to complete the last layer. The last layer is composed of 8 more pieces. We have 4 corners and 4 edges that still need to be solved. Notice that they all have exactly 1 yellow sticker, so we have yellow stickers here, here, here, here, and here. Right now, all of these yellow stickers point in random directions. Our task in Step 4 and Step 5 will be to make sure that every piece is what we call correctly oriented. All this means is that the yellow sticker will point to the top. So after Step 4 and Step 5, The cube will look something like this. Notice that every piece has now yellow pointing up, even though the cube is scrambled on the sides still. The goal of step 4 in particular is to orient all 4 edges. So right now we can see that these 2 edges are correctly oriented, these 2 are not yet correctly oriented, and we will orient them in step 4. So after step 4, the cube will look something like this. All the edges are correctly oriented, and the corner orientation is handled in step 5. So let's see how we do step 4. To complete step 4, first count the number of edges that are correctly oriented on your cube. If you have already all 4 edges yellow, you are lucky and you get to skip this step. Most of the time though, you will have exactly 2 edges correctly oriented, and this can happen in 2 ways. The 2 edges can be opposite to each other, like here, and they will form a line, or the 2 edges can be adjacent to each other and they will form a little L shape. If you are unlucky, you can also have none of the edges correctly oriented, like on this cube. Please note that it is impossible to have 1 or 3 correctly oriented edges. So either you have not completed the first 2 layers correctly, or if you did, your cube is simply unsolvable. Many people are surprised to learn this, but if your cube ever somehow falls apart and you put it back together randomly, there's about 92% chance of it actually being unsolvable. So make sure that when you assemble your cubes, you put them together into a solved position. So actually what I did to get to this state is that I simply popped an edge out and I flipped it. So I'll flip it back. Now the cube is actually solvable. Anyways, if you want to solve the case where you have two correctly oriented edges and they form a line, hold the cube like that and apply the following algorithm: F R U R'. R', U', F'. For this case, when they form a null, just hold the cube like that and apply the exact same algorithm, except for this time you will have small f's. These are double layer turns. So normal F looks like that. A double layer turn, small f, you just grab the middle and you twist it with the front face. So that's small f. So the algorithm is f R U R' U' f'. If you have this case where none of the edges are correctly oriented, just apply the first algorithm followed by the second algorithm. So you will do f R U R' U' f', and now the second algorithm: f R U R'. U', f'. All your edges should now be correctly oriented. We now get to step 5, where we will orient all of the corners. After we finish with this step, the cube will look something like this, where you can see that all the pieces are now correctly oriented and yellow on top. Like we did with the edges, first count the number of corners that are correctly oriented on your cube. Here I have a couple of examples of what your cube can look like at this point. You can only have 0, 1, 2, or 4 corners correctly oriented. If you have 3 corners correctly oriented, like on this cube, then your cube is actually unsolvable. So, take it apart, put it back solved. Now, for this step you only have to remember a single algorithm, but you may have to apply it a couple of times. You also have to remember a few simple rules. So here are the 3 simple rules that you must know: if you have a single corner correctly oriented, Turn the top layer until that corner is located here, on the bottom left if you look from the top, in here. Then apply the algorithm. The algorithm is R U R' U R U2 R'. Remember that you may have to apply this algorithm several times. Since the corners are still not yet solved, just continue on doing the same thing. Again, we have only a single corner correctly oriented. So turn the top layer until it is located here and apply the algorithm: R U R' U R U2 R'. Now the corners are solved. If you have 0 corners correctly oriented, like on this cube, turn the top layer until you have a yellow sticker on the left here, in this position and on the left here, then apply that same algorithm. R U R' U R U2 R'. We are still not yet done, but we have only a single corner correctly oriented now. So turn it until it's in this position and apply the algorithm: R U R' U R U2 R'. If you have two corners correctly oriented, turn the top until you have a yellow sticker in the front. Here. Then apply that same algorithm: R U R' U R U2 R'. We now only have a single corner correctly oriented. It is already in the correct position, so we don't have to turn the top layer. R U R' U R U2 R'. We are still not yet done. Only a single corner correctly oriented. Place it there, R U R' U R U2 R', and now we are done. If you follow these rules correctly, you should never have to apply the algorithm more than 3 times, but all the pieces should now be correctly oriented. We can now go on to step 6. Now that all of the last layer pieces are correctly oriented, we can actually fully solve them. In this step, we'll solve the 4 corners of the last layer. After completing this step, the cube will look something like this, where you can see that every corner is in its correct position. This step is very simple. You must look on the sides here for what we call the headlights. This just occurs when two stickers in these two places have the same color. So like here we have orange and red, it's not the same. Green-orange, not the same. Blue-blue, so we call these blue headlights. By the way, if you have headlights on every single side of the cube, that's because your corners are already solved. You just want to turn the top twice. Don't get confused by that. But otherwise, you want to place your headlights in the back, and now you want to apply the following algorithm: R' F R' B2 R F' R' B2, R2. You should now be able to align the top so that all the corners are solved. If you are unlucky, it may happen that you cannot find headlights on your cube, like it is in this case. What you want to do is just hold the cube in any way you like and apply that algorithm. So we have R', F, R', B2, R, F', R', B2, R2. You should now be able to find the headlights. So here we have orange headlights, place them in the back and apply the algorithm now: R' F R' B2 R F' R' B2 R2. All your corners should now be in their correct places. And finally, we have step 7, in which we will complete the cube by solving the 4 remaining edges. This step is almost as simple as step 6, and again we only have a single algorithm to deal with all cases. So first check if you have a solved edge. Sometimes you can find this edge, so for example here we have a solved edge, and sometimes you can't, like in this case. So no single edge is solved. Just as always, if you have something weird that I did not mention, like for example here we have two edges that are solved, then your cube is unsolvable. Now, if you have one correct edge, rotate the cube so that the edge is in the back and apply the following algorithm: R U' R U R U R U' R' U' R2. You may have to apply this algorithm more than once, but never more than 3 times. Again, since we have one edge that is in its correct place, keep it in the back and apply the algorithm again. R U' R U R U R U' R' U' R2. Now if you have one of these cases where no edge is correct, simply hold the cube in any way you like and apply the algorithm. R U' R U R U R U' R' U' R2. You should now be able to locate a solved edge and just proceed like we did before. Rotate the cube so that it's in the back and apply the algorithm: R U' R U R U R U' R' U' R2. Congratulations, your cube should now be solved. And that is the complete solution. I count about 8 algorithms that you have to learn, and that is if you count things like R U R' as an algorithm. So really, it's not that bad. Again, remember that all of these algorithms can be printed out from the website that I linked to in the video description. Please let me hear your thoughts on the video, how easy or hard you found the video, or even the method in general. If someone brings up a good point about something, I will be posting additional comments or corrections in the video description or in the form of annotations directly in the video. And finally, check out my channel for more videos on Rubik's Cube. If you are a complete beginner, I recommend that you watch my video called "How to become a speedcuber" to get an overview of the speedcubing world. And now let's do our full example solve. I have scrambled the cube here. If you would like to follow along, hold the cube with the L on top, orange in front, and then apply this sequence of moves. I think the only moves that I did not cover explicitly in the video until now are B, which looks like that, L looks like that, the left side clockwise, and D' is the down side counterclockwise. In the video description, I will give a link of a nice animation of the entire scramble if you are having trouble. Okay, so So let's solve this thing. So step 1, the cross. I'm looking for all the edges that contain a white sticker. So we have one here, here, here, and here. So this white-red is the easiest to solve of all of them because the whites are already aligned and this is our first edge. So to solve it, just rotate the top so it's in its correct position. Edges that have white sticker pointing to the bottom are as you recall, very easy to solve. So turn the bottom layer until you match on the side and turn that face twice to solve the edge. This blue-white edge is also very easy to solve right here because the blues are already aligned, so just like that. Our last edge is in its correct position, but it's incorrectly flipped, so move it away from the top layer Now move the top layer so that you can place the edge in there, and now adjust the top layer. So now we have the cross finished, and I also noticed that one of the corners happened to get solved as well. So we only have 3 more corner locations to solve. So I'm looking on the top for corners that contain a white sticker, for example this white-blue-red corner. It has to come here. Blue, red, white, right there. So move it, move it on top of where it needs to go. Since the white points to the left, the algorithm is F' U' F. We look for more corners: white, red, green. This corner needs to go here: green, red, white, right there. So move it on top of where it needs to go. White points to the right, So the algorithm is R U R'. Our last corner is here, white green orange, so it needs to go right there. So move the top layer until it's above where it needs to go. Since the white one's at the top, the algorithm is R U2 R' U' R U R'. And now we have all of the corners solved, and we can proceed to solve the edges. So I'm looking for edges on the top that do not contain a lock sticker. For example, this orange-green edge. Move it so that it aligns on the side, so green with green. Rotate the cube so that it's on the right, and we need to shoot it to the back between the green and the orange center, right there. So we need to shoot it to the back, and the algorithm is R U R U R U' R' U' R'. So that edge is now solved. We look for more edges, for example this red-green, align it with green center, rotate the cube so that it's on the right, it needs to go to the front here between the red and the green center, so the algorithm is R' U' R' U' R' U R U R. So we solved that edge. We look for more edges, for example this orange-blue edge. Align it first, orange with orange, rotate the cube so that it's on the right, and it needs to go to the back here, between the orange and the blue center, so the algorithm is R U R U R U' R' U' R'. So that edge is now solved as well. Our last edge is right here, the blue-red. It's already aligned, hold it like that, and it needs to go to the front. So the algorithm is R' U' R' U' R' U R U R, and the edge is solved, and the entire first two layers are now solved as well. Now we go to orientation of the edges. We notice that 2 edges are correctly oriented, and they form the L shape, so we hold the cube like this, with the 2 unoriented edges in the back, and apply the algorithm f, small f, that is R U R' U' f'. Now we look at the corner orientation. We have 2 correctly oriented corners, so we want a sticker in this position. Like that. Now apply the algorithm R U R' U R U2 R'. Now we only have a single corner correctly oriented, so place it on the bottom left here and apply the algorithm R U R' U R U2 R'. Again, we only have a single corner correctly oriented, so rotate the top until it's in here, and apply the algorithm one more time. R' U R leads to R'. All the corners are now correctly oriented. We are done with the orientation. We now proceed to look for headlights to solve the corners. We can find the headlights, so rotate the top layer to place the headlights in the back and apply the algorithm R' F R' B2 R F' R' B2 R2. Okay, and now we notice that we have one edge correctly solved, so we hold the cube so that it's in the back and we apply the algorithm R U' R U R U R U' R' U' R2. Again, we have one edge correctly solved, so hold it so that it's in the back. Again, R U' R U R U R U' R' U' R2, and the entire cube is now solved.
More from Andrej

Skill Issue: Andrej Karpathy on Code Agents, AutoResearch, and the Loopy Era of AI










Andrej Karpathy: Tesla AI, Self-Driving, Optimus, Aliens, and AGI | Lex Fridman Podcast #333