How to solve the Rubik's Cube: Beginner's Method [part 1/3]
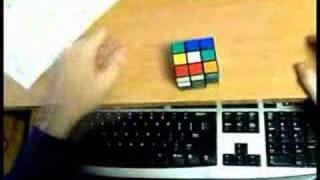
Learn the beginner method for solving a Rubik's Cube, starting with the white cross and first layer. The cube has a fixed core, eight corners, and twelve edges. Three algorithms handle the corner cases: F' U' F, R U2 F' R' U' R U R', and R U R'.
Chapters
I've now been asked a couple of times to make a beginner's method tutorial for the Rubik's Cube. I've been under the delusion that there is a good beginner's method tutorial out there on YouTube, but now that I've actually searched for one, I can see at most 2 decent videos on it, and they teach a beginner's method variation that I would not necessarily recommend. I'm now going to take this opportunity to teach you what I think is a good beginner's method. It is both easy, fast, and it will allow you to quickly transfer into a very popular and advanced method the Friedrich method. This video is for anyone out there that wants to learn how to solve the Rubik's Cube, and there is no past knowledge of the cube assumed. Now, if you've seen other people solving the cube before, you may feel a little intimidated by how fast or how hard a cube solve looks like, but believe me when I say this: solving the Rubik's Cube is very easy. Solving the Rubik's Cube very fast is hard. So the first thing I'm going to do is I'm going to take away some of that mystery that the cube holds, you know, It's the Rubik's Cube. Okay, well, let's see exactly how it works. I'm going to now take it apart. It's made up of pieces. It's made up of 8 corners and 12 edges. So I'm just going to take it apart. The pieces just pop out if you do this. Now this is how a Rubik's Cube works. There's this one centerpiece in the middle. And all these pieces are around it, and that's what makes up the Rubik's Cube. So the first thing that this should tell you is that the centers, look, they're fixed. You cannot possibly move them. On the Rubik's Cube, this will always be the yellow side because this is the yellow centerpiece. No matter what I do to that cube, I'm not going to be able to change this. So the colors stay the same with respect to each other on the Rubik's Cube. Yellow side, orange side, white side, etc. The second thing I wanted to talk about is that you should not think of the Rubik's Cube as stickers, but as pieces. When we talk about solving the Rubik's Cube, we talk about solving the actual pieces, not just the stickers. So this is the yellow-red edge. It's made up of 2 stickers. This will become important when we do the cross and stuff like that. I'll come back to this later. Now I'm going to go over some standard notation that we are going to use. We denote each side of the Rubik's Cube by a letter. We have 6 sides: the front, back, left, right, up, and down. Each side is denoted by its first letter. So front is F, right is R, etc. Now by side I mean like this, this is the right side, this is the front side, etc. Now given a side we can do two things to it. We can rotate it one way, clockwise, or we can rotate it the other way, counterclockwise. We can also do a full 180-degree turn, which is just two clockwise turns or two counterclockwise turns. Turns. A clockwise turn of the cube is denoted by just that side's letter, so this would be an R. We turned the right side clockwise. A counterclockwise turn is denoted by that side's letter followed by a prime. So R' is this counterclockwise turn. A 180-degree turn is denoted as the side's letter followed by a 2, the number 2. So R2 will be this. This is R2. So I'll give you an example. An algorithm will look like something like this. So we have F. What this means is look at the front side and turn it clockwise. Front side, turn it clockwise. Look at the right side and turn it counterclockwise. Counterclockwise. Look at the upside and turn it clockwise. Look at the back side and turn it clockwise. Looking at the back side, I'm turning it clockwise. Now be careful because from here it will look like a counterclockwise turn, turn almost, but this means look at the back side, turn it clockwise. That's what it means. Look at the downside, turn it counterclockwise. And look at the left side and do L2 quarter turn. So that's notation. That's all you need to know for notation. Okay, so now that we know the basics, we can start to get to the actual solve. The first stage of the solve is called the cross. In this stage, we are aiming to solve all the 4 edges of the cube that have a white sticker. Differently put, we will solve the white cross. It can be any color, but just to make it easier, we're going to do white first. We are aiming to get to something like this: 4 edges, 4 white edges, they're all solved. Now, for example, so this is a very intuitive step, and there's nothing I can do too much here to explain You should pretty much get this by yourself, it's not too hard. For example, say I wanted to solve this white edge. I'm just going to turn it like this. Now the problem is that look, this is— remember what I told you about edges and stickers? This is the white-blue edge and this is the orange center, so this is the orange side. We don't want this blue here, you see? This thing has to be orange, this has to be the orange-white edge. So this blue edge actually has to be here, aligned with the blue center. So for example, to solve this one, I could do this. To solve this one, I could do something like, it has to come here, so I'm going to turn this twice, put it up, and I'm going to restore the cross. Now if you don't get this, that's okay, just play with it, play around with it and figure out how to do a cross. It's fairly intuitive and you should be able to figure it out by yourself. And that is the end of the first stage. Next, we are going to solve the entire first layer. We are aiming at something like this. Notice that the entire first layer here is solved. So we just built a cross. Now what do we need to do to finish the entire first layer? We only need to be— we only need to place these 4 corners, and that will finish the entire first layer. So what we're going to do now is we're going to turn the cube over, and we are going to put the cross in the bottom, and we're going to keep it on the bottom until the end of the solve. So we're going to be inserting corners from this upper layer down to this layer to their solved positions one by one using one of three algorithms, one of three cases. So let's see, we're going to be finding corners on this top layer, and now we're going to choose one that we want to solve. So say you want to solve this blue-red-white corner. First, identify where it needs to go. It's red, blue. It has to go between the red and the blue side. Now put that corner above where it needs to go. So it needs to go here, put it above here. Now the white sticker can be on the left, on the right, or on the top. That's the 3 cases that we have. If the white sticker is on the left, do the following: F' U' F. That will solve that corner. Now we're going to find another corner on the top layer. So this corner, orange-green, orange side, green side, put it above where it needs to go. So it needs to come here, put it here. The white this time is on the top, so do the following algorithm: R U2 F' R' U' R U R'. That will solve that corner. Let's see another one. Orange blue between orange and blue. The white is on the right. To solve it, do the following: R U R', and that will solve that corner. Now what you'll notice is that we have no more corners in this top layer. That's because one corner is already in its correct position, but it's incorrectly flipped. What we have to do is we first have to bring it to the top, and then we have to solve it the correct way. To bring it to the top, just pretend you want to bring one of the other corners in there, and in the process of putting that corner in, you will pop this one out. So for example, pretend we want to put this corner in there. Do an algorithm, for example R U R', and in the process we're going to pop this corner out. Put it over where it belongs, white points to the right, the case is R U R', so we finished the entire first layer.
More from Andrej

Skill Issue: Andrej Karpathy on Code Agents, AutoResearch, and the Loopy Era of AI








Andrej Karpathy: Tesla AI, Self-Driving, Optimus, Aliens, and AGI | Lex Fridman Podcast #333