Rubik's Cube: Cross (Advanced)
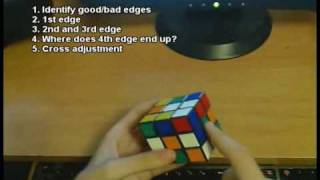
Learn how to build an efficient cross on a 3x3 Rubik's Cube by identifying good edges (0-2 moves to the top) versus bad edges, then solving them strategically while flipping bad edges into good ones. The presenter walks through five mental steps for each scramble and shows how to avoid traps where a plan backfires on the fourth edge.
Chapters
The highly anticipated cross video is finally here. I received a ton of requests for this one, and I think it is a good idea to do it. Everyone always says that cross is intuitive, just go and do it. I was one of them, but now that I actually brainstormed some stuff, I think there are some things that I can show you that may help you out. This video will require to be able to think ahead slightly, so I would say that about 40-second average would be ideal. If you have a little more than that, then you should still be fine, you may be able to pick up something, but just be warned. Okay, so firstly, it takes 8 or less moves to solve the cross, but 99.95% of the time it can be done in 7 or less moves. Also note that most of the time it can be done actually in 6 moves. Next, you probably heard this already, but just for completeness, solve the cross on the bottom. You want to do this because it gives you a good look ahead into F2L, and it saves you a cube rotation that you would otherwise have to perform once you are done. For educational purposes, I will hold the cross on top in this video. Okay, now I want to explain the concept of relative position. In building the cross, you will solve each edge one by one by putting it to the cross layer. The key point here is that the edge need not be placed in the correct final destination. It only matters that the edge is placed correctly with respect to all other edges that are already solved on the top here. In order to do this, you will have to know the color scheme of your cube inside out. Only once you've solved all the edges and placed them correctly with respect to each other on top here, you will actually adjust the cross layer and fully solve the cross. Here's what I mean. This orange edge here, its final destination is like this, paired up with the orange center, but it was given to us like this, in its scrambled form. So here we have a red edge here. I know that on a Rubik's Cube, the orange is opposite to red, so I'm okay just solving this red like this because I'm placing it opposite to orange. Once I place all the pieces, I will just adjust the cross layer and everything should fall into place as long as I place them correctly with respect to each other. Another important concept is that of edge orientation. Edges can have good or bad orientation. The goodness of an edge is based on how many turns it takes to solve that edge to the top, ignoring all other edges. So this is a good edge because it only requires 0 moves to solve it to the top. It's already solved. This one is a good edge because it only requires this single move to be placed at the top. This edge is a bad edge. It requires 2 moves to solve it to the top. They are this, okay? There's no way you can place this in one single move. It's a bad edge. The final edge here is a good edge because it only requires one single move to be moved to the top. So that's how you tell the goodness apart. So the basic idea is, of course, that bad edges are hard to place because they require more moves. What we're going to try and do is in every solve, first we are going to identify all good and bad edges. And then while solving the good edges, we will try and transform every bad edge into a good edge. So in a sense, we'll be multitasking and solving multiple edges at the same time. It's not as hard as it sounds though. Here we have an example. I have 2 edges already solved. Now we have this green edge here. If you were to just greedily place this edge up, you are left with this case here. This case requires at least 4 moves to solve. It's a terrible, terrible case. This is a bad edge and it's hard to place. So the idea here is that while we are placing this edge, we are going to try and flip this edge and make it a good edge instead of being a bad edge. We can do this in this case by simply moving this edge below it, and then as you place this green edge up, you are going to convert this edge from being a bad edge into a good edge, and then you can solve it easily. So not only did this move solve one of the good edges, it also made another bad edge a good edge. We're going to employ this strategy again and again and again. Okay, enough of the general stuff. The remaining concepts I will have to illustrate by doing actual cross solves and just taking you through them. Here's how I think about the cross in most cases. Firstly, given a scramble, there are 4 edges that you're going to have to find and identify them as good or bad edges. Then you have to decide on the first edge. The first edge, once you decide which edge is going to be placed first, is completely going to identify the color scheme of your cross. So if I decide that this blue edge is going to be my first edge, then we can see that this green edge is in the wrong place. This will make it orange, orange will have to end up here, red and green. If I decided that this green is in the correct place, then this would be red, orange and blue spots. So after I choose my first edge, how hard or easy is it going to be to place the second and the third edge? and then after I place the second and third edge, where is the fourth edge going to end up and how easy is it going to be to place it? And finally, after I place the fourth edge, what kind of cross adjustment will I have to make to completely finish the cross? You're gonna have to do like a U U' or U2 to adjust the cross. So you have to think about all of this stuff. So in this case, I will decide that blue will be my first edge. If blue is my first edge, how easy is it going to be to place the second and third edge? Well, look, the orange is already paired up, the green is already paired up, so placing the— making this the second and third edge is going to be really easy to place them both together. Where is the fourth edge going to end up? Well, the fourth edge is going to be the green edge. After I do orange up, the green will be here and white will be in here. So how easy is it going to end up the green has to come here, so I will have to do a U-turn, place the green, and then what kind of adjustment will I have to make? Well, I just made a U-turn, so I'll have to undo that. I'll have to do a U' to fix the entire cross. So here I'm placing the second edge, third edge, the green end up here, the green has to come here, so I'll put it here, put the green up, and do a U' to fix the cross. So there I identified 5 mental steps that I go through most of the time when thinking about the cross. Each step has its own best and worst case. It's important to think about these cases because if in your mental process of building a cross you ever run into any of these cases in any of the steps, they can immediately convince you to either abandon or keep your current plan. So for step 1 and 2, the best case is that already one edge is solved. It's correctly oriented and already your first edge is solved. So this would be a good case. For, uh, this would be a bad case because all the edges are incorrectly oriented, they're all bad edges, and your first edge will require you to do 2 moves at least. For step 4, the best case is that last edge is solvable in a single move. The worst case, of course, is this. I already showed it to you. This requires 4 moves to solve, this requires 4 moves to solve as well, and this requires like 5 moves at least, I would say. Anyway, so any of these cases, after, after in your mental process when you place the second, third, and the first edge, and you've noticed that your fourth edge would be in this place, that just raises a flag to you immediately that you should not go down that path. For step 5, the best case is that your cross is already aligned and you don't have to align it. The worst case is that you have to do a U2 or a D2 when you do it on the bottom, or a U2 like this. So let's see another case. We have blue, orange, red, green. All of them are correctly oriented except for the red. So here we go. The first edge could be already placed. If we make this the blue, the blue first edge, if we decided this, we're going to keep this as the first edge, then this will become automatically green, this will become red, this will become orange. So now, what could be my second edge? This could be my second edge. I could just place this right away. Red— green is opposite to blue, so this is the correct place for it. Next, I could place the orange because it's already a good edge, and let's just see where this ends up. Well, I can see where the problem is going to be already. I'm going to place this, this, this, and look, we have the worst possible case here for step 4, so we really do not, really do not want to do this. So, I mean, it was really good that in one move we got two edges, so I really like this plan, I do not want to abandon it, but we don't want to get into that case where it would be the worst case for step 4. So I see, I see the best way would probably be to place the green, so in one move we have two edges, and then instead of moving it and solving the orange right away, I'm going to first waste a move to make this a good edge and put it opposite to the blue, to the orange, because orange is opposite to red. So then I adjust and then I place that orange and then I place that red. So that was an interesting cross because it had a trap in it. Unless you bring that red down, it's gonna screw up your cross. Let's see if I can come up with some interesting cross now. Okay, so let's see this. Orange, red, green, blue. So these two are correctly oriented, this one is oriented, this one is badly oriented. So what could be my first edge? My first edge could be any of the good edges. So it could be this, it could be this, or it could be this. Now I'm going to choose either orange or blue to be my first edge, simply for the reason that once I place that, they're correctly with respect to each other. If I make this blue, then this will be orange place, so I can place the orange right away. So in 2 moves I can get 2 edges. That's good. Where's the— if I make this the first, this will come down. If I make this the first, this will come up. So what I could do is I could place this 2, and I flip this edge, so now it's a good edge, and now we have 2 good edges, and they can be placed easily. And notice that I placed the green last because that will make me skip step 5 because I saw that green was already aligned with the center, with the correct center, so I can skip step 5. So let's see another one, last one. Okay, so we have a red here, so in all likelihood this will be my first edge. Actually, hold that thought because I can see now that orange is here opposite to the red in its correct spot but incorrectly flipped. So that's not looking too great. We have this and this. This is great because they're opposite each other and green is indeed opposite to blue. So what I could do is make this my first edge, ignore this fact, and place this one and this one. As my second and third edge. The orange will end up here incorrectly flipped, but it's okay because this is looking too great. I'll place these, and normally I would be solving it on the bottom, so I have a pretty fast finger trick to solve these. Even though this is a terrible case, there are pretty nice algorithms to do it, like R' U R' U', and they can be done pretty fast. And then I would have to adjust. So yes, it's a terrible case, but I mean, that's how much it costs. And all the other edges were really easy to do, so I just had to take the price. Also know that there are different ways of doing it as well. This is the same case. What I could have done is, look, I need this to be made a good edge first. And this green can make it a good edge, and also relatively to the green, it can be on the right place, meaning that if I place green and I make this green, then this will become orange, and I can place that orange in there in one single move. So instead, I can make not this my first edge, but my green my first edge, and then my orange second edge, blue third edge. The fourth edge, which is the red in that case, would end up right here and it would have to come here, so I would need to adjust, place red, and adjust one more time to finish the cross. So there's now an alternate solution to this, and it's green, orange, blue, adjust, solve red, and adjust the cross. It's a matter of personal preference. Okay, at this point I will stop with the examples. There are way too many cases for me to show you, and after all, I wouldn't like to spoil all the fun for you. The main point was to present you with some feeble attempt at formalizing my general thought process while solving the cross, show a few examples, and give out some helpful external resources. So, firstly, I have a website for you that generates scrambles and tells you solutions for the cross. And second, there is a program that will let you enter a cross and see what is the best way to solve it. So I'll show you these now. Okay, so this is the first website. So here, you just come here, you click New, it's gonna generate a scramble for you. So just do the scramble and then you come here, Show Solutions, and you basically go through these solutions here and see how the cross is done optimally and extract the tricks and stuff. So this is very useful for practice. Okay, so this is the program, it's called Cube Explorer. I'm giving all the links in the video description. So basically you just come here, you click Clean, I mean, you come here, click Empty, and you click on the centers to get the colors. You put in where your edges are, and once you are done that, you just click Add and Solve. It's gonna generate solutions for you, so just apply this algorithm to solve that particular cross and stuff like that. So this is very useful as well. Okay, so that's basically it. Cross is extremely intuitive, and you need to be able to do all those moves in your head and of course that will take some time to get used to. I don't personally think that it is worth practicing just by itself, unless you really suck at it. It's one of those things that just comes to you with time. Spend more time on F2L instead. And that's it for now. Bye-bye. So in particular, what I notice here is that if I place the orange, it will orient my blue. And the orange, as you can see, is opposite to the red, as you want it to be. Hello?
More from Andrej

Skill Issue: Andrej Karpathy on Code Agents, AutoResearch, and the Loopy Era of AI






Andrej Karpathy: Tesla AI, Self-Driving, Optimus, Aliens, and AGI | Lex Fridman Podcast #333