Rubik's Cube: Fridrich F2L explained (PART1/2) [New!]
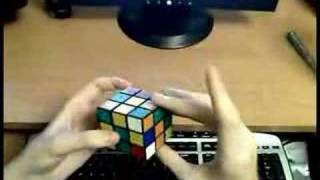
A step-by-step guide to the Fridrich method's second stage: forming corner-edge pairs and inserting them into the four slots that complete the first two layers. The tutorial covers multiple cases including the R U R' algorithm, wrong-position edges, and flipped-edge scenarios, emphasizing how to preserve already-solved slots while using the top layer as a workspace.
Chapters
My F2L videos here on YouTube got very popular, but I must say that I am slightly ashamed of them. When I made them a year ago, I did not expect too many people to watch them, and therefore I didn't put too much thought into them. The camera angle is crappy, the lighting is terrible, my use of terminology is confusing, and my explanation is mediocre at best. I've recently decided to rework the F2L tutorial to a much higher standard and hopefully it will be much cleaner and much easier to follow. One more thing that I would like to mention before we start is that Fridrich F2L is an advanced method, and you should definitely be able to solve the entire cube using the beginner's method already. If you cannot do this, then there is a high chance of you getting confused, so please don't hold me liable. Okay, so let's start from the beginning. F2L is the second step of the Fridrich method of solving the Rubik's Cube. This method solves the entire first two layers of the Rubik's Cube right after the first step, which is the cross. So I've completed the cross on this particular cube. After finishing the first two layers, your cube will look something like this. As you can see, the first two layers are complete and you're only left with the last layer to be solved. The way to do it is to form edge and corner pairs and insert them one by one into each one of these 4 slots, thereby completing the first 2 layers. For example, I have a cube here which has one single slot filled in. This slot is filled, so it only has 3 more slots that need to be filled, and then the first layer is complete. Okay, so I set up the cube such that we have the cross and none of the first 2 layer pairs are yet inserted. Let's say we want to insert this red-green corner and its corresponding edge, which is right here. So we want to insert them both into this slot between the red and the green center. So let's just forget about the edge for now. Let's just concentrate on the corner. To insert this corner to its corresponding position here, we can do this algorithm: R U R'. You may already know this algorithm from the Beginner's Method. RU, R'— let me just reverse that. Okay, so when I do that algorithm, notice which edge comes along with the corner: orange-yellow. Let me reverse it. Where is orange-yellow before the insertion? It's right here in the back. So if I could only have the correct edge in its place right here in the back position and then do that algorithm, then both of the— then both of these pieces would come into their right places. So what I need to do is I need to move this edge in this place here instead of this edge and then do that algorithm. I need to move it here without changing the position of the corner though, because when I do the insertion, it's required that this corner be in this position. For example, if I only move this edge like this, the corner would move away. So what I need to do is I'm going to hide this corner away from the top layer. For example, I can do it like so, and now I'm free to rotate this top layer where I want, and it contains this edge. In particular, I want this edge to be in this back position. Now, when I put this corner back, I'm going to have it set up. So now when I do that same algorithm, R U R', notice that I took along the right edge this time. And I filled the slot in. So let's do the symmetrical analog of the case I just discussed before. Let's say we wanted to fill this slot in, the green-orange. The corner is right here and the edge is right here. So before we had the white sticker in this position on the right, now the white sticker is on the left here. So before we try to do R F U R', but that won't work this time. We have to do the symmetrical analog of that, or doing it on the other side, on the left side, F' U' F, like so. Okay, so this time we brought along the orange-blue edge. Orange-blue edge before insertion is right here, across from the corner, just like before. So what we need to do is we need to have our edge in this position before we do that insertion. So again, to do the same thing, we have to hide this corner away, then put that edge in there, bring the corner back, and do that algorithm. So to hide the corner, you have to be careful slightly here because before— you have to be careful on how you hide that corner away. We want to hide it in such a way that the edge remains in the top layer. So for example, I can— yes, I can hide this corner like so from the top layer, but that would drag the edge along with it. So I need to be careful how I do it. In this case, the right way to do it is to hide it this way. That will hide the corner away but make the edge remain in the top layer. Now I can move that edge into the position that we want it in, and now when I restore the corner back, we're gonna have it set up. Across from each other, F', U', and that solves the slot. Okay, so I set up the cube so that we again have the cross. Let's try to fill in the green-orange slot that's right here. The corner is here, the edge is here. Now notice a subtle difference in here. The edge is in the back position like we want it to, like we wanted to do it before, but notice that now if I do R U R' to fill in the corner, the edge does come along, but its flip is incorrect. This is because this is not exactly the case we looked at before. The case we looked at before looked like this. The corner was here, the edge was here, but look that the colors on top before were different: green, orange. The colors of the corner and the edge now are the same: orange and orange. So they're the same thing, but this edge is flipped. So we can only use the previous method if the colors on the top are different. In this case, they're the same, and we can't do the same thing because, as you can see, the, the edge would be the wrong way. So this is case number 2. We need to do this differently. What we're going to do this time is that we need to form a pair of the corner and the edge in the top layer here, and then insert that pair in the slot, which is going to be easy. So we need to bring this edge behind this corner to form a pair. We need to place it in here. So what we're going to do is we're going to hide the corner away from the top layer, just like we did before, bring the edge to this convenient position, and bring the corner back. So to do this in this— to do it in this case, I'm going to hide this corner away from the top layer. The top layer now contains only this edge that I care about. I want this edge to be right here so that when I bring the corner back, notice that I joined the two pieces together. Now once you have a pair like this, it can be inserted into its slot quite easily. If the white is pointing to the right, then we need to do U' F' U F. It's pretty intuitive. You need to open the slot, align the whites, and close the slot, pretty much. Okay, so I want to discuss the symmetrical case of the case I just showed you, case #2, where the colors on top of the corner and the edge are same, so red and red, but this time the white sticker points to the left instead of to the right like it did just now. Just before. So what we need to do again is we need to move this edge just behind that corner to this position to replace the blue-yellow edge so that we can form a pair. So I need to hide this corner away from the top layer, move the edge in place of the blue-yellow edge, and then restore the corner and form a pair that way. So we have a subtle problem here that I want to discuss in addition. You need to have a notion of what you care about on the cube and what you don't care about. We care about this slot because we already filled it in, we do not want to mess it up again. We also care about this slot because it's already filled in, so we never want to move these slots to the top layer. The top layer is our working space and it should never contain things that we already built. What we have not built is this slot and the slot in the back. Anyway, so if I want to hide this corner, I could do it, for example, like so. But the problem, again, just as I said, is that I would be moving these two pairs that are already solved into the top layer, which I can't do because I would mess them up. So what I need to do first is I need to move this corner away and hide it like so, because by hiding it like this, I'm moving these two pieces that I don't care about into the top layer. So the only thing in the top layer that I do care about now is that edge that we want to put behind the corner. So we want to put this edge behind the corner instead of the blue-yellow piece like we said. So when I hide the corner, I need this edge twice in that position, and when I bring the corner, the two get joined. So this time we have an F2L pair like this, white points to the left, so you want to do U R U' R', and that will solve it.
More from Andrej

Skill Issue: Andrej Karpathy on Code Agents, AutoResearch, and the Loopy Era of AI









Andrej Karpathy: Tesla AI, Self-Driving, Optimus, Aliens, and AGI | Lex Fridman Podcast #333