Tutorial: Solve the Rubik's Cube blind
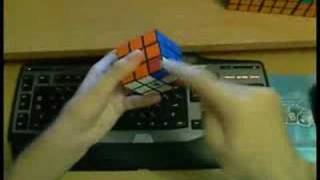
Learn the Pochmann method to solve a Rubik's Cube blindfolded using a buffer piece and four permutation algorithms. The method solves edges first, then corners, with a memorization strategy that encodes moves as letter pairs. Practice and the parity-fix R permutation handle the trickiest cases.
Chapters
Hello everyone. In this video, I'll show you how to solve the Rubik's Cube blindfolded. Now, people are always impressed by this ability, and they assume that it's really hard, but as I'll show you in this video, it's actually not that bad. There are some subtleties involved, but I'll cover everything, hopefully, and with some practice, you should be able to solve your Rubik's Cube blind today or tomorrow. Soon. It depends on how much practice you get, obviously. But the only requirement is that you already know how to solve the Rubik's Cube, because otherwise you will get confused with the basic terminology. But that's pretty much it. I will teach you what we call the Pochmann method. The Pochmann method is the easiest way to solve the Rubik's Cube blindfolded. You only need to know 4 algorithms to do it. You actually only need to know 2, but it's best that you know 4, and all 4 of them are PLLs. So you may already know all the algorithms. So the idea of the Pochmann method is to solve one piece at a time. You'll be solving one piece on the Rubik's Cube, one by one, until they're all solved. And we will be doing first all of the edges and then all of the corners. You can also do it the other way around, but in this tutorial I'll do the edges first because they are much easier to show and explain. So here's the basic idea: I scrambled the cube by rearranging a couple of edges around. We will always hold the Rubik's Cube in the same way by convention. Let's say yellow on top, orange in front. Always like this. Next, we will denote this position here between the top and the right layers to be the buffer position. The edge in the buffer position is called the buffer piece. So in this case, the orange-green is in the buffer position and is called the buffer piece. We will always be solving this buffer piece by shooting it to its correct location. The correct location for this edge is of course here, between the orange and the green center. So ideally, we would like to swap this orange-green edge with this white-green edge that currently occupies that position, and then the white-green edge would move to the buffer position to be solved in the next iteration. However, it is impossible to just make a single swap of two edges on a Rubik's Cube. In addition to swapping these two edges, we also have to have some kind of a side effect. In our case, the side effect is going to be that we're going to swap two corners somewhere on the Rubik's Cube. That is just simply the best that we can do. So one of the algorithms that we will be using to swap edges will be the T permutation, which you may already know. It swaps the edge in this position, the buffer position, and this position here. Or in other words, we can say that it shoots the buffer piece across from this position to here. As a byproduct, of course, it will swap these two corners, but just ignore the fact for now, and I will tell you later why this is not a big deal. Now, there appears to be a problem. The T permutation swaps two edges here and here, but we want to swap this edge with this white-green edge like we said before. So in order to make to make sure that we swap the correct pieces, we have to use what we call setup moves. They work pretty intuitively. You simply have to move the edge that you want to swap the buffer piece with into this position right here, then perform the swap, and then undo that setup move. So I will demonstrate now. We need this white-green in this position so that the permutation, the T permutation, can swap the correct pieces. So I will move that edge into the correct position I'll perform the T permutation that will swap the two and swap those two corners, and now I will undo that setup move. The end result is that the orange-green went to its correct position, the edge that was in there before, the white-green, is now in this position, the buffer position, and the corners are swapped. Everything else on the Rubik's Cube is of course the same. We can now proceed in the same way. The next edge to be solved in the buffer position we can see is the white-green. It has to come here between the white and the green center, so we need to swap it with the orange-white edge. So we will move this orange-white edge to this position. This is the setup move. Now we will swap out those two edges using the T permutation. And we will undo our setup move to return everything to the original positioning. The end result, of course, is that the white-green edge is solved to its correct position. The edge that was there before is now in the buffer position, the orange-white. And look, the two corners that we swapped last time are now swapped again and are once again in their correct places. So we are currently— we are constantly solving and unsolving these two corners. There is a possibility that you need an odd number of swaps to solve the edges. In that case, you run into a minor problem, because when you are done with the edges, before you move on to solving the corners, you have to first correct these two corners by swapping them one more time. We call this the parity problem, and I will come back to it in a minute. One more thing that I want you to notice though is that we are always swapping these two corners every time we shoot the edge, and it is obviously extremely important that we always swap the two exact same corners. In other words, these two corners must never must never be moved away from the current positions by any setup move. So for example, you can't have a setup move like an F, because then when you do the T permutation and you shoot an edge, you would be swapping these two corners, and you must always be swapping the two same corners instead. So these three pieces here must never be moved away by setup moves. Otherwise, you are not constrained in any other moves that you can use for setup moves, so you can use D or s— small d or L, but you cannot use F and not B because they would be moving away these two corners. So just keep that always in mind, you cannot mess up the positioning of these two corners. I will now solve the next edge and show you that you don't only have to use the T permutation to solve these. This orange-white edge needs to come here between the orange and white center, so we need to swap it out with this blue-orange edge. As it turns out, it's a pain in the ass to bring this edge to this position here. Sometimes, like in this case, it is more convenient to use a J permutation instead, which will swap again these two corners, but it will swap these two edges here instead of these two edges here. So this is the J permutation. So the setup move in this case is something as simple as this. Notice that this is a perfectly allowed setup move. We are not changing the position of the two corners or the edge in between there, the buffer piece. We are simply moving this edge to that position. Now we will swap it out, so the J permutation, and I will undo that setup move. The end result: the white-orange is swapped, the edge that was there before is now in the buffer position, and the corners are once again unsolved. We now have only one more edge that we need to solve. This edge needs to come here. With it, I will illustrate one more, perhaps slightly subtle, issue that I have ignored until now. Not only is it important that you shoot this buffer piece into its correct position, but you must also shoot it there in its correct flip. So instead of thinking about swapping edges, perhaps it is more, more helpful to think about it as swapping stickers of those edges. Here's what I mean by that. I have a T permutation here. What the T permutation actually does is that it swaps this yellow sticker with this sticker here. These top stickers get swapped, and this sticker that was here before, the blue sticker, gets swapped with the sticker on the left. So these two side stickers actually are swapped, and these two top stickers are swapped. Of those edges. So that is important, and I will show you why. Here we have this blue-orange edge. When we do the setup move, we must make sure that this blue sticker ends up here, because this is the blue side. So it needs to replace this yellow sticker. So we need to place this edge into this position like before, but we need to make sure that the yellow sticker ends up on top there. So— because we need the blue to replace it. So the correct setup move in this case is D' L'. The yellow sticker of that edge is on top. Perform the T permutation and undo, and the cube is solved. In this case, it's almost exactly the same case, but the edge is flipped. So now we have the orange-blue, we need to shoot it to the exact same position but we have a different setup move because this orange sticker needs to come here to replace this yellow sticker here. So when we place this edge into here with the setup move, we need to make sure that the yellow is on top. So in this case, the setup move is actually D2 L. So that edge is moved there with the yellow on top. And now we can swap it and undo to solve. We are almost ready to start solving the corners. There's only one more issue that I have to cover because you will run into it every solve, perhaps several times. So let's just solve this random scramble here. So we have the red-green edge here, it has to come here between the red and the green center. So we'll just swap it out with that edge. So simple setup move, swap, T permutation, undo. Next edge. Wait, next edge in the buffer position is already in the correct position. Yellow-blue belongs there. So, uh, that's a problem. The reason is that every cube scramble has actually several cycles in it. So this and those cycles can be perhaps disconnected from each other. So we have a cycle here that was disconnected from the other cycle there. So what we have to do here is what we call "break into a new cycle." So we have the correct edge here, but we have to break into this cycle to solve it. To do that, we have to shoot this edge into any of these unsolved positions to break into it. So for example, I'll shoot it here because it's the simplest one. That's the setup move. I will swap it out So it will come here, and that orange-blue edge now ends up here, and now I can continue solving just like we did before. Orange-blue has to come here, it will replace the orange-white, then the orange-white will replace this orange-green, and then that orange-green will replace the yellow-blue again. So the yellow-blue will come back full circle into its correct position, and the cube will be solved then. By now, I have covered almost all the most important concepts, but admittedly, there were a lot of them. So before I go into the corners, I just wanna pull back for a second and present you with a very brief summary. So the idea is that we solve one edge at a time by shooting edges from the buffer position to their solved positions. As a byproduct, two corners somewhere else must be swapped as well. By convention, we decided that we will always be swapping these two corners here. Now, any permutation can be used, such as the T or either of the J's, depending on what gives the easiest setup move. So the T permutation swaps these two and shoots the edge here. This J permutation swaps those two corners again and swaps these two edges. And this J permutation, the inverse of that one, just shoots the edge here and swaps those two corners again. Now, Every iteration looks like setup move, permutation, and then undo setup move. The setup moves are intuitive, but I will still give you a website that lists most of them. Now, the setup moves must be such that they do not disturb the corners that are always being swapped. Also, remember that the setup moves must be such that the stickers are swapped, not only the correct edges. So when you place the edges into the position here for the T permutation, for example, Think about which stickers you're going to be swapping, not only which edges. And finally, the yellow-blue edge may sometimes go into its correct place in the buffer position. If the cube is not yet solved, you need to break into a new cycle and shoot that edge to any other unsolved position on the Rubik's Cube to break into that cycle, and you have to repeat this until everything is solved. OK, we can finally move on to solving the corners, and you will be happy to hear that it's almost exactly the same thing. That's right, everything applies in exactly the same way. Here are a couple of differences though. We need the new buffer position we have because we are now doing the corners, so the buffer position will be here. The corner in that position is again called the buffer piece. Now, as a byproduct of swapping two edges, we have to swap two corners. In exactly the same way, to shoot this corner to its correct position, we will have to swap two edges somewhere on the cube. By convention, we will always be swapping these two edges here. So to shoot corners to their correct positions, we will use the Y permutation or either one of the J permutations, whichever one yields the best setup move, the easiest setup move. So here I have them. The Y permutation will shoot that edge across the cube here. And swap those two edges. The J permutation will shoot that corner there and swap those two edges. And the inverse of the J permutation, I mean the reflection of that J permutation, will put that corner, will shoot it there and swap those two edges again. So the same things still apply. Every iteration still looks the same. We will find where the corner belongs to move the piece that we need to swap it with into any of these 3 locations without messing up the positioning of these 2 edges, perform a permutation, and then undo those setup moves. Now we may also have to break into new cycles just like before, so if we get the right corner in the buffer position, we must shoot it to some location that is still yet unsolved and just repeat until everything is— until all the cycles are solved and the Rubik's Cube is solved. I will demonstrate with a short demo. So here I have a scramble. In the buffer position, we have the white-orange-blue corner. It has to come here eventually. Now remember that we do not only have to place this corner into any of these 3 positions, but it is important that the correct sticker is on top. So which sticker do we need? This sticker when we do the Y or either of the J's will end up on top. And we need this sticker, this white sticker, to eventually end up here with the white face. So we need it to replace this blue sticker of this corner. So however we place this corner on the top here, we must make sure that the blue sticker is on top facing up. So this won't do because the red sticker is facing up. But we can do R2, and then we have that corner in one of these 3 positions, and the blue sticker is pointing up. So now I can swap those 2 edges, swap these 2 corners using a J permutation, and I have to undo my setup move. So that was put in the correct place, the corner that was there is now here, and the 2 are swapped. Next corner is the blue-red-white. Corner. It has to come to this position here. Now again, we have the blue sticker on top. The blue sticker has to replace this yellow sticker on that corner, so we have to make sure that this yellow sticker is facing up after we place this corner to either one of these positions. So the correct setup move in this case is D' R. We move that corner there, yellow is pointing up, and we did not disturb these 3 pieces with our setup moves. So we can now perform the Y permutation and undo our setup moves. Okay, before I go into how you memorize all this, I have to revisit the parity problem and to show you what it is and how to handle it. So here we have a scramble that I set up just to illustrate the problem. Let's solve this. So let's solve the edge. Orange-green has to come here, so setup move, very easy on purpose, undo setup move, edges are solved. Let's do the corners. Blue-white-orange has to come here. Blue sticker is facing top, so it needs to be replaced with the yellow sticker. So the yellow sticker must be on the top, so this is the setup move. Now, the white permutation, undo setup move. So all the corners are done. So— wait a minute, why aren't we done? So the problem is that we solved the edges— to solve the edges, we used the T permutation, which not only swapped those two edges but also unsolved these two corners by swapping them. And we were done with the edges before they had a chance to be swapped back in. And the exact same thing happened with the corners. We only made one corner swap, so these two edges are now swapped as well. So in the event that you solve all of your edges using odd number of swaps, like in our case we did one single swap, which is odd, you will always run into this case. I talk about it way too long because it is actually really simple to fix. This is just a simple R permutation, as you can see. So, remember how I told you that you need to know 4 algorithms to do this method? Well, I lied. Gotcha! You actually need to know one more to handle the parity issue. So, if you use odd number of swaps for the edges, this is what the cube will look like. And to fix it, always remember that you must fix the parity just by applying the R permutation. Okay, so that took a while, but I wanted to make sure that I covered everything and that this tutorial made at least marginal sense. Now, that is all you need to know to solve your Rubik's Cube using the Pochmann method. To solve it blind, you will need to know how to memorize the cube. I think it is best to illustrate how you memorize the cube using an example. Okay, here's the scramble that I'll be using—scramble with yellow on top, orange in front: L2 HREURU R U' F R'. Okay so as you can see the first layer is already solved—I've done this on purpose because the video is already long enough so we will only do part of the cube. Okay let's start memorizing this mess! So we will always just remember the positions that we want to shoot to. So here we have the first edge, we will do the edges first. Green-orange. We want to shoot this to the green-orange position on the Rubik's Cube, which is here. So the green sticker will be replaced by the blue sticker, the orange sticker will be replaced by the red sticker of this edge. So this blue-red edge will be next to be solved in the next iteration, and it will be here. So after we swap these two edges, next one to do is blue-red. After we solve the blue-red, you can see that orange-yellow will be next. We solve orange-yellow. What's next? Yellow-blue. Now do not memorize yellow-blue just yet. Why? Because yellow-blue is actually the correct edge, remember? So we have to break into a new cycle. So let's pick a position on the Rubik's Cube that we have not shot to yet. So, uh, for example, this position is the easiest because it requires no setup move. We can just do the T permutation. So we will shoot the yellow-blue edge into here. So instead of yellow-blue, remember yellow-green. So after we shoot here, what is the next edge to be solved? Orange-blue. So orange-blue is here. So instead of orange-blue, next we will have green-red. Instead of green-red, next iteration we will have green-yellow. So we remember green-yellow. And then we shoot— after we shoot to green-yellow here, then remember that we stored the yellow-blue edge in this position, so we will get it back to our buffer position now. And we have to yet again break into new cycle. Now the only position left unsolved is here, so we will have to shoot here. Easiest way to do that is to shoot to yellow-red, so remember yellow-red. And it will pop this piece out, this piece out, and we'll have it here. And then the last thing we have to remember is red-yellow. So we shoot the correct— the piece here, and the yellow-blue edge that we just stored there will come to the correct place, and everything should be solved then. So in our case, as you can see, we had 9 positions that we have to shoot to in order to solve the edges. So there's a way to double-check that this number is correct. And that you have not missed out any edges in the cube that are still unsolved. Here's the formula that you need to know: the number of items that you have to remember is the number of wrong pieces plus the number of cycles minus 2. So let's count the number of wrong pieces for us, the edges. We have 1, 2, 3, 4, 5, 6, 7, 8 wrong unsolved edges, and these 4 edges are of course solved. So we have 8 wrong pieces, 8 wrong edges. Now the number of cycles we had to solve, we had the first cycle, then we had one cycle that we had to break into where we shot the yellow-blue edge across to here, and then we had one last cycle when we had to shoot here at the very end. So we had 3 cycles that we had to solve. So we have 8 3 2 9. So indeed we have the correct number. Now of course, 9 is odd, so remember that at the end, do not forget to do the parity. Okay, so the corners should be much easier. So we have yellow, blue, orange as our first corner to be solved in the buffer position. So read them like this clockwise: yellow, blue, orange. So the yellow, blue, orange has to come here. Now, do you have to remember yellow, blue, orange? No, actually you only have to remember yellow, blue. But how does that make any sense? You say, "If you just say yellow blue, then the last color could be yellow blue orange, or it could be yellow blue red. It could be in two positions." Oh yes, that is true. It is ambiguous, but we will remove this ambiguity by insisting that we always read the colors of corners in clockwise direction. So yellow blue orange exists because I'm tracing out the clockwise motion if I call them yellow blue orange. But yellow blue red does not exist. So just saying yellow blue unambiguously means yellow blue orange. So first we have yellow blue. After doing yellow blue, the red yellow green edge will come to the buffer, the buffer position. Now that is the correct corner for this buffer position, so we have to break into a new cycle. Now the only position that is still yet unsolved is this position here, so we will have to shoot here. The easiest thing to shoot into is just to do the J permutation, so we will shoot to yellow, red, blue. So we only have to remember yellow, red though. And then after yellow, red, we have red, blue. So that's the 3 things that we have to remember. So is 3 correct? So we have the number of wrong pieces, which is 1, 2, 3, then the number of cycles— remember we had the first cycle is just this, and the second cycle that we had to break into, so that's 2 cycles, and then -2. So we have 3 2 2 3. So we indeed have the correct number, and we're fine. So clearly, if you can remember the sequence of positions, you can solve the Rubik's Cube blindfolded. Because it encodes all the positions that we need to shoot to one by one to solve the cube. Now there are many ways to actually remember this sequence of positions. One of the most common ways is the storing method, which is also what I use. So, um, I'll also give you a link to a forum thread where people discuss different methods that they came up with. Maybe you would be interested in that. So here's what I do. So first, the first item to remember is G O. Now I don't obviously remember the letters G O, For me, G-O is a gong, or things associated with it, like loud bangs or explosions and stuff like that. So I would imagine a loud gong going off somewhere. Next item is B-R. For me, B-R is brick or brain. So now my story is that I'm in a dark room and I hear a loud bang. I'm curious as to what happened when suddenly a brick falls from the darkness and almost hits me in the head. Next is O-I. O-I for me is oil. So as I observe the brick, I notice that it is all oily and disgusting. I wonder what the substance is. YG is usually ignite. So as I examine the brick, it all of a sudden ignites into giant flames and stuff. Now I just keep going on like that. Now it is actually quite interesting how easy it is to recall these kinds of stories. Now there are two keys to making it even easier though. First, you have to really experience everything. Actually imagine every sensation in your head. When I examined my brick, I imagined the oily and disgusting substance and Maybe I even touch it briefly and stick my fingers in it, and when I hear the loud bang, I get scared. Now, second, make the story as ridiculous as possible. It is much easier to recall ridiculous stories. Often in my stories I have elves riding spaceships. You know, they're using their interstellar jump drives to teleport themselves to McDonald's just to buy a unicorn. Things like that. Like, I usually have a lot of fun with my stories. Now, not only is it easy to recall these stories, but I sometimes am afraid that I will never forget them. I can recall the stories months later if I try, and it scares me a little. Okay, so I finally get to solve this case, so let's do it. First one, we have the green-orange, so it has to go here. So setup move, T permutation, setup move, undo setup move. Blue-red, right here, so setup move, G permutation, undo setup move. Orange-yellow, I have to rotate the cube to perform the G permutation slightly, undo. Now yellow-green, so see, we broke into a new cycle there. Next we have orange-blue, right here, D permutation, undo. Green red, undo. Now we have green yellow, so complicated setup move: L' D' L'. D permutation, undo. Now we have blue-yellow, so remember we break— we're breaking into a new cycle, shooting it here. And finally we have red-yellow, so this, and now a J permutation to fix that. Now remember we only made 9 swaps, so we have to fix the corners because they are not how we memorized them. They are swapped from what we memorized, so we have to do the R permutation to fix the parity. Now we have the corners exactly like how we memorized them. First is the yellow-blue, so that's just the Y permutation with no setup move. And now we have red-yellow— I mean yellow-red, so it's right here, so the J permutation. And finally we have red-blue, so this is the setup move and the Y permutation. Undo setup move. Take off blindfold. Yay! That's it. So that was a long tutorial, but it had to be that way. I'm sorry. I'm sure I bored a few of you, but I'm sure that there are people that are still confused, and there should be many of them, and that's okay. Like, this is not easy, and there was a lot of material that I had to cover. So what you have to do next is this: First, check the video description for links, algorithms, setup and solutions. And second, try this for yourself. Convince yourself that this works and see why and how it works. Definitely try to solve a few cubes without a blindfold first and then work on the blindness and memorization later. But first, just get the method down 100%. Okay, that's it for now. Bye-bye. So here I have the T permutation. Wait, wrong cube. Here I have the T permutation, so the corners will now be much easier.
More from Andrej

Skill Issue: Andrej Karpathy on Code Agents, AutoResearch, and the Loopy Era of AI










Andrej Karpathy: Tesla AI, Self-Driving, Optimus, Aliens, and AGI | Lex Fridman Podcast #333