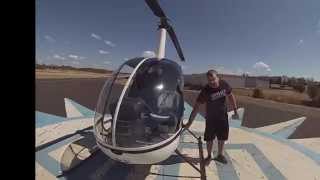
This content was created by Kenny Keller. This content was uploaded by Kenny Keller. This is a YouTube video titled "#1 Robinson R22 Preflight Helicopter Training Video Online Ground School" created on October 9, 2015. It features David Redmond, a flight instructor at Odyssey Aeronautics, providing a detailed preflight checklist and instructions for student pilots on the R22 helicopter, including safety checks and equipment preparation.
Chapters
Sam. My name is David Redmond. I'm a flight instructor at Odyssey Aeronautics and me, along with our other two flight instructors are going to take you through a pre flight on an R22. So as a student pilot, when you walk out to the helicopter, the first thing there's a couple of things that could be a little different depending on your school. But generally a lot of times you're going to have a book that maybe has the keys and a Hobbs. So one of the first things I do is take the keys, verify which one, and then you're going to want to look at the Hobbs sheet and write down the Hobbs and fill out the info for the flight, that kind of thing, and then verify that the Hobbs matches up with the last flight. Next thing you'll typically want to do is go ahead and hang up your headset. Also, if the helicopter has a tie down on the rotor blade, now is a good time to go ahead and take that up, push up on the blade to level it, and then we're ready to go with the actual preflight. Now, most schools will have some sort of pre flight checklist, typically right in front of the seat. This checklist a lot of times is just a little bit of a short and condensed version of the pre flight checklist that you will find in the R22 POH. So if you have one of these, you can actually follow along with me at home. But inside here will be a checklist for pre flight. So before I pre flight, there's a couple of things that you're typically going to want to go ahead and pull out and have handy. One thing I like to do is I like to do pre flights with a flashlight. There's a lot of hidden areas in the ship that if you don't have a flashlight, you're really not going to be able to see what's going on. So I'll take one of these out, throw in my back pocket. The other thing you're going to need is a fuel tester. We're going to have to sample the gas to look for some water and debris and that kind of stuff. Also, these fuel testers typically have a little screwdriver on the end and that comes in handy if you find a little loose screw or something that you can tighten back up. Another thing I find handy is if right now, before you even start, you go ahead and a lot of times there'll be a little rag under the seat, something like that. I like to carry that around with me because you're going to be Wiggling parts, moving things that can be kind of dirty. And the saying is if you're pre flight, your hands are clean. Afterwards you didn't go thorough enough. So I like to have a little rag that I can wipe my hands off as I'm doing a pre flight. Alright, so now we're just going to go ahead and start with checklist and I'm just going to go right on down the line. So master switch on, clean up, turn the master on. Oil pressure, alternator, governor lights, low fuel. So this bank right here on our ship, they might be a little different on yours. I'm going to verify that the governor light is off, oil pressure light is working and alternator is on. These other lights we have to test to make sure that they are working. Bulb can be burned out and you might not even know it. So in this panel right here, I'm going to open it up and there's a couple of push to test switches. So we're testing our warning switches. We have our tail rotor chip, main rotor chip, main rotor temperature and low fuel. And you just push these buttons and then you watch for them to light up on the gauge. So if you look up here, there's my tail rotor chip, there's my main rotor chip, there's my main rotor temp. And low fuel usually takes a second. There's low fuel. So now I've verified that those bulbs work, the warning system works and those bulbs aren't burned out. So next we're going to check our fuel quantity. With the master on, you go ahead and look at the fuel gauge and just make sure that you have appropriate fuel for your flight. Rotor brake. You want to make sure your rotor brake is off. In this ship, we don't have one, but your rotor brake will be right up here and it's on a little pull chain and you pull down release and then don't just let go of it, just let it go up slowly. Next we're going to check all of our lights to make sure they're working. So we're going to turn on our strobe and we're going to turn on our nav lights. Once the nav lights are on, you can walk around and see that this side will be a green light and it's on the right side. There will be a red light on the left side. We want to verify that our strobe light is flashing. This we leave on pretty much all the time so that whenever the master is on, this is flashing so it catches people's attention that stuff might start moving. And at the very back of the ship, you walk around and verify that your white tail light is on.