#287 Robinson R-22 Preflight-Coffee with Kenny
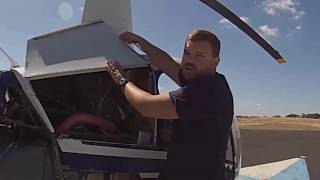
Kenny Keller walks through a detailed Robinson R22 preflight checklist with Odyssey Aeronautics instructors, covering everything from fuel sampling and transmission oil to main rotor blade inspections and tail rotor gearbox checks. The seven-video series shows the specific tools you need, like a flashlight and fuel tester, and practical tips for each step.
Chapters
Hey, day 287. Coffee with Kenny. Gonna have some fun today. We're gonna roll our Robinson R22 pre flight videos. I am Kenny Keller, creator, Helicopter Land ground school. We have seven videos that's included in the R22 membership within helicopter high ground school. And you get that with the private commercial CFI or professional pilot memberships. All include the Robinson R22. They. They all include the R22 membership. I'm sorry, just the R22 section. So we are live right now. If there's anybody out there, type in the box. This is the first time we've done a live event from the new studio with our new Internet. And we hadn't done any live from here since we've been here in April because the Internet was so slow. So we're getting ready to show video number one. Are you over there and alive, Heather? What are you laughing about? You're keeping your head down because you're laughing. Everything looks good. All right, let's click off that special little thing we're going to show them for the next one. Yep, go for it. We're gonna roll you the first video in the R22 preflight section and we'll be back shortly.
My name is David Redmond. I'm a flight instructor at Odyssey Aeronautics. And me, along with our other two flight instructors are going to take you through a pre flight on an R22. So as a student pilot, when you walk out to the helicopter, the first thing, there's a couple things that could be a little different depending on your school. But generally, a lot of times you're going to have a book that maybe has the keys and a Hobbs. So one of the first things I do is take the keys, verify which one, and then you're going to want to look at the hob sheet and write down the Hobbs and fill out the info for the flight, that kind of thing, and then verify that the Hobbs matches up with the last flight. Next thing you'll typically want to do is go ahead and hang up your headset. Also, if the helicopter has a tie down on the rotor blade, now is a good time to go ahead and take that up, push up on the blade to level it, and then we're ready to go with the actual pre flight. Now, most schools will have some sort of pre flight checklist, typically right in front of the seat. This checklist a lot of times is just a little bit of a short and condensed version of the pre flight checklist that you will find in the R22 POH. So if you have one of these, you can actually follow along with me at home. But inside here will be a checklist for pre flight. So before I pre flight there's a couple of things that you're typically going to want to go ahead and pull out and have handy. One thing I like to do is I like to do pre flights with a flashlight. There's a lot of hidden areas in the ship that if you don't have a flashlight, you're really not going to be able to see what's going on. So I'll take one of these out, throw in my back pocket. The other thing you're going to need is a fuel tester. We're going to have to sample the gas to look for some water and debris and that kind of stuff. Also these fuel testers typically have a little screwdriver on the end and that comes in handy if you find a little loose screw or something that you can tighten back up. Another thing I find handy is if right now, before you even start, you go ahead and a lot of times there will be a little rag under the seat, something like that. I like to carry that around with me because you're going to be wiggling parts, moving things that can be kind of dirty. And the saying is if you're pre flight, your hands are clean. Afterwards you didn't go thorough enough. So I like to have a little rag that I can wipe my hands off as I'm doing a pre flight flight. Alright, so now we're just going to go ahead and start with our checklist and I'm just going to go right on down the line. So master switch on, clean up, turn the master on, oil pressure, alternator governor lights, low fuel. So this bank right here on our ship, they might be a little different on yours. I'm going to verify that the governor light is off, oil pressure light is working and alternator is on. These other lights we have to test to make sure that they are working. Bulb can be burned out, you might not even know it. So in this panel right here, I'm going to open it up and there's a couple of push to test switches. So we're testing our warning switches. We have our tail rotor chip, main rotor chip, main rotor temperature and low fuel. And you just push these buttons and then you watch for them to light up on the gauge. So if you look up here, there's my tear rotor chip, there's my main rotor chip, there's my main rotor temp and low fuel usually Takes a second. There's low fuel. So now I've verified that those bulbs work. The warning system works and those bulbs aren't burned out. So next we're going to check our fuel quantity. With the master on, you go ahead and look at the fuel gauge and just make sure that you have appropriate fuel for your flight rotor brake. You want to make sure your rotor brake is off. In this ship, we don't have one, but your rotor brake will be right up here and it's on a little pull chain and you pull down release and then don't just let go of it, just let it go up slowly. Next, we're going to check all of our lights to make sure they're working. So we're going to turn on our strobe and we're going to turn on our nav lights. Once the nav lights are on, you can walk around and see that this side will be a green light and it's on the right side. There will be a red light on the left side. We want to verify that our strobe light is flashing. This we leave on pretty much all the time. So that whenever the master is on, this is flashing. So it catches people's attention. That stuff might start moving. And at the very back of the ship, you walk around and verify that your white tail light is on.
All right, that was video number one from the Robinson R22 pre flight section within Helicopter Land Ground School. Put your comments down below. If you're watching today, we know there's at least a few watchers out there. Nobody's made any comments. Our first live event in forever Halloween. We got a 10 day sale going on. We have a special in our private commercial CFI instrument, yearly memberships. And then the big professional pilot package. We got a code we can throw up there if Heather can slide that into the presentation. There we go. There's the code right there in the corner. Halloween 33 off. You can go below this video. You won't even need that code because we have links down below in the description box. We'll take you right direct to the page where you get the discount. If somehow you find your way to helicopterground.com and you don't see that the code is Halloween 33 off. It's an awesome deal. So go ahead and cue up video number two, Heather. Again, you get this with private commercial certified flight instructor. Any one of those memberships, you get all of the Robinson R22 pre flight videos and then other videos as well. We go through the PoH to help you memorize the things that you need to know. Number one, to be safe and prudent pilot. But number two, to get through the checkride. Because during the checkride, you're going to be stressed out by the examiner. You're going to be taxing your brain. So with the POH section of the Robinson R22 manual, you can go through and watch the videos, listen to the audio, and memorize this stuff. So there's no way the examiner is going to stump you. So let's go ahead and roll video number two, and we'll be back.
So next, I'm going to show you how to check the landing light. Now, there's an old way and a new way to check the landing light. I'm going to show you both and explain why Robinson recommends the new way to check the landing light. The old way, you would turn the master on and you would turn the landing light on. However, the landing light will not come on unless your clutch switch is engaged. Well, as soon as I engage that, the clutch starts actuating, tightening up the belts. So the old way, you would pull the clutch breaker so the clutch would not move. Then you could hit the clutch switch, and now you could come up front and you can verify that your two landing lights are on. Now, as soon as you verify they're on, you want to come back around and turn them back off, because these are a big drain on the battery. So you don't want to leave them on while you're checking other things. So you would come back around here, you would disengage the clutch, push the clutch breaker back in, turn off the landing light. Now, as a note, On Beta and Beta 2s, the landing light switch will be here, not here. Now, this is how I was taught this is how the old way of doing it. But Robinson actually recommends a new way. Reason being is that if the landing light gets checked a thousand times, this breaker will start to wear out. However, the clutch, it's designed to actuate on and off and on and off and on and off every single flight. So they actually say they're not worried about the clutch engaging. So the new way, you leave the breaker in master on, you go ahead and turn the clutch on, you'll hear it engaging. Turn on the landing light, walk around, verify the landing light works, then come back around, turn it off, disengage the clutch, go ahead and wait a couple of seconds for the clutch to fully disengage. Once it's fully disengaged, then you can turn the master off. So this is a good time to explain that this helicopter is an R22hp. It's a little different than the Beta or Beta 2. And the main differences are one, we have an 0320 rather than an 0360. But the engines are actually identical except for the bore and stroke. So everything will apply one to the other. The other main difference is that we do not have an aux tank. So I open up this panel door, you'll see it looks a lot different because we don't have a fuel tank in here, which is going to be good for these videos because I can show you all the inner working. Now, when you open up these panel doors, be careful, especially when it's windy, because if you're standing right here and it happens all the time, it can blow and it can hit you on the head and just rattle things around. So watch out in the wind, maybe keep a finger up here to hold onto it. So going down our checklist, we obviously cannot check our ox fuel or aux fuel drain because we don't have one. Next is gearbox oil. So right here we have our main rotor transmission. This takes our power goes across and then it sends that power upward. And you can see right here is a little sight gauge. And it has an oil level in here and it has a little sticker up here saying add or full. Now, this oil level, I like to check this in the hangar before I roll it out. I've actually canceled a flight because I thought my oil level was too low. Rolled it in the hangar, set it down, and there it came back up just because the ship wasn't level. Gearbox teletemp. You want to verify this teletemp and verify that the reading was where it was last time you flew. These burn up as the temperatures go up, so you typically want to look at the last bar and you'll get to know your helicopter where the bar is. And you want to watch out for this. If these are burning up more and more, it means that the transmission is getting hotter and hotter. Back here we have. This is the drive shaft going through. So next we're going to check our flex coupling and our yoke flanges. So this is the flex coupling yoke flange. These right here are actually the yoke flanges. And the star in the middle is the flex coupling. And what this allows is the drive shaft to have a little bit of flex in it because it has to move up and down for the clutch, so it doesn't have to be perfectly straight. It can be a little bit off. What you want to check for. And here's a good time to go ahead and grab this, and you can go ahead and slowly. And you want to call up blades turning slowly, begin spinning it. And the first thing I check is that all four of these bolts are tight and the torque stripes are across and they're good. Next, I want to check for cracking. Where you typically can get a crack is on the inside of these flex couplings. They can start to get a crack in here. So you want to look at both sides and verify that there's no cracks. Everything looks tight, And we're not going to have any problems. Next is going to be the sprag clutch. The sprag clutch is contained inside this. This is our upper sheaven. Now, just like if you're riding a bicycle and you're pedaling and pedaling, pedaling, and you stop pedaling, the tires don't stop spinning. It has a freewheeling unit in it. So the engine is normally driving the rotor system. But then if the engine stops, you can see the shaft continues spinning. So we want to check that that works. Also, there's a teletemp on it to make sure it's not getting too hot. But inside of here. And this goes along with any bearings, anything like that. You're looking for any grease, any oil, anything dripping out of this. That's a sign of a failed bearing and something going wrong, wrong in there. Also on the outer edge here, you're looking for cracks on these bolts. And you can kind of ratchet this. You can push, stop, push, stop, push. And that helps spin all the whole rotor system. So we're looking for any cracks, any loose bolts, any oil dripping out. All looks good. Static source. So we have instruments that require static pressure and pitot pressure. This line right here is your static source. You want to make sure it's clear, not clogged, and it's all tight and secure. Control rod ends up over here. These control rods actually go all the way up to your swash plate up top. What I'm going to do is, as you're looking at this, I'm going to go ahead and move the cyclic around. And as I move that, you can see they go up and down and work their magic to tell the swash plate where we want to go. So I start on one end, and I wiggle. Check bolts, check bolts. Make sure they're tight. All the mounts are tight, these guys. Tight, Tight. They should wiggle like that, but they should be in there tight. And make sure that they are all secure and not coming loose. Steel tube frame. So you can see this frame is what this transmission is bolted into. And so you want to check out and make sure that the big nut here, and this one here, is holding the main rotor gearbox in place. You want to check along this frame that all these bolts are tight, and then along these welds, that's where you can possibly get a crack. So you're checking all this steel tube frame goes back over here and up here, this bar right here, making sure everything's tight, no corrosion, no cracks. And if you look underneath the gearbox, you can actually look to the backside and you can see the bolt. It might be hard to see in the camera, but there's actually bolt on the back side. That's the other mounting point for the transmission. You can verify that those are tight, all fasteners. So you'll have a lot of electrical lines and tubes. And so you want to make sure that these are all secure. You have zip ties holding them in place. And you want to make sure there's no chafing, rubbing split wires. And you go up and along, make sure that they are all tight, all going to where they need to go. Tail rotor control. So this tube right here, it's called a push pull tube because it pushes and pulls. Starts right here, and then it comes up, goes all the way back, and then it goes back in here. This is what your tail rotor is connected to. So your pedals up there are moving back and forth as I move this. So you want to verify that all these bolts are tight, that this has full movement. You don't want to slam it, but you want to go full one way, full the other way and make sure you have full movement and it's easy movement. Next, this line right here, this gearbox has to be kept cool. This line right here actually has cool air coming from the fan and it blows it on the gearbox to make sure it doesn't get hot. So you want to check the condition of this tube and it's in there tight. Now we're done in here, but before you close this up, always take one last look to make sure you didn't leave a checklist or a rag or something like that. Make sure that this is clear before you close it. These guys just go in close tight and close tight. Okay, so now we're going to be doing the engine right side. First one is the carb air ducts. So we have down here, we have the air intake for the carburetor which is buried in here. You notice we have two air intakes. One of them is starting from up here. And this is our cold air intake. This is where we typically get most of our air from.
All right, we got to give a shout out to Orison, who is watching. First person to comment today, Orson logs in every single day to our Coffee with Kenny videos. Today's 287. So thanks Orison, for being probably the biggest viewer of our daily video where we talk about helicopter training, all kinds of different things, careers, so on, anything's fair game. Helicopter training related. So today we're rolling our R22 videos. Another one of our ground school members who logs in often is Clarence. And Clarence is always going, hey Kenny, how come you never Talk about your R22 section or your R44 section or your Nstrom section inside helicopter land ground school? And I'm like, you know, I'm just always so busy marketing the fact that we have private commercial CFI and instrument and then a big professional pilot package that includes all those. I forget to mention that we also have sections with for R22 specific, R44 specific, and instrument specific. So thanks Clarence for pointing that out. So today we're rolling all of them. And we've rolled how many head of there too? We've rolled two of seven pre flight videos. We're going to roll the other five for you. First I'm going to have Heather pop a code up here for you. On the screen right now we have a special going on to the end till Halloween night at midnight. Of course it has to end Halloween night at midnight. Right? You got 10 days to take advantage of our Halloween sale. Up there is the code. If you wander onto helicopterground.com but below this video in the description box, there's links that take you directly to the private yearly commercial instrument and CFI yearly, where it takes you right to it. You don't even need the code. And then the big professional pilot that's down there too. That is a savings of around 300 bucks probably in that general vicinity. That's a really good savings. So I'm going to have Heather queue up the next video. And I just wanted to mention Orson because see anybody else make a comment. Captain Seal, hello there. Thanks for tuning in today. Anybody else watching, ask a question. Bring up topic for a future video. Ask a question about our membership. So we'll both be here monitoring questions. Heather's over there running cameras and monitoring questions. So go ahead and roll video number three.
Okay, next we're going to do the engine right side first, we're going to start out with the carb air ducts. Inside here we have a carburetor. And this is the air filter. And you notice how we have two airlines coming in. This one is our cold air intake. It's just outside air going straight into the engine. This one is our warm air intake. And there's a lever inside called carb heat. And when you pull the lever, it takes all of the air from this. You notice this is an exhaust pipe. So the air coming in gets heated up from this exhaust, gets warmer, and then goes into the engine. Both of these are filtered, so you can run both of them at any time. Next we have engine sheet metal. Generally, you just want to look at the engine and check all of these screws, make sure they're all tight screws up here. Wiggle things around and make sure nothing's coming loose. A lot of times you might get a little bit of an oil drip at the bottom. These are the cylinder head covers. And if you get a little oil drip on the bottom, you can take a screwdriver and just tighten these up just a little bit. Electrical terminals we have some terminals up here that send electricity off to do this and that. And you want to make sure that they are all tight. And you see these covers on there that prevents anything from shorting out. So you want to make sure that's tight up against the firewall is tight in here. And make sure that you don't have any loose wires and everything is in there tight. Oil cooler door so we have an oil cooler, and that is this right here. And what it does is oil will go through these two lines and one will go in and one will go out. And then air is coming through and blowing down through that to cool the oil off. And what you want to do is check in here to make sure that it hasn't been clogged up by grass or a mouse hasn't made a nest in or whatnot. So you open this door, make sure it's all clear. And then now we're going to check the oil lines. So I start at one end, make sure that these fittings are tight and you're not getting oil dripping out through here. And then I follow the line all the way over to the front of the engine. And you can just follow them up here. And you make sure that the fittings are tight and that there isn't any oil dripping down these lines. Exhaust system so these two are the exhaust pipes. And you can tell which ones they are, because you can see they're burnt, blackened, and they are the hot air coming out of the engine. So you want to make sure that the bolts are on tight. Wiggle it around. Make sure your muffler is on tight, V belt condition. So if we come back here on the bottom of the engine, and it can be kind of hard to see with the camera, but we have the two belts down here, and you want to make sure that both of those are in their grooves and they're not half out and the condition of it. Also, there's a teletimp up here. So you want to make sure that the teletemp has not burned up any further than it has been in the normal conditions. There's a big bearing right there. As long as we're here, this is the starter. This comes out and engages this gear and turns the engine over to start it. So you want to make sure that this is bolted on tight. And the electrical terminals are on there tight. Now, these tubes back here, we have the exhaust. These two are the intakes for the engine. And you want to make sure there's a bolt in the back and a bolt up front. And you want to make sure that those are on tight front and back. These are oil return lines. So the oil gets pumped to the top of the engine, and these just let it drain back down into the bottom of the engine. So you want to make sure that these are on tight and no oil is coming out. These are spark plugs right here. So you want to make sure these lines, you can see they're zip tied up tight. They're not rattling around and rubbing and cutting into something. And you want to make sure these are in there and nice and tight. One last thing we're going to check are magnetos. These are what sends spark to the spark plugs. It will be a big box on the front of the engine that you can see these wires are coming out of. And you want to push on it and make sure that it's on there tight. And you want to make sure it cannot twist, because if it twists, that's actually how you adjust it so you don't want it to be loose. This is our cooling fan. As the engine is running, this is sucking air in. And then it is directing it over the tops of the cylinder heads and down to keep the engine cool. So if you look right here, there's a big nut and there's a pin in there and a big torque stripe that goes through the middle. You want to make sure that this torque stripe is in line with this pin. If this has been split, that's a possible sign that the engine has actually been oversped and that has twisted from the force. Next, you want to check and make sure that the bottom of this, there's no standing water. There's, you know, a rat hasn't gone in there, made a nest or whatnot. There's actually a little drain hole down there to let water out in case it gets up there. Also, you want to check and make sure all these bolts are on tight. You can see you might have some washers on here. This is actually balancing for the engine so they spin this, see how it needs to be balanced and add weights to balance it out. And then you want to make sure all these fins are on there tight. And you actually just listen to it and you'll hear a fin if it has gone loose or is cracked or is going bad.
All right, we're back. Thanks for the question, Maverick, where I said say to Captain Seal. That was video number three. We got four more coming for you. These are Robinson R22 pre flight videos. And these are really good stuff. When our operations manager, Brian Rutledge, shot these for me out in California, when he sent them to me to do the editing after I was done, he's like, hey, what did you think? Think of that? And I'm like, man, if I was going to a checkride tomorrow and I was going to be flying an R22, I would absolutely watch every single one of those videos before going to the check ride. And I'd be confident the examiner would not stump me on a pre flight. And he's like, really? And I'm like, yeah, those three instructors? Well, you've seen one or two of them so far. There's three total instructors. All these guys did a phenomenal job. They're very, very detailed in these videos. And I was thrilled that they were a part of these videos and that Brian Rutledge sent these up for us. It's awesome. So we got four more to go. Number four is coming up. I'm gonna have Heather throw up the code again. We got a special code for you.
Oh.
My name is Dave Sipes. I'm a CFI here with Odyssey Aeronautics in Auburn, California. I'm gonna be talking to you a little bit.
All right, we're back. She'll fix it. That's okay. Hey, live production. That's the fun of live. You got to go with it and fix it no matter what. So anyway, there's the code Halloween3 3 off. So if you come back later or you go to our direct to our website, you can use that code for a discount on the private, commercial, CFI or instrument yearly memberships or off the big professional pilot package. Now you're right on YouTube right now. So. So you can go below in the description box. And because you're here watching this video, we've provided you links in the box that will take you directly to those sale prices. You won't even need the code. So we are very proud of our training. We've been online almost eight years now. And the Robinson R22 section comes with the private or the commercial or the CFI membership. It also comes with the big professional pilot membership. Professional pilot includes private, commercial, certified flight instructor and instrument. And that is a lifetime. It doesn't expire. So there's only a one time fee. So it's a pretty huge saving on the professional pilot membership. Again, it's not really even a membership because you only pay one time. You keep the training. So that code again, Halloween 33 off. 33 off. Or you go down below and click that link. So want to have Heather bring up the next video number five I think coming up next, right or no, still got to roll four. Alright, we'll see if we get it right this time. Here's video number four. Go ahead and roll it.
Hi, my name is Dave Sipes. I'm a CFI here with Odyssey Aeronautics in Auburn, California. I'm going to be talking to you a little bit more about the tail cone section and the empennage of the Robinson R22HP. So we're back here on the right side of the engine and tail. And to cover a couple more things, if you continue following your checklist in the engine compartment here, we're going to be checking the belts and the overall condition of the belts. This is a good time. When Dave Redmond was going over that spread clutch, you can see those belts moving. It's a good opportunity to just check to make sure you don't have any tears, cracks, rips or anything like that or visible damage of those belts. While you're also checking that belt, you also have a small wear ring right here. Now you can see that when these belts are disengaged, those flop around quite a bit. Robinson put this little ring in here to prevent those belts from eating into the frame as the engine is starting up. So we want to check the condition of that. Make sure there's no cuts or grooves or anything like that. If there are you can simply just loosen this up and turn it or replace it, depending on the level of wear. It's also a good idea right now to check the tension of the belts. And the easiest way to do that is take your hand and put one finger on each belt and just push it in and see how far you can. And this bar right here should come no further than the second knuckle on your fingers. If it is, then the belts might need a little bit of retention or a possible replacement. Now, up on the top side here, we're also going to check the clutch actuator. We're going to kind of give it a little wiggle if you can, to see if you can move it. We don't want a whole lot of excessive movement. We also checking for grease or any kind of other seepage coming out of the seal seam right here. Checking the teletemp. We're just going to make sure that there's no extreme temperatures experienced by that clutch actuator. Before we also get in more to the tail. We're actually going to check this tail rotor control right here. We're just going to check the play of it. I like to wiggle a little bit, maybe move it back and forth. And it's also a good opportunity to make sure that you don't have any interference within that tail rotor bell crank. So now we can move a little bit further back into the yoke flange and flex coupling right here for the tail rotor. As we turn in the main rotor system, you can see that those yoke flanges and flex couplings turn. It's a good idea to check these tensions on the nuts to make sure that those lock nuts are properly on there and you don't find any looseness and that the torque striping is unbroken on the backside of the engine. You also want to check the squirrel cage. You want to make sure that there's no cracks, wrinkles, dents or anything on that. You also want to go along these screws in the top and in the seam to make sure you don't have any loose or missing screws. Alright, now we're going to start getting into the tail cone and epinaz section. The first part I like to check is these mounting points right here. If you take your finger and reach behind here, you can feel the PAL nut that's on the other side of this bolt. You want to just put your finger back there and make sure that you can unscrew that bolt. There's also one up top here. So you just Reach around and kind of feel for that, making sure it's tight. We're also looking for any cracks or anything along these weld points or any slippage that might be noticed in the where these two mounting points are of the tail cone. You also want to check to make sure your antenna is tight. So you just put your hand on there and just wiggle a little bit. You don't want to rip it off though, so just be a little gentle, make sure it's secure. Alright. So as we start working our way down the tail cone and empennage, what we're going to be checking for is any kind of wrinkles or creases or anything like that. If the helicopters had a hard landing or anything, you're going to notice a lot of ripples here in the underside of the tail cone. We want to make sure that those aren't there and all so that the tail cone isn't drooping at all. The further we come back here, we're going to reach the first line of rivets here. We're going to check these rivets for what's called fretting. Fretting is kind of a very fine metallic graphite looking powder. And the fretting comes from the friction between the rivet and the tail cone. If you see that, it just means that one of these rivets is getting loose and it needs possible replacement. So we're just running our finger along that looking for the fretting and we're also feeling those rivets for any kind of looseness. Continuing to move back, we're looking for the inspection point to make sure that this plate cover is on here.
Good.
And that the screw is tightened in along the rivets the same way. And also on the bottom side, we're checking this antenna to make sure it's secure on there as well. Continuing to move back. Just running my hand alongside of the underside of the empennage and telecom here. Checking these rivets as well as well as this inspection point. Still looking for any kind of dents or cracks or dings or anything like that that can compromise the structural integrity of the tail cone. Come back to the strobe. I put my hand on it, just grip it a little bit and see if I can wiggle at all. I'm not wrenching down on it. Just making sure that it's secure and that it's not going to be flopping around during flight. Continue moving back, checking these rivets again. And also this inspection port here. Make sure that that is tight. Now we get back down here to the vertical stabilizer and the horizontal stabilizer. What we're checking for on each one of these is any kind of damage to the leading edge. So on the vertical stabilizer, just running my fingers along here, making sure that there's no dents or cracks or anything like that, that signifies that we hit something with that. And also on the bottom side here as well, checking for any kind of dents or damages to the leading edge of those stabilizers. Now we're going to come around here to the back, still checking these rivets on the top to make sure that those are tight and that there's no damage to this horizontal stabilizer. We're going to run our fingers along here and we're going to check to make sure that this trailing edge now is straight. We don't want to see any kind of bends or anything like that. Same way here for the vertical stabilizer. Doing the same thing, checking to make sure any kind of damage, cracks or any kind of bends or anything like that. We don't want to see any of that kind of stuff. Checking the rivets all the way down here. Now we're getting down to the stinger. Now the stinger does. It allows us to hit this instead of hitting the tail rotor. So you want to make sure that this is actually on tight. So these two bolts right here, you just reach it along the other side right here, make sure that those two attachment points are good. And also I put my hand under here to make sure that the metal along there is smooth. If we have had a stinger strike, you'll feel a very coarse roughness right there on the bottom, and that lets us know we might need to inspect a little bit of something else. So as we've checked that everything looks pretty good on the Stinger, we're going to come back up here and start looking at the tail rudder, gearbox and assembly.
All right, we're back. That's the first four section of seven videos from the Robinson R22 Edition to helicopter Online Ground School. We're proud of that section. You get that with any of our private commercial or CFI packages or with the big professional pilot package. Another comment from Orson. Orson was out and decided to save his money and wait for the colors to change before he went flying again. Good for you, Orson. Let us know where you're coming from. And even if you're coming along this video after it's. After it's live. We still monitor YouTube questions every single day. And we answer every single question. So if you're watching live now, put your questions down below. If you catch this later, still put your questions down below. We do a video every single day. Today is day 280 87. And as you can see, we're celebrating Halloween and we just put up some new letters on the wall yesterday. This is the opposite wall of the Hogs Wall. Many of you have seen the Hogs Wall of fame. We'll be back to that wall after the big Halloween sale is over. So you got 10 days including today. Sale ends Halloween night. So I'll have Heather throw the coat up here in the corner. Remember this code. If you come along later and go to helicopterground.com or come back to this video and go in the description box below. We have the links down there for you that take you direct to the cell for the yearly private, yearly commercial CFI or the big professional pilot package. All those come with a 30 day ironclad, no hassle, money back guarantee. We've had that in place the whole time that we've been online. We're proud of our training. We have filled an entire wall with happy ground school members. When they send in their pictures for any of those ratings, we put them up on the wall. We filled one entire wall up. And I mean a big wall of them. And now we've moved over to the stairway by Heather's office. So when somebody says you got testimonials. Yeah, we got a few. More Than a few. All right, Heather, if you want to get rid of that. There you go. And bring up the next video. I don't see any other fresh comments coming in. Awesome. Leave your comments down below. Here's the next video in the R22 pre flight video. Let's go ahead and roll it, Heather.
So as we've checked out, everything looks pretty good on the stinger. We're going to come back up here and start looking at the tail rudder gearbox and assembly. First thing we're going to check for here is going to be our oil level. We want to make sure that we can see oil on that inspection level. We're going to check to make sure our drain fill here is tight. You can notice that the safety wire is along here. So this shouldn't be loose at all. Coming down here to the tail rotor bell crank. This is the other end of that control rod that we noticed in the right side of the cowling. What we can do is just take this and move this along here to make sure that there's no Kind of interference with this wire down here. I also like to take the control rod and just make sure that there's any kind of looseness up or down, left or right. And I can also turn it a little bit while making sure that lock nut is tight. While onto the underside here, we're going to check this wire here, make sure that that's tight on the bottom of the tail rotor gearbox. That wire is our tail rotor chip detector. So we want to make sure that that's attached and tight on there. As we continue along the tail rotor here, we're going to continue checking these lock nuts in this belt crank to make sure everything is good and tight. Now we get to the swash plate assembly of the tail rotor. We have the stationary plate and then the rotating plate. The way we check the stationary plate of the swash plate is we just take it and just kind of give it a little wiggle, make sure that there's not any kind of excessive looseness on it. We come to the rotating plate and just make sure there's not any excessive looseness on that as well. A little bit of movement like this is okay. Much more than that. You might want to get something checked out. Next, we'll come down here to the pitch links. Pitch links are checked the same way as that tail rotor control rod. We just kind of give it a little wiggle. We give it a little left and right or up and down to see if any kind of movement is on that. That pitch link looks good. So I'll come up here and check the other one. Same method on here. Just kind of rotate them. Give it a little left, low right, up and down. Shouldn't have any movement in there. We're also going to check the. The lock nuts on these pitch links. So we're going to make sure that each one of those is okay on each side. So that pitch link is good and the lock nuts are good. The pitch link up here is good and the lock nuts up on the top here are good. Now we're going to come out here to the main rotor or, I'm sorry, the tail rotor blades here. We're going to check to make sure that these lock nuts are tight on there that hold on to the tail rotor blades. And we're also going to check the tail rotor blades themselves. Now what I would do is just run my hand along here and check that leading edge to make sure that there's no damage to the leading edge. Also checking the backside to make sure there's no damage to the Trailing edge of that. Now, as we start rotating this blade, you can notice that I can do this pretty easily. That's all the pressure we want to use, though. We just want to use fingertip pressure to rotate this blade. Now it will move the other direction. But being that the system is designed to move in rotation of the way it was designed, that's how we want to move that tail rotor. So once again, only fingertip pressure as we're moving this, we also don't want to get it going really fast where we just have to put our hand on it and stop. What that's going to do is just going to put a tremendous amount of strain and pressure all the way down the tail rotor drive shaft. And you can end up damaging something with that. So we're checking this tail rotor blade once again, looking for any kind of bends, cracks, or anything in the leading edge as well as the trailing edge. And as we get about to this point here, we're going to check this little hole here. We want to make sure that that hole is unobstructed. What that is is if there's any kind of water seepage or anything like that that somehow gets into this tail rotor blade, it has somewhere to drain out. That water actually adds weight to that tail rotor. And if it can't get out, you'll actually have an unbalanced tail rotor section. We're going to come down to the other tail rotor blade now. Check the same way. We're going to come down the leading edge here, making sure that there's no dents or any kind of damage to the leading edge as well as the trailing edge of that tail rotor system. I'm going to check these two lock nuts here on that to make sure the tail rotor is tight and both these tail rotor blades are good. One more thing here we're going to check on the tail rotor is our main hinge bolt right here for this, for the delta hinge of the tail rotor. Checking, make sure that doesn't turn. And I also want to take my hand here and just move this a little bit. Now, I'm not grabbing this thing and yanking it all over the place. You still, once again, just want to use fingertip pressure, but we're making sure that this area here, you can feel a good amount of tension in it, but you don't want it to be sloppy. And you also don't want it to be super tight to where you can't move it at all. So all the delta hinge there looks pretty good. So the Last thing for the tail rotor gearbox here is just going to be checking our tail temp to make sure that we don't have any kind of excessive temperatures in that gearbox. I also like to run my hand along the bottom of this gearbox to make sure that we don't have any small leaks or any kind of seepage. If we do, then we can get that addressed before it becomes a large problem. Now we're going to start working our way down the left side of the tail cone here. So the first thing I'm going to look for is this inspection port right here, making sure that this plastic cover is actually on and that these two screws are tight. So that looks good. So now we're just going to continue moving down the tail rotor, checking the rivets again, making sure that there's no fretting or any kind of looseness of those rivets. Also looking for damaged dings, dents, cracks or anything like that that can compromise the structural integrity of this tail comb coming down. Just rubbing my hands along those seams and checking those rivets coming out here. Still looking for dents or cracks or anything. Still, this tail cone is looking pretty good. Looking for this inspection point here, making sure that that's on as well and that that screw is tight. Continue coming back here. Check this seam right here for the same thing, the fretting and the loose rivets. And then we continue back for this left side of the engine and tail cone empanade section.
All right, back again, and Maverick had a good question. He said, hey, Kenny, I think you should do a video on lost logbooks, if you haven't already. And that's a topic I've never talked about, I can't think of. In 10 years of making videos, I've never talked about losing your logbook. You know, that's a great topic. And a person, if you're using a standard logbook, man, I'd just be making copies of every single sheet and putting them somewhere safe. And I know a lot of people are using online log books now, so I would think doing an online backup and making copies and keeping somewhere safe would be the way to do it. Because, man, if I could think of if I lost my log books, if this place burned down, I have three logbooks now, that'd be a nightmare. Trying to go back and duplicate all that over 20 years, that'd be a nightmare. So great topic, Maverick. Thanks for bringing that up. Let us know. Anybody got an idea on logbooks or what you've been Doing what's cool. What are the new online that are cool quite frankly, anymore. All I do is just log flight reviews or anything for like night currency. I don't even fill out a logbook anymore other than to keep myself current. I've got logbooks full of every flight. So it's like for me personally, hours don't matter anymore. And yes, I'm lucky to be that point. All right, so hope you're enjoying the R22 pre flight videos. We've got two more to roll for you. These guys do an excellent job. I still think watching those videos, they are really super detailed and those guys took the time to give you this really super detailed pre flight. I don't think they missed much of anything on on those. Those are really, really good. And those are part of the Robinson R22 section inside helicopter Land Ground School that you get that comes with private pilot, commercial pilot, or certified flight instructor. Let me mention this in case you're new to us. I am Kenny Keller, Creator, Helicopter Land Ground School. Private is standalone. Commercial membership includes the private and then the certified flight instructor membership that includes the the commercial and includes the private. So depending on how you're going about this, monthly might be the best option for you, which we don't do a sell on that because it's so cheap. Anyway, yearly is the next best option because that's going to save you some money versus the yearly and then the big professional pilot package. That one doesn't expire, that one's good for life. So we have the special going this month until the till Halloween night. It's a great deal. But remember, on the monthly and Heather's going to throw up the code for you or on the yearly, this is a membership. If you decide to take advantage of our sell, please remember you've got one year to remove your credit card. Let me go a little deeper. First off, you got 24 hours to test it out. You'll get the discounted price, but you won't be billed for 24 hours. If you log into sites and not right for you, you remove your credit card from Settings or go end it in PayPal and you'll be billed nothing. If you decide to keep the training, you've got one full year to utilize the training and in that year you must remove your credit card and the subscription on your own or email us. I can do it for you and Heather can do it for you and we're happy to do that for you. But one year from the date of when you sign up you will get billed again, that is on the yearly. So just remember that you've got a full year to unsubscribe. And we've had some people that have forgotten and like oh man, I meant to unsubscribe and then they email me and yes, we do a refund on that as long as it's within reason right now, like three years later. But just understand on the yearly, it is a yearly membership, just like the monthly is a membership. You can keep it as long as you like. You can keep cancel absolutely anytime. So let me see if we got any other questions that came in. Derek Henson, I'm a new private pilot for fixed wing. How much time and money would it take to learn to fly a helicopter? That is a great question. Thank you Derek for asking that. Since you're doing an add on, you know that the private fixed wing you had to have 40 hours total for the helicopter add on, you must have 20 dual and 10 solo. Now the average person isn't going to get it in that. Not saying you couldn't if you're really good at studying, but you have to go back through the private pilot. Make sure you refresh all your knowledge. And you got to have a minimum of 20 dual and a minimum 10 solo. So what is it going to cost? Depends on where you're flying, what's instructors charging, what is the aircraft rates? Because of course, as you know, you're already a pilot, instructors charge different rates and helicopters are anywhere from these days. A cheap one's going to be 300 an hour and, or you could be clear up to, you know, in the thousand dollar range flying a turbine aircraft. So most training helicopters are going to be somewhere around three to 500 hours. So you can take that times a minimum of 30 hours plus whatever ground time you're going to need with your instructor. You can save some money by joining helicopter airline ground school because that's what we designed it for. And I'm gonna throw in a question today a person asked me, hey, I'm, I'm going through flight school. I'm doing good in the flight training, but with home life and my studying, man, I'm having a hard time learning the material. Is your product right for me? And I'm like, absolutely. That's why we built it. Helicopter online ground school is built to supplement anything that you're doing, whether you're doing self study or you're doing one on one with an instructor. Even if you're at a part 141 flight school where you have to do a certain amount of ground. You can still use our, our training to supplement that training. That's why the videos are broken down just like you see today in these R22 videos. We try to keep them somewhere three to five minutes. Sometimes they might go as much as 15. But you can go through the course step by step and it has a resume course. Just like if you're watching a show on Amazon and you go switch TVs, you can resume on the other device. Ground school works the same way. You can log out of one device, log into another device, hit resume course and start going through it. And you can also see which videos have been completed, completed, which have not. So you can look at the course at any time and go, hey, I've complete, I've completed three quarters of the training. I still have this many videos to go. And then people say, well, hey, do you have something to mark for? You know, watch again once you've completed, it'll show completed. You have an opportunity to mark it uncompleted even though you've watched it. That way it will pop up. When you go back to overview and say, man, I had three videos. There was like three videos I want to watch again or 10 videos I want to watch again. If you mark them uncomplete, when you look, you'll see completed, completed, completed, uncompleted. So you'll know that you purposely did that so that you can go back and mark those. That was a great question, Orson. With drones, I'm more concerned hitting one of those than birds that they sit and hover. Seems like they could be harder to see. Yeah, yeah, the whole drone thing, that's another great big can of worms. Pilots got to be vigilant, man. You got to be always looking outside and not spending too much time inside the cockpit playing with fancy gadgets. And a lot of jobs that we do, you get. You're in the cockpit a lot because of working different radios or even as a new private pilot, you can be distracted because you're messing with radios. Learning to fly by feel and looking outside is a frickin number one. And so many people spend way too much time in the cockpit, monkey with gadgets when they should be looking outside. As a VFR pilot, you should know how to be looking outside and you should know the sound of the aircraft, the feel of the aircraft. You'll get good at it. The more you fly, you'll know, I know I'm flying 80 knots versus 100 knots or you'll know RPM when it's high or low, the more experience you get, the better you'll get at all that. All right, well, Heather, we better. Kenny, I haven't flown in about 13 years. I have a private pilot. What do you suggest I do to get current? Jump in an aircraft Maverick, and go do it. And number one, are you a ground school member? If not, sign up for a month and refresh your knowledge would also be great. Or refresh the knowledge on your own. But man, if I haven't flew in 13 years, I'd go find me a flight somewhere. Somebody giving dual training, go get a couple hours. You'll be amazed at how quick it will come back. I flew with a guy in EMS who was a retired navy pilot and he is about like you. He hadn't flown in like 13 years or more because when he came to work at the EMS base, he was still on the old airspace. So that was changed many years ago. And he was amazed at how fast the flying came back to him. Now the ground part was the hard part for him. And he told me that as an experienced retired Navy pilot, he's like the flying came back immediately. It was. I was amazed at how fast I got back into it. But he said the ground kicked my ass. And that's back when I was an EMS pilot, long before I started helicopter land ground school. And I can tell you it's a problem in the industry. It's a problem across the board in every industry. Lack of knowledge. Lack of knowledge is what gets people in trouble. Knowledge is what keeps you safe. Knowledge is what gets you through the problems and issues. So that is a great question, Maverick. I would just call up a flight school and I would schedule some time and go, go fly with an instructor. It'll come back and I believe you're a member. Let me know if you remember or not. Well, let's roll the next video. Heather, I think we've got two more to go of the Robinson R22 pre flight videos. Take it away, Heather.
Hi, my name is Austin boa. I'm another one of the flight instructors here at Odyssey Aeronautics. I'm going to be taking you through some of the last parts of the pre flight here on the R22 GP. Alright, so now we'll start the pre flight on the left side of the engine. We'll work our way from the rear portion all the way up towards the front. One of the first things you want to look at, it may be kind of hard to see on the camera. It's going to be up here, right by the scroll cage. There's a tall temp there. Want to make sure that that doesn't change from before the flight, after the flight. Just making sure that the same amount of boxes are lit up by the temperature. Make sure that nothing got too hot. I also just want to check the belts on this side, make sure those aren't coming off. There's nothing wrong on this bottom portion here. Moving up from there, we'll look at our flywheel here. Make sure that there's no cracked or missing teeth, anything like that that could cause any issues as the engine's running or as we're trying to start it, anything like that. Moving up from there, we'll go to the alternator. Check this belt first. Make sure it's not loose. It's not going to be coming off of the alternator at all. It's not too tight. This is a pretty good tightness right here. We also want to check the general condition of alternators. Make sure that that's not loose. That's not going anywhere. Nothing obvious has fallen off. The safety wire here is installed. We also want to check this tube here. This provides cooling air from our squirrel cage to cool off the alternator. So just check that, make sure there's no leaks, that that air is going to pass through there and be able to cool off the alternator as it should. On the left side here, you want to check the exhaust as well. The checks here are the same as on the right side of the engine. So we won't go through that too much. Over here, though, it's a little bit easier to get a look at the muffler as well as this shroud right here. This shroud is where we actually get our heat for our cabin heat. So you want to definitely check this, make sure there's no obvious cracks or dents, anything that could cause a leak here. Because if there is a leak, that would mean that we were getting carbon monoxide leaked into the cabin heat that we're pumping in to the cockpit. So we want to make sure that there's no issues there. We're not going to get carbon monoxide or anything like that there. So along with the exhaust, everything over here, including the valve covers, spark plugs, spark plug wires, that's all going to be the same check that you did on the right side here. The one different thing that we do have over here is this is actually where we get our manifold pressure reading. So you want to check that, make sure that that's loose or not Loose rather. And you know, that's an important gauge that we want there. We'll move on down from there. Well, you want to check the intakes, all that stuff like you did the other side. This is our duct for our cabin heat that we talked about earlier. You want to make sure there's no tears in this. You can see this goes down to our shroud down here and that's where it actually picks up that heat. So it's actually drawing air in through here on the side of the helicopter. And then it comes down through that tube down to our shroud there. Then we want to move up. At that point. You may want to check the throttle. So you just want to reach down. My hand may be kind of blocking it there, so I can reach around here. Here's our throttle linkage right here. So you want to check this, make sure that that's not loose. And then one big thing you want to do as well is you want to actually check that the correlator is working. So with the correlator you want to add throttle as you raise collective. So what you want to do is I like to lean over, just grab the collective and then we'll raise the collective. And you can see that the throttle is actually increasing as I raise collective, whereas I lower collective, it decreases that throttle. So you want to make sure that that correlator is working and it's doing that. We also want to make sure we can override that in case we have a tail rotor failure or anything like that. Want to make sure that we can prevent that correlator from rolling the throttle on. So what we do at that point, we roll our throttle all the way into the over travel spring or the detent. And then again we raise that collective and you'll see that the throttle doesn't move as we raise or lower collective when they roll into the detent like that. Alright, so now we've checked our throttle. Now that we've done that, we want to go ahead and pull our dipstick out. I'm not going to actually do that, but you're just going to unscrew that. You want to have an oil rag handy. You want to make sure that we have between four and six quarts of oil, as well as the condition of the oil as well. Putting the dipstick back in, make sure it's just hand tight. You don't tighten it too much because as the engine heats up and cools down when you go for a flight, it actually tightens up even more. Makes it difficult for the next person to get off. So you want to make sure that you only go hand tight on that. On this side as well. You could also see the magneto that Dave Redmond was talking about. On the other side you can see it a little bit better over here. Again you just look at it, check that it's not too loose. It's not going to shake back and forth because that affects the timing of the magneto. So that's a big thing that that's not loose at all. Alright. So the next thing that we're going to check is the fuel. Make sure that we're getting good fuel going into the engine. On our hp we only have two points to check. That's going to be the gas collider down here. And then as well as the bottom of the tank which will be further up on the side. We'll show you that in a minute. On any beta or Beta two you'll have two tanks. So you'll have one more extra point to check on the auxiliary. But for us we only have these two. So we'll start down here at the gas collater. This is an important spot. This is one of the last filters that the fuel actually goes through before it goes into the carburetor. So you can see here's our gas collater, acts as kind of a filter. And we have our fuel line running down to the carburetor here. So while we're checking this as well, you can check that fuel line. Make sure that there's no leaks there, no fuel leaking out of it or anything like that. So now we'll come back down here to our drain. You'll just stick your fuel tester. It should look like this. We'll have a screwdriver in it on one end. And then we just put the fuel in this upper portion here. So we'll put that underneath our tube there. We just push up and that will get us a sample of fuel out of it. Might get a little fuel on your hands. That's no big deal. So what we're looking for here in the fuel, it should be blue in color. That indicates that it's 100 low lead fuel, which is what we run in the R22 helicopter. Big things to look for is any floating debris in the top. That's all going to be lighter than the fuel. And you'll see it floating in the top. Any water that may get in it will show as bubbles in the bottom of the fuel. It's actually more dense Than fuel. So you'll see that on the bottom. So that fuel looks pretty good. Let's go ahead and come up here to the side. This drains off the bottom of our tank here. So we want to check this out as well. On this one, this helicopter, you want to make sure that you push on this metal portion of the tube rather than this rubber piece. Otherwise it could get pushed back and you won't get a sample of fuel anymore. So we just want to push there on that metal tube. Get a small sample of fuel from there as well. May leak a little on the side. Just make sure you have your rag handy so that you can wipe that off. And again, looking for the same thing, you can see it's still blue in color. There's no water on the bottom, bottom or any sediment floating around the top. So at that point I'll go ahead and put it back into the tank. Looks like pretty clean fuel. It may depend on your flight school whether they allow you to put this fuel back into the tank or not. But at our school we do allow that. As long as it's a clean sample of fuel that we get. Just want to be careful to not drop this fuel tester back in the tank. Obviously it's not easy to get it back out. Alright, so now we'll kind of run through our last check. We want to check right before we actually jump in the helicopter and go to fly it. One of the first things, or one of the first last things you want to check is just the general condition of the skids. We want to take a checklist. Let me go ahead and grab my checklist here. And you want to make sure that we have enough meat on the skid shoes. And the best way to do that is just to take your checklist and stick it under the skids like that. If it doesn't fit, then there's not a left, not enough left on the skid shoes that are right here and right here where it's actually connected to these cross tubes right here. You also want to check all these bolts here, make sure those are all tight. You want to come back here to our cross tube back here. And if you can see that, you want to make sure there's no major bends in that. It shouldn't look like a smiley face. It'll kind of get bent and that will indicate that someone's had a hard landing. Once that happens, it kind of uses up all the spring that those skids have. So if there's another hard landing, there's nothing left There to really save the helicopter or help cushion that landing. So at that point you wouldn't want to fly it. If there's any major bends in it, you want to get a mechanic and possibly get that replaced. So now we've checked the skids, we want to go around, check all the same things on the other side of the helicopter too. You also want to check the controls, make sure that those are appropriately secured. It'll be different on each helicopter, how the control is actually secure in. But you know, if you're flying with dual controls, make sure that those are all secure where they need to be. If you're flying solo, you want to remove all these controls. If you have a passenger that you're taking up, you want to make sure that they know to make sure they don't get their seat belt wrapped around the collective. Otherwise it could actually limit how much you can raise that collective up or down. If you're flying with the doors on as well, you want to make sure that the doors are secured properly. It is easy to not put these doors on. Right. So you want to make sure that both these points here, the door is in there securely. You also want to make sure that there is a cotter pin. Ideally there will be two cotter pins for each one of these points, but a minimum of at least one cotter pin that's secured. It's not going to break off. Otherwise that door could come loose and jiggle its way off at that point. So you just want to make sure that those are secure there.
Yeah. Coffee's tasted. Oh, coffee's tasting good today. Cold, windy, raining, October day. God, I hate seeing summer go well. That was video number six of seven of the Robinson R22 pre flight videos. Orson says hogs is the greatest. Thank you, Orson. From one of our biggest fans who's tunes in every day. Today's 287 Coffee with Kenny. We do a video every day celebrating Halloween, as you can see, having a blast. We're getting ready to roll the last video. We'll wrap it up pretty quick, so throw any more questions you got, even if this isn't live later. We answer YouTube comments pretty much daily. Even on the weekends. I try to answer them every single day and try to answer every single person. YouTube is a big part of what we do and the daily video is a big part of what we do. So when somebody takes the time to comment, we try to at least acknowledge your comment. And you know, it's fun getting a lot of different opinions and things and of course, some people, you get haters once in a while. But, you know, we did pretty good with the haters. We know that's going to happen, right? We least want to get you thinking about things, bring up different topics and. And the one thing that just pops my mind immediately is there are so many different styles of teaching and there's so many different ways of doing things as long as the maneuver, whatever it is you're doing is safe. And there's tons of different ways of studying helicopter line ground school is one opportunity. I had one guy email me one day and said, well, hey, I want a refund because I can just do this on my own. And I'm like, yeah, okay, no problem. We have no problem with our 100% money back, no hassle guarantee. And anybody can study on their own if they want to. I mean, there's a lot of books. But that's why I created helicopter land school, because I had to do it on my own in the beginning. Instructors I flew with neat guys, still my friends today. But they weren't big on doing ground school. And that's why I failed my first private pilot checkride. And as much as that hurt, all these years later, I have helicopter on ground school and I created because of that first failure. And that's it. I talk about that all the time. So, any new comments? Getting ready to roll the last video. I see no new comments. Let's bring up video seven. This is the Robinson R22 preflight video number seven. These guys do a freaking incredible job. I think it's awesome. This is part of the membership site. You get the R22 section. There's also an R44 section and an instrument section. So with any of the memberships or not any. Doesn't come with instrument Instruments, a standalone course because it was built after everything else. But the R22 comes with private commercial or CFI. So let's roll that last video and we'll be back to wrap up. So we'll see you shortly.
All right, so now you want to come around to the front and you want to check this vent here. It's a cabin vent, so you can open it up when you're flying and you'll get cool air blowing through, kind of cool it off in the summertime. You want to make sure that that's clear. There's no nest or bird's nest, anything like that in there. You also want to check on the hp. Your helicopter may not have it, but our battery is actually in the front of the Helicopter. So we have a tube right here that provides cooling air as we move forward to cool off our battery. So you want to make sure that that's clear. Otherwise you're not getting that cooling air to cool off that battery. One last thing to check up here is these trim strings. You want to make sure that you got both sides. You got enough there that you can actually see what the helicopter is doing if it's trimmed up. These are fairly easy to replace. So if they do go bad, just have them through a new set of trim strings up there. Alright, so now we're going to move on and check the actual blade itself. Super important check. You want to make sure that everything on this blade is how it should be. Otherwise something could go wrong and fight and then at that point you don't have a blade anymore. So this is a super important check. When we're down here at the tip of the blade, you want to check this tip weight here. There should be two screws that should be secure there. That shouldn't have any looseness there. It's been in a high speed, so it should be very secure. You also want to check this drain hole, just like you do on the tail rotor. You want to make sure that those are free so that if any water gets in there, it can drain out. It won't throw off the the weight of the blade itself. The next big thing that we want to check on the blade is for lamination. So we have this leading edge bar that we have right up here on the front and that connects to the rest of the blade here at this bond line. So this is a super important part that you want to check. You want to run your finger up and down it. You want to make sure that the paint hasn't been eaten away to that bond line. Once it does, it needs to be repainted immediately. You don't want to fly it. Once that paint does get up to that point, you just want to run your hand up and down and make sure it's smooth and that that paint hasn't gotten too far there. You want to do the same on the bottom as well. We also have a bond line here and you can see a little bit better what happens if that paint does get eaten away and that bond line starts to tear apart. So you have it bonded right here. And once that paint gets eaten away, you start getting dirt and bugs and air that starts eating away there. And eventually this will just fold down like that. And at that point you don't have a smooth airfoil. Anymore, and this becomes delaminated. So that's super important to check and make sure that that is all secure. You also want to check this trailing edge here, make sure there's no dents. That's all smooth there. And then I like to just take a step back, look at the entire blade as a whole, make sure there's no cracks anywhere up the blade, anything that indicates any obvious kind of wear or damage that. That you can't fly with. All right, so now we're going to jump up and check everything on the main rotor hub. You're gonna have to step up in order to reach all of that stuff. So, biggest thing as far as doing this, this cross tube right here is not. Can't handle the weight of being stepped on. It's actually placarded. It says no step, so we can't put any weight on that. This is actually going to be your step right here. So this is where you want to put your foot. What I like to do is I grab this frame back here, put one foot up here, and then you want to grab the gas cap just to kind of brace yourself. You're not pulling yourself up with the gas cap, but you can just kind of brace yourself, balance yourself using that. And then you just step up on this step here. Once we get up here, you want to check visually and physically, basically just this general condition of this cowling that we have here. Want to make sure there's no dents, any obvious problems there. Want to make sure all these screws are tight, these rivets. You want to check for fretting, anything like that. This pitot tube up here, as you come around the front, you want to make sure that that's clear and unobstruction. If you can see the front while you're up here, then you can do that. If not, I can't really reach it. You can step down and actually walk around and check the front for any bugs, anything like that. We'll move around, check the other side again, just visually and physically, make sure there's no dents, anything like that in there. Then we'll go ahead and move up to our main rotor hub here. We'll start here. We have these control rods. These are what actually transmits our inputs from the controls up to the main rotor hub up here. So you want to make sure that these are secure. You want to check all the bolts and nuts and all that. Here we have one control rod right here, one control rod over here. You want to move them up and down, make sure, they can move back and forth, but you're not have any play up or down. And then you have another control rod over on this other side here that if you can reach it. You definitely want to check that as well. We kind of have to reach your hand around the other side. You also want to check we have our stationary swash plate here. This doesn't rotate with everything. This is what these control rods actually move to transmit our inputs. So you want to make sure that'll move back and forth a little bit. But it shouldn't have any excessive play in it or anything like that. That's about as much as you want for it to move there. Alright, so now we're going to move to the rotating swash plate here. Just like the stationary swash plate, you want to check for any excessive play back and forth. It may have a little bit like this, but you don't want it to excessively move back and forth, forth, anything like that. You also want to check this bolt or not this bolt, this boot here. You want to check the top and the middle as well as the bottom here for any grease, anything leaking out of it. If you get any grease leaking out of it, it could indicate a possible bearing failure that may be coming up. So you want to check that. Then we'll move over to our pitch change links over here. So you want to basically move back and forth just like our control rods. But there shouldn't be any play up or down. You want to check these bolts at the bottom and at the top you want to check the torque striping and check that they are tight as well. We want to check that these safety wires are installed. These are important safety wires so that if this pitch link were to fail, it would still stay attached so that you could get the helicopter on the ground. So these are kind of your last resort to hold those pitch links on. You want to come around, check the other side too. Same thing. It should move back and forth, but not up or down. Check all the bolts and the torque striping. As long as you can reach all that, you can move everything around as you need in order to check everything as well. Moving our way up, you want to check these weights here. These are for balance. It balances with the scissor that we have over here. So you want to make sure that those are secure. Again, torque striping is lined up. So this is the rotating Swiss scissor here. You want to make sure the condition of that, that that's tight. All these bolts are secure. This is actually what attaches from our main rotor drive shaft and what turns the rotating swash plane and the pitch links, all that kind of thing. So you want to make sure that that is secure as well. Then we'll go ahead and rotate the blades around here a little bit. You also want to check these static stops too as well. If you can see that I kind of turned it a little early there. You want to make sure there's no cracking or anything like that. That's what actually, when you push up on the blade, that's what actually stops it from being pushed too far down so that it doesn't hit the tail rotor as it spins around. So go ahead and rotate the blades around this way. That way we can check our bolts up here. Now you have a better view of. This is our coning hinge here. So you want to go around, check all the bolts around the coning hinge, make sure those are all secure, all the torque striping lines up on all of those bolts. You also want to check this boot as well. Again, check for any grease, anything leaking out of it. Just as this one could indicate a bearing failure that's about to occur, then we're going to move over to our main rotor bolts here. Alright, so we want to check our coning hinges here. These two are what allow the blades to both move up as a result of lift and coning, which we'll cover in other grounds we videos. But these bolts are what allows the blades to cone. So you want to check those. You have torch striping again on these. That should all line up. They should be tight, not loose at all. We also have cotter pins going through them. You want to make sure that those cotter pins are there and are secure. Alright. So this is our main rotor bolt, probably the most important bolt on the helicopter. This is what actually keeps our blades attached to the rest of the helicopter. So you definitely want to check this. It also allows the blades to flap, so it's called a flapping hinge. So on this you want to again make sure it's tight. Check the torque striping as well as the cotter pin, the same as the other bolts. Alright. So once you've checked on this side, all the coning hinges on the feather hinge or feather bearing. Feather bearing and flapping hinge. You want to go ahead and just spin the blades around, grab either the trailing edge or the leading edge of the blade. Use gentle pressure to push it around as much as you can. And then once you get it about halfway around, I reach around Grab the other side and pull it the rest of the way around. And then again, just as we did the other side. Feather bearings. Check all the nuts, coning hinges, cotter pins, torx striping, flapping hinge there. Just make sure everything is the way it should be. As we checked on the other side.
Who says we can't have fun at helicopterland ground school? Clarence was making fun of me last night. I'm like, hey, can I have some fun? Yeah, I can. Because you know what, we work really hard here, but we also like to have fun too. And I have to mention, Heather has been working really hard on Instagram probably for over six months. So I'm not a big Instagrammer, but I know a lot of people are. Heather's been putting a lot of time and after effort into that. So for you people that are into Instagram, go check us out@helopterground.com, give us a little love over there. Because Heather has worked really, really hard on it and spent a lot of time, you know, digging up pictures and, you know, making posts and doing a lot. So do us a favor. And she's asked me to mention that in the past and I always forget. And I said, if I forget, forget today, just throw something at me across the hanger here or do something to get my attention. So check us out on Instagram. Give us a little love over there. Give us some love on this video, on this video today. If you haven't already, leave us a comment and even leave it in the comments down below. If not the live, because we're going to wrap it up. If you come along this video later, give us a comment again, I keep saying we answer comments every Single Day on YouTube. Try to get them answered every day. If not within a day or two. We got to thank everybody. Helicopter grounds online, ground schools turned into a phenomenal thing. It's went way beyond what I ever expected it to do and we're really proud of it. So got 10 days left of the Halloween sale. You got till midnight on Halloween night to take us up. Heather's gonna pop the code up, Halloween 33 off. But actually, if you go below in the description box, you don't even need that code because there's links down there for private, yearly, commercial, yearly that includes private certified flight instructor yearly that includes commercial and includes private, includes the R22 section, R44 section, Enstrom section. And then there's also a link down there for the professional pilot. If those links are working correctly, you click on them, it takes them to the those sign up page and you won't even have to enter the code. It's going to show you the discounted price so you can at least go see the kind of money that you're going to save. And then remember, 30 day money back, no hassle guarantee. And when I started this for six months or a year, people kept telling me, friends, family, even people that would purchase, man, 30 day money back, no hassle, man, I don't know if I would do that. And I said, you know what, you got to believe in yourself and you got to believe in your product. And I learned for some key people in the industry, I learned, I've learned from who I think are some of the best marketers in the world because that's how I've built this business is through marketing. Right? People think marketing is a dirty, dirty word. But in order to make a living and to have be an entrepreneur and a business owner getting cobwebs on me, you lost my train of thought. What was I saying, Heather? Money back guarantee. And so I've never, I've never wavered from that and I say the same thing every time. And today I'm going to go a little further with it. We are proud of our training. We have members from all over the world. There is no hassle with a 30 day ironclad, no, no hassle money back guarantee. That means if you're not satisfied, you got 30 days. And I do always say we don't even look for an excuse. I don't need an excuse. You don't have to tell me why you don't like or it wasn't, wasn't right for you. Hell, I've refunded from my gurus when I bought a product I wanted and then maybe I didn't have enough money that is there to prove that we have the faith in our product. So there is no hassle. If you request a refund, we zap you the money and we part as friends and you're always welcome back. And that's another fun thing is two people I can think of specifically that refunded said my instructor told me I didn't need this. Okay, no problem. Part as friends. Then within six to eight months I heard from both of those people, hey Kenny, I failed the oral portion of my checkride. I want to become a member again. Is that possible? I'm like, absolutely, we part as friends. You're always welcome back. Proofs in the pudding. So give us some love on today's video. Go check out Heather's post on Instagram. Go down below to take advantage of the Halloween sell. Links are all down below in the description box. You are on YouTube, so they are down below in the description box. Did I forget anything? All right, day two. 87. See you tomorrow in day two. 88. Peace out. Yep, Heather's moving.










