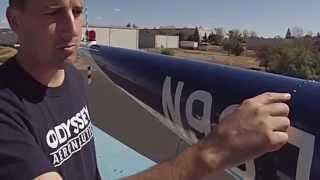
Dave Sipes (CFI, Odyssey Aeronautics) provides a step-by-step preflight inspection of the Robinson R22HP tail cone and empennage. He demonstrates physical checks for belts and the wear ring, belt tension (push-in to the second knuckle rule), clutch actuator play and seepage, tail rotor control play, yoke flanges/flex couplings and torque-strip integrity, squirrel cage and fasteners, rivet fretting and inspection ports, antenna and strobe security, leading and trailing edge damage on vertical/horizontal stabilizers, and stinger attachment/underside roughness. The segment ends as he transitions to inspect the tail rotor gearbox and assembly.
Chapters
Hi, my name is Dave Sipes. I'm a CFI here with Odyssey Aeronautics in Auburn, California. I'm going to be talking to you a little bit more about the tail cone section and the empennage of the Robinson R22HP. So we're back here on the right side of the engine and tail cone. And to cover a couple more things. If you continue following your checklist in the engine compartment here, we're going to be checking the belts and the overall condition of the belts. This is a good time. When Dave Redmond was going over that spread clutch, you can see those belts moving. It's a good opportunity to just check to make sure you don't have any tears, cracks, rips, or anything like that or visible damage of those belts. While you're also checking that belt, you also have a small wear ring right here. Now, you can see that when these belts are disengaged, those flop around quite a bit. Robinson put this little ring in here to prevent those belts from eating into the frame as the engine is starting up. So we want to check the condition of that. Make sure there's no cuts or grooves or anything like that. If there are, you can simply just loosen this up and turn it or replace it, depending on the level of wear. It's also a good idea right now to check the tension of the belts. And the easiest way to do that is take your hand and put one finger on each belt and just push it in and see how far you can. And this bar right here should come no further than the second knuckle on your fingers. If it is, then the belts might need a little bit of retention or a possible replacement. Now, up on the top side here, we're also going to check the clutch actuator. We're going to kind of give it a little wiggle, if you can, to see if you can move it. We don't want a whole lot of excessive movement. We also are checking for grease or any kind of other seepage coming out of the seam right here. Checking the teletemp. We're just going to make sure that there's no extreme temperatures experienced by that clutch actuator. Before we also get in more to the tail. We're actually going to check this tail rotor control right here. We're just going to check the play of it. I like to wiggle a little bit, maybe move it back and forth. And it's also a good opportunity to make sure that you don't have any interference within that tail rotor bell crank. So now we can move a little bit further back into the yoke flange and flex coupling right here for the tail rotor. As we turn these using the main rotor system, you can see that those yoke flanges and flex couplings turn. It's a good idea to check these tensions on the nuts to make sure that those lock nuts are properly on there and you don't find any looseness and that the torque striping is unbroken on the back side of the engine. You also want to check the squirrel cage. You want to make sure that there's no cracks, wrinkles, dents or anything on that. You also want to go along these screws in the top and in the seams to make sure you don't have any loose or missing screws. Alright, now we're going to start getting into the tail cone and epinaz section. The first part I like to check is these mounting points right here. If you take your finger and reach behind here, you can feel the PAL nut that's on the other side of this bolt. You want to just put your finger back there and make sure that you can unscrew that bolt. There's also one up top here, so you just reach around and kind of feel for that, making sure it's tight. We're also looking for any cracks or anything along these weld points or any slippage that might be noticed in where these two mounting points are of the tail comb. You also want to check to make sure your antenna is tight. So you just put your hand on there and just wiggle it a little bit. You don't want to rip it off though, so just be a little gentle, make sure it's secure. Alright. So as we start working our way down the tail cone and empennage, what we're going to be checking for is any kind of wrinkles or creases or anything like that. If the helicopter's had a hard landing or anything, you're going to notice a lot of ripples here in the underside of the tail cone. We want to make sure that those aren't there and also that the tail cone isn't drooping at all. The further we come back here, we're going to reach the first line of rivets here. We're going to check these rivets for what's called fretting. Fretting is kind of a very fine metallic graphite looking powder. And the fretting comes from the friction between the rivet and the tail cone. If you see that, it just means that one of These rivets is getting loose, and it needs possible replacement. So we're just running our finger along that, looking for the fretting. And we're also feeling those rivets for any kind of looseness. Continuing to move back, we're looking for the inspection point to make sure that this plate cover is on here. Good. And that the screw is tightened in along the rivets the same way. And also on the bottom side, we're checking this antenna to make sure it's secure on there as well. Continuing to move back. Just running my hand alongside of the underside of the empennage and tail cone here. Checking these rivets as well, as well as this inspection point. Still looking for any kind of dents or cracks or dings or anything like that that can compromise the structural integrity of the tail cone. Come back to the strobe. I put my hand on it. Just grip it a little bit and see if I can wiggle at all. I'm not wrenching down on it. Just making sure that it's secure and that it's not going to be flopping around during flight. Continue moving back, checking these rivets again. And also this inspection port here, make sure that that is tight. Now we get back down here to the vertical stabilizer and the horizontal stabilizer. What we're checking for on each one of these is any kind of damage to the leading edge. So on the vertical stabilizer, just running my fingers along here, making sure that there's no dents or cracks or anything like that. That signifies that we hit something with that. And also on the bottom side here as well, checking for any kind of dents or damages to the leading edge of those stabilizers. Now we're going to come around here to the back. Still checking these rivets on the top to make sure that those are tight and that there's no damage to this horizontal stabilizer. We're going to run our fingers along here. And we're going to check to make sure that this trailing edge now is straight. We don't want to see any kind of bends or anything like that. Same way here for the vertical stabilizer. Doing the same thing. Checking to make sure any kind of damage, cracks or any kind of bends or anything like. You don't want to see any of that kind of stuff. Checking the rivets all the way down here. Now we're getting down to the stinger. Now, what the stinger does, it allows us to hit this instead of hitting the tail rotor. So we want to make sure that this is actually on tight. So these two bolts right here, you just reach it along the other side right here. Make sure that those two attachment points are good. And also, I put my hand under here to make sure that the metal along there is smooth. If we have had a stinger strike, you'll feel a very coarse roughness right there on the bottom, and that lets us know we might need to inspect a little bit of something else. So, as we've checked out, everything looks pretty good on the stinger. We're going to come back up here and start looking at the tail rotor gearbox and assembly.