Autorotation Advanced Helicopter Robinson R-22 & Heli Trivia
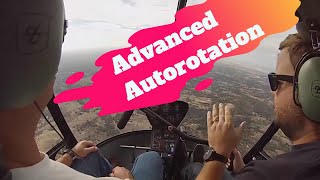
A recorded YouTube training session (Robinson R-22) led by David Redman (with Kenny Keller and Brian Rutledge) teaching autorotation fundamentals, phased instruction, and advanced coordination of collective/cyclic to control rotor RPM and airspeed. Covers: slow autorotation entries (maintain ~65 kt), recognizing engine/rotor separation (engine idles ~10–11 in. manifold pressure), rolling throttle to idle to enter autorotation, keeping RPMs in the green, gentle recovery by "cracking" throttle to ~80% so the governor remarries needles into the green (mentions governor bringing to ~104%), and coordinated use of collective and cyclic to change airspeed between ~45–65 kt while holding rotor RPM. Instructor guidance includes recommended training altitudes (initial entries ≥1,000 ft; recover around 400–500 ft), practice drills (collective-only, cyclic-only, then combined), and cautions about over-rolling throttle during recovery (can overdrive/overspeed). The video also contains live-host commentary, promotional material for Helicopter Online Ground School, and a short trivia/giveaway segment.
Questions this video answers
About 10–11 inches of manifold pressure.
Approximately 65 knots (with practice range down to ~45 knots).
About 1,000 ft or higher for initial practice entries.
Around 400–500 ft (may be higher depending on obstacles; 1,500 ft preferred for extra safety).
Climb-out: 53 knots and ~23 inches manifold pressure.
Chapters
And I start to lower collective. I do nothing else, but I start to lower the collective. Watch what happens to the attitude of the nose. So here I'm going to start lowering and you see how the nose drops. Now if I raise.
Hey, this is David Redman at Odyssey Aeronautics doing some more videos for helicopter online ground school. And today we're going to do some stuff on auto rotations. Now the videos we're shooting are two parts put together. It's going to be both for the new student trying to learn how to do an auto and also for a CFI trying to teach how to, you know, introduce an auto and techniques. Now, before we even get started, a couple of things we need to go over in. You know, this has to do with all the flying, but in general, especially in auto rotations, you want to be kind of do this stuff very slow and have very small smooth inputs. You don't want to, you know, be moving the thing all over the place because you're just going to cause RPMs to go everywhere. Also, as a flight instructor, you have to choose your words carefully. You don't want to be in the auto and go recovery or, you know, go, okay, roll on because the student's gonna panic and roll the throttle on. Always choose your words that make the student feel relaxed and do slow inputs. For example, when I'm ready to remarry the needles, I don't say roll on or power up. I say crack the throttle or like ease the RPMs up or gently bring the RPMs up. That way the student does it slower because that's what he or she should do. The first step, when I am going out and starting to introduce autorotations, the student must understand the correlation between raising and lowering the collective and the attitude of the aircraft. When you're entering an auto rotation, Ravi's going to take and lower the collective. Well, when you do that, the nose is going to drop. Now, to keep the nose from dropping as you're lowering collective, you have to be giving aft cyclic. Now we're not trying to give aft cyclic to climb, we're just trying to give aft cyclic so that the nose stays level and stays at about that 65 knot attitude. So as you're lowering the collective, you're giving a little aft cyclic just to keep the nose from dropping.
Alright? So first of all, I'm going to start like we start everything when the lights are out. Needles on the green, 1, 2, 3, in the green, feels good. Pull up a little bit of car beat because it's a Little cold today. So it's important to understand the relationship between the collective and your attitude. So if I'm flying along, I'm doing, let's say I'm doing 65 knots, and I start to lower collective. I do nothing else, but I start to lower the collective, watch what happens to the attitude of the nose. So here I'm going to start lowering, and you see how the nose drops. Now, if I raise collective, watch what happens. The nose comes back up. I'm doing no cyclic inputs at all. So it's important to understand that the collective will control your attitude as well. And think of it this way. When you raise collective, you're producing more lifts. So nose comes up. When you're lowering, nose drops. So when you're going in or auto, the reason why you're lowering collective and aft cyclic is not that you're trying to climb, it's that you're trying to keep that nose level.
So now we're to going, all right, now that you and the student have understand the correlation between collective and attitude, now we're ready to start doing auto entries. Now, I don't actually like to take students out and just go, here's how you do an auto. 3, 2, 1, boom. Now copy me. There's too much going on. They don't understand it, and it's just too much all at once. So kind of like how I approach almost any maneuver is I break it into its parts, and I slowly build the student up to where I want them to eventually be. Step one is I do what I call a slow auto entry. Now, when you're flying along, you're under powered flight. And then if you just start lowering collective, first of all, the nose will start to come down a little. So you have to go a little bit aft cyclic. And then if you just keep 65 knots with the cyclic and you start lowering collective a little more and a little more and a little more, your engine is going to be working less and less and less. Now, if you just slowly keep lowering collective, eventually you're going to be in an auto rotation. And that's basically what I'm doing, is just doing a nice slow entry. I'll be flying along, and I'll say, keep 65 knots, and I'll start lowering collective, and I'll watch the manifold pressure going down, down, down. Now, I'm familiar with my ship. The engine usually idles between 10 and 11 inches of manifold pressure. So I know when the manifold pressure gets there, the engine's not really doing anything. So I'll just continuously slowly start lowering collective. Lowering collective. And then when the engine gets down to around 10 to 11 inches, it's not really doing anything. And you'll feel the helicopter kind of start to yaw a little bit. And I say it's like the engine's confused. Am I powering the rotor system? Am I not? Am I powering it? Am I not? And right about there, you slow down a little on lowering the collective and go a little more. And then you'll start to see your engine. RPMs will start to separate from your rotor RPMs. As soon as they start to separate, you are in an auto rotation. Just stop lowering collective and at that point you can gently roll throttle off. And that is the smoothest, easiest way of just going from powered flight into an auto rotation. You're doing all the same stuff. It's just you're doing them much slower so you can learn it and it makes sense.
Now we're going to start our slow auto rotation entry once again. Lights, needles. One, two, three. Feels good. Carpet. I'm going to go and pull full up for this. Now what I'm going to try and do is maintain 65 knots, and all I'm going to do is start lowering collective and at about 10 to 11 inches of manifold pressure, the engine will be idling. At that point, I can roll throttle off. So maintaining 65 knots, I'm just going to slowly start lowering collective with right pedal and gentle aft cycling. Just trying to keep 65 knots to keep that nose from dropping. There's 14 inches of manifold pressure. 13, there's about 12. Helicopter's going to start to yaw a little bit. And that's the engine being a little confused. If I push through, you're going to see my rotor RPM start to separate a little. As soon as that rotor RPM starts to separate from the engine, I'm just going stop lowering collective. So right about there, you can see them start to separate. And then I can go ahead and roll to idle. And we're in an auto rotation. Nice and easy. Now, if you want to, you can go ahead and throw a turn into this. I always like to throw in a turn. That way everyone's not always stuck going straight ahead. So we'll just start a gentle turn.
Hey, Kenny, with helicopter only ground school, we got 10 more of these videos coming up for you. We're going to show you. This is a whole section from the Robinson R22 section inside helicopter island ground school. Clarence, one of our ground school members and always come up to the videos always goes, Kenny, you don't talk about the R22 section enough and the R44 section in the instrument section. So we're going to show you the rest of these videos. Heather's getting the next video lined up. And this is good stuff. This with Dave Redmond and Brian Rutledge, who is our operations manager, who you're going to be hearing and seeing a lot more of Brian here in the very near future. It's exciting stuff. So go ahead and roll the next video, Heather, and we'll be back shortly.
Now, once you have done this entry, you're now in an auto rotation, and you're looking to keep your RPMs in the green and your airspeed at 65 knots. Although, because you did it nice and smooth, they should all just be kind of there already. And they're not going to all of a sudden start flying all over the place. As long as you do that nice slow entry. Now you're going to glide a little bit. I like to throw in a turn. You know, I like to have my students just get used to turning. You know, the ship flies just fine in auto. It's like. It's like an airplane gliding. It flies perfectly well. So at this point, you do a turn, and then when you're ready, about 500ft or something like that, you're ready to recover. Now this again is where you want the students to be relaxed. You just say, look, all I'm going to do is just gently crack the throttle, and I'm slowly going to bring the engine RPMs up to 80%. Once they hit 80%, the governor's going to take over. The governor's going to bring it right up into the green. They're going to remarry. And then right then and there, once they're remarried, just slowly start raising collective. And then you're going to start loading up the engine. And then at that point, you're just going to climb on out. Things to watch out for. Students will get nervous and they'll roll on and they'll just keep rolling on. So watch out for that. Also wait until it kind of gets married. And then gently up. If you pull up real quick, you'll actually can overdrive the rotors because the correlator is going to give a bunch of gas to the engine. So right then and there, like everything, real gently marry the needles and then just slowly start easing up on the collective, and then you can fly away. And that's how you do basically every recovery. When you're not bringing it down to the ground. You're just wanting to enter, glide a little bit and then recover. And that's all you have to do for the entry on the bottom.
Just going to stop lowering collective. So right about there you can see them start to separate. And then I can go ahead and roll to idle and we're in an auto rotation. Nice and easy. Now if you want to, you can go and throw a turn into this. I always like to throw in a turn. That way everyone's not always stuck going straight ahead. So we'll just start a gentle turn off to the side. Good. Now that we're ready to recover, I' to gently crack the throttle slowly bring up to 80%, let the governor take over merits up to 104%. And then I can begin raising collective. All right, now to climb out, I'm going to bring it on back to 53 knots because that's our max rate of climb. I'm going to pull into about 23 inches of manifold pressure. That's just below our limits for the day. I'm going to let my car beat back down a little bit. Auburn Traffic Helicopter 781 is about five miles out to the west and doing maneuvers at 2500 and below Auburn. Let's get back up to 53 knots and 23 inches of manifold pressure because this will be our maximum rate of climb to climb up and do another auto entry.
Now, Dave, when you're teaching your students how to initiate these auto rotations, where do you tell them their eyes should be? Where should they be looking?
Typically, before you enter, you're doing a scan on the horizon and then as you're entering, I actually like to go ahead and look at my RPMs right here and then do a peripheral scan on the horizon with your peripheral vision, but your eyes right here. Because I want to see those RPMs until I kind of lock it in and then I'm back outside. Some students, you know, eyes outside and that's how they enter. And it's good they can see outside, but it's bad in that you come in and you have to figure out where are my RPMs. I don't know where they are. In my mind, if I'm up at 1500ft, I'm not going to hit a tree in about two to three seconds that it takes to enter the auto. So I like to look at my RPMs through the entry and then once I'm in the auto, look back outside. Alright, so we're climbing on back up I'm going to add just a little bit of carb heat. A little close to yellow. All right, ready for the next one? I'm going to do it exactly the same way, but I'm just going to do it a little faster. So I'm going to get on up to 65 knots. There we are. I'm going to go look around. Everything's clear. Lights are out. Needles are in the green. 1, 2, 3. In the green. Fuel's good. Car beats up. And I'm going to go three, two, one. I'm going to start lowering collected with right pedal. Gentle aft just to keep the nose level. You see my engine's working less, working less, working less. And then right around 10 to 11 inches in this ship, going to be a little bit of yawing. And then if I push just a little further, you'll see my rotor RPM start to separate. At that point, I stop lowering, roll off, pulling just a tiny bit of pitch, and there I'm in an auto rotation, nice and easy. And that's about the easiest way to enter an auto that I can figure out. Now, once we're ready to recover, I'm just going to gently crack the throttle, bring it up to 80%, let the governor take over. Then I'm going to just add a little bit of pitch in, and I'm going to slowly start climbing on out. Back to 53 knots, back about 23 inches of power. Back off a little bit on the cart before we're going to keep some cold.
Now, a common mistake is that when you're trying to remarry the needles, the student will just continue rolling on, especially when they're trying to recover. What that will happen is it will overdrive and you'll overspeed, and it will, you know, you'll have an engine overspeed and a rotor over speed. So when you're remearing the needles, just get it to 80% and the governor will take over. And the governor will bring it up to the green and just let the governor do its job. And then once it's up in the green, then you can slowly start raising collective to recover.
All right, this is some good stuff. We got. Those are three. I think that was a long one and a little short one. So we're going to roll the rest of those here shortly. We'll keep it moving. We are going to do some trivia here. At the end. We are live, so if you want to play, you got to be on YouTube in the live chat to play. We're going to Give away a book, couple books and a T shirt as long as we got some enough people in here playing. So hang around. We're going to show you the rest of the videos. Eight years online. Go below. You can check out this course for 24 hours for free with our 24 hour test flight. Go down below helicopterground.com and you can sign up. Let's go ahead and pull up the next video. Heather, roll it.
So now once you've done this entry, you want to do this entry a couple of times, a nice slow entry. And then once you've started to get the hang of it, now you're ready to start playing with your RPMs. And what are these? You know, what does the collective and the cyclic do to the RPMs? So climb back up, do that same nice slow entry again. Get everything established and then once you're in the, you know, 65 knots RPM in the green, always get everything trimmed up and steady first. Now we're going to start playing with it. All you want to do is your collective. You think of it like a handbrake. When you raise collective, you put more pitch in the blade, more drag, your RPMs slow down. When you lower collective, you take that pitch away, you start descending quicker and your RPMs speed up. So you're in the auto, you're at 65 knots in the green. And again, all of this is very slow minute. You know, I'm looking at for like maybe a 5% at most. And what I do is slowly raise collective until your RPMs start to descend and then just stop raising collective and just let them come down. Let them come down. And I like to go until I just get the horn. And then once you get the horn, take and lower the collective and then that will start to bring those rotor RPMs back up. Now as a note, whenever you make a correction like you lower to bring them back up, you always have to then catch them when they get to where you want them to be. So if you just, you know, you pull up and your RPMs are coming down and then you get the horn and you lower, RPMs will start coming back up. But if you just leave that collective down, your rpms are just going to keep going up and up and up and up and you'll eventually overspeed. So what you want to do is raise a little bit, get your RPMs to come down, get that horn lower and then catch them. So you want to lower to bring them back up. But then once they get to the point where you want them to be you have to take that correction away and catch them in the green. And all you're going to do here in this maneuver is raise a little bit, bring your RPMs down, get the horn lower, bring your RPMs back up, catch them. And so we're coordinating that when you lower collective, your RPMs come up. When you raise the collective, your RPMs come down. When you get the horn lower collective, you will get your RPMs back up. And we're making those connections in your brain that this does this.
Alright, for this next one, we are going to enter an auto just like we just did. But this time, once we're all trimmed up and in the auto, I'm going to use the collective and I'm going to work the RPMs from the top to the bottom of the GRE and I'm actually going to go low enough to just get the horn before lowering and recovering.
And Dave, when you're teaching your CFIs how to instruct these particular maneuvers in the auto rotative state, what do you tell them as far as the safe minimum altitude to take their students out when they're introducing a student into autorotations?
Generally for starting just the auto entries, I like a thousand feet or higher as my entry point. And I always have, you know, a field to go to or something. If the engine does quit when I roll it down to idle. And then usually at around 400, maybe 500ft is where I'll recover. Depending on if there's trees or houses or whatever, I'll do it higher. If there's an open field, I'll go a little lower. But some fields that I'm familiar with, so I just never really get close to the ground during this initial phase of just we're just learning how to enter, glide and recover and come on out and I don't bring it to the airport for a while. 1500ft is even better though. All right, so for this next entry, we've got lights, needles, one, two, three. Carpet is up. Scan for some traffic. We're all clear. And I'm going to do the entry and then mess with the RPMs with the collective. Let's get back up to about 65 knots for this entry. Alright, there we go. And Here we go. 3, 2, 1. I'm going to be lowering collective with right pedal, little bit aft cyclic. Bring it on down till the engine's not doing anything there. They're starting to separate. So I'm going to roll off first. I'm just going to get it established good in the green Now I'm going to raise just real slowly, a little bit of collective and you see my rpms are coming down, hit the horn. Then I'm going to lower collective and they're coming back up and you need to catch them. Don't let them go over speed. Now I'm going to raise collective just very slightly, let them come down, horn, lower, collective, come back up, catch them, raise just a little bit of collective. Just barely get the horn. I just want 97 a little lower. Then I want to lower and then catch him at the top of the green. So this is establishing what the collective does to your RPMs. Raise. It's like a handbrake. RPMs come down a little bit, get the horn just for a second lower and then the horn goes away and then you catch them back on the top of the grain. Now I'm going to go ahead and crack the throttle, ease it up to 80%, let the governor bring it up to 104 and then once they're married, very gently, slowly be raising the collective. So I'm gonna say on the ground is that I'm trying to hardwire their brain. Horn, lower collective. You know, horn, lower collective brings your rpms back up. So I'm just working on those connections basically. All right, so back carb heat off just a little. 53 knots, 23 inches of power. Get back up.
All right, this is some good stuff. Dave Redmond is an awesome instructor. And that guy sitting beside Dave is Brian Rutledge, who is our operations manager. 30 year aviator, been flying 25 years for a aviation unit in California. Pretty proud of him. And he's gonna take a bigger role here very shortly in what we do here. Helicopter line ground school. People are gonna love it. So we're gonna keep rolling the videos. But real quick, we are live at this time, we're rolling videos. We're gonna play some trivia at the end. For our birthday special, you gotta be in chat, live on Facebook. I'm sorry, not on Facebook. We're live on Facebook but we're not monitoring that chat. So we'll do those after these videos. Eight year celebration, but online, eight years. We've been going live every day for the first two weeks of March, celebrating and giving back to the community down below. You can sign up for helicopter ground school. Great discount going on right now. 50% off anything. Alright, if you got the video ready, go ahead and roll it, Heather.
Alright, after you've done the maneuver with the collective a couple of times now we're ready to do the same thing, but with the cyclic. So you're going to do the same thing. You're going to do that nice slow entry, get yourself established glide for a second or two, get yourself 60 to 65 knots, RPMs in the green. And now just like with the collective, you're going to start messing with the RPMs with the cyclic. Now, the cyclic, when you push forward, your RPMs will drop. Now the way to think of this is that you have, You have your disc like this and the air is coming up kind of like that. Now if you tilt forward, and I'm going to exaggerate it, so you can see the air is coming up through about that area. If you tilt the helicopter forward, the disk is going to tilt like that. And you can see now you have far less area of wind going up through the rotor disc than you did on this one. So you can see you're changing the angle of the wind. So more air going up through the disc means that your rpms go higher. Less air means that your RPMs drop. So when you nose over, your RPMs are going to descend. Now when you go aft cyclic, you'll take this disc and now you'll tilt it into the wind so you'll have it more again exaggerated, but you'll have more air going through like this and you can see that much area, you'll have more air going through the disc, which means that your RPMs will want to increase. Another way of thinking this is that you're pulling down on that rotor disc. So you're pulling down on those rotors to keep them spinning. When you nose forward, you will get light in your seat, which means you're not pulling down as hard, which means they'll slow down. When you go aft cyclic, you're really pulling down on that rotor system because you're tilting it like that, your rpms will go up. So as you do this maneuver, it's the same thing. I want about a 5% change and all I want to do is gently nose over. You'll feel light in your seat, your RPMs will come down, maybe even to the point where you'll just get the horn and then you go just gentle aft cyclic. You'll feel reloaded in your seat and then your RPMs will start to come back up and you just kind of repeat the process. Lower RPMs, push forward, lighten the seat, a little bit of aft RPMs come back up, regain your RPMs.
Alright, so back car beat off just a little. 53 knots, 23 inches of power. Get back up. Alright. So on this next auto entry I'm going to do the same thing but with the cyclic. And this is to show what the cyclic does to you, your RPMs. So I'm going to get myself established, 65 knots, RPMs in the green and then I'm going to gently nose the ship over, just very gently and you'll see the RPMs drop. Also you want to feel light in your seat. RPMs come down, then I'm going to go a little aft cyclic and the RPMs are going to slowly come back up. Now we're doing this very slowly, just about as fast as we did the collective. Not trying to drive these things all over the place, just very gently lower the RPMs by nosing forward a little, out a little, build the RPMs back up and then really pay attention to what it sounds like and what it feels like. Note that when you get pushed into your seat, you know that those RPMs are going to come up. When you feel light in your seat, those RPMs are going to be coming down.
I find it's real important to the way you're instructing this particular type of a maneuver. For the beginning helicopter is showing them collective all by itself. Then show them cyclic all by itself, then incorporate everything together. Because I think a lot of students, they become overwhelmed very, very quickly and they're not understanding how the rotor RPM works in relationship to changes in collective or cyclic. And by separating them and allowing them to do one at a time is so much more beneficial than just going out and trying to teach them A full blown auto at an airport all the way into a power recovery.
Exactly. You got to cut the parts into their individual pieces. Learn those pieces, then put them all together. Alright, lights are out. Needles are in the green. 1, 2, 3. In the green. Fuel is good. Carpet is coming full up. I'm going to get on up to about 60 knots for this one. Get nice and straight and level and we're going to scan outside for some traffic. All looking good, looking good below. I got some nice fields below in case anything were to happen to the engine. And I'm going to give a countdown. Three, two, one. I'm going to lower collective about. The engine is idling there. Starting to separate. Roll it down now. I'm just going to get it established first. Not doing anything yet now. RPMs back. Top of three. Now watch what happens when I push forward. My RPMs come down. When I go aft, feel the loading in your seat, they come up. When I push forward, they go down, maybe you can get the horn. There's the horn. If I go aft, you can see it reloads the rotor system. Now I'm making some minor collective inputs just to keep them in the range I want to be. And as a flight instructor, you'll be doing that. But you can see as I slow down, that'll load your seat, build them up. If I go forward, lighten the seat. RPMs come down, there's the horn. If I just go aft, they come back up. So you can see going down. And again, I'm just adjusting by about 5%. Just real minor. Little forward, RPMs come down, little aft, RPMs come up, and you can feel the loading in your seat. Light in your seat. Heavy in your seat. Ooh, a little heavy. Heavier in your seat. So I pushed a little forward and I unloaded it. Now we're ready to recover. So I'm going to go ahead and gently remarry the needles, let the governor bring it on up into the green. Once they're married, then I'm going to slowly start raising a little bit of collective and flying away.
All right, and we're back. Hope you're enjoying these videos. Smash that thumbs up button just below the video. Give us some likes on that. If you're enjoying the content, this is good stuff. This is from our Robinson R22 course inside helicopter on Land Ground School. You get these videos with any membership, private, commercial or cfi, any one of those three, or our big professional pilot membership. You have access to these videos. We have an R22 preflight and some other R22 stuff. And they're really, really good videos. And as you can see, Dave was a freaking awesome instructor. People really enjoy the videos from Dave, and Dave is in some of our aerodynamic videos as well, in the private and commercial section. So Dave is an awesome instructor. He has moved on to a commercial flying job. I don't think he's teaching much anymore. Some people have asked lately where they could they want to go fly with Dave at a certain location. And I don't think he's actually teaching right now, but we'll find out what Dave is doing. So, Heather, if you want to have them pull up the next video, got ready to go. So this is. Keep enjoying the content and we're going to do some trivia here at the end, do some giveaways. So we'll be back shortly. We're going to roll another video. Go ahead.
You can see here that if you're gliding at 65 knots, you have let's say about this much area of air going into the rotor system. Now, when you nose forward, your RPMs are going to decrease. And the reason being is that you're taking this disc and you're tilting it forward and you can see the air coming up. You've reduced the amount of area of air going through your disc to produce your rotor RPMs. So forward cyclic will increase your airspeed and decrease your rotor RPMs. So as you go forward, you'll also feel light in your seat. So you have to put all of those sensations together. Forward, light in your seat, RPMs dropping. Now you can go low enough to just maybe just barely get the horn. And then when you go aft cyclic, you're then going to feel loaded in your seat. Your RPMs will come up and you'll get to the top of the green. And you can see here, obviously these are exaggerations, but when you go aft cyclic, you're turning that disc, so the whole thing is coming up into the wind. Now you have a much bigger area of air going through the disc, and so your RPMs will spin back up. So aft cyclic, your airspeed will decrease and your RPMs will increase. Now, what you want to do is again, all this very slowly, just a couple of percentage down, a couple of percentage up, and you're just playing with it and you're putting together all the feelings and sensations of being aft loaded in your seat. RPMs coming up, little bit forward, light in your seat, rpms coming down. So now that you've done these exercises where you played around with the RPMs, with the collective and the cyclic, it's time to put everything together for kind of the final end game. Now, when you're in an auto rotation, your goal is to be able to always control your AirSpeed and your RPMs. But the thing is, these two controls have to work together, so you want to be able to. And when I. When you are shooting for your private pilot level, I like students to be able to go from like 65 to 70, back to about 45, back to 65 and 70, and be able to control it all through those airspeeds. Obviously, we're doing this out away from the airport, up at altitude. Now, in forward flight, when you want to go faster, but you don't want to descend, you have to pull collective. When you want to slow down, you don't want to climb, you have to lower collective. So you end up doing a lot of this. Well, in an auto rotation, it can be kind of tricky, but actually the controls Work more like this. So if you're flying along and you're in an auto rotation and you're. Let's say it's 65 knots and you want to slow down, remember, your RPMs are going to go up. So as you slow down, you have to raise a little bit of collective to keep those RPMs from descending. Now, let's say you're slowing down to 45 knots and then you want to then speed up. Well, remember, when you go to speed up, you're going to get light in your seat and your RPMs are going to drop. So in order to counter that, you have to lower collective as you're speeding up. So the controls work kind of more like this. Want to speed up? I got a lower collective. I want to slow down. I got a raised collective. And that's how you can take a helicopter in an auto rotation. And you can go from 65, slow it on back to 45, speed it on back up to 65 knots. Now some little details when you want to go slow down. And again, we're doing all this very slowly. I don't give a time limit. I want to get to 45 real quick. I just say start me off at 65 and as slow as you can, bring me on back to 45, and then as slow as you can, ease me back up to 65. Now when you're flying along 65 knots, you go to slow down. Nice and easy. You can, okay, here come my RPMs. I'm going to raise a little bit of collective, no problem. What happens is when you go to speed up, those RPMs actually drop very quickly. So a lot of times I'll actually, when I want to go speed up, I'll actually start lowering and then I'll follow it with the cyclic. Otherwise, if you go to push over and then lower, your RPMs have already dropped, you might have already gotten the horn, and then you're trying to play catch up with the collective. Now, if that happens, it's no big deal. And in fact, at the end of the film, I do this just to show what happens if you go to nose over a little and you haven't quite lowered enough collective and you get the horn. Let's say all you got to do is you did this, you got the horn, just pull back a little bit, make the horn go away, get your RPMs back up, and then you can start lowering and then start to speed up and keep everything at 60 RPMs in the green as you're getting to 65 knots.
All right, good stuff. We're gonna have two more videos to get through, then we're gonna do some giveaways. I am Kenny Keller, creator of Helicopter Rolling Ground School. We're celebrating eight years online. We're showing you these videos from our Robinson R22 course within Helicopter Line Ground School. There's four different sections and this is one section. So there's some good stuff. This is some really good stuff. So do us a favor, give us a thumbs up on the button, subscribe the channel, click the bell so you'll be notified of our other videos we're going to be doing over the next eight or nine days, celebrating eight years online, doing some giveaways. So we'll roll these last two videos and then we're going to roll through some trivia questions, give a few things away. So go below helicopterground.com if you want to take our online Ground school for a test drive. You can do it 24 hours without being billed. But it's explained in the site how to unsubscribe if you don't want to continue on after the test flight. Alright, let's go ahead and roll those two videos and then we'll be back to play some trivia.
So on this next maneuver, we're going to put the two together and we're going to be adjusting our airspeed, but we're going to try and keep the RPMs at the top of the green. But we're be moving our airspeed together around, which means we have to use these two controls together. So also on this next entry, I've been going a little faster, a little faster, a little faster. Now I'm going to do more of a realistic entry where instead of just lowering the collective to where it reaches that perfect point and then stopping, I'm going to take the collective all the way down. Then and only then do I roll off. And then I look at my RPMs and as soon as my rpms stop descending, I do a little pitch pull. If you wait for your rpms to start climbing, then you're gonna have to chase them and then pull a little more. Lights are out, needles are in the green. One, two, three. Car beats up. I'm gonna get on up to about 60 knots for this entry, Scan around. All right, and then I'm gonna go three, two, one. I'm gonna lower the collective all the way, roll off and a little pitch pull as soon as those RPMs stop descending. Good. Now I'm going to slow down to 45 knots. So I'm going to pull a little aft, but I'm going to raise a little collective to keep those RPMs in the green. Little adjustments as you're doing it, so you got to lower a little bit, keep in the green. Now, as I go to get more airspeed, those RPMs going to drop. So I'm going to lower some collective and then I can nose it over to get my airspeed back up. Now, right about here, usually you got to pull a little bit because it might want to try and climb. And at 65 knots, I'm going to go a little aft to level it. But you see my RPMs come up, so I'm going to raise a little collective. Now I'm just going to do it again. I'm going to go aft cyclic to get to 45. My RPMs are coming up, so I'm going to raise just a little.
Good.
Now I'm slowing on back down to 45. Now when I go to speed back up to 65, I have to lower some collective before I nose it over. Otherwise those RPMs will drop on you. There we go. Now I'm accelerating back up to 65 knots, raising just a little bit there at level out of 65 knots. And let's do it one more time. And I'm going to show you what happens if you don't lower collective before pushing over. So we're down around 50 knots. And if I push over first, first my RPMs drop and I get the horn, and then I have to go back aft, lower a little, and then once I lower the collective, then I can back up to 65 knots. About 65 knots here. I'm going to gently roll on the engine, let it marry, and then start climbing away.
Yeah. The common reaction with students, especially learning this, is chasing that needle all over the place because it hasn't come click jet that what forward cyclic and aft cyclic, combined with lowering collective and raising the collective will do to that rotor rpm. And by having a visual demonstration of.
It.
They can understand that when you change one and you don't change the other one at the right time, you're going to be getting the horn, and then you're going to have high rotor rpm, then getting the horn again, and then high rotor rpm, you're going to be chasing it all over the place.
So as a, as a new student coming in, my goal is for them to be able to go from like 65 down to maybe 45 and back up to 65. I don't really take them any slower than that because there's really not much of an E2 once they get to commercial level, then we can go to zero airspeed, that kind of stuff. But in the beginning, I like to go down to 45, back up to 65 out here with altitude and reason being. And I'll show you here in just a minute. What if you're flying along and you're in a turn or whatever and your engine quits and you're at 45 knots? Well, you know the beginning entries, we always do at 65, but you may not be at 65 knots. You have to know how to like, oh, shoot, get your airspeed back. You're gonna have like 15 minutes of looking around, chewing gum.
That's all good.
Alright, lights are out. Needles 1, 2, 3 in. The green carpet is up, doing a scan outside for some traffic. So in this scenario, let's just say you weren't at 65 knots. You were at like 45 knots and you're flying along and let's say the engine quit, so you had to enter an auto rotation. Oh, shoot. Okay, well, I know how to get to 65. I have to lower low collective and nose it on over. And then there we go, back up to 65 knots. Because I have the coordination to do that. Now just for practice, I'll do it again. Slowing on back a little bit of collective in to hold those rpms a little too much there. There we go. I know before I nose it over. You can see what happens if I nose it over that lowering collective. You see how fast those rpms drop. So I'm going to bring it back and then now I'm going to lower some collective and then I can accelerate without those rpms dropping. Now once you get to 65, you have to raise a little just because you're leveling back out. There we go. If you're working the collective, you see how the governor or the correlator works those engine RPMs. So if that starts to happen, just roll the engine back down. You can see if I raise the collective here, I can actually get the RPMs up without the throttle. And that's just the governor.
Now as you're doing these entries, you want to be doing them a little bit quicker and a little bit quicker and a little bit quicker. Now the end goal is the entries we're doing now are more of a practice entry. I'll still do entries like this, but we eventually want to get to the point to where you can. 3, 2, 1, enter an auto. You know, just like that the only difference is that once you get a little bit more comfortable with going a little quicker and a little quicker, it's all in the collective. You're still going to be lowering, going aft and then giving right pedal. But in a normal auto rotation entry, you're going to lower the collective all the way, then you're going to roll, throttle off, and then you're going to do a little bit of a pitch pull. Now the first key thing is it's very, very important that you lower then roll off. It's a common mistake and honestly, most students at some point do it, so you got to watch out for it as a flight instructor. But it's a common mistake to go 3, 2, 1, and then roll off and then lower, or even you lower and you're rolling off as you lower. The problem is, remember, when you're up here, you still have pitch in the blades. So when you roll that engine down, those RPMs are going to drop very quickly. So you want to take the pitch out, then roll the engine down. Now the other thing is that you got to know when to lower, roll off, and then you have to know when that little bit of pitch pull is going to come into play. So what I do is that as I'm lowering the collective, I watch my rotor rpms and as you're lowering them, they'll drop a little bit, you roll off, and as soon as those rotor RPMs stop descending, I put a little bit of pitch in the blades. Because if you leave the collective where it's at, those RPMs will come down, they'll stop and then they'll reverse and then they'll start climbing and climbing and climbing and eventually they'll overspeed because you have the collective all the way down. Now if you're a little bit late on it, you'll lower, roll off, the RPMs will come down, then they'll start to come up, and then you have to come up and catch them to then bring them back down to where you want to be. But the correct way to do it is just lower, roll off, and as soon as those RPMs stop dropping, just put a little bit of pitch in the blades and then they should steady out right in the green.
Alright, Dave made a comment.
Hello.
This auto rotation series by Dave is excellent. It is excellent. This is some really, really good stuff. He dove into the auto rotations and gave you some really good insight there. It's good stuff. This is a part of our R22 section inside helicopter only ground school. You can have that along with the private course, the commercial course or the CFI course. Private is stand alone. Commercial includes private. CFI includes private and commercial both. And then we have an instrument course. And then we have a big professional pilot package where you can get it all. Unlimited, never expires. Go down below. Helicopterground.com link is in description box. So we're going to give away, we're going to play some trivia here real quick. Here's how it's going to work. We're going to give away a copy of helicopter checkride and then a copy of top 10 checkride tips both. Those are my Amazon best selling books. And then a helicopter on ground school T shirt. This is a hoodie. We're going to send you a shirt, same logo. We're going to do three rounds of questions. We'll warm up with the first one on question six. On question 70, we'll give away the first book. Book 75, we'll give away the second book 80, we'll give away the T shirt. So you must type in the box in the, in the live chat box on YouTube when you go to answer, say 66. If the right answer is C, type in 66C. That way in chat we'll know who is the winner. So I'm just going to have Heather share that screen. There's your directions. So she's going to bring up the testing. And here is our first question and it is what is lost or what is lte? Loss of tail rotor effectiveness. A. The helicopter becomes more efficient. B. The helicopter tail rotor system fails due to a component failure. C. The helicopter tail rotor stops reducing thrust because it is operating in disturbed air. D. The helicopter tail rotor thrust reverses. Everybody says C. There they are. All right, you guys are on it. Awesome. I get my mouse working here. Gets away from me sometimes. Get down here. There we go. C. Correct. Come on. There we go. Let's go to the next one. Which is not one of the dangerous wounds to consider in the prevention of LTE loss of total effectiveness. A, quartering left wind. B, wind straight in from the left C, tailwind. D, wind straight in from the front. If you are flying a helicopter, you need to know this correct answer is D. Anybody get it right? Nobody answered, man. All right. Could be the lag. Could be the lag.
Yeah.
Now they're coming in two people.
Got it earlier.
Awesome. All right, next question. All right. Which accurately describes possible contributing factors to LTE loss of tow rotor effectiveness. A. Fast ridle. Ridle fast right pedal turns low RPM Hovering with the three dangerous winds and operating with high gross weight, high density altitude. B, operating without doing a proper pre flight which could have caused A a tail rotor problem. C, there are no contributor contributing factors to LTE and is just something that helicopters experience at some time or another. D, the only thing that can contribute to LTE is hovering with dangerous winds.
Yes, they're answering 68. So they're seeing it.
Okay, what are they answering on? What are they answering on 68?
He says question 66 is still in view.
Really? Because it's up on my screen. Dang. What's going on? Okay, let's look at the software here, see what's going on. It's been operating flawlessly. What's going on? You're right, it's not switching. All right, hang on here, people. I gotta try to do a little fancy maneuver in here. Let me add another screen and bring it up again. What the heck is going on? What a bummer. It's not giving me the.
It's been working fine all week.
Will you. Maybe we'll just have to do it, man. I don't know how else can we do this real quick? You know what? What could I do real fast? This is just being stupid.
If you're willing to listen that you.
Could just read them. Yeah, I can just read them, I guess.
Hard when you're not having a visual.
But man, why did that happen?
He goes, we all win T shirts.
All right, well, you know what?
What?
I guess we'll just do the best we can here. So you got to listen to the question. So I'm going to go ahead and answer that one because those are long ones. I don't want to read all that again. If anybody did answer they were listening on that one, it was a. Let's go to the next one. All right, so listen closely. That's actually a good test. If a pilot experiences LTE loss of tower effectiveness, what actions would be most appropriate? A Immediately reduce RPM and raise collective somewhat. B, perform a hovering auto rotation if near the ground in a hover. C, flying to clean air with cyclic inputs if adequate altitude and clearance for from obstacles exist. D, both B and C are appropriate pilot actions to handle lte. Hopefully it's not too tough for people. We'll probably just end it after the next one.
Some of our PTEs and say that they're still seeing 66. We know we tried to fix it.
Yeah, you know what? Let's do this. In case anybody was listening to that one. The answer is D We're just going to do one. We're just going to read it. It. And I'll just go over here, we'll bring the screen back up and we'll just do one giveaway and we'll fix everything up hopefully for tomorrow. This thing has been flawless. So I don't know what in the hell happened. Oh, well, Golly's crazy. Got lights going on in here. Let's give away the T shirt. We've been giving away stuff like crazy. You can bring my camera back, Heather. I gotta turn my light on here so I can see. So here we go. All right. This will be an easy one. Be ready to go. Here you go. Do what? Yep, we'll give away a T shirt on this one. First one to answer. And I'm actually jumping ahead to question 71 because I can't read 70 on here on the page is messed up. All right, 71. What is the rule for when navigation lights must be on? A, one hour after sunset until one hour before sunrise. B, from the end of civil twilight until the beginning of civil twilight as published in the Airman's Almanac and converted to local time. C, from sunset to sunrise. D, any time visibility is less than three statute miles. The correct answer is actually 471. This is Sunset to sunrise. The night stuff always gets people. So nobody got. Did he get after I say it? Oh, so it is. It is C. The first one that got C. Is that Paul?
Is that darn Paul, man.
Okay, let's do this. We love. We love you, Paul. We love you, Paul. But you got both books. You won the T shirt and you won the first no go button.
That was easy.
So let's go to the next one. And I don't think Paul's gonna care. I think Paul will be okay with that. Paul's gonna be a guest. Yeah. The next day after Paul, whoever won. All right. Grill Master. I think Grill Masters won before too, right? Maybe. Maybe not. So email heatherelicopterground.com and give her your shirt size and your address, and she will ship you your shirt. All right. Hey. The celebration goes until March 15th. We have 50% off the monthly memberships for the first month. Any of them. And on those memberships, we offer an unlimited option that we've taken away and we brought it back just for the sell only. That's a freaking bargain. On private commercial, CFI or instrument, you can keep it unlimited and you get 50% off. Right. Now, the codes. KK50, right? Yeah. KK50 is the code Then we have big professional pilot package, Private commercial, cfi unlimited private commercial cfi, an instrument, all four courses. It does not expire. You get to keep it. There's no expiration on it. That is 50% off. So you got a whole bunch of options right now to join helicopter only in ground school. The code is 5 0-KK-50. Yeah, man, I'm losing it, losing my mind. I got me all screwed up over there on that damn school screwed up on me. Oh well, hey, you know what? I learned from some awesome people and I see their live events get screwed up once in a while. So you know what? It's all part of it. Show has to go on, right? So go down below. Helicopterground.com you for the monthly memberships, you get 24 hour test flight, meaning you're not even billed for 24 hours. So the private monthly is $49 a month. It's cheap compared to the money you're spending per hour paying instructors. The money you're spending per hour on a helicopter. The money you're spending on your rating. 49 bucks is cheap. You can get the first month for 50% off. It's a no brainer. And I, like one of our members made a comment last night on Facebook. He said the professional pilot membership is a no brainer. He said with all that training you get, he goes, it's less than what I pay for an hour of flight time in my instructor and I got four courses unlimited that I get to keep. Keep it, don't expire. And he said, people, you should jump on this now. We've never offered 50% off ever, any sale in eight years, ever. So in celebration of eight years online. March 1, 2012 is when I launched this crazy thing called helicopter Online Ground School. March 1, 2020 is our eight year anniversary or birthday. I keep saying my birthday is March 15th. So for 15 days we've been going live every day. We've been giving books and T shirts away. Awesome discounts at 50% off anything all the way through March 15th. And included in this is a 100% no hassle money back guarantee. And Heather's been helping me now over two years and she's seen it. That's the rule. That's the way it is. We don't argue, we don't hound you with emails, we don't say, oh, tell us why you didn't like the course. You can unsubscribe at any time, but you can also get a refund within 30 days. Okay, but 30 day refund means 30 day refund. You can't go 90 days and then want a refund for the last three months. 30 days on any membership. That's fair. And we don't squabble, we don't argue. You're not happy with the course, you ask for a refund and we go in, we hit refund, deactivate, send you a quick email and say your account's been deactivated, you're welcome back anytime. And we've had quite a few people over the years that have come back. I'm going to end on this note more than once, probably four times now in eight years, I've had somebody come back and join again. And then they'll email me and say, kenny, I refunded your course, or I got a refund on your course. My instructor told me I didn't need it. And then I failed my checkride and can I come back? And it's like, absolutely. You can always sign back up at any time on your own. And four times now we've had people that refunded, failed a checkride because their knowledge wasn't where it needed to be to get through a checkride, and then came back, rejoined helicopter line, ground school, went through all the videos, went back and retested and smoked their, their test. And so they're excited and they tell us, kenny, I, I refunded your course. And they're like, they're almost embarrassed, right? And I'm like, don't be embarrassed. It's okay. That's why we offer 100%, 30 day, no hassle, ironclad money back guarantee. We don't argue. There's no reason to not try the course. If you think you need help, you sign up, as I said, on monthly, you got 24 hours that you can pull your credit card back out of the system. Just remove it from settings and you'll be billed nothing. And then if you want to continue on with monthly membership, just keep it as long as you like. 30 days you get billed. 30 days you get billed. At any time you want to stop, you just unsubscribe by going into settings, removing your credit card information, or you email Heather or I and we do it for you. We do it all the time. So not only do you have a 100% money back guarantee, you can subscribe anytime, unsubscribe anytime, you can come back anytime. We have people now, honestly. And Heather's watched this happen with me, a member comes in, joins private for two or three months, and then they'll Go, hey, I'm going to unsubscribe for right now because I'm going to build my commercial time, but I'll be back. And then we see them two, three, four, five, six months later, they're back again for the commercial. And then the same thing. They'll leave for a little while and then all sudden, hey, I'm back for the third time. I'm working on my instrument rating now, you know, so it's gotten very popular now. And this over here, if you're new to helicopter line ground school, what we have back here is what we call the helicopter online ground school wall of fame. Okay. When you send us a picture after your checkride and you're excited like most everybody is, it's a big deal, right, Whether you get through in the first time or you fail and you have to go back and retest, people are excited because it's. You spend a lot of money, it's hard work work. It's a lot of studying. So you're excited when you get the checkride done, right? So they start sending us pictures years ago. And then a couple years ago we're like, hey, you know, we start putting those on the wall. And we did that on our old airport where we were at this old nasty 1960s paneling and we were just slapping them up on the wall with stickies and it became quite popular and it was really cool. So a year ago we moved here, we built this special wall that we call the Hogs wall of fame. And Heather now prints and frames every single picture. So everybody you see up there is a happy, excited helicopter on ground school member. And we have some people up there that have their pictures four times. They have their picture for private, their picture for commercial, their picture for CFI and instrument. So when you say, do you have any testimonial? Yeah, we got those. We got a whole wall full of them right there. And we're proud of our members and we like to share the excitement because we know how it is. I failed my first checkride 20 some years ago now for my private and it sucked and I felt horrible and I didn't go back for six months. And I tell this story all the time, but it's an important part of the story. That's why I'm here all these years later doing helicopter only in ground school. So do us a favor. No, do yourself a favor. We're here to help you. We're here to help you. You go through the course step by step. We do have a new mobile App. Once you're inside, look to the top of the page. You can download a mobile app and use your smartphone or your iPad or whatever you want to use, or you can use desktop laptop. So there's two ways to view the course. We have progress tracking. We have written test practice, which that's what you were seeing earlier. That's what we've been working with is we have written test, test practice. You can take these tests over and over as many times as you want. You can score yourself. You can print out after you go through it and you score, you can just view it online, scroll through every question, see how you answered and what the correct answer is if you missed it. And then you can even print the thing off if you so desire. And then there's a completion certificate that you can also download. And then you can take those same written courses. You can do them for practice. Or we have another section of the same questions that are available for FAA Wings credit. So if you say, well, is hogs FAA certified? Well, I guess you could say, yeah, considering you can go through our videos, take the associated written test, and when you pass with a score of 70% or higher, we have a computer up here in the office that's set up just for the FAA Wings program. It automatically reports to the FAA that you have passed that test. And you get FAA Wings credit for any course, private, commercial, CFI or instrument. So, yes, we are recognized by the faa. They were wonderful to work with us and help us set that up. And we've had a really good relationship with FAA and we really appreciate that. It's awesome. All right, I'm gonna roll out of here, so do us a favor, subscribe the channel and click the bell, because that way you'll be notified when we come out with new videos over the next celebration of the next week or so. And then after that, anytime you go with a new video, you'll get notification. So subscribe, click the bell, hit that thumbs up button for us, and keep it pointed into the wind. See you in the next video.










