Autorotation Training - Top Ten Tips
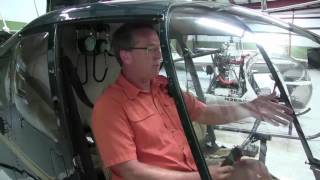
Kenny Keller walks through ten autorotation practice tips, from entry setup at 500 feet to the final flare. Key moves: split the needles on throttle rollback, hold mid-green rotor RPM, and time your flare at treetop level. R44 example uses 70 KIAS glide speed.
Questions this video answers
Approximately 70 KIAS at 500 ft AGL (he also mentions entering about 75 in one remark).
R44: ~70–75 KIAS; instrument example: 60 KIAS.
Approximately treetop level (he notes manufacturer guidance may specify 40–100 ft).
About halfway through the green range (mid-green) for the rotor system.
Chapters
Hello, I'm Kenny Keller, the creator of Helicopter Line Ground School. And I want to give you my top 10 best auto rotation practice tips. Number one, you need to have a nice entry. If you enter it nice, it's going to be nice. If you enter it sloppy, it's going to be sloppy. So in this case we'll use the R44 example. These tips are pretty common. No matter what aircraft I'm flying, it doesn't really matter. R44, Enstrom, Jet Ranger, it doesn't matter. The elements of a good auto, the majority of them are the same. In this example, we use 70 for Airspeed 500 AGL when we enter. And I want to be at zero rate ascent when I enter. So we want to give ourselves enough time that when we get to our entry point, we can have a nice entry again, zero vertical speed, the airspeed entry that we need, the altitude we want, and the trim that we want. I've heard my examiner say many times during the check ride, private commercial CFI, if it takes you 10 minutes to get set up for the straight in auto, take 10 minutes to get set up for the straight in auto. You want to have everything ready to go. You want to feel good about it, so you have a nice entry. If you enter it nice, it'll be nice. You enter it sloppy, it's going to be sloppy. Number two, you need a small aft cyclic pulled entry. So we talked about having everything set up. I like to use 70 for the glide in the R44, 60 in the instrument, doesn't matter. Whatever aircraft you're flying, you're going to have your glide speed. I enter about 75 in the R44 so that when I enter and I give that small aft cyclic pull, the nose does not dive. So you're setting your speed when you enter the auto rotation with a small aft cyclic pull. And if you do that and you set your speed correctly at the beginning, chances are you'll have a nice glide going down. If you screw up the speed at the beginning, then you'll start going forward backward, airspeed up and down, rpm, trim, everything kind of goes wacky. So getting that or getting that speed set at the beginning is very, very important. Number three, you need three things simultaneously at that entry. We just mentioned the aft cyclic. So you need a little bit of aft cyclic, a little bit of right pedal, whatever it takes to put yourself in trim and also lower the collective. All three of these things should be done together. If you do one, then the other, then the other, then you're kind of just monkeying a thing around and it's not going to be that nice. You need to do all three of these entry points. Half cyclic, right pedal down collective, all simultaneously. Number four, roll off enough throttle to split your needles. No throttle chops. Back in the old days, they taught chop that throttle all the way off. Well, when you do a throttle chop, you have a chance of the engine actually stopping and then you're going for a real engine failure when you're trying to do a practice engine failure. So you want to roll off enough throttle to split the needles, do it smoothly, gently, and split the needles to the point that's appropriate for the aircraft that you're flying. Control your airspeed during the glide. So in this example we're using 70. If you set it right and you get a 70 and you don't start moving that cyclic around, keep that airspeed nice, then it makes everything nice again. You start messing with airspeed, then things change with rpm, so on, so forth. So really work on focusing inside, outside. You have a cross check inside your airspeed, outside your spot, inside at RPM outside, look at your spot. Inside trim outside to your spot. You want to really focus on keeping that airspeed steady. Number six, raise enough collective smoothly to control RPM on most aircraft. Depending on the day, after you enter, the RPM is going to start to rise and you're probably going to pull up collective a little bit. Now, this could be different on varying aircraft. I'm not saying in every single instance, but most generally after you enter it, the RPM is going to start to rise. So be prepared and know that it's going to rise on you and just start raising a little bit of collective ahead of time to keep it from getting too high. If you catch it early, it just makes the auto nice. If you wait till the RPM is too high, then you're making more of an abrupt up movement with the collective. And it just things make. Makes things messy. So not only you're focusing on your airspeed, your trim, you're really focusing on keeping that RPM under control. Number seven, maintain trim during the glide. I can tell you it's amazing if you get that trim in there and you have the aircraft trimmed into the wind, it actually seems like it comes down a little bit slower. It's more controlled and a lot of people will enter it. They'll put in the pedal, but not enough or too much, and they come down out of trim. If you fly the thing in trim, no matter which aircraft it is, it will come down. What seems like slower by being in trim number 8, set rpm close to range where the needles will join when the throttle is added. So again, this could vary a little bit depending on the aircraft or maybe an instructor, the way a person, a certain instructor wants you to do it. But in general, about halfway through the green range is pretty usually close to the actual operating range for the engine. So that could vary on instructor and technique. I'm just saying, in general, you know, high isn't necessarily the best and low isn't necessarily the best. Usually about halfway through the green range. And again, depending on the aircraft and depending on circumstances, if you're trying to stretch a glide, you might go to the lower side of the rpm. So there are other factors to take into consideration. This is just kind of an in general, rather versus being too high or too low. I like to be about the center of the green RPM range for the rotor system. Number nine, start with a gentle flare at approximately treetop level. Now, again, depending on what aircraft you're flying, it may say, start your flare at 40ft. It may say 50ft, it may say 100ft. So again, it depends on the manufacturer's recommendation on what point to start your flare. Personally, I use treetop level. It's hard for me to distinguish between 40ft, 50ft. I use the term tree top level. So as I'm coming down, I'm actually watching the tree line and kind of as I pass the top of the tree line. So when I start a gentle flare, during the flare, I start a small aft pull just below treetop level. And as I get closer to the ground, I make it bigger, and I make it bigger, and I make it bigger, and then I level and raise the collective. And what I'm doing is I'm doing that gradually so that depending on the wind for the day, I can decide as I start with a gentle flare, do I need to be aggressive because it's not windy, or can I have more of a shallow flare because it is windy? So depending on the day, as you pull it, you can decide I need to get more aggressive with it, or I can leave it a little more less aggressive because I have a lot of wind and then level out again, it's technique some people teach to get down closer and get more aggressive near the ground and then level it. I struck a tail rotor once during a practice auto rotation, so because of that reason, I'm a little more conservative. And I was also taught this early on by an instructor who I thought very highly of, and he taught me a Lot of really good stuff. And that's where he taught me. Start it with gentle. As you get closer, make it bigger, make it bigger, make it bigger. Deciding how much you need to flare and then level the helicopter. Number 10. When the speed is almost gone, level the aircraft, raise, collective, roll on throttle. Now, this can vary a little bit too on techni, but if you remember in order what's going to happen, it's speed is almost gone. Level, raise collective, roll on throttle. Now, depending on the technique, some people pull a little collective before they level. That's okay, depending on the aircraft and the inertia in your rotor system. I personally don't really start pulling collective until I have it leveled out and then I raise collective and roll on the throttle. For me, that works really well. So I understand that that's tough for people cleaning it all up at the end. But you'll get better with practice. And as long as you have the technique in mind of what it is you're going to do, that will help you cleaning up that auto rotation at the end. So that was basically for one of our members that emailed me this morning and he said, kenny, I'm really struggling with the autos. And he gave me a long list of the different problems he was having. And I just thought, you know, over the years of the teaching and all the different aircraft that I've flown and got the chance to instruct, then the basics of the maneuver. The 10 tips I just gave you are pretty much what I think are the general elements of good auto. And I just sat down and did the first 10 that come to mind. We could probably do another 30 of those on tips, but those are the top 10 that just came to mind. The things that I see that people struggle with, whether it's messing up the airspeed or messing up the trim or whatever the case is, those are the most common problems that I see. So let us know what you think down in the comments section below. If you're interested to learn more about helicopter online ground school, go to the link in the description box below. Click that link. Any questions, you can email me@kennyelicopterground.com so give us a like, share some feedback and we'll see in the next. Sam.










