Cabri G2 Start Up Procedure & Hover Power Check
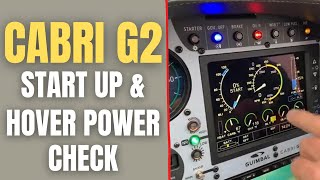
Kenny Keller and Chris Hauser walk through starting a Cabri G2 helicopter and checking hover power at 84-86% with a 360-degree turn. The video covers preflight setup, engine start, rotor synchronization, and governor checks using Sweet Aviation's condensed checklist.
Chapters
Hey, it's Kenny with Helicopter Land Ground School. Chris Hauser with Sweet Aviation.com is going to do a startup for us today in the cabaret G2. So he's going to use a Sweet Aviation approved checklist and walk you through how he does the startup. Before we get started, go down below for helicopter checkride. Free PDF download of my Amazon number one bestseller. You can get the PDF for free and they also, we also have paperback copies that we ship out for anywhere for just seven bucks shipping and handling. The book is free, so those links are down below. All right, so Chris, just go ahead and take your time. For anyone that's viewing this video today, that's when it gets themselves familiar with the Cabri G2. I'm even going to use it as I'm editing and watching you use it to sharpen my skills on the startup since I'm new to the Cadbury and just learning it. So just if you would take your time and just walk me through the startup basically like you would a brand new student.
Okay, so obviously the pre flight, the walkarounds completed, we're inside. The pedals have been adjusted, we've got our seat belts on. As you mentioned, this is a condensed version that's approved that we took out of the PoH for the startup procedure and condensed it to fit our needs. Since this aircraft is manufactured in France, they put some stuff in there that doesn't necessarily apply to us.
Sure.
In the US So we've made a condensed version here that's been approved and that's what we're gonna run off of.
Awesome.
So first topic there is before starting. So we've got objects stowed. Yes, everything, especially if you have doors off operation, you want to make sure there's nothing in here that's gonna fly around on you. Okay. Fuel shut off valve is on. So if you turn your head back here, if you'll shut off, valve is back here between the seats and it's pointing to the on position. If for some reason you want to turn that off, some people like to turn it off at the end of the flights and store the aircraft like that. You would pull this knob out and then turn the arrow so it's actually facing the off position. But we leave ours on all the time. Also, the next thing, while we're back here, the circuit breakers make sure all circuit breakers are in. I usually run my hand across there just to make sure they're all there. I don't see any white. Everything looks good. The hobbs meter is also back here. So we always take note of the beginning. Hobbs. Beginning and end, Hobbs. Okay, so objects are stowed. Fuel shut off was on. Breakers are in. Harnesses are fastened?
Yep, mine's good.
Okay, controls full travel and free. So what they're saying is move all sets of controls to make sure there's no binding. Make sure they move freely. I'm amazed at some people. They just kind of take the cyclic, and they just move it.
Okay, good to go.
Right. Know all the controls, move the cyclic, move it around, make sure it's free. And actually look outside, make sure the blades are moving as you're moving that cyclic. Now tailor pedals. Okay. Move those pedals back and forth. Make sure that cable's not binding on anything. You've got free movement there. Okay, collective, make sure your friction and off is off. So I'm gonna roll friction off, and now I'm just gonna bring up that. That collective, make sure it's not binding on anything. And again, I'm looking at the blades. Make sure I see movement out there. I do see movement. Okay, and then the last one that everybody forgets. The throttle. Roll that throttle on a couple times. I even do this in the turbine engines. You know, roll that throttle on, make sure it's not biting, make sure it's free, and then make sure it's in the detent position. Now, my personal preference is once I roll the collective friction off, I'll leave it off until the very end of the flight. So I just know that my collective friction is off now. Okay, so controls, full travel and free. We checked them. Collective is down, and it says friction on. But again, my personal preference, I like to leave the friction off once it's off. Okay. Pedals are in the neutral position. Instrument switches off. Okay, so now we're looking at the instrument or the switches here. Everything is off except for my strobe. I leave another personal preference. I leave the strobe on all the time because as soon as I hit the master, I just know the strobes on again. And also, it's a good reminder that there have been times where it's happened, where people have walked away from the aircraft and forgot to shut the master off. So if you leave the strobe on, you can quickly see from a distance your master is left on. So all switches are off except for the strobe light. The next one is that the carb heat. The auto. Carb heat is in the auto position, and it is. Okay, so master on. So before I flip this on, I'll just go Through a couple here just before, so we know what we're looking at. So master will come on our NR switch to go to the backup position. Then I'll make sure that I've got a green light. And then I also listen for the horn. And you also want to make sure that all these lights light up. Okay, and then the EPM will go through the electronic pilot monitor, which is this whole display here. We'll go through its self checks. All right, so I'll go ahead and go do that. So master is coming on, going to backup. I've got three lights here. I've got my green light. Now I have all my lights on here and I'm waiting for one more horn. There's our horn. Okay, so that's all good. Now the EPM is going to go through its self checks here. It says everything is in the okay, and now it goes to here. If the EPM finds something that it.
Doesn'T like, it will stay on that.
Last screen and you'll have to acknowledge it before it comes to this screen. Okay, so masters on, switch master or NR to the backup. Green light is good. We heard the horn.
That's good.
EPM monitor, we're good there. Governor off. Okay, so governor is off, indicated by the blue light being on. Okay, rotor brake come up here. Grab the rotor brake and you're going to pull back to make sure it's functioning. And as you're doing that, make sure that the brake light on the panel comes on. So again, and I'm pulling back. Brake light comes on. And then I'm pushing it forward, giving a little tug. Make sure it's in the locked position. Okay, then while you're up here now, you will come over to the mixture control and push it full forward. All right, so now we're to the engine start. All right, so strobe is on it already is fuel pump, fuel pumps coming on. When you flip it on, come up here to the fuel pressure gauge and make sure that you had a rise. This aircraft's been flown today, so the fuel pressure is already up a little bit. But it did come up a little bit more when I flipped it on first start of the day. It'll read zero and it'll come up more. All right, so throttle going to come down to throttle. Roll it full on. And as you notice up here, we'll.
Do it for the camera. I'm going to roll back down.
So throttle off is zero percent. Roll throttle full on. You should be about 35, 36. Okay, now I'm going to manual prime it. Here in Indiana. We're out here in the winter. If it sits out here, you might have to do seven or eight primes. We left it on the tannus heating system, so it shouldn't be too bad to start. So I'm going to do five primes. So what that means is with full throttle fuel pump on, I'm going to raise collective five times, and then I'm going to just hit 100% on our EPM. So there's four and there's five. So I did that five times. Now, what it says is throttle set to 4% or 14. So what I was told how we do it is however many times you primed it, that is where you're going to set the throttle. So I primed it five times. So we're going to set that at 5%. If it was a colder day and it sat outside and we primed it eight times, then I would set it at 8%. Ignition. So both ignitions on. So the plasma ignition's on the right. Is your right switch. Your magneto is on the left. So both ignitions on. You can flip them both at the same time. You'll get that warning horn that's letting you know that the plasma ignition is armed. Okay, clear the area over there.
We are clear. Actually. Let me look out the window, then.
We're clear on the right.
Clear.
All right. So I'm going to go through this before I actually do it, because this is part of the sequence that I feel needs to be memorized. Okay. That way you're not sitting here waiting for it. So what we're going to do is we're going to push the starter button, which is on the end of the collective. The starter light is going to come on. While you're pushing that. The starter light should be on. Once the engine is running, release the starter button. The starter light should go off immediately. Check. Make sure you have oil, oil pressure.
Okay.
The oil pressure light should go off within 30 seconds. After that's done, we will roll throttle down to zero percent, and then we'll come down here, Flip the alternator on. And you want to confirm alternator light is off and that the battery is showing a charge. So all that happens kind of quickly here. So here we go on the start. So we'll see. Make sure starter light comes on, and then I'll release the starter button to start light should go off. There it is.
The starter's on. Oil pressure lights already off. Confirm that. I've got oil Pressure engine's running, so I'm going to back it down to 0%. Now I'm going to work my way down, flip alternator on, alternator light goes off and I confirm that I got a charge. Now we can go to headsets. All right, so the ignition, everything started up just fine. So I don't like to leave the engine running without the blades going too long. So we got a good start. Now we're going to come down here and flip the clutch or engage the clutch. You can see that the clutch light is out right now in the off position. So we're going to flip the engagement switch up, put the safety cover over top. Clutch light should come on. A second here. There we go. Blades are spinning, clutch lights coming on. And then you want to come up here. And now you're watching for your needles to sync up or marry up. Once they're married up, then I like to give it just a little bit of throttle to keep those blades off the droop stop rings. And then come down here and look at your clutch engagement light. Once that light goes off, then we can go ahead and take the needles up to 2,000. Alright, so there we go. We're sitting at 2000 or so. We'll just adjust very minute inputs here to make sure that throttle is good. All right, so now we are down to the Clutch is full disengaged. Light is out. We showed that clutch is engaged and locked. Light is out again. Rotor and engine needles are synchronized. We got our headsets on and clutch light is out and it is. So now we're up to the ignition carb test. RPM set at 2000 it is. So plasma ignition. So what we're going to do now with your right hand, once the rotors are engaged, you don't want to ever take your hand off the collective. That's what we call guarding the collective. So my left hand is on the collective, guarding that. I'm going to take my right hand. We're going to come up here to the plasma ignition switch and what we're going to do is we're going to flip that down and the plasma ignition can't drop more than 300 RPM in five seconds. So what I'm going to do is flip this down. It can't drop. So we're setting at 20, 30. Can't drop more than 305 seconds. So here we go. 1,001, 1,002, 1,003, 1,400, 1,005. So we had less than 300. So I'm going To flip it back up, let that come back up to where it started. Now we're going to do the magneto. That's the left switch. Same thing, though, except this. The magnetos can't drop more than 100 in five seconds. So we're back down, looking at our RPM. So we're going to start at 20. About 2030. I'm going to flip it off. 1001-1000-2003-1004, 1005. So it didn't drop more than 100. I'm going to flip it back on, let it reset, bring it back up to 2,000. Okay, now I'm going to bring this. Now I'm going to bring the rotor Speed up between 430 and 450. Looking here, between 430 and 450. Once we're set there, what we're looking for is oil temp greater than 100 or oil pressure less than 95. And it's either or. It doesn't have to be both. So right now is now we're just sitting here waiting for this to be greater than 100 or oil pressure to be less 95. And this is where I take the time to set up my navigation, check my AWAs, set up the GPS, all that, because there's nothing for us to do until those numbers come down. So what I'll do is I'll just go ahead and set up the GPS here. Gallons on board right now. We'll push, continue, hit the map for us, and then we'll just listen to the AWAS.
35 Zulu. Wind 320 at 06.
I like to set the wind.
Visibility 2 1/2 miss. Sky condition broken 700. Overcast 1300. Temperature 04 Celsius. Dew point 03 Celsius. Altimeter 3024.
3024.
Variable between 500. Density altitude minus 500.
So weather's crappy, as you guys can hear, but that gives me time for my temps to come down. So now we've got oil temp greater than 100. And I also. Well, I don't have oil pressure less than 95 yet. However, it's either or. So since I have oil temp greater than 100, I can move on in the checklist. So now what I'm doing is bringing rotor up to the 530. So we're just slowly going to increase throttle. And as you can see, the needles have come to the low yellow. So if you check your nr, you can see that the light is blinking to show low rotor speed. Then the yellow should coordinate there as I continue to roll on. Once the needle hits the green, then our NR should go to green. And it did. We're going to stabilize about 5:30. And now we're going to check our carb heat. What we're looking for is once I go hot on the carb heap, I'm looking for a rise in carb heat here and a decrease in rotor rpm. So here we go. I'm going to flip it to hot. Ok, there's our carb heap starting to come up and you can see that our RPM is starting to drop. Because remember, as you add carb heat that robs engine power. So it's coming down. So now I'm going to come back down to hit my auto. Go to auto. Now I'm going to go to the cold position. Now the opposite should happen. My carb heat should decrease and my rotor RPM or my needle should increase. Okay. So that's coming down and it is. And the needles are coming up slowly. Once we do that check, come back down here and put your carb heat back in the auto position. Because the computer, the auto carb heat, it does exactly what it says. It's going to run your carb heat for you as you're flying. Alright, so we did that carb heat hot, carb heat cold. We did that carb heat to auto. We're back there. Okay, now what we're going to do is split the needles, we're going to roll off throttle. So this is kind of one of those things too that all happens here at once. So I'm going to roll throttle off, I'm going to split the needle to check the sprag clutch. When the rotor RPM hits around the 460 then I'm going to get the low rotor RPM horn and I'm going to mute that by flipping that switch to mute also when I split the needles, we're going to add some left pedal to help compensate for the loss of torque there so the aircraft doesn't spin if we're sitting on something slippery. Alright. Or wet like today. So here we go. I'm going to Split it in 3, 2, 1. There's the split, there's the horn. I'm going to mute and as you can see, you'll see that I've got left pedal. And now going to rejoin the needles around 1600, 1700 and I'm going to come down here, I'm going to flip my governor switch to the on position and you'll notice that the gov light Went off. This is where I like to say that the governor is armed. So above 400 or 2000 is when it kicks on. So the governor is armed right now, but it will go active once I roll the throttle up and hit the 400. I don't like to sit here and finish the checklist at the RPMs at the operating RPM because you're just burning a lot more fuel. It's noisier. Plus the thing's ready to fly if you're not guarding the collective. Ready to go. So I'm going to sit here. I'm all ready to go. All I got to do is roll up throttle into the operating RPM and then we can take off. But while I'm sitting here, I'm going to finish this checklist. So I rolled off throttle. We split the needles, we heard the horn, we muted. Now we're at stable. Governor is on, which we showed that it will engage at 400. We talked about that. So now I'm going to do the before takeoff checklist. So doors are closed, seat belts are fastened. Yep. Warning lights are out and they are okay. Temps and pressures are in the green. So warning lights are out by temperatures. I still have one yellow here, however, that's my oil temp. And my checklist states that I need greater than 86 on the temperature to take off. If I want max power, then I need 140. So right now we couldn't do max power because we don't have 140 on the temp. But we are good to take off. So I can move on the checklist here. So landing lights and navigation lights as needed. So I'm going to go ahead and flip on the navigation light because it's kind of a dreary day out here. Transponder is in our altitude reporting and it is performance calculation, the mli. So you guys need to know that there is a difference here. So your EPM is the total screen. Here is your electronic power. It monitors your whole screen. Your MLI is your multiple limits indicator, which is your power setting here. So the MLI is taking in several indications like outside air temperature, throttle position sensor. Oh, man. Like three other things. It's. I don't even. I can't remember. So there's taken in five different sensors here and giving you a power setting. So it's figuring out what kind of power it's going to give us, taking in those settings. Like I said, outside air, tempo, density, altitude, probably throttle position sensor, that kind of stuff and giving us an output here. So that's our mli, so performance calculations. That's good. It's done it for us. Collective friction is now off. But I know as a personal setting that I already know it's off. And comms check we've done. And then for our checklist it goes on into instrument stuff. If we were training for instrument, we would check our gps, the vor, the attitude indicators, that kind of stuff. So there is your checklist. Alright, so now all I got to do is roll throttle up and I'm ready to go. So we're going to go ahead and do that. So I'm going to roll throttle up. You'll see that the governor kicks on at 400. And what you want to do is just kind of guard that throttle and make sure that your governor doesn't run away with it because you can override that governor. So I'm just kind of letting the governor do its thing. If it started to go up into the red, then I would catch it, make sure it doesn't overspeed. And now we're ready to go. All right, so here we go. I'm clear on the left and right. Our windshield's cleaned up a little bit.
Yep, window looks good.
Yep, window looks good. So I'm getting in our pickup position. So a little bit of right pedal, a little bit of right cyclic and aft cyclic. And now we're just going to get light on the skids. Two step process. We're going to pick it up. We're checking our power setting. We want to note how much power we're pulling in the hover. Here we come. We're coming, getting light and we're coming straight up. There we go. So hover power right now is about 84%. So that's 86 somewhere in there. And now what we're going to do is I'm just going to come straight out. I like to make 90 degree turns, so clear me on the left. Tail's clear on the left.
Clear on the left.
Alright, so I'm going to add some right pedal and then I'm just going to follow us out. Now, before we take off or before we do anything, we're going to come out here and I always make my students do a power check. We need to make sure that we can override if we got into a left turning tendency in order to do a power check. We're just going to come out here. All right, clear me on the left side again. Clear on the left. Alright, so I'm just going to do a 360 right pedal turn. Making sure that I have the power to go right in case the aircraft starts spinning to the left. The other thing I'm doing is I'm checking the area. So I'm about ready to take off. I'm just kind of looking around in the traffic pattern, see if I see anybody out there flying. As you can see, we've got plenty of power. We're sitting about 86. Still plenty of power. And that is our power check. And that is your startup procedure for a gimbal G2. Awesome.
Nice job man. Thanks for talking us through that. And I like it because even though we've been flying this together a little bit, I've been paying more attention to training and doing videos than I have really with the startup. So now when I'm editing this, I can really learn the startup and really hone in the verbiage of what goes on during the startup.
And again, I think everybody, every company or every people who fly these, they condense the checklist out of the poh. And that's what Sweet Aviation has done. So the checklist may not be exactly what someone else has or exactly how someone else might do it, but that's our checklist and that's how we go through it. Sure.
Alright, that's it. Hey remember, you can go down below to get that free PDF of my Amazon number one bestseller helicopter check ride. You can get the free PDF and or get the paperback. We ship it anywhere for just seven bucks. So do us a favor, subscribe to the channel, click the bell so you'll be notified of our upcoming videos. And Chris, give yourself a plug for.
Sweet Aviation.com come find me Sweet Aviation.com Fort Wayne, Indiana second location Goshen, Indiana and hey, I'm enjoying, enjoying doing this with Kenny. I love to put these videos out for you guys. And it's because of you guys that we're doing this. So feel free to. When we put them out, feel free to comment. We try to respond as, as we can. Got any questions? Give Kenny a call or you can call me back on. I'm not going to announce my phone number over this, but you can also, you can always get a hold of Kenny or somebody or, or me through the website. Call me and we'll, we'll get in touch. Yep.
Kennyelicopterground.com so subscribe. Click the bell and there will be more videos to come on kg2. We're having too much fun.
We are having.
We got a bunch more we want to do.
Oh yeah, we do.
All right, peace out. See you next video. I think Gringos is going to be proud.
I hope so.










