Enstrom Helicopter F-28 F
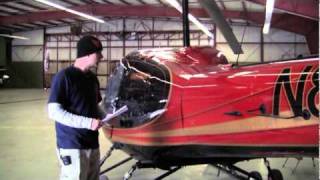
A first-person walkthrough (voiceover) of a preflight inspection for an Enstrom F-28F helicopter, demonstrating step-by-step exterior and engine compartment checks, fuel and oil measurements, rotor and tail inspections, and basic cockpit light checks. The narrator references the Enstrom operator's manual and emphasizes safety: verifying doors/panels, fuel quantity, oil levels, seals/clamps, lights, and visual signs of damage or leaks before flight.
Questions this video answers
40 gallons
About 38 gallons
20 minutes of reserve fuel
Between 6 to 8 quarts (ideal ~7 quarts)
Just under 7 quarts
Chapters
This is the Enstrom F28F. And we have our Enstrom preflight checklist developed by a few different guys. It's always coming in handy. And it's taken right from the NSTROM operator's manual. If we had any covers on it, any tie downs, we take those down, we check our skids, make sure that there's nothing frozen, nothing locked down, nothing hanging on top of them to prevent any takeoffs or movement or anything like that. First we gotta check our. We check our left hand door for security, make sure the latch works, and we check inside, make sure we still have our fire extinguisher, which we do, and just a bit of safety. Every time we open any panels, open any doors, take off the fuel cap, anything like that, once we check whatever portion we're checking, we go ahead and shut that. We just make sure. And then of course, at the end, we still do a walk around, make sure all our panels are closed, all our fuel caps are on, our doors are closed, things like that go through. Rechecking our top windshield, of course, our bottom screen for any cracks, any brakes, of course, check for clarity. If we've got to clean it, we'll go ahead and clean it. Do that across the entire front of the aircraft, both left and right side. Bottom side is also. We want to check our landing light for security, of course, make sure that the landing light's there, but then also make sure that it is fastened in, make sure it's not going to fall out. We've got our pitot static tube right here. Our pitot static tube tells us basically our airspeed. We want to make sure that that's not clogged, there's no debris in it, so that we get proper airspeed indication. A lot of the checklist is redundant, of course. Whatever we check on the left side of the airc, we still check on the right hand side. So again, we're checking our right hand door for security, make sure the latch works. Then we go ahead and we start checking our fuel now with this. This may look like a simple paint stirrer, but actually Enstrom does have it for the various models. To where you can actually dip this inside your tanks, to where you can visually check your fuel quantity as opposed to actually relying on that gauge. Of course, anything mechanical can and effectively will go wrong at some point, so we just make sure that we have the fuel that we need. Right here at our fuel mark, we're showing about 38 gallons of fuel, which means we're just about topped off. The Nstrom here holds 40 gallons of fuel. And per FAA regulations, we have to have 20 minutes of reserve fuel. What that means is once we land and shut down the aircraft, per regulation, we have to have at least 20 minutes of usable fuel within the tanks. That's basically just for safety and security of the pilot, the passengers, if there's any equipment on board. Just make sure that you realize and understand how much fuel you do have. Inside here is the top of the engine compartment and then also the bottom of the fuel cells. What we check in here is there's a bladder that surrounds the fuel cells. We want to check and make sure that there's no fuel actually in that. We want to check for any leaks, any damage, anything like that. And there are screws on top of a plate that covers the engine compartment. We want to make sure that they are, of course, intact there and everything squared away. But we also visually inspect to make sure that there's nothing in there. Let's say the aircraft had sat for a while. You could have a bird's nest, there could be a tool in there, something like that. We want to make sure that there's nothing in there. Go ahead and close that down. And we check our right hand side engine compartment. Here. Of course, it's general condition. We want to make sure that we've got a few different hoses back here. We want to make sure the hose clamps are good, want to make sure the seal on our induction is good. We want to make sure that there's no debris going through our oil coolers or anything like that. Basically, you're not really looking for anything mechanically wrong. Of course, that would be on the mechanic's job. But we want to make sure that there's nothing visually wrong. Obviously, if we had a major oil leak, if we had a coolant leak, anything like that, it'll show there. So once we've done that, as always, we open a compartment, then we shut it. Again. Instead of just checking for icing or any debris on the struts, on the skids. We want to check and make sure that they're not in any sort of unnatural position. We want to make sure that they do set flat. We want to check the pistons here, make sure that there's nothing crazy there. Because of course, in the event of like a hard landing or an emergency landing, you want, you know, this is just like a shock absorber on your car. You want to make sure that there's still a little bit of that. It'll do its job. Now here we've got two different access panels. They just pivot. And what we do is we check the drive pulley. We want to check it for any sort of cracks that we can see through coming. And we also want to check the oil level in the main rotor gearbox. We just check down through here. There's actual, there's a hole that's engineered to where you can see straight through the airframe to the gearbox. Of course, the same thing at the base. You want to check, make sure, just visually inspect the drive belt, make sure that there's no excessive cracking, nothing's broken, anything like that. On the tail boom. It operates basically the same way on both sides. You want to check, of course, for any damage. You want to check for any loose antennas. You want to check the underside for essentially any damage, any cracks, any debris. You want to check for any looseness. You want to make sure all your lights are intact. You check down at the tail rotor protection, make sure there's no cracks, no damage. Here at the tail rotor, there are a few different things that you check for. You've got your course, your leading edge. Excuse me, you check your leading edge. You check for your strike tabs, which are at the end of both of your tail rotor blades. We have pinch links here which are part of the tail rotor system, which actually help actuate it for the tail rotor to pivot. Here we've got an oil level indicator for our rear for our tail rotor gearbox. Make sure that there's oil there. If you check what they call a teeter stop. Basically you want to check and make sure that when you're full pedal that you have at least an inch to an inch and a quarter of distance between your actual tail rotor blade and this cable. This cable is what actuates your tail rotor to give you any movement or anti torque. With that, we're good. And as I mentioned, it's the same way down the left side of the aircraft. We check the boom for any damage. We check for any looseness either in the antennas. We check for in the right and left stabilizers. Make sure our lights are still there. Make sure with our static ports that they're clear. Our static ports actually feed a number of our internal instruments. Also, if our static port does get clogged, it can. We've got our gyroscopic compass that can malfunction. And of course, without a compass, you know, unless you're really, really good at navigation, you know, you may not know where you're going. Back here at this panel, it's the same as the opposite side, where we're checking the drive belt pulley, make sure that there's no cracks, no tears, make sure that it is operable. We also have our drive belt pulley engagement. We want to make sure that that's nice and fluid and movable. Same thing. Again, we're checking out our left hand skids. Make sure that the pistons are in good shape, make sure there's nothing visibly wrong with them. We go in here to our left hand engine compartment, and as opposed to the, to the right side. Here on the left side, we have our turbo, we have our exhaust, and here with our, with the heads, we want to make sure that the, the welds are still solid. We want to make sure that the wastegate isn't broken. And obviously we're checking for any sort of oil leaks. We want to check and see if there's any debris or damage. We can actually look through it, check through our oil cooler, make sure there's no blockage or clogging in the oil cooler, whether it's from grass, dirt, mud, anything like that, that's all done. Once again, we make sure that we close down our panel. Then we go here. Once again, same as the other side, we want to check and pat and make sure that there's no fuel leaks in that fuel bladder. We want to check our engine compartment cover screws. But also on this side, we check our oil quantity. Unlike most vehicles, where it's, you know, four or five quarts, our operation, our operational fluid here, is between six to eight quarts. Generally, of course, you know, shoot right in the middle at seven quarts is going to be perfect for us. But it's just a standard dipstick, just like your car. We check our oil levels, and we're just under seven quarts, which means we're good to go. You want to make sure your fuel, your oil cap is on, and of course, it's just another visual inspection throughout to make sure everything's good to go. And just as we did on the right side of the aircraft, we go ahead and check the left side of our aircraft for our fuel quantity. In this case, the aircraft has been sitting, so all the fuel would have siphoned from one side to the other to balance itself out. And in this case, our fuel quantities shows the same on each side. Now, if we would have just put fuel into the aircraft and it hadn't siphoned over just yet, we would have a reading on one side that would show, for example, 18 gallons. And on the other side, it may show 8 gallons because it actually siphons out from one tank to the other to equal out. So we have good weight and balance for the aircraft. Now we go actually back into the aircraft. We want to turn on our master switch, our position lights, our anti collision lights and our landing light to make sure that everything is operable. So we've got our strobe and our red light on the left hand side, of course, we've got our landing light in front. Check down the right hand side, we've got our strobe and our green light on the rear stabilizer there. So we know that all our lights, all our functional lights, all our necessary lights are operable. Now we want to go ahead and check the underside of all of our three main rotor blades. Just check down, we want to make sure that there's no breaks, there's no bonding issues, make sure that the base of our leading edge, the edge that actually cuts into the air, is all in good working order and good shape. We check that around to all three of the main rotor blades. And just like on the tail rotor, where at the very end there's a strike tab, we still have strike tabs. There are two strike tabs on each of the three main rotor blades. And once we check the underside, of course, we've got to check the top side. When we climb up, we check the top side of the rotor blades, we check the walking beams and dampeners for any looseness, anything like that. We check our main rotor pinch links, which operate the exact, exact same way as the tail rotor. And we also check the air inlet as well as our transmission fuel, our transmission fuel cap, to make sure that everything is squared away with that. So once again, we down each of the rotor blades, ensuring that there's no cracks, there's no bonding issues, just to ensure that everything is good to go for a nice safe flight. We check our pinch links all the way across. We check our dampeners for any looseness. We also check our walking beams. Now with that, of course, to any sort of novice, you may not know exactly.










