H269 / Schweizer Preflight Part 1
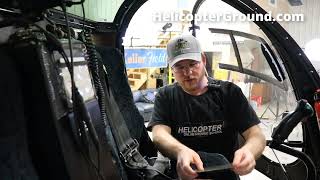
Kenny Keller walks through a preflight inspection of the H269/Schweizer helicopter, starting at the nose and moving back. He checks windshield condition, fairing screws, pitot and transponder attachments, induction intake, doors, seat belts, and controls for cracks, loose fasteners, and obstructions that need a mechanic.
Chapters
So today we're going to go over the preflight on the H269 helicopter. Now there's a couple things I like to do when I start a pre flight and a few things I like to have on hand. First off obviously is the checklist. Always, always, always have the checklist. Reason for that is we're human, we use checklists a lot in aviation. For that reason, there are a lot of things we want to make sure we check that are in good condition that we don't forget. And having a checklist helps you not miss those items. So checklist number one. Number two, good flashlight. Because there's a lot of stuff inside the engine bay or even in the cab. We're inside the hangar right now and the lighting is not even super amazing for some of this stuff we're going to check. And so having a good flashlight lets me actually get into the nitty gritty and see stuff in there that I wouldn't get a good view of otherwise. You're also going to want to have a couple of paper towels because we're going to check some oil and your hands are going to get dirty. The way I can tell you've done a good pre flight or not is how dirty your hands are when you're done. If you look like you've already washed your hands and you're just, you just finished a pre flight, I'm probably gonna have you do it again if you're my student because I want to see you get in there, really get to know the aircraft. And then something else I have on hand usually is band aids just in case. There's a lot of cotter pins on here and I'm kind of ham fisted sometimes. So if I'm reaching in there and checking something when I pull out, sometimes a cotter pin will catch my finger. Just nice to have on hand. But we're going to start on our aircraft today with the nose area. And as you approach the aircraft to start your pre flight, something I like to do is give the aircraft a good once over visually. So when you're walking up to approach the aircraft, see what kind of attitude it's in is you know, the tail hanging lower than it normally would do you see a puddle of fluid under the aircraft that we need to investigate and find out is that fuel, is that oil? Something else. Do we have a leak in the hangar roof? Maybe it just rained last night. It's just water. But note that kind of stuff while you're walking around. Additionally, first item on our checklist is aircraft tie downs and covers. So when we're coming up to the aircraft, some places use tie downs that go over the ends of the rotor blades. And so we want to make sure that those have all been removed. Obviously, if those are still on the aircraft when we start up, we're going to have some pretty serious problems. So make sure that the tie downs are removed. If you have one that covers your rotor mast as well, you'll want to remove it now so we can move through that pretty good when we get there. Next, we're going to check for aircraft attitude for weak or damaged oleostra. So we're going to get in front of the aircraft here and I check from all sides as I do the preflight. But since we're starting at the front, I crouch down, get a good look at it, looking to see if it's offset to one side or the other or if it sits nice and even. In our case, it looks like it's in pretty good shape. Next is canopy condition and cleanliness. So for here, I climb up and I'm going to run my hand along all of the supports on the windscreen and I'm looking to see or feel while I see, because I'm doing both. Are there any screws, anything that's protruding from where the windscreen is attached to the actual airframe of the aircraft? Looking at the windscreen itself, do I see any cracks? We've got bug guts here we could clean off later. What's the overall condition of the windscreen? Because this is what we see the outside world with. And when we're in VFR flight, we're out, eyes outside a lot. Right. So I don't want a bug gut down here or worse up here. That's going to make me think there's an aircraft that I have to avoid when really there isn't. Plus, it's just we like to see outside. There's pretty things to see when you're flying, so get rid of all the bug guts and whatnot. If you find any cracks, let the mechanic know. They need to stop drill though, so they don't continue to spread. So we're going to continue over to this side. Same thing. Any screws sticking out, any other obstructions on the 269? We also have a sealant here that seals the gap and I'm looking to see if there's any significant cracks or if that sealant is pulled up and away from the windscreen. Something that's going to flap in the wind and get worse While we're flying. So it looks pretty good. Next, I'm going to move on to the fairing itself. And there's all these screws here. Now, these are captured screws that have a spring underneath that will pop out. So we're looking to see that those are all flush. We're looking for the condition overall of the fiberglass itself, Making sure everything is nice and secured. No cracks or holes in the fiberglass. Everything looks pretty good. I also check our air filter here for our induction system. Make sure that this pin is in place to keep that cover from coming off and make sure the COVID itself is actually secured and everything looks good. So from there, we're going to start checking these items that protrude out of the front of the aircraft. So we have our outside air temperature gauge. And I'm just giving a gentle kind of wiggle. You don't need to be really aggressive with this. You don't want to rip it off if it's not loose already. You don't want to rip it off at all, to be honest. But just give it a nice wiggle. Make sure it's actually secured in there. Check the secured collar nut here that it's in good shape. Check our VHF antenna. Same thing, just a nice wiggle. You can feel all the screws there, see if they're sticking out at all. Moving on to our pitot tube for our pitot static system. Very important here as well. Make sure it's secured. It's not going to wiggle or fall off. Locking collar is in good shape. And then visually inspect the tube itself. And down in Arizona, where I did a lot of my flight training, we have bugs that like to crawl in there and make nests. So it's always good to actually look in there as far as you can. This one bends pretty quick, but get a good visual of what's going on inside there. It feels good, but there could be something further down, so check and make sure there's no obstruction there. Checking our transponder antenna. Make sure it's in good shape. That looks good. Next, we're going to check the actual induction system. So this is the air intake for the engine. And again, I get the flashlight out, Take a good peek, make sure a bird or something hasn't fallen in there, or not fallen, but built a nest. Make sure a bag hasn't gotten ingested or leaves have built up. You want it to be nice and clear. So we get good air flow to our engine, which doesn't or won't give us problems. Later if it's clear. From there we're going to move on to the cabin on the left side. I'm going to continue my check for all of the nuts, bolts and screws, checking to see if anything is loose, has backed out or is protruding. The overall condition of the door again, no cracks, significant dents or dings, anything loose or out of place. That all looks good. So then I'm going to go ahead and open the door up and again check on the inside and you don't have to go along and we're not looking for you to torque these to a specific spec or anything. Just make sure that they're secured. None of them are loose, vibrating or anything. Those are good. Make sure that our strut here is good and it's actually secured. And come around here real quick. I'll show you what a crack that's been stop drilled looks like in the Plexiglas. We've got one right here and this is a good example of why we do a check externally and internally. Sorry. On the doors. Because this crack was hidden behind the support beam, I wouldn't have seen it from the inside. So a good outside look helps first. That drill hole right there just prevents that crack from spreading further. Alright, so now we're going to come back inside the cabin here. We're going to check the seat belt. So what we're looking for here first is to make sure that the actual seat belt system itself or mechanism works correctly. So I pull the seat belt out, make sure we actually get good travel. Because I've had seat belts in aircraft before that didn't like every time you move, they caught and it was a real pain in the butt. So check and make sure that you actually have good movement so you can move about freely in the cabin. But then we do want to listen for giving a sharp tug and mechanism should engage to prevent us from going too far forward in the event of an abrupt stop or an accident. On top of that, we're going to look for any fraying on the seat belt itself, make sure that the straps themselves are in good condition. There are no cuts, loose seams, anything like that would cause a failure of the harness in a moment where we actually needed it. Everything looks good there. Latches all look secured and of course when you're done with an aircraft, always, always buckle it back up from there. We're going to go ahead and check our pedals now here. Some aircraft don't have adjustable pedals. We're lucky that we do in the 269. There are four different positions you can set them in. They just rest over the actual peg itself, and then there's a retaining pin. We're looking to make sure that that pin is over the peg to prevent them from coming up and getting loose in flight if you know where you want them. Once you've flown it a couple times, you'll know what setting you want it in. Now is a good time to go ahead and make that adjustment as well. Make sure that those move freely without any bind things. Good there. Check to make sure that your fire extinguisher, if you have one, is secure, because you don't want that coming loose in flight. If you have a gauge on the fire extinguisher, make sure it's in range. Make sure that the inspection date's good. Ours is over here, and it looks good. And we have a little tape because it vibrates a little bit during startup. Go ahead and check your controls. Make sure the frictions work correctly and that they are appropriately tensioned. Make sure we don't have any fraying for any wires or cables that go to controls on the stick itself. And then make sure that the floor area is clear. And from there you can also move up. And we'll do a quick scan of our instruments, make sure all of our gauges look like they're in good condition. No cracked glass anywhere. That would impede anything in the Pitot static system from working correctly. All of our switches are off. We leave the beacon light on here because if you forget to turn the battery off when you walk away from the aircraft, the beacon will keep flashing. And it's a good reminder, hey, go back and turn your main battery off. Everything else looks good. And we'll do a more detailed check when we're actually in the aircraft doing startup.










