H269 / Schweizer Preflight Part 2
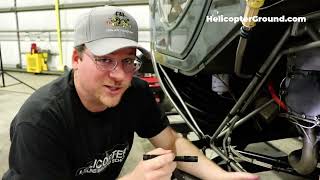
Kenny Keller walks through the left-side preflight of a Schweizer H269 helicopter, checking landing gear, lamps, and engine components. He notes six quarts as the minimum oil level, inspects safety wires and fasteners throughout the engine bay, and flags what to report to the mechanic: leaks, wear, loose bolts, or missing safety wire.
Chapters
So the next thing we're going to look at is the landing gear system on the left side of the aircraft. And we're going to start by inspecting our front oleo damper. For that, we're looking for proper extension. And this is something you'll just kind of check over time with the aircraft. You can put your hand up next to it. That's a good way to gauge how much extension it actually has. If you're used to seeing, you know, a certain amount or maybe a palm's width in this case, that's pretty close for me. If it's a lot less than that, you need to notify the mechanic and have them take a look at that. We're also going to check to see if there's any leaks inside. And you can do that by grabbing the skirt here. And you should hear a squeak. If you don't hear that squeak, There's a good chance that the strut has leaked a little bit. And there's some grease or excess oil on the strut leg itself. That's letting that slide too easily. Make sure that it's secured with our zip ties here. And then check the actual bolt at the bottom and the top itself to make sure it's secure. After that, we're going to check the skid tube. Now, it's a little hard to see when we're on the dolly here, because our dolly has some kind of waves in the metal a little bit. But what we're looking for underneath here is clearance underneath the skid, as well as overall skid condition with clearance on the skid. On this aircraft, we have three skid shoes. So we got one in the rear, one in the middle, and one at the very front. And we're looking for good space between the base of the skid itself and the ground underneath. Because if we don't have any clearance at all, that means our skid shoes are worn and they need to get replaced. In this case, we've got pretty good view of light and space underneath them. So the skid looks good. Overall skid condition looks good to me. Cap is secured. Now we're going to check the left nav and strobe lights. And that's this right here. Notice this is no step, so don't go stepping on that and break it off. We don't need to give an aggressive tug on this, just like we wouldn't with any of the other electrical equipment or the antennas. We're just looking for a nice little wiggle just to make sure none of the Bulb assemblies themselves are loose and that the mount itself is in good condition and securely mounted. From here, we are going to break out one of our handy paper towels and we're going to check the engine oil. Now on the 269, the dipstick is actually pretty long, and when it gets down in there, it might need a bit of a tug to get it out. So don't be surprised if it's fairly firmly seated. And we're going to withdraw this and check our oil level. The way we're going to do that first is we're going to fully retract it and wipe the dipstick itself off to make sure we get a good clean reading. Well, then reinsert down the tube all the way. Sometimes you'll hit kind of a dead stop where it'll feel spongy. You want to get past that and make sure it goes all the way in, close it and then back out. And for us, right now, we are dripping on our checklist. We're just below six quarts, so we like to have six as a minimum. We're pretty much on the line, so we're good there. Aside from checking oil level, you can also keep an eye on oil condition if you know how long it's been since the oil has been changed. If it's maybe only been a few hours and it's already really black and dark, that might be something you want to keep track of and let the mechanic know about, as that could indicate other issues. From here, we're now going to go down inside the engine bay itself a little bit. If you want to swing over here. The first thing we're going to check is our engine sump plug, which is this guy right here. So here's the engine sump plug itself. We're going to take a look at this, and we're going to make sure that the safety wire is in place, that the sump plug itself is flush with the gasket underneath and no leaks beneath that. Then we're going to start looking throughout the engine compartment itself for any other leaks that might be present. Special areas of note would be something like around the crankcase edges where they meet, so you have a split case, the oil filler tube itself, and again, there's another safety wire we're going to check for and anywhere else within the engine compartment that may have a fluid leak of some kind. We want to take a look and narrow down where that's coming from and what it is so we can solve that overall. We're also going to inspect all of the electrical connections, anything in here to make sure that they're still secured. We don't have any frayed wires anywhere. Any zip ties that might be broken from age we want to let the mechanic know about so they can replace those. Also any of the oil lines we're going to check and I like to run my hand along them here so we can get a good visual inspection as well as physical. Go back over to the oil filter here. Same thing, run your hands along the oil lines themselves. Now if it's a braided line like this rather than a coated one, just be careful in case there is any fraying you don't get poked. Again, band aids and we're looking to see if at any of the low points on those oil lines if there's any oil that settled would indicate a leak. The filter itself looks good. It's safety wired in place. Electrical connections are looking good so far. Again, zip tie secured grounding cables, good fuel lines. Fuel is another thing we can look for to see if it's leaking anywhere really any fluid we're looking to find now a little bit of oil seepage is normal. That's normal to get on your fingers like this. Like I said, if your hands aren't dirty after a pre flight unless it's a brand new aircraft, you've probably not been thorough enough. But we're looking to see if there's any significant dripping puddling under the aircraft. Build ups on low points that would indicate something more severe. We're also going to check our spark plug wires here for fraying, make sure they're in good shape. And then I now I do this right now because the aircraft's cold, but reach in here and check these spark plugs to make sure that they're actually secured. If this aircraft had just flown, you'll want to exercise good judgment. That's likely to be hot. So don't go sticking your hands in places that are going to be really hot. But if you can, it's good to get in there and feel around a little. We're also going to inspect the exhaust system. Now if you look here, we've got a little bit of white deposit that's normal in those locations at joints on the exhaust system within reason. However, if we see a significant increase of that soot buildup or if we see it in other places we've not normally noticed it before, we're going to want to let the mechanic know. We're also going to check all of the screws on our valve Cover gaskets. We know we've got one here. So we've already notified our mechanic that that one is not there. Make sure that they're all present and secured. That our spark plug cover here is secure. Along with the four screws that secure it. So everything looks good so far on the left side. We're also going to go to the back here. If you want to point the camera back inside. And check our alternator belt tension. A good way to check belt tension is to give it a rotate or a rotation of 90 degrees. If you can go a little bit past that, that's okay. But it should be fairly difficult to get more than about 90 out of the belt. If you can get a lot more than 90 degrees of rotation, that belt's not tight enough. And you'll again want to notify the mechanic. We'll go ahead and continue to check that the alternator itself is mounted securely to the bracket. There is a screw there for adjustment. End up on the crankcase itself. Make sure that's secured. Connections on the back look good. All right, from here, we're going to swing to the back of the engine real quick. And we're going to inspect the lower coupling shaft. So that's this right here. So this is what's called a short shaft or the lower coupling shaft. And this is where the output of the crankcase or the crank itself comes to and goes to our lower sheave. We want to rotate this. I don't know if you can hear that or not. I'll get a little closer, so maybe my mic will pick it up. That's what it sounds like. Normally. What we don't want to hear is a lot of hard metal to metal contact. We also want it to move a little bit. If it doesn't move at all, we'll want to check with the mechanic and let them know that looks to be in good shape. You'll have a little bit of four and a half movement. That's perfectly normal as well. Now we're also going to go inside the impeller housing here. Which is the cooling system for our aircraft. If you note, there are a lot of safety wires in there on the main nuts. So we want to make sure that these are all present, not broken and in good condition. Verify everything is tight. I also go along and check the smaller nuts that secure the impeller blade itself. Make sure they're good. Often you'll see that these are marked with paint. And that makes it really easy to tell visually if they've rotated or not. Because there'll be a little line across the nut and the item that it's securing. And if that paint is broken, then that nut's moved. And then I give a little flick to the impeller blades. I'm looking for anything that sounds unusual or different, Kind of like a dull thunk. And then we check the impeller housing itself, make sure that it's secured. Now, we also have the clutch assembly here. The next thing we want to check is the lower H frame tie bar bracket. This bracket here. Make sure those nuts are secured. There's also one at the base underneath the battery. Check that that's secured so that's in good shape. We're going to check the strut itself for cracks and security. And there are several nuts we're going to feel. Make sure that they are tight. Inspect the bracket itself, upper and lower, for any cracks. It looks good. Check the top. Same thing. Checking to make sure that these nuts are secured. These ones in the back are a little harder to see. So you might have to swing to the other side, which I'll do real quick just to check the other one. See how much I'm using this flashlight, though. Man, they make life so much easier when you're doing this stuff.










