H269 / Schweizer Preflight Part 4
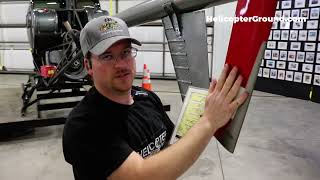
Kenny Keller walks through a complete preflight inspection of the H269 helicopter's tail boom and rotor system. He checks support brackets, rivets, fins, tail blades for cracks and wear, and verifies the tail rotor gearbox oil level. The inspection relies on visual checks, feeling rivets, and shaking components to catch loosened bolts and damage.
Chapters
Next, we're going to go down the tail boom, left side. We're going to start with that by checking this tail boom support here at the base. There are a couple of bolts we want to check for tightness, make sure that those are all secured. We want to verify that this is nice and straight with no bends, because again, no steps. So we want to make sure nobody stepped on it and caused any damage to the support boom. When we get to the top, there's an additional four bolts we'll check. Then finally, the bolt that secures the actual clevis to the tail boom itself. We also want to verify that our GPS antenna is secured and not loose in any way. We're going to check our static port, which on this particular helicopter is located right under here. It's kind of hard to see, even for me, but if you get up there just right, you can see this white tube on ours. There's an open end. We're looking to make sure there's no insects or anything else that would obstruct proper airflow through our static line. I also check on our exhaust system to make sure that the mounting bracket is secured here. Then, as we work down the boom itself, we want to verify that the boom is in good condition. Now, I found the best way to do that is if you start at the one end of the boom and sight down it, which may be difficult to see on camera, but you can see small ripples if any are present. So think of like a soda can. If you've ever, you know, bent the side of a can, squeezed it too hard, you'll see those little dents. Those are really easy to see if you sight down the length of the boom. So we're just giving a good visual inspection. If your hands aren't too greasy from your pre flight, you can also feel as you go making sure all of these rivets are still in place and none have backed out, and that you don't feel any big dents or divots in the boom itself. When we get to the vertical fin, I give it a little shake. Not much, just enough to verify that it's actually secured to the mounting bracket itself and then check. And here's some of those paint marks that I was talking about earlier. If you zoom in here, you can note that there's paint on the bolt itself and then on the surface it mounts to. And if those have been broken loose, you would be able to easily see that. So those all look good. Vertical fin looks to be in good shape. We'll continue our check here. Rivets are good. Alright. So once we get to the tail itself, there's a lot of other stuff going on here. I like to start with the stinger and I feel down the stinger through this entire length. And you want to see if there's any wear on the bottom that might indicate someone has scraped the stinger on the ground or has caused an impact of any kind. And that's something you can check from flight to flight. Gives you a good idea of what's going on there. A gentle shake for security as well as checking the bolts that attach the stinger to the tail. And now we're going to start checking the actual blades along with the pitch links and the teetering assembly. So we have two pitch links here. We're going to treat these much the same as we did on the main rotor system. So we're going to grab these, give them a twist and you should have a little bit of movement in that twist. That doesn't feel too tight but isn't sloppy. Up and down. There should be minimal movement along with fore and aft. You want those to be tight but not so tight that they stick. Next we're going to check the teetering assembly. Make sure the blades are free to flap as needed. And then the bolt that goes down the middle has the cotter pin in it, so that's good. There's also a rubber bushing in here. It's a little difficult to see, but the tail rotor blade main shaft goes over that bolt and it dampens its movement. We want to make sure that's in good condition. From there we're going to start checking the individual blades themselves. We'll check the pitch link bolts on both. Those look good. We'll check the blade mounting bolts themselves and make sure that they're secured. We're going to want to check around these pretty closely as well. So what you can develop in these is cracking. So we want to make sure that around the mounting holes themselves there are no cracks that would indicate fatigue or stress to the blades. We're going to check this abrasion resistant tape on the front. Make sure it's in good shape. We do have a little bit of wear here, but that's acceptable. Make sure that the corners are all good. And we're going to check where the leading edge of this blade bonds to the skin and the tail or the trailing edge. Sorry. So this is a steel leading edge that's then bonded to a fiberglass skin. And we're looking to make sure that that bond line is in good shape, that there's no separation there. Make sure our rivets are in good shape. Make sure that the holes in our skin which allow air pressure from inside the blade to equalize on the outside as we climb in altitude, make sure that those are not plugged and you're looking at just the blade's overall condition. There is another particular area you want to pay attention to, where the blade root meets the shaft itself and make sure that there aren't any significant cracks there. A little bit to pain is likely to occur, but anything significant that looks deep or extends around the blade is something you're going to want to bring to attention to the mechanic. We've done the one blade. I'll go ahead and climb up the ladder and we'll check the other. Same checks looking for the mounting bolt. Any fatigue cracks. I'll rotate this just a little bit to get a better view of the abrasion tape. Normally if we're outside, I would rotate this all the way around, but because we're not rotating blades inside, I'm not going to do that. But when you're doing this, you would want to rotate this to get a better view of both sides of the blade. Alright, that looks good. Next we're going to check the control rod, just like on the main rotor and the pitch links, making sure that that is firm but tight. Checking the bolts for security. And then we're going to want to push on the control clevis itself, make sure that it moves in and out smoothly. And as we do that, we can also check these boots here. We're looking to make sure there are no tears in these boots. They do have some small holes to vent air as they collapse or expand. We want to make sure that those are secured on both sides so they protect that tail rotor drive shaft and everything looks good there. Then we're also going to want to check the oil level. So we have a sight glass right here which indicates either full or that you need to add. If it's low in our case, it's right smack dab in the middle, which is just about perfect. Then the last thing we'll do on the tail rotor is we're going to check all of the mounting bolts. Get my checklist out of the way here. We have several bolts. We're going to check around the circumference of the gearbox itself. Make sure that those are secured as well as the gearbox mount to the tail boom which has some safety wire on them. Those are good Our lights are all in good condition. We also have a sensor back here for the tail rotor gearbox to detect any chips. Make sure that that lead is secure there. And lastly, we're going to check the horizontal fin, just like the vertical. We'll give it a little bit of a shake to see if it's loose and then verify the bolts themselves are tight. And we'll move this ladder out of the way here, Just like when you're moving the aircraft itself in and out of a hangar. If you're moving anything near the aircraft, like a ladder, make sure that you're clear. You're not going to hit anything, rotor blades, tail assembly, anything like that. Go ahead and check the other bolts. Everything looks good. Skin condition also looks to be in good condition there. Now we're going to work our way down the right side of the boom. So I'm going to sight from the other end because I'm not tall enough to see down the boom from here. So we'll sight for any dimples or creases or anything from the other end. But you can feel as you go down. Again checking the four bolts that mount the vertical fin to the boom. Everything looks good. Now, there is a dampener inside the tail boom on the 269 here that dampens tail rotor drive shaft movement. The way to check that is there's a small access port here that usually has a covering. All you do is you stick your finger in there and you can't really see it. But on the back side of that there is a support. You kind of hear it move a little bit, and you're just making sure that that's free to move so that it can dampen any movement within the tail rotor drive shaft, just like on the left side. We're going to check the mounting bolts for the boom support and make sure that that's not bent. We'll check the bottom bolts, verify those are good. Now I'll climb up here and we'll sight down the right side of the boom and make sure that's in good shape. And then lastly, for the tail, we'll check the remainder of the bolts on this cluster fitting and the forward portion of our tail rotor control, which includes this push rod. Again, minimal movement fore and aft, but good rotation as well as the bell crank assembly here. Make sure the bolts are nice and tight. As you move the bell crank, make sure it rotates freely with no binding on the cable. And then you're going to check for cable condition. And a tip for that. Remember your paper towels here or rags. You can use a rag as well. I thought I had a little one, but we'll use the big one. I guess if you take this and wrap it around the cable itself, this is going to prevent you from getting poked if the cable is frayed, but it'll still snag the paper towel or rag. As you move it down the cables, you'll reach a point where it might be difficult to get to. You can reposition. That's fine. And it does get kind of dark in there. So again, we'll break out our trusty flashlight and we'll check these all the way until they enter the cabin, and those look good.










