H269 / Schweizer Preflight Part 5
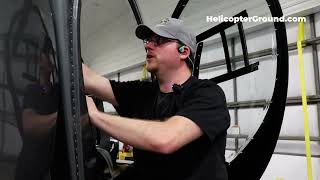
Kenny Keller walks through the right-side preflight of a Schweizer H269 helicopter, checking the drive pulley and sprag clutch, fuel tank straps and cap, engine fittings for cracks, oil and fuel lines for leaks, throttle linkages, landing gear, and cabin components.
Questions this video answers
Within about a half the width of the rubber bushing.
February 7, 2023
Chapters
All right, so next we're going to check the drive pulley system and our clutch assembly. We're going to start by checking the lower pulley. And we're going to again shake that a little bit. And we're feeling along the sheaves themselves. Each one of these belts rides within a groove. We're checking those to make sure there is an excessive wear. Any pitting, make sure the belts themselves haven't worn into the groove. So you'd actually feel an additional groove in here if there was excess wear. So we're checking both the lower and upper sheave or pulley for excess wear. And I do that just by sticking my finger inside each channel and running down the length of it that I can feel. Make sure that those are all good. Now up top is our sprag clutch. So in the event of an engine failure and we have to enter an auto rotation, this is what's going to decouple the engine from driving the main rotor. What that means is that it should rotate smoothly in one direction without engaging the main rotor. Very easy to do here. If I go the other direction, it's a little harder because now it wants to actually rotate the blades. And I'm only going to rotate them a tiny bit because again, we don't rotate blades inside the hanger. But one direction should rotate very smoothly and easily. The other should feel some resistance as it starts to engage the main rotor gearbox. Next we're going to check the tensioner pulley. Same thing we're going to reach in here. And I'm kind of cramped in here for the sake of getting a good view for you guys. Normally I wouldn't pre flight in this tiny space, but this works for now and actually lets me get a pretty good view of the sheave on this tensioner pulley for any wear. We'll check fore and aft movement. We'll relax some tension and check rotation on it. And we'll also check the mounting bolts as well as on the tensioner. It's a little hard for me to get from where I'm at, but there are two other bolts on this side as well that we would check. And then down at the spring to make sure that it returns to neutral when clutch tension is released. Now I'll climb out of here real quick and I'm going to engage the clutch and show you what that looks like. As it begins to tighten main battery on, I'll turn our beacon off again. We leave ours on so we don't leave the battery on, but I'll Turn it off for now. We're going to go ahead and engage the clutch. Now, as we do that, we have a tensioner assembly here that's going to draw this rod up into the servo body. And as it does that, there's a cable that runs down through a pulley, and that's going to tension all of our belts. While that does that, what we're looking for when it reaches full tension is for this rubber bushing up top to match up with the mark on the clutch itself. And it should match within about a half a width of this rubber bushing at most. Notice ours is almost perfectly aligned. So that's good. Once we've checked that, we can go ahead and release the clutch tension. While that's releasing clutch tension, I also check the remainder of our lights. So I'll turn the beacon back on along with our position lights. Make sure the beacon's flashing. We've got a green light on the right. We should have a white on the tail, which we do. I'll come around to the other side and I make a full circle of the aircraft. Make sure that I have a red light on the left side. And those are all functioning correctly. So then I go ahead and turn those off. I again turn the beacon off, and I'm going to climb in and turn on the landing light. Make sure that works. Looks good to me. Turn that off for us. I'll turn our beacon back on and then battery back off so that we don't drain the battery. And then always close your doors when you're not using them. Remember, very important. All right, so once that's checked, we can start moving down through the engine right side and the engine or the right side fuel tank. So we'll start with the tank to get that out of the way. Make sure that the straps are secured. Fuel level sensor is in good condition and secured. Fuel cap is on. Now, on the other tank we had a vent line. These cross feed, so they use the same vent. In this case, we treat it kind of like the pitot tube. I want to make sure there's no plug or anything that would block that, that would prevent the tanks from venting. If the tanks can't vent, they're not going to feed fuel reliably. That causes all kinds of problems. So that's good. We'll start moving down the engine right side here. We're going to begin with the lower cluster fitting. Make sure any bolts that attach there are secured. There are no cracks. Okay, that looks good. We'll check the Top center cluster fitting. Again, using our light to get a little bit better view. Reach up in there if you want. Feel around on the backside. Make sure you don't feel any cracks there. Now the cracks we're looking for, these are all welded joints. So each of these welds can be a failure point. And that's where we're looking for those cracks to occur is along those welds. We have one more cluster fitting up front. A little hard to see past our cabin heat hose, but poke around in there. Everything looks good there. Okay. Alright. Continuing with our checklist, we're now going to check the rear oleo damper extension. So just like we did on the other side. And I'll move through this quick since we've done it already. Make sure those are all in good condition. No leaks and mounted securely. Drag strut rotates freely. No bend. Bolts are secured. And front oleo same thing. Check for extensions, leaks. Security of the skirt with zip ties and bolts. So those all look good. Next we're going to check for any leaks. Now on this side of the engine, this is one of the areas that differs. We do have an oil cooler here and this is also where our cabin air heat comes from. So I want to check all these lines and I feel all of the joints because that's where they leak from first. And then I follow them down with my hand. Again, a little bit of oil on there is normal. There's an old joke in aviation that if an aircraft is leaking oil, you know it has oil. Obviously we want that to be within check, but a little bit is normal. Next we also have fuel lines, so same thing. I'll feel the fittings first, work my way down. I'm feeling for moisture, any accumulation. This is one of our vent or sump lines. These two lines go to one of the fuel pumps we have and then to a gas collater or strainer which filters our fuel. I don't feel any leaks there. We'll continue to follow that into the engine driven pump. And that looks good. We'll get you a view of that with a light in just a second here. All right. Now before we go a little further in underneath the engine, we're also going to check just the general area like we did on the left side. I'll get my flashlight out here. We're just going to look for security of bolts, nuts and screws. Make sure these covers are in place. Check our spark plugs again. If this engine had just been run, you'll want to use caution when reaching into these areas looking for any additional leaks. We do have a very slight leak on this aircraft which we're aware of and keeping an eye on. I then open the cabin door and verify that our cabin heat works correctly, which is this valve down here. So we'll then pull that out and make sure that the valve opens and then closes. Do it a couple times if you need to, to make sure it moves freely. Okay. That functions as it should. Again, close the door for the moment being. And now let's go ahead and take a look underneath the engine a little bit here, see if our cameraman can get a good view. The next thing we want to check are our throttle control linkages. So under here we have our throttle assembly. There are several bolts. We want to check various fasteners that should have cotter pins in them and be tight and torqued to spec, along with a couple of control rods. You want to make sure that there's no excessive slop in any of these fittings and connections and they are all secure. And you can also check for freedom of play or movement. Make sure it returns back to its original position and travels freely. We're also going to inspect the fuel pump for any leaks. There's a little bit of oil in this engine. It's perfectly normal. Seeping is okay. A drip type leak is not. So if you see a little bit on the engine, that's okay. But if it's a constant drip or it's leaking a lot of oil, you definitely want to get that looked at. Other than that, we're just going to inspect for additional areas that could leak from any fittings and general condition in the throttle assembly area. Once that's done, we will go ahead and do our right side cabin checks. Open the door here. We'll check inside first, just like we did the left. Make sure all of our fasteners are secured. Make sure that our lift support is secure because those can pop off. We'll check the seat belt and harness for proper function. Again, I extend all the way. Make sure I can actually move in the aircraft when I need to give it a solid yank there so that engages. Check the condition of the straps for fraying cuts or other failure points like loose seams where the belts should attach to themselves or to the harness anchor points. There is one down here and one on the other side and the very far back of the seat belt or the seat itself. And on the 269, as with many other helicopters, the controls on this side are removable. So I like to check and make sure that they are secure. There is a little bit of wobble here. It's just the nature of removable controls, perfectly normal. There's a couple of pins you'll check real quick and make sure that they're secured. That looks good. We'll also check the pins on this side just like we did on the left, make sure that they are secured. We'll check the pedals to make sure that the tail rotor moves appropriately. Then we'll close the door up. We will climb up and check. Make sure I don't step on the no step area. We're going to climb up and check our slat, our cabin slat here, make sure that it's secured. We'll check the condition of the plexiglass up top, make sure it's clear as well. Check the outside of the door and make sure that the door latches securely. The door pins are in their appropriate condition or place to lock the door in. And then lastly we'll hop down and we'll check the skid. Just like on the left hand side, we're looking for a little bit of light underneath to make sure that the skid shoes themselves are in good condition. And then we're ready to roll.










