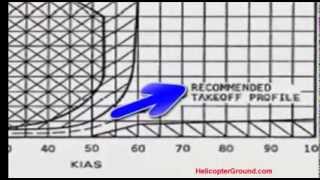
Kenny Keller (Helicopter Online Ground School) explains the height–velocity (H-V) diagram for helicopters, focusing on the two shaded danger areas (upper and lower) that pilots should avoid because an engine failure there prevents a safe autorotation or leads to tailstrike during flare. He describes the recommended takeoff profile—gaining forward speed before climbing—to exit the danger zones and emphasizes frequent consideration of the diagram during takeoffs and by examiners.
Are you struggling with all the information there is to know to become a helicopter pilot? Welcome to Helicopter online ground school.
Last but not least, the height velocity diagram. I love talking about this one. This one you really need to understand. You have the upper shaded area that you can see there marked in red. And we have the lower shaded area of the height velocity diagram. These are the two areas that you must avoid when flying helicopters. Every helicopter has a height velocity diagram. You have the upper shaded area. If you have an engine failure in that upper shaded area, you do not have enough altitude and airspeed to complete a successful auto rotation. These diagrams were designed at the factory. Guys with tons of experience went out and tested this thing and took it to its limits. And that's what it's all about, about it showing what the average guy is going to be able to and not be able to do if he has an engine failure. If you're in a lower shaded area and you have an engine failure, when you go to flare, you're going to bang your tail boom and wreck the aircraft. They're showing you the recommended takeoff profile. As you get moving forward in the helicopter, you're gaining speed little bit by little bit. And as you go faster, you can see there that they want you somewhere before 50, around 40 or so in that general vicinity, they want you to start climbing up. And then once you come up out of that takeoff profile, then you have a little more leeway for handling an engine failure. If the engine quits, you're then going to have air speed, you're going to have altitude, engine stops, you've got somewhere to go. So you could be, you know, climbing up a little more aggressively maybe, if you need to be, or getting up to your cruise altitude for your cruise flight. That's what this diagram is all about. You need to know it, you need to understand it. Examiner is going to ask you about it. He's going to take you to this page or he's going to have you open up the book and show you this. And that's what you're going to want to explain to him. I don't want to be in either area, the upper shaded area. I do not have enough airspeed and altitude for a successful auto rotation landing. And again, the lower shaded area, if you're going fast and you're close to the ground when that engine quits, you're going to descend quickly and hit the ground. So you need that altitude with that higher speed so that you can flare and safely land the helicopter. Recommended takeoff profile. It's everything. You should be thinking about this on every single takeoff that you make, because you're using this chart and you're using the high velocity diagram to keep yourself safe. And that's the bottom line. Will you ever operate in those shaded areas? Yes, you probably will. But be thinking about it and try to minimize that time in that area as much as you possibly can. You get out into the real world and you're flying ems. You operate in that high velocity diagram quite often, and you don't really have any choice but for training, using a big old Runway, you got lots of room. You want to avoid those shaded areas.