Helicopter Maximum Performance Takeoff
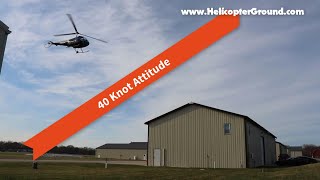
Kenny Keller shows three ways to take off a helicopter at maximum performance: a 40-knot climb from a hover, a straight-up climb into the high-velocity diagram, and a ground-effect run-up with a pop. He also covers a gradual partial-power technique from EMS work, stressing the importance of hover-checks and staying near safe landing areas.
Chapters
Go fly.
Okay, I'm rolling up the instrument here. We got cameras rolling. We're gonna go do some max takeoffs over the hangar. And again, I'm at the end of the hangar. So in the event I had it for real engine failure, something bad happened, I can go to the grass. So I'm not like flying over the very middle of the hangar or anything. So I just picked up hover, check, everything's looking good. Warning, caution lights, gauge is green. Then I get out away from the hangar, check on my left and right, make sure nobody's coming. Heather's got the cameras going, so we're going to get right to it. So the first one I'm going to do is the kind of standard old Max takeoff that I was taught.
All right, as we're shooting all new maneuvers for helicopter land ground school, we're going to do Max performance takeoff. I'm going to talk about it a little bit to show you some options you may have. But I'm going to explain to you first what it is I'm going to do. And then we'll move the helicopter out and we're going to go over there, we're going to film it. So with Max performance takeoffs, you're going to hear some different methods. Around the country, around the world, people teach this differently. I'm going to show you several of the options. What I was taught early on was we did Max takeoffs from the ground. This was 20 years ago. We did them from the ground. You did all your checks, your magnetos, you did all that stuff, and then you just took off from the ground and went like this and away you went over your obstacle. Okay, along the way, I changed my thinking. I don't do it from the ground anymore. I do them from a hover always. The examiner I've used for 20 years, that's the way he wants to see it. He doesn't want to see him from the ground. He wants to see that hover check and then start to maneuver. Okay, so that's my first point. What we used to do, what I do now, been working with the Same examiner for 20 years. So Max takeoffs always start from a hover for our purposes. Okay, so when I was taught, we taught or were taught a 40 knot attitude as you started your max takeoff, that may be what you're doing right now. Very common in the beginning. As a private pilot, this is what many people teach. Basically, you've got your pre takeoff checks done. You've done a good hover pre takeoff check. You know your power, everything's good to go. Here's your obstacle. Now, when you're out training, you're going to usually have a make believe obstacle. Okay? So what I was taught early on, you start pulling the power close to max or to max power, depending on how somebody's teaching it. 40 knot attitude, take off, clear your obstacle and fly away. Okay? So there's one option that you may be being taught then later, as I was a cfi, I went to a specialized school. And the gentleman that I trained with at this point said he didn't like this style of takeoff, max takeoff, he said his opinion, he would rather see you go straight up, get the height of your obstacle and then fly away, never changing the power. Okay? And it makes sense. And when he first showed that, I wasn't sure, but then I tried it and I liked it. So now 20 years later, I think it depends on what you're doing. So in this one, his opinion was if you go straight up like this and you have some kind of a failure or problem, you've got time to come down and do this. His opinion was doing this, if you have a problem, boom, you fly into your obstacle. Okay? Just giving you the different ways of thinking. So I kind of like that. And I still do both. Depending on the situation out in the commercial real world, you may have to do more of this type situation in order to get out of there. This one may not work. So again, I'm giving you the options. These can be done different ways. Then my examiner showed one time, he said, you know, you can as an option, and I've done this too. You can be close to the ground and ground effect, get some airspeed moving, start getting to ETL or just through ETL and then pop up and clear your obstacle. Okay? So I want to show you those three things and tell you, you do whatever your instructor at your flight school or your company, you do it the way they want you to do it. Okay? I think it depends on the situation. I think you can use any of those. Now the one other thing that I want to show you, there's something cool that I wasn't taught until I was a commercial pilot flying EMS. We were flying the EC135, had a lot of power, but they were limited on the amount of power you could use because they were tearing up transmissions, right? The two big jet engines grinding that transmission and they were having a lot of trouble. So we were very limited on the power we could use in the EC135. That I flew, and sometimes we'd have trouble trying to get up high enough to clear our obstacle by pulling straight to max power, okay? And you'd be pulling max power and you'd get about so high, and then you couldn't get out. So you'd have to set back down, burn off fuel, offload equipment. You'd have to do something in order to get lighter. And sometimes it would take us two or three tries in order to get out of there. Okay? So what a Czech airman taught me was he said, have you ever tried doing a max takeoff and not going to full power? And I'm like, oh, I don't know. Not really. And he goes, I want to tell you about something. And he showed me later in the aircraft sometimes. And if you ask me aerodynamically why this happens, I can't tell you. But sometimes if you go straight to max power, you'll get to a point where you. You're at your max and you can't pull anymore and you don't have enough height by going straight to max. He said, don't go to full power. Don't go to max power. Go. Maybe between hover power and max power, just pull in a little slower and only go part way. And he goes, sometimes you can climb higher. And I tried it, and it worked in the EC135. Now I'll do it in the nstrom. And I've told people that. Some people don't believe me, and I've done it. For whatever reason, instead of pulling all the way to max power, let's say you go halfway between hover power and max power, and pull that power in slow, versus a lot of times for a max takeout, people pull right to the max right away and try to get that momentum going. Right? This method is to just pull slower, not pull quite so much and come up a little bit slower. And then you've got time to go, you know what, we're getting close. I'm going to pull a little more. I'm going to pull a little more. And by doing it slower, sometimes you can actually get higher and be able to clear your obstacle and fly away. So it's a method that I was taught again later as a commercial pilot in the EMS environment, taught by a Czech airman. And it does work. So I want you to understand there's different methods. The one thing you're thinking about always is, of course, engine failure on takeoff, right? And the other one point I want to add is I'm a firm believer in this. You Want to limit power changes as much as possible on a takeoff, a normal takeoff, a max takeoff, they tell us that an engine failure is most likely to happen if it's imminent or coming or possibly going to happen. If it happens, it's probably going to happen when you change the power. So one thing that I'm always thinking about during a normal takeoff and a max takeoff, I'm trying to limit the amount of times that I actually change the power. I'm most generally trying to keep the same power the whole entire time without changing anything. Get your airspeed, get your altitude, and once you're clear your obstacles and you have the airspeed, you have the altitude, you have everything you need, then change the power. If you've got somewhere to go. In the event you had an engine failure, you've got a place to go. So just giving you some ideas on how these can be done. So now we're going to take the helicopter out and go see how it works. So let's go do it. Max takeoff, maximum performance takeoff. That is. It's one I like to teach. We're going to go demonstrate it for you here with the helicopter and use the hangar for our obstacle. And I'm going to stay close to the end of the hangar. So in the event I had a problem, I could actually set down in the grass between those two hangars. We're going to use the helicopter. I'm going to go demonstrate the different ways people teach this. I talk about these a lot. I like teaching this one. I got the toy to demonstrate, but I'm going to go get in the helicopter and do the real thing. Right. So many people are taught now very common from a hover where they take off and do what they call a 40 knot attitude climb out over your obstacle. Very common way people are doing it today. Another method is to go straight up, which puts you in the HV diagram. But sometimes it's necessary to do this, particularly in a commercial operation like an EMS operation. Sometimes they just have to do that. So there's the option of going straight up, flying away. And then there's another option where, say again, your obstacle is over here where you stay low to the ground and ground effect, get some speed, get a little, get ETL to get the benefit of that increased lift and then pop up over your obstacle. And then there's something I like to teach where instead of using pulling straight to max power, I use in between hover and max power to climb out over an obstacle. It's still more of a kind Of a straight up thing, or it could even be used this way. But I'm going to explain that in the aircraft. So that's what we're going to do. And we got another camera set over there, so you can get two different angles. And I'll run a gopro from inside, too, so you can see a little bit kind of looking out the front. So again, there are different ways this is taught around the world. I'm going to show the options that I've seen. And I think depending on who you are and where you are in the world, One may be more appropriate than other, and one or more may not be appropriate at all. It just depends on the situation. So let's go fly.
Okay, I'm rolling up the instrument here. We got cameras rolling. We're going to go do some max takeoffs over the hangar. And again, I'm at the end of the hangar, so any event, I had a real engine failure. Something bad happened. I can go to the grass. So I'm not like, flying over the very middle of the hangar or anything. So I just picked up hover check. Everything's looking good. Warning, caution lights. Gauge is green. I'm got away from the hangar, Checking my left and right. Make sure nobody's coming. Heather's got the cameras going, so we're going to get right to it. So the first one I'm going to do Is the kind of standard old max takeoff that I was taught as a student pilot, Private pilot. This is the method that a lot of you are probably learning and seeing. Okay, so on a max takeoff, of course, we want a really, really, really good hover Pre takeoff check. Make sure everything's going good. I've got a lot of fuel on today, and I did it on purpose so that I'm, you know, having to work the helicopter a little bit harder. But I can tell you we're not doing it. Got to do anything really dangerous. I'm pulling 32 inches of manifold pressure. I need to keep it below 39 inches of manifold pressure. That's where the red line is at. So I'm going to set down because guess who didn't have their door completely latched. So I'm setting down, and I'm going to lock my control, Locking my collective, still guarding it with my leg in my hand. Fix my door, latch it. Yep, there we go. Release collective. Okay, so another pickup. So I'm gonna keep talking while I'm picking up, because we want to get to this. So this first one again, I'm gonna Do the standard kind of max takeoff that many are teaching. So 32 inches or so in a hover is the manifold pressure. I do not want to exceed 39. Okay, so we're gonna get ready here. Good pre takeoff check. Warning. Caution lights are out. Gauges in the green. And I'm going to start raising collective and get a little bit of forward movement. And here we go. There's max power. There's the top of the hangar. I'm not going to change power until I'm clear. Clear my hangar. And now I'm going to go forward speed and fly away. So we'll go around and do another. Okay, so here's the next one. So as I mentioned earlier, I got a big load of fuel on and I have a crosswind, okay. So that if the wind was off my nose, I'd have more power available. I'm doing it with a crosswind, so I have a little less power available. This one I'm going to do the straight up version where it does put you in the high velocity diagram. But I'm going to pull max power on this one and then fly away. So here we go. In 1, 2, 3. I'm going to pull that power in. I've still got a pretty darn good climb. There's max power. I'm going to keep it there. I know I can clear my obstacle. So now I'm going to go forward and fly away. So there's option number two. It does put me in that high velocity diagram for just a little bit. It didn't last real long. Okay, so now we're going to go back and we will do a third option which is get a little ground speed, get a little etl, and then pop up over your obstacle. Okay, back for another one. So this one I'm gonna get just a little bit of ground speed. Not much, but just a little bit in that little bit of airflow coming in is gonna help. So I'm gonna get a little bit of air speed and then start climbing up over my obstacle. Now, in the event it gets to be too much and I'm putting myself in an odd spot, I'll just abandon it and not do it. That's the one thing you gotta be ready in these max takeoffs. Make sure you can do it. If you're unsure, don't do it. Even if you're stopping partway through. Maybe we'll do an example of that. So here we go. I'm going to talk about this option. Get going forward, Moving forward, moving forward. Get A little bit of airflow coming in now. Pop up. Okay, I'm pulling up the max power, and I'm clearing my obstacle, but I'm not going to change power. I'm going to fly away for just a little bit, get some more altitude, near speed before I lower the power. Now I can lower the power and fly away. Okay, now I'm going to go around and do one more, but this one, I want to show you something I was taught once I was flying in the EMS environment, and a Czech airman was talking to me about when I was flying the EC135 and the version. The model I was flying back then, it was a model that they had to really limit you on power. That two. The two turbine engines had a lot of power, right? But the way it was built, there was too much for the transmissions. They were tearing up transmissions. So they limited us quite a bit on our power that they would let us use. So the Czech airman taught me something. He said, you know what, Everybody pulls straight to max power before taking off to try to clear their obstacle. And the problem in ems, because we were held to points where we had a lot of fuel, maybe a heavy passenger, hot, humid day, and you try to get out of a situation and try to clear an obstacle, and you just didn't have enough power, you'd get to a certain point and you would max out. And so you'd have to set back down and either burn fuel, offload equipment, you'd have to come up with some other alternative and then try again. And sometimes you might have to do that two or three times. Well, you're. You want to get out of there, deliver your patient, but you can't because you're too heavy. And then you're burning fuel off, right? And that's kind of the defeating the purpose of an EMS helicopter.
When you.
You're burning. You're sitting there burning fuel, ready to go, but you can't get out of your hole. Okay? So what he taught me was instead of pulling straight to max power, Most people pull 2 max, and they pull it really fast. Okay? That's a method, that's a technique. He said, here's what you try. When you're having trouble getting out of a hole, only pull somewhere between hover power and max power and pull it in real gently and slowly. And for whatever reason, sometimes you can actually get higher than if you just pull to max power. And I went out and I did it, and I. And it worked and it was flipping amazing. So I'm going to use that method right here. I'm going to get a little closer to the hanger so it's a little tougher and I still got some good PO on. Have a crosswind and we're just gonna see what you saw. It climbing pretty good today, but I'm still going to talk you through it. So warning caution lights are out, gauge is green. Everything's looking really, really good. Now what I want to do is again, I'm going to pull about 35, 36 because I'm hovering at 32. My max is 39. I'm going to pull about halfway in between. Let's just see how it climbs. And trick is I'm going to pull it in slower. I'm not going to pull it in aggressively. So let's do that. Let's just start kind of pulling it in. Coming up slower, pulling the power in. I'm only at 34. There's 35. Okay, now I can go. Is it going to keep climbing? Yep, it's going to keep climbing. Going to keep climbing. And there's a point where you'd be stuck if you were pulling max. Look at that. Look at that thing climb. So now I'm going to go. Okay, forward cyclic, fly away. I don't want to change the power until I have plenty of room over my obstacle and I fly away. So aerodynamically I cannot tell you why that works. I can just tell you that it does. So there are four different things to think about. Again, you always want to refer to the manufacturer's pilot's operating handbook for any method. First on anything you're flying and then depending on whether you work in flight school, how they want you to do it and. Or a company you're working for, how they want you to do it and. Or I'll say this one. Back when I was trained, we did max takeoffs from the ground when I was brand new to all this and then I was out in the world working as a CFI and the examiner I used, who's been an examiner forever, very well respected in the midwest and around the country, as far as I know. And he said, kenny, we, I want on these checkrides, I want to see a match take off from a hover. I do not want to see them from the ground. And he just said, you know, we need that hover pre takeoff check before lifting off the ground. And he was still his chief pilot for medical service, even though he does checkrides, which a lot of examiners do that, right? And he said, with my guys, the first time I see them doing a max takeoff from the ground, they get a warning. The second time I see him doing a max takeoff from the ground, after they've been warned, they're fired. And he said, that's just how strongly I feel about that hover pre takeoff check. So as you can imagine, that was 20 years ago and I've been using that Same examiner for 20 years. So I adopted then the max takeoffs come from a hover, not from the ground. And of course people could argue that if that's what your school wants you to do or your examiner wants you to do. But you always got to take into consideration first what's the POH say, what's the Pilots Operating Handbook says, and then what does your flight school or your company or whatever the case is? I'm just showing you some different methods and giving you some food for thought. Now that I've done them. I've been flying 23 years now. I think it kind of depends on the situation. I think that there are times where one's more appropriate than other. I just, I think it depends and I'm going to do. Let's see, one more. Do you want to do one more? Thing I want to tell you is the thinking in this. In the beginning when I did the ones like most of you are trained that 40 knot attitude lineup of your obstacle. And then the first guy I flew with, kind of a guru and the guy was very interesting individual and he taught me the straight up thing and he said, and I'll show you as Heather's still filming, let's say you're coming up like this and then you started to have a problem. You got time to go forward and try to come down and land before you get too close to your obstacle, which in my case is the hangar. He said, you know, if you're doing that, the first one I showed you where you're doing more of an angle and I'll kind of demonstrate this, he says, if you're coming up at an angle like this, you're going towards your obstacle and if you lose, you have a problem, boom, you're going to fly right into your obstacle. So made a lot of sense to me. And then of course, getting in the EMS environment, there are times where you have to go straight up. But yes, you know, anytime you're going straight up, you are in the danger of that high velocity diagram. So the HV curve is very, very important. It's something you need to know and need to be able to understand and you want to try to fly by that the best as possible. So there you go on some options for a maximum performance take off, Sam.










