Hovering Square Pattern Great Method To Measure Your Progress
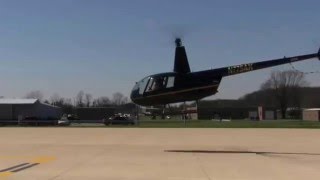
Kenny Keller coaches Art through hovering square patterns and landings, emphasizing tail clearance on turns, managing air cushion during setdowns, and a two-step pickup technique: light on skids, pause to neutralize, then gently lift.
Chapters
So we're heading over to our hovering square pattern. Art's been working on his commercial add on. He's been through the hovering square pattern several times now. Three or four probably at minimum. Of course the first one, when we first introduced it, as I mentioned the beginning of the video, it was really ugly. But that's the way it is for everybody. We show it to them early so they know what they're striving for to get a nice hovering square pattern. So he's now perfecting his skill in the hovering square in a pattern. So we're on the first square we're gonna go. We have the what we call blocks in the concrete. There's nice square cuts. So each leg of this four square pattern has four concrete blocks. So we're at the third block, he's working his way to the fourth one. We'll stop, he'll clear the tail to the right and then we'll make a left hand turn right, so there's the first side. So we're going to go all the way around, clearing the tail each time. 2, 3, 4. We have the squares marked with tape so we know exactly where they're at. That helps make a nice square pattern. We forgot to verbalize the turn on that one. We tried to clear the tail every single time, right and left. If people think that's too redundant. But experienced EMS pilots go out, stick their tails into trees, wires, buildings every day. Experienced pilots do it. You never know who's coming up behind you unexpectedly with an airplane or a helicopter or a truck, a fuel truck, whatever the case may be. Alright, bring us to a nice stable hover here. Now I'm going to clear the tail left and we're going to do our right 180 degree turn and go back around the pattern. So if I had a video to show you of what it looked like the first time Art tried, didn't look anything like what it looks like today.
Clear a left.
Clear. And a left. You're getting hovering with the wind off all four sides, turns in all directions and everybody that's ever used it after they get used to it, they love it. When we first start doing the hover time, hover solos, this is what we have them do for the first couple hours. Go out, do the hovering square pattern, pick up, set downs, clear on the left. And a couple hours of this during their solo time, they get this down to where it's just, you could say even to an art form, it gets really, really nice and clean. Alright, score's looking pretty Good. Probably the best you've ever done. Would you agree?
Yep, I agree.
So let's push it to the next level. Let's set down on the square that we're above right now. Let's set down on that square as centered as you can be and as centered as you can be. And do it safely. I'd rather it be safe. Nice set down and be a little off the square versus sloppy and then just slam it right in the middle. So best job you can at setting us down in this square right here. Okay. Was real good till you got to the air cushion.
Yep.
So again, you got to focus outside the ground is there. You will find it. Just get the aircraft coming down just like you did. And when it stops moving, you have to give a little downward collective push to get it to go onto the ground.
Let me back up a little bit.
You're not doing anything different than a hundred people I've trained in the last 15 years have done. Everybody does the same thing. You get down that air cushion and then you start wobbling the controls. So breathe in and out. Relax. And when you're ready, try it again. We want to sit down with the nose straight. Either straight down or down with forward movement. No sidewards movement, no rearward. Rearward movement. Pretty good. There's your air cushion. Just push it on down. Just like that. Okay. Pretty good set down. It'd be better if we were in our square, but still the set down itself. Not bad. When you're ready, pick us up. Let's clear tail right and we'll do a 180 turn. We're going to go back. We're going to do one on the other three corners. FA mobile crb driving on the Runway. So clear your tail right when you're ready. Yep. Left pedal turn 180 degrees. Nice slow turn, just like you're doing. Okay, now we want to set down on this square facing to the north. Plymouth traffic. FAA mobile Sierra is off of the Runway. Plymouth.
I gotta start over.
Yep. When you find yourself getting squirrely, you just take a deep breath. Relax. Relax your arms and your legs and your grip. Get rid of that monster grip. Breathe in and out and try it again. Keep it coming down. Yep, just like that. Very nice. That's the way to do it.
There we go.
Pretty decent in the square. Looks good. Pick us up when you're ready. Left pedal turn 90 degrees. Set down on the other corner. This will be a good shot because you're going to be able to see the tail. You're Going to be able to see this from behind. I'm going to come on with you and we're going to do, if you remember, I showed you how to do kind of a practice dolly landing. Let's say the square ahead of us is our dolly. So let's start back with about a 3 to 5 foot hover. And then start moving towards the dolly which is the next square. Bringing it down nice and slow. Moving it forward, bringing it down, keeping it straight. There's our dolly. And nice on down to the dolly. Just like that.
Nice.
And when you're ready, pick us back up. We do all these pickups with a two step process. Number one is get it light on the skids. That one was a little rough, we got a little rushed. So if you want back up from that square and use that method we just used for the last one. Start from the square back. Pretend this is a dolly that we want to land on. Use forward movement. Come down nice and slow. Focus outside. Don't look at the ground ahead of you. Okay.
And I don't know what it is. Having that problem there.
Alright, let me take the controls for a minute. You take a break, relax your grip and we're going to move over here and we're going to do it for the camera. Put on a little extra pressure. But it's really not for extra pressure. This is going to be that you can use. You can watch at home. You can see exactly how this looks like from the outside. So we'll get a little closer to the camera just so we get a really nice view of a pickup and a set down. So I'm going to give you the controls back. Take your time and when you're ready, set us back on the ground. Looking good. Keep it coming down, keep it coming down. There's your air cushion. Little push down. Very nice. Not too darn bad. If you could do that every time, you'd be in good shape. So now when you're ready, pick us back up. Two step process the aircraft light pause. Neutralize all movements. And then step number two, gently lift it up. Really work on those pedals. Keep that nose straight. Don't go backwards. Push a little forward in there if you have to so that we don't go backwards like last time. There you go. Okay, very nice. All right, that's the best we've done. Let's go fly the pattern.
All right, is there a tail to the right or left?
I mean clear on the left. Take me out and let's just start out with a Normal takeoff, normal pattern, normal landing. As you know, we've been struggling with the.










