How To Build Your Online Business Chapter 4 Audio Equipment, Blue Yeti, Sennheiser, Audacity etc.
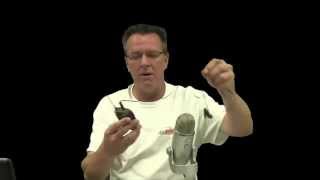
Kenny Keller explains his progression in audio gear and workflow for creating online video content, comparing low-cost starter mics (flip camera mic, webcam, cheap Radio Shack mics) to a recommended Blue Yeti USB mic and a higher-end Sennheiser lavalier for standing/moving shots. He demonstrates recording with Audacity, exporting audio, syncing it to camera video using a hand clap as a sync point, and basic editing techniques to hide pauses (zoom/cut). The emphasis is that good audio is more important than perfect video and that modest investments (Blue Yeti, pop/P filter, mic stand) yield large improvements.
Chapters
Okay, next, I want to talk about audio. And I'm not an expert, but I'm getting a handle on it, and I'm going to show you exactly where I started and where I'm going now. If you noticed right now I'm using the blue YETI microphone. I just bumped the table, so you probably heard a thump in that audio. So this is one of the things that you got to think about. Depending on whether you're shooting indoors, outdoors, standing up at a table, whether you have a computer sitting next to you, there's a lot of things to consider when you're doing your audio. So as I explain what I've done, I'm going to tell you about the mistakes I've made and try to help you along the way, save you a little time and effort. So in the beginning, as I showed you already, I was using the flip video on a tripod, and I'm doing videos and I'm yelling across the room hoping that the audio is going to be loud enough. So that's what I started with. And then I started doing some videos with the webcam. And when was using the microphone from the webcam and it was only about 2ft away from me. So that was a little better than the little flip video camera. But, you know, again, it's a process of getting better and getting smarter as you go. So the next thing. So I started doing my original training that I've been selling online for over three years. I started with this webcam, and the video was not very good. Audio is not very good, and I've since went back and eliminated and redid those videos. So then I moved to a small $30 microphone that I got from Radio Shack with a little battery in it, and I plugged it right into the camera, the camera that I'm using right now, and it worked pretty good. But it was only a mono mic, so you couldn't get stereo out of it. And the sound, it worked at the time, but going back now, I really don't like the sound of that microphone, so I don't use that microphone anymore. Then I moved up to another Radio Shack model, which was the remote unit that you can put on your side has the base unit that you can plug into your camera. The signal from the mic goes to the receiver and then records it onto the camera. That was okay, but again, that was mono, and that's about a $50 microphone. Okay for getting started, but I would recommend making a little bit of a better step up to something a little bit better than that so then the next one I moved up to a couple years ago is this right here. This is called a blue Yeti and this microphone absolutely and entirely rocks. Now I'm going to mention again, like anytime you bump the table, you got to think about that. You got to be careful to not be bumping stuff and those things are going to come through. So depending on what you're doing, if you're sitting down, this is a great microphone. Just remember that you're going to have problems if you're thumping your hand on the table or, or if you have a computer monitor or a computer sitting right next to you that's noisy. It can pick up the sound from the computer and it also will vibrate the table. So you'll get a buzz in this microphone from the vibrating or from the vibrations from the computer. So if you're using a mic like this, make sure that you try to set the computer down on the carpet. Don't have it on the table beside you. Again, learned from my mistake. Now, this microphone, the blue Yeti, it's about a hundred and fifty dollars microphone. I went to Best Buy and at Best Buy did the search on Google found the blue Yeti on sale somewhere for 75 bucks. And best Buy matched the price. So I got this microphone for $75. And for the money, this thing is hard to beat. Now there are lots of other microphones out there. I'm not saying you have to get a blue Yeti, but for me, when I first got the blue Yeti, what it did for my audio was huge. It just really, really helped. And for the money, you can't hardly beat it. Now for standing up videos where I'm going to be moving around teaching something on a board, I did step up to a fancier body mic. And this is a Sennheiser. Now this is about a $600 microphone. So I don't suggest you run right out and spend 600 bucks. It's not necessary in the beginning, but as you move forward and you want to increase. This is a really nice microphone and I have an audio card that I installed in the computer that helps make it a more quality recording. So I'm sure there's tons of choices out there. I wouldn't jump into that. Starting off, I would. As soon as you can, I would spend the money on the blue Yeti and the next thing that's really cool is P filter. Now when I first started using the blue Yeti, you know, I'm doing these recordings and I kept every time I would say a P. I get a puh. A puff in the microphone, and I can see it. I'm recording right now with Audacity, and we'll get to that in a little bit. Every time you would say a P, it pops in the microphone and you can see it in the audio recording. So I went to Best Buy, got a great deal on a microphone stand. It's like $15. And on Amazon, I bought the P filter for about. I think it was $15. So this thing is actually amazing. By just setting it in front of the microphone, adjusting it, something like that, it's amazing how much clearer the recording will be. And it helps cut out those P's. That's why they call it a P filter. So a lot of times I use this microphone just like this. There's other times I take the blue Yeti off its stand and I can connect it right to the end of the microphone stand. There's a number of different ways you can do it, but I highly, highly recommend the blue Yeti. Getting started. The one thing that I've learned, I've watched a lot of different videos from people on how to make videos and equipment they use and tips on audio recording. And I can tell you, I'm a firm believer in people will put up with video that's not really very good, but they won't put up with audio that's not very good. And if you think about it, it makes a lot of sense. You'll drive down the road and you'll listen to a radio station, music or talk radio without the video. But do you want to watch a video without the audio? So people, at this point, you know, with now the way people are shooting video all the time with their phones and shaky video, and it's just amazing out there. Some of the really crappy video that you see people do, and you can get away with video that's not that great, but you really need decent audio. Now for the recording part of it, I have the blue Yeti plugged in with this cord right into the USB port on the computer on this laptop that I have right here. So now what I'm going to do is I'm going to stop the camera, stop the audio program Audacity that I'm using, it's free. You can download it from the Internet. I've been using Audacity for about three years. It's a great little program. And the best part is it's free. And I'm going to do a screen recording now and show you exactly how I do the audio part. Audacity. Okay, so now I have switched to screen recording and I'm using Camtasia again to record the screen and show you what I'm doing. A little tip. The furnace just went off, or the air conditioner, I should say, just went off. I'm shooting this in July. It's an upstairs office at the airport. So it gets kind of hot. The furnace or air conditioners will come up in the background and make your audio very noisy. So I cool the room down, and then I go over and I shut it down while I'm doing the recording. So this audio file is from the beginning of this video. I'm going to show you how I save this and move it to the editing program. And I'm going to show you how I line up the audio with the video and how you make a nice, cool audio recording. Okay, I'm going to zoom it in so I can see the whole project, or zoom out, I should say. And then here is what I want to show you that's very important at the beginning. When I turn the camera on and the microphone on, I clap. And you can see right here, this is the point when I clap my hands. So the audio from the camera will have the same thing. So when I put in the editing program, I line up the audio file with the video file, and then I silence the audio from the camera because the audio from the YETI microphone is so much better. And I'm going to show you how we do that. So I'm not going to edit the audio file here because I need to keep it intact to match the video file. So first thing we're going to do is save it. So I'm going to save Project as online video for audio, click save. And now I'm going to export this to my server. And for you just starting out, you're going to probably save it right to the computer you're working on. Once the file saved, you can always move it to a different computer. I'm now exporting the project out of this laptop to my server. So as this is exporting, I'm going to move to the other room, show you how we put it all together. Okay, so now I'm going to show you how I edited the beginning of this video. Now there's going to be some extra noise here because I've moved to my main editing computer and I have a big honking video card that's absolutely necessary in order to really edit and be able to edit quickly without a Lot of breakdowns with the computer crashing. Now I say that I've been doing it the hard way for three and a half years before I finally spent the money to upgrade my audio card. I'm sorry, I mean upgrade the video card so we can go into that at a later time because that's more advanced piece. I wouldn't recommend running right out and buying a video card in the beginning when you're first getting started. But if you really get heavy into this, eventually you're going to want to move up to a better video card. So to show you the basics of what we do, I've already pulled in. I've imported the video file and the audio file. So I'm going to drag them down to the timeline. Going to stretch the video to fit the display. Now I'm going to bring in the audio file and put it just above the video file. Line it up so it's close. And then I'm going to expand it so I can really match up the audio and the video. So now I just slide to get these marks where I did the hand clap. I know everything before that I can get rid of. So I'm going to just delete all this as I'm starting to clean it up. Cut that out. And you can see right here. It's pretty close. Stretch it all the way. I can move this just a little bit. And now let's see. Okay, next I want to talk about audio. Okay, next I want to talk about audio. And I'm not an expert, but I'm getting a handle on it. Okay, so now I want to show you a little editing Trick my videos over the years, every time I have a pause, majority the videos, you can see that the video is clipped. And it just doesn't look very professional. The little trick that I learned is, let's say right here's a gap where I'm thinking about what I want to say. So I'm gonna take out that gap. I try to kind of hold my position, Cut the gap out. Now I'm going to make a split in the video. What I'm going to do is change the size of the screen so it looks like a camera zoom. So let's try it. First I'll show you what it looks like. You're going to see the jump when you're doing your audio. So as I explain what I've done, that looks unprofessional. I've done it a thousand times. Now what I do is we'll go right there, click on the screen and I'm going to slide it just a little bit to make the camera just zoomed. And let's watch it again. Next to you. There's a lot of things to consider when you're doing your audio. So as I explain what I've done. Looks like a camera zoom. Tell you about the Pretty cool, huh? So don't get overwhelmed by this. There's a lot to learn. I'll show you what I can. I can work with you one on one to help you, but a lot of it is also going to be trial and error. These have great tutorials that go along with them to help you learn how to use the system. And again, the more you do it, the better you're going to get. During hovering flight. Also called tail rotor drift, it's one of the three T's that everybody screws up. Effective translational lift, transverse flow effect and transit. So you want to learn about an online business selling your information product online? That's what we're here to talk about. I'm going to show you all kinds of cool stuff and I'm going to tell you the story.










