How To Master Helicopter Hovering In The Robinson R-44
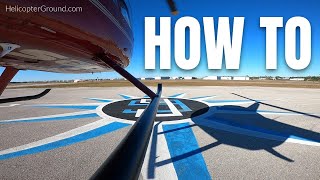
Kenny Keller and Gavin demonstrate hovering drills in a Robinson R44, including the hovering square pattern with pedal turns and adapting to wind from different directions. They cover recommended hover heights of 3-5 feet, downwash awareness, and R44-specific cooldown procedures like reducing RPM to 60-70% and waiting for cylinder head temperature to drop below 350 degrees.
Questions this video answers
23 Celsius (74 Fahrenheit)
3 to 5 ft
60 to 70 percent
Below 350 (needle south of the 350 mark)
Chapters
Okay, so we're going to do a few hovering exercises here. What we should do is make sure we know where the wind is coming from and what that is going to do to the helicopter. Right now it looks like the wind is coming from the west. So it's the left side of the helicopter, the left crosswind right now. So as we pick up, we'll do our two step pickup, nice and gentle. And we'll anticipate a little bit of wind input from the left hand side. As we raise in the collective, we're going to add a little bit of left pedal. And as we get light on the skids for our two step pickup.
We'Ll.
Use our pedals to counteract any yaw and we'll use our cyclic to counteract any drifting. Stabilize ourselves in a hover. Just give our engine gauges and our instruments a check. Over.
Hey.
This is a wonderful technique for honing your skills in the helicopter, your hovering skills. This footage is from my recent flight review and flight refresher in the Robinson R44 with Gavin from Straight Up Aviation in Fort Myers, Florida. I was thrilled to find out that he uses the same technique that I do with students. We both agreed this is one of the best ways for students to hone your skills with the hovering square pattern. So we'll get right back to it. I want to tell you there's a free download below for our helicopter maneuver guide. You can go down below the video, click on that link and download our maneuver guide for free. Free PDF.
The basic hovering exercises, pedal turns, pick up set downs, and then a little hover taxi around the area as long as you have space to do it. So any combination of pedal turns, we do 90 degree pedal turns, 180 degree pedal turns both to the left and the right. The slower the better, shows more control. And then eventually we do 360 degree pedal turns all the way around.
Ah, that feels good.
I knew we forgot something. Or even two. They don't put the AC on the.
Checklist there, but yeah, that's a good call there. That should be added. And I'm gonna do one to the right. And I think I'll throw in a couple of 180s too. Just because while I got her there filming and I got, why not? This is stuff I can do even where I'm just showing footage. And if I'm doing, you know, voiceover. Yeah, admit it. I'm getting tired now. I feel good. But I'm like, I'm, I'm not like, I do a couple of 180s.
Tell clear.
Right. I miss at that point where.
For.
Me, the longer the days go, the longer the day goes on, it is harder for me to shoot video.
Yeah.
The more hours I've been up, the more I've used my brain.
And the other thing is, it's hot in Florida. Like, we got 23 Celsius right now. You know, that's 74 Fahrenheit here. And right now it's kind of dry. It's not as humid. Normally in Florida, it's humid, so you don't dehydrate as much. But right now we've got very dry air around here. And then with the heat and of course, sitting in this plastic bubble, you know, you dehydrate over the course of the day as well.
Yep.
That makes you tired. You want to talk about half a height at all, how high your skid should be from the ground, because, you know, you ask different people, you're going to get different opinions. If you ask the examiners, they say 3 to 5ft is a very safe hover height.
Sure.
But if you're doing these hover maneuvers around the ramp here, a little bit closer to the ground, a couple of feet. As long as there's no obstacles around, as long as everything's going to be clear from the skids and the tail.
Do kind of a square pattern. I'll go over here, set it down, pick it up. I'll turn right, go that way a little ways. Go ahead. I'm gonna go ahead and do that. And you could go ahead and if you feel like talking. Okay, keep talking.
So you sit down on the corners, right? You do the set downs on the corners, then pick up, do a 90 degree turn, and then head down the next leg of the pattern.
This is really good for me, too.
So as we're doing this exercise where we're basically going to draw a square or a rectangle out with a helicopter, as you go around the different. The different legs of the traffic pattern, what you also get the benefit of is the different directions of wind. So at some stage you'll have a headwind. At some stage you'll have a tailwind, you'll have a left crosswind and a right crosswind. And it's often interesting when people are doing this to realize that that wind blowing from a different direction on the side of the helicopter or the back of the helicopter makes a difference in your control inputs for your set downs and your pickups, particularly if that wind gets kind of strong. Today we got not too strong a wind. We got a nice calm day. But sometimes on the stronger wind days, it makes it a little bit more challenging. And then at every set down, we make sure we pull all the pitch out of the blades, put the collective all the way down, put all of the way to the helicopter back on the skids. So we do a full set down and then a full pickup.
Oh, it's good too, because she's getting the helicopter from both the sun behind her and in front of her. So we're getting some really nice footage right now of the aircraft from different angles with the sun.
Awesome.
Hitting it different directions.
It's a nice metallic paint as well. So those that the sun on, it'll be nice and reflective.
Oh, yeah, it will. And when I edit, I always try to edit to where I catch the little glimmers of sun as they, like, slide up and down. The whoops as they slide up and down the aircraft. You know, when it's turning. This will be good stuff. I recently checked the one today, the video I have on this topic, and I'm like, oh, my God, it's so old.
Yeah, I can imagine you constantly want to be updating. Right. You'll look at it and think, oh, damn, I missed that one. I should have put that in there. Or, yes, I could have done that.
Differently all the time. Five minutes after I do it, I go. By the time I'm done, I'm like, that's good, that's good. I don't like that. I wish I had done this. But, yeah, that's how you learn, like everything else.
And also the technology advances. Right. So the cameras you were using five years ago.
Yeah. Oh, it's.
Don't compare.
No, it's unbelievable how much better it gets. Even stuff I was shooting two years ago, I was using an older GoPro for the audio part, and for a couple of shots, and I was like, oh, my God, that footage is gross. Absolutely gross.
Did I put my name on that? Yes.
Oh, my God. Trust me. Heather's constantly going, it's fine.
Yeah.
So clear left. It's fine. Quit worrying about it. But then I did make myself feel better. I got looking at around the Internet on YouTube and I'm like, oh, yeah, I find some real comparison. I feel some real crud out there.
Another interesting thing we do with students is, you know, when they're comfortable with hovering is have them look at the grass. So when you're hovering, like, for example here, closer to the grass, and when you come down, you take the Picture of the blades. So it kind of gives them an idea of where their downwash goes to, like, how far out it goes. And then you can bring in the whole. Well, you know, if you're hovering around other aircraft, just be careful of what you're doing, because your downwash actually does extend quite a way out there.
Yep.
And then, of course, there's a great exercise of, you know, when you're doing takeoffs over the grass, when all of a sudden you hit ETL and the grass is perfectly stationary out in front of you.
Yep. All right, I'm gonna go back around the whole square, the other direction. This is actually. This is really good for me.
Yeah.
Just today for me, getting back in it. This is really, really, really good for me.
We'll do that with. And you have this too, Right. You'll do that with students and they'll say, okay, you'll do your 10 hours of solo now.
So.
When they're ready for their solo, I normally send them out on their cross country first thing. You're doing your solo now. Okay. Today you're going to plan your flight, you're going to pick up and go do a cross country and then, you know, work out where you're going, who you're going to talk to, you, what you're going to say, what your alternatives are, and when you plan to be back. So they'll go to their cross country and then they'll come back, and then they say, well, you've got eight more hours of solo to fill up now. What are you going to do? And honestly, the best thing they can do is come out and do hover practice.
Yep.
Build those skills, and they'll come and, you know, maybe 20 minutes, 45 minutes on the morning, on the way to work or on the way home, come take the helicopter, hover around the ramp, put it away.
Yep.
And yeah, the more startups and shutdowns and pickups and set downs and shorter sessions, repeated sessions, the better you get at it. And every day they come, there's a different wind blowing, so there's a different appreciation for what the weather is doing. Plus, if they're doing it as a solo, nobody's watching them and judging them either. It's a great confidence booster.
I can't agree more with Gavin's statements because everything he's saying is so true. As you use this hovering square pattern, the more you do it, the better you'll get. You're going in each of the wind directions, hovering in all those directions, picking up and setting down with the wind off the different sides. And the skill level is just when you see students, they start off really frustrated when you first start teaching them. But you want to show this to them early on before they're very good at hovering. And then every so often bring it back and reintroduce it again. And then they see their own progress. And as Gavin stated, it's great to go out and use during your solo time. It's just such a big confidence builder. I absolutely love this method. While we work our way around the rest of the pattern, I want to tell you about Helicopter Online Ground school and specifically our Robinson R44 specific section. We have those inside helicopter on ground school. We have R22 and R44 specific section, instrument specific section. And this video you see right here is, is a another new video. We've uploaded like 13 new videos to the R44 section just in the last few days. This is another one going into the R44 section. I can't think straight up aviation enough in Fort Myers, Florida and Gavin going out with me and doing my flight review and getting me current R44 again. I then hung around and flew with five different Hogs members in Florida. Three of them. Four of them. Right there is straight up. It was awesome. The first day with Gavin was my flight review. And then Tuesday, Wednesday, Thursday, Friday I flew with HOGS members. We flew up to a taco Tuesday, which was a blast. Went somewhere for lunch every day and went out and filmed a bunch of maneuvers. And I'm excited to go back. As soon as I get done finishing up editing all this fresh content I have now I'm going back for another round of videos. So go check out Helicopter online group Ground school. We'll put a link down below helicopterground.com. that link will be in the description box. Anyway, with 30 day money back, no hassle guarantee on all of our courses, burden is on us to provide you the value so there's no risk to you.
That'll take us back over to our spot. I suppose I should actually be avoiding those ropes.
They're weighted ropes. They won't pick up. Yeah, they're. We land here all the time. They don't have a fly up. But good point though. But these particular ones are weighted so they will never fly up.
Okay, that's cool. All right, well, I think I'm ready to park.
Sounds good.
I know. She's getting tired too. Yeah. All right.
Okay, so first two lines of the shutdown checklist we memorize. Roll the throttle down to Idle and use the index finger to turn off the governor. Use that same left hand to go back and put the friction on the collective. And the same left hand comes forward to put the friction on the cyclic. All right, and then we pull the checklist down here. So collective down. RPMs 60 to 70. Let it cool down. Friction on. Cyclic and pedals neutral. Friction on. We've done those two lines already. And now what we're waiting for is the cylinder head temperature to drop. We can keep the engine a little bit above idle. We can keep it in 60 to 70% to bring a little bit more cooling air in. And we're looking for the cylinder head temperature here for the needle to come down below the 350. Little white mark in the middle there. Depending how hot it is outside, depends how long it's going to take for cooling. And then once that needle is starting to come south of the 350, which it kind of is right now.
Can.
Close the throttle all the way to idle. So make sure that comes up to the idle stop and then disengage. The clutch cover comes up and then the toggle switch. I'm going to set a timer down here, looking for about 30 seconds to release the tension from the belts, and then we'll pull the mixture to cut the engine.
Do you find yourself where, you know, like, to. To this day has been awesome, but, like, I'm starting to now feel kind of tired.
Yep.
Like an hour from now, like, sit down and eat. Yeah, I, I. Do you ever find yourself where you go, damn, I'm. Oh, yeah, tired. Yeah, I know. That's the way I'm gonna feel.
Yep.
Like we sat down and have lunch. I felt great. I'm like, oh, man.
But just like you again, coming back.
Here and doing this once we were up, I'm like, you know what? I feel it right now. I'm tired. Brain's not working as well as I'd like it to.
Let's pull the mixture now. Yeah, absolutely. Yeah. A little bit of dehydration there. A little bit of, you know, long travel day yesterday. And, yeah, it all gets in there.
I mean, I'm very happy.
And then, you know, the talking and the concentrating and all that stuff, it all takes a little bit out of you right through the day. So, yeah, absolutely.
I've always told people, it's like, sometimes I think the instructor is more tired than the student.
Oh, yeah, yeah. Especially if you don't do any flying. Like, if the students are flying all the time and you're not demonstrating, you know, like you're doing stuff. You sat here a lot of the time.
Right.
So waiting for the 30 seconds and then we can pull the rotor brake up above our heads here, waiting for the clutch light to fully go out, which it's just done, and we'll stop those blades, Ac can go off.
I'd say you have some nice aircraft here. Yeah. Is the other one similar to this one?
Yeah, the other one. This is a 2006. That one's a 2002, I think, actually, but they both been recently overhauled and then everything off.










