Robinson R-22 Preflight
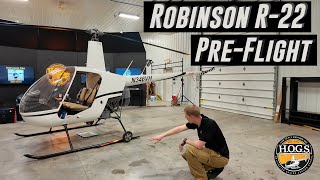
Kenny Keller and CFI Hunter Gamble walk through a complete preflight of a Robinson R-22 helicopter, checking the battery, fuel sumps, gearbox, rotors, and cockpit. They cover what to look for on the exterior, engine compartment, and inside the aircraft before flight.
Questions this video answers
April 2, 2025
Kenny Keller (host) and Hunter Gamble (CFI demonstrator)
Four to six quarts
Chapters
Hey, we're going to share an entire pre flight video with you that's brand new going into our R22 section inside Hogs. And we'll start that video here in just a second after we offer up a free resource. If you're interested in pre flight, you might be working on one of your helicopter ratings. Ton of free resources in here. Private Pilot 101 helicopter training blueprint. You get a free PDF down below. You also get the paperback copy as well. Amazon number one bestseller. So that free resources down below. All kinds of good info in there to help you work towards Private pilot. So enjoy the Pre Flight with CFI Hunter Gamble. We're going to go through a R22 pre flight video for the Robinson R22 specific section inside Hogs. We wanted to tell you that this checklist right here we're using, we just compared it to the pohs in the aircraft and it is directly from the PoH. And then we want to put a disclaimer on here. I always preach that no matter what panel it is you're working under or in or on, when you walk away, you snap something back up. Even if you're only going to walk over to get a rag to check the oil and you're walking back, snap that thing up even when you're inside the hangar. For today's purposes, I got Hunter Gamble helping us HOG cfi. We're going to do this pre flight together and we're going to one's going to hold the checklist and one's going to run a camera and one's going to hold a flashlight and we're going to try to get a decent pre flight for you. So we're leaving these open. I don't normally do that. I don't recommend it. But for our purposes of checking everything, checking lights, looking at stuff, we're going to leave this open so we're not flipping it open and closed every five seconds looking at different things. Then I want to add before we get started with the checklist, when you get done at the end of the day, always put the helicopter back the way you found it. This has got a squirrely ass seat belt on it that needs replaced. But when you walk up to the aircraft, you want to take an overall look inside. Like the last person that got out, did they clean up their water bottles? Did they snap back everything back in? Buttons and switches, are they in the right places? Did they do the proper shutdown? Number one, when you're done at the end of the day, put the aircraft Back the way you found it. You learned that in kindergarten, so you should be doing that through the rest of your life. Put your toys away when you're done. Put them back the way you found them. These are some of my pet peeves. Headsets. If you take my headsets out, put them back when you're done. Leave the aircraft the way you found it, Clean it up for the next person. So when you're coming up to do your pre flight, when you walk up there, take a look at it and.
Go.
Does it look like it's nice and neat and the person did their job and put it back away? Or are things in a disarray? Because if that's the way they left the cockpit, what'd they do with that aircraft when they were out flying? So mental note, what is the interior looking like when you first walk up? Same thing with the whole exterior of the aircraft when you walk up to it for the day before you even get started. How's it looking? Is it sitting funny? Everything looking like it's in its place or not? The best way to kind of start getting the feel for the aircraft as you get ready to go with the checklist. Well, we're going to start working our way through. I'm going to hold the checklist and read it and Hunter's going to start going through it. So we start off with battery switch on.
Turning the battery on, looking at the oil light, confirming that the oil light is on. Alternator light on. And then while the battery's on, stepping back here to the aft part of the right side of the helicopter, going to test the warning switches. So the first one being the main rotor temp. So as I press the light, I'm confirming that the light is activating, Moving to the main rotor chip warning light as I press the light, pressing the switch, confirming that the light is on, moving on with the tail rotor chip as I press the button, seeing the light is illuminating. And then lastly, the low fuel light. So there's going to be a delay. So once I hit the low fuel light switch, usually about just over a second between 1 second, 2 second low fuel light is on. Moving forward after I've checked the warning lights, just coming in, checking the quantity of the fuel and then shutting the master battery off. Here at hogs, we always leave the strobe light on. In the event that we were to walk away with the strobe light going on, it let us know that we left the battery on. Leaving the strobe light on, but shutting the master battery Off. Testing auxiliary fuel tank, which is going to be located on the right side of the helicopter. Removing the lid. Obviously, we can do a visual inspection. Just confirming. Okay, that's showing that the main's at a half tank. Trying to look and confirm that the main is full with what the gauges are showing. So doing a visual inspection and then, as always, placing the auxiliary fuel cap back on. Just sitting on there. You want to make sure it's secure, not just leaving it unsecured. So tightening it or securing it. Confirming that the black line lines up with this right here. Showing that it is secured.
Okay, so after full fuel filler, cap tight. Now, auxiliary fuel tank. No leaks, Fuel lines, no leaks.
Moving down here on the right side, like I said. Looking at the auxiliary fuel tank. I'm checking here, just visually and physically inspecting it. Make sure that there's no screws missing. As I don't see any fuel leaking. And just fill for any visible moisture. And checking the surface here. I don't see any fuel here on the surface. Indicating any fuel leaks.
We have fuel tank sump drains.
Checking the fuel sump drains. Gonna start here with auxiliary tank. Just making sure that your tube is in your container. So you're not getting fuel anywhere. So just make sure that's in there. Releasing up on the clamp. Scooting it forward May be a little hard to see, but this area right here, I'm just gonna push up to release fuel into the container. So as I push up, fuel will start filling up in the container. Just about a second. And then I go through and just make sure that I'm getting the fuel out of the lines. I don't want no fuel being left in the lines. And then once I can confirm there's no fuel left in the lines, Just sliding this clamp down, Re securing that clamp. And then just make sure there's no fuel in there. For checking the fuel, Checking the color of it, blue being 100 low lead. And then stirring it around, making sure that there's no debris in there. Because obviously, if there was debris in there, we would not want to be putting it back into our fuel tanks. And then just making sure that there's no water in there. If there was water in the fuel, There would be a separation between the fuel and the water. So once I visually inspected it, it's safe to put back into the fuel tank.
And depending on your flight school, you'll want to see what their recommendation is. Some people don't allow you to dump it back in. To me, if it looks clear and it looks good. And we've been running it and there's no problems. I don't have any problem dumping it back in the tank. And then you'll need to check with your school on if they don't want you putting it back in. Where do you take the fuel from your container? And they might have a five gallon can set somewhere. They'll have somewhere where they want you to go dispose of that fuel. So you want to check with your own school, what do they want you to do with that fuel next? You got gearbox oil.
Coming up here to check the gearbox oil. So there's this little sight glass here. You want to confirm that there's oil in there. And then might be a little hard to see, but I'm running my fingers along the underneath side just feeling. Confirming that I'm not feeling any oil, it's dry, that there's. There's no leak. Leakage in the oil.
And on that gearbox level oil on these helicopters, it's usually about halfway. If it's higher or lower than that, you want to think about is the aircraft warm, Is the aircraft cold? Because that fluid will go up and down a little bit. So you might think it's low, but what's going on temperature wise and is the aircraft sitting level? Maybe you're up on the wheels or some other reason you're sitting on an incline. So just because it might be a little off doesn't mean it's high or low. You got to think about the circumstances around why does it look low or why does it look high? Next we have rotor brake.
So as we're testing the rotor brake and we're pulling on the lever, we're confirming that we're listening for that clicking noise to confirm that's working. So as we pull down, we should hear a click and then once we release it, we'll hear the click again just to indicate that the rotor brake is working.
So next it's showing us flex coupling. So like everything else that we're checking on this thing Roy's looking for, are the nuts secure? Looking for cracks, looking for all kinds of things. So we're going to do the best to get shots of this for you. So bear with us while we try to make sure we can get a good view of what we're looking at. Flex coupling, no cracks, nut secure.
Coming back here, looking at the flex cuffing and yoke flanges, I'm going to visually and physically inspect as I run my hands in here. Just make sure that there's no deformities. Don't feel any cracks. And then I'm just confirming that the torque stripes are lined up. Nothing's been broken. And checking all four sides. Like I said, Just filling for any cracks, any deformities. So feels normal. And then just doing a quick visual inspection.
Gearbox teletemp normal. This is one that's really hard to see, right?
Yep.
You got to get way down there.
Up here on the forward side, you see the orange and white placard? That's your teletemp. So what I'm looking for is notating where. If any were black or kind of dark gray. Just notating where that is at. If is black. Just indicating that that part may be getting warm or hot. If you were to go out and fly and then come back and see that those white boxes are getting darker. So it's adding more. That's something that you would want to bring up to your mechanic so they could inspect it that maybe that item is getting hot.
Next we have sprag clutch. No leaks.
Coming back here to check the sprag clutch, make sure there's no leaks. So I'm just coming right here inside the upper sheave. Just running my hands along like as always. Doing a physical and. And visual inspection. Just making sure that there's no leaks. I'm not seeing any oil or grease. And then everything looks fine there.
Next is static source. Clear.
Checking. The static source is going to be this tube here. So what I'm looking for is that the. This end, that that hole is free. There's nothing obstructing it. And that it's obviously secure and where it should be.
So next we're going to check control rod ends. This is a little difficult. Lindsay's going to sneak the camera in there because we have an auxiliary fuel tank. In our old video, we didn't have auxiliary fuel tank. So Hunter's going to move the collective, actually, so you can at least see those control rod ends and see exactly what's moving. And you're going to actually want to get in there and visibly inspect the best you can with the idea. If there's a tank in your way, it's a little hard to get in there and see.
This is okay for checking it. You just don't want no up and down movement or no forward and aft that it's secured. What we do check.
David, this is another one.
Basically, we're checking this exact same thing. It's just standing vertical.
Okay. Still tube frame. No cracks.
So moving on to the steel Tube frame. Just checking, obviously, the framing visually and physically inspecting. Just make sure there's no cracks coming along. Just checking all the steel tube framing, obviously. Yeah. The aft. And then there's still tube framing up here that we're just checking and that everything is secure. And then checking on the other side and then looking at that right side as well.
All fasteners secure.
Just looking at all the fasteners. Just die one. Just checking that all the zip ties and everything and there's nothing loose. Just checking that everything is all secure. Looks like it's in its place and nice and tight. And then just stepping out here, checking the screws and then these little rivets that make sure that nothing's coming loose. When checking the rivets, I'm checking to see if there'd be any black powder. If there's black powder with one of these rivets or screws, it would just indicate that one of these are coming loose.
Tail rotor control, no interference.
Checking the tail rotor control with no interference Coming back here. I want to move this aft and forward so that this has full range of travel so that it's not affecting the tail rotor to be able to change the pitch in the tail rotor. Because if we have a blockage here and it was only stopped here, we wouldn't have full control or authority of our tail rotor. So we're just checking to make sure that nothing's keeping this from moving forward and aft. After checking this side, we're just gonna secure the cowl doors.
Yeah. And the reason we made that little disclaimer earlier and why he's closing them up now and why we said you always want to latch everything up is if you push the helicopter out one time and you didn't latch something, the wind kicks up, you can damage a component. And especially one of the problems is doors. Doors will come flapping open either from a gust of wind or a helicopter lands beside you, and you could damage a $3,000 door like that because you didn't keep things secured. So that's why we gave you that disclaimer in the beginning that during your pre flight, when you're checking things, latch them back up, even if you're coming back in 30 seconds, because the problem is you get distracted. You go, oh, well, I'm coming right back. I'm not going to latch that. And then Billy Bob says, hey, Joe. Oh, hey, what's going on? And then the helicopter gets drug out, and then something bad happens because you didn't latch that door. You're Ready for engine right side. And the first would be carb air ducts secure.
Checking the carb air duct on the the right side. So just making sure that obviously before I check it secure, I just want to make sure that there's nothing obstructing this hole, allowing air to come in through the hose into the engine. And I'm just reaching on here on the other side, Giving a visual inspection and also just maybe given a little tug to make sure that it is secure and all fastened.
Carb heat scoop secure.
Coming here, Just checking the carb heat scoop. Make sure that it is secure and making sure that all the it's got all its screws and just giving it a little wiggle. Making sure that it's secure and not going to fall off.
Engine sheet metal, no cracks.
Checking the engine sheet metal. I'm just showing that there's no cracks. Just given a visual and physical inspection. Make sure that it's got all of its screws, all its rivets. I'm doing an overall condition, looking up here. Don't see anything missing. Make sure there's no cracks. There's not like any fluids or leaks. And just confirm that there's no cracks in its overall condition.
Electrical terminals tight.
Checking the electrical terminals and making sure that they're tight. I'm coming back here. You got this wiring with a cover. Just make sure that it's not loose or has come disconnected. And it's showing that it's secure. And then just coming forward to the firewall and just making sure that these as well, the wiring, the orange covers are secure and that nothing has come loose.
Fuel line, no leaks.
Checking the fuel line with no leaks. So it's going to be this big bigger orange hose. So I'm just trying to visually and physically inspect it. Running my hands on the underneath side due to that's where if it was leaking, the gravity would pull the fuel down. Just making sure that there's no fuel leaking.
Oil cooler door.
Check. Checking the oil cooler door here on the right side of the engine. Just going to open this door. Doing a visual inspection, making sure that there's no grass or debris buildup or that any animals have crawled in there and living in there. So just make sure that it's. It's clear and free of obstructions.
Oil lines. No leaks or chafing for the oil lines.
Just come back here near the oil cooler. Starting I'm doing a visual and physical inspection just to confirm that there's no oil leaking. Running my hands on there, the underneath Side. Then just following them forward over here to the front of the engine and make sure that there's no leaking or chafing. And then also just checking the oil lines to the cylinders, making sure that there's no excessive leaking or any leaking of the oil lines here.
Exhaust system, no cracks.
Moving on, Checking the exhaust system to make sure that there's no cracks. Check here. Looking at the exhaust system, I don't see any cracking in the metal back here to the muffler. And then just also checking that these nuts and bolts are secure, holding them in their place. And then just checking the overall condition of the exhaust system. Checked all the things on the pre flight. I'm step back just a little bit and just doing a general overview of the engine, seeing if anything is sticking out. Once again, just making sure that the engine's got all of its bolts and safety wires and then there's no dents, dings or holes and just the overall condition of the engine. Moving on. Checking the V belt condition here in the aft portion. Looking, doing a visual inspection, make sure that there's no fraying of the lines feeling. Make sure that there's no excessive wearing on one side or the other and any tears. Just looking at the V belt conditions, Checking the V belt slack. Kind of just using my fingers, pushing in. Shouldn't go past your knuckle, your knuckles on your hand. So there, there's slack in the V belt conditions right now because the clutch isn't engaged. So there should be some slack in the V belt conditions just to making sure that there is slack in the V belts.
Sprag clutch, no leaks.
Checking the sprag clutch up here in the upper sheath. Once again doing a visual and physical inspection. So I'll just slide my hand up here and then checking up here that there's no oil or grease leaking. If there was oil or grease it may indicate a pending failure. And then moving back, checking the upper bearing here, just making sure. Running my hands again, trying to do a visual and physical inspection to make sure that there's no oil or grease leaking.
Teletemp upper bearing normal.
Checking the upper bearing tele temp. So on this helicopter you see the, the three boxes. So we notate where it's dark at and then that's within our normal range. And, and if we were to go out for a flight and then come back we would just confirm that one of the white boxes are not getting darker, indicating that that part is getting hotter. Checking the upper sheave condition. Just doing an overview, just looking at it. Don't see any deformities, cracks, dents, dings, paint missing or anything. Just doing an overall condition and making sure that it looks like it's in good condition.
Lower sheave groove wear smooth and uniform.
Checking down here in the lower sheave and the grooves. Doing a visual and then doing a physical inspection. As I'm feeling, I'm going to remove my hand for recording purposes so you can see what I'm looking at. But just running my hands on there, make sure that there's no rocks in there that would be. Or any fraying or binding that may be tearing up the belts and that the belts are able to lock in and move accordingly. And that the teeth are not wearing on one side.
Lower sheave groove wear smooth and uniform.
Looking at the lower sheave gear and then that there's no wear and that all the teeth look like they are uniform. That it wouldn't show like if we had a bunch of wear on the left side, that there would be wear or grinding somewhere on the left side. So we're just checking all these little teeth and making sure that they're uniformed and then that they look normal. Alrighty. So checking the aft part of the yoke flange and flex couplings. Coming in here like we did in the front half. And just doing a visual and physical inspection. So just running my hand along all four sides and confirming that there's no dings, dents or deformities. And then while I'm visually inspecting, just checking the bolts and nuts and make sure that they all have their torque stripes and that nothing's coming loose.
Steel tube frame, no cracks.
Again, just checking the steel tube framing. Make sure that there's no cracks here up here on the cowling side. And then checking the steel tube framing back here towards that, the tail cone. And make sure that there's no cracks and that everything looks normal and that the bolts have their. Their torque stripes. And then just looking at the overall condition, checking the tail rotor, no control interference like we did in the front half. I'm just moving this forward and aft. I make sure that nothing's preventing it from moving forward and aft and it's got full control. And then once again, just checking here that it's. This is normal for it to rotate this just slamming it back and forth is not checking it, just rotating it. And make sure that there's no up and down movement or no 4 and a half movement of this area right here moving forward and after up and down. So just coming here, checking that you Want to make sure that this line is lined with this and that they haven't changed direction. They should be lined up. If they were maybe misaligned, it could indicate a potential overspeed. So that would be something that you would want to bring up to your mechanic. But just making sure that those are aligned. And then while I'm in here, just making sure that all the bolts and little weights are on there and secure and then just making sure that none of these have come loose. So just making sure that all these are secure and you don't want that coming apart. And then checking the overall condition, making sure that all your screws and everything are secure. You wouldn't want this coming off in flight. So just checking the overall condition and making sure that it is secured.
Cooling fan, no cracks.
Checking the cooling fan, like I said, just making sure, doing the overall condition that there's no cracks, everything looks normal. Checking that there's no cracks.
Fan scroll no cracks.
Checking the fan scroll. Just doing a visual, visual and physical inspection of the overall thing to make sure that there's no cracks, that nothing's coming apart. And like I said, confirming that all your screws and everything are fastened and secure and it's not going to come apart.
Teletemps lower bearing normal and lower bearing no leak.
Checking the lower bearing. Teletemp Step back here. So up here is you're gonna be your teletemp. Just making a note where it's normal, keep an eye on that, that it's not getting warm and excessive. And then just kind of running your hand up, make sure that you're not feeling any leaks. Nothing's leaking, no grease, no oil.
Next is empennage tail surfaces.
No crap going to come back here. Just check the tail surface. Doing a visual and physical inspection. So I like to look down as I'm looking down the telecom, looking that there's no density or deformities. And then as I just like to run my hand along the whole tail cone itself, antenna is secure. Checking these inspection points, making sure that all the rivets are there. Kind of just fill in the whole tel cone as I go down. Checking these inspection points. Don't feel any dents or dings. I'm doing the same thing as I work towards the rear of the aircraft, as I'm working down the tail cone. Just checking these rivets, the inspection points. Checking the strobe. Working my way down, making sure the guard here is secured. Checking this bolt and torque stripes as I work my way back. Going to check the vertical and horizontal stabilizer, making sure that there's no dents, dings, that everything looks normal. And then come down here and just fill in the bottom part of the stinger. Moving to the rear part. Checking the position light, showing that it is secure, not loose. Then checking these fasteners here. Everything is secure, zip tied. Checking the gearbox teletemp. Normal. Going to come up here. Checking this teletemp here. Just making a note if there is any black mark is where it's at. And then post flight. Just checking to see if the boxes are getting black, indicating that maybe this part's getting hot. So just visually inspecting this teletemp here. Checking the gearbox oil. Just make sure that there's. It's visible that there is fluid in there. Don't know if that kind of makes it easier to see. So just make sure that there's fluid in there. And then running my hand along the bottom part. And then just make sure that there's no moisture or I don't feel any oil. So make sure that there's no leaks.
I want to jump in here for a second. On an nstrom, it always sat about half. And I had some guys, they were an hour away, landed somewhere, oh, we don't have any fluid. And I'm like, are you sure? 100%. And I'm like, okay. So I drive down there, and because there was a lot of instrument, they were low in the front. So the front oleos were down, the back ones were up. And I walked back to the back of the helicopter and I pulled the tail boom down and the oil ran back into the sight glass. So depending on how you're sitting, don't immediately think, oh, my God, I'm full, or I don't have any. Make sure the aircraft's on level ground. When you're looking at that fluid level, you'll know what should be normal. But just make sure if you think it's too low. Is the aircraft sitting kind of weird?
Moving on, Checking the blade, making sure that they're clean and no cracks. Doing a visual and physical inspection. So just running my hands long. Don't feel any dents, dings, deformities. And then just checking the bottom side and then moving forward, checking the second blade. Same thing. Making sure that there's no dents, dings, or any deformities and checking the overall condition that they're clean. And then I always like to also check the little drain holes here. That's to allow water to drain if water gets happens to get inside the tail rotor. Blade so the water has a place to escape. So I'm going to checking that on both ends, just making sure that's obstructed and free.
Pitch links, no looseness.
Same thing on this one. Just rotating. That's got a little bit of movement. That's okay. Just up and down four and a half, make sure that there's no looseness. And then same thing on the top. Just moving it forward and backwards and side to side, make sure that it's secured.
Teeter bearings, check condition.
Looking at the teeter bearing, just make sure that it's overall condition, it's not loose. Nothing looks out of the ordinary. And no deformities.
Teeter bearing bolt does not rotate.
Coming up here, Checking the teeter bearing bolt, just rotating it, making sure that it doesn't rotate. And then also confirming that the torque stripe has not been moved. And just make sure that this in itself does not rotate. Coming back here. Checking the tail rotor belt crank and free without looseness. So once again checking this. No side to side up and down movement and that this is free and able to be moved without any interference.
Tail cone skins, no cracks or dents. Strobe light condition check and antenna check.
Working from the aft back to the front. Working down this left side. Again checking the left side of the tail cone. Just confirming that no rivets have come loose. And on this side, visually and physical, inspecting that the bolts are there, the torque stripes are matching. Running my hands along, just feeling for any dents or dings and then just working my way back to the front and then checking the position light, make sure that's secure, not loose coming off. As I work forward, doing the same thing, checking the rivets. And just make sure that there's no black powder anywhere along this, indicating that one of these would maybe come loose. So as I just keep working forward and then when we get to the forward part of the tail cone, going to check and make sure that the antennas have their screws, that they're in there and secure and that this isn't loose. This helicopter has two. Your helicopter may have more. So just checking all your antennas and make sure that they are secured and not going to come off.
Engine oil, four to six quarts.
I'm sure we have between four and six quarts. So we're going to come down here on the left side of the engine. This right here with the little yellow cap is going to be your dipstick for your engine oil. So we're just going to remove that and then just kind of bring it all the way up as far as you can and then make sure that you're clear. And then rotate down and then just doing a visual inspection, making sure that you're between the four and six quarts. There it is. Sorry. So there's six on this top half right here, and then your four is down here. So we're about five and a half. So we're good there. And then when placing it back on, it doesn't need to be cranked down. Just keep rotating it. And then once it gets tight, maybe just a little quarter turn, you don't have to like really rip that down and twist it and make sure that's so tight that the next person can't get it off. Checking the oil filter, make sure it's secure, no leaks. So up here and forward part, the little white canister there, that's going to be your oil filter. So you're just visually and make sure that it's secured. And then just looking down underneath of it, make sure that there's no oil leaking in this area of the compartment and that make sure that the oil filter is secured. No leaks.
Fuel lines, no leaks.
Checking the oil line or our fuel lines to make sure that there's no leaks. Running my hand along the aft part and just visually and inspecting that there's no fuel leaks that would indicate a fuel leak. So like we did on the right side of the aircraft. Going to come down here and check the gas collater. So same thing, making sure that you're nozzles in your container just a little forward pressure up, take some fuel in.
It.
Make sure that nothing leaks out. You want to get all the excess. And same thing, just checking, visually inspecting, make sure that there's no debris in it. Got the shade of tint of the blue and there's no debris or water in it. And if it is good and we're okay with it and it's clean, everything, just placing it back in the main fuel tank. And then just confirming that that main tank fuel cap is tight and secure.
Throttle linkage operable.
Coming back to the throttle linkage is going to be this right here. So we're just making sure that that's free, it's secured. It's got a torque stripe. And as you watch it, and I read it collected, you should see that move and that it's free and able to move. No binding, it's operating as it should.
Battery and relay, if located here, secure.
Checking the battery, Just make sure that it is secured and that your Fasteners are tight and secure and that they've got their safety wire here, that the battery is not loose, going to come out and fall apart, and that it is secured.
Alternator belt tension check.
Coming back to the alternator, you're going to check the belt. This belt should be tight, unlike V belts for the upper and lower sheath. So as we're checking this one, just looking at the overall condition, make sure that there's no fraying, that it looks like it's going to fall apart, and then just making sure that it is tight and it's not loose. So just checking the alternator belt here on the left side. Just checking the steel tube frame, that there's no cracks, just like the right side. I just like to check that there's visual and physical inspection. Looking at the overall condition that there's no crack. Checking the torque stripes and then just working down this left side and just making sure that nothing's sticking out. There's no deformities, no cracks. Anything that's grabbing my attention.
Engine sheet metal, no cracks, Just like.
We did on the right side of the helicopter. Gonna check the left side. Engine sheet metal, Making sure that there's no cracks. I'm just looking at the overall condition of the engine and making sure that there is no cracks. Exhaust system, no cracks, just like on the right side. Checking the left side, Checking the exhaust, exhaust system, that there's no cracks indicating any leakage. And just look at the overall condition, make sure that it is secure.
Engine, general condition check.
And then once again, just like on the right side, just taking maybe a step back, looking at the overall condition, the engine, making sure that nothing's sticking out, looking that we have all of our screws and bolts and safety wires and that everything is secured and as fastened as it should be.
Main fuel tank quantity check. Filler cap tight. And leakage, None.
Left side of the helicopter, just like we did on the right side. Just going to remove the main fuel cap. Doing a visual inspection, confirming what the gauges would have been showing, what is actually here. So if the gauges were showing a quarter tank and we had a half tank, that would indicate a problem with one of the needles. So we're just visually confirming that what's in the fuel tank is what's shown on the gauges. Coming up here, just looking on the upper side, just make sure that there's no fuel leaks or any fuel anywhere or moisture. The main tank. Moving on. In the checklist, the next section is going to be the main rotor. While you're conducting a visual inspection or physical inspection of the main rotor. The caution, do not pull down on blades. To teeter the rotor, lower the blade by pushing up on the opposite side. So I'm not going to go to the forward part of the helicopter and pull down on the blades. If I needed to lower that, I'd come to the aft portion of the helicopter and push up to lower the blades to do my inspection. Before starting and climbing up here, I just like to do a walk around, look at the blades, confirm that there's no dents or dings and that they're clean. So as I do that, as I walk around just confirming that nothing's sticking out, and then just checking that there's no holes or opening or bonding. And then going to climb up on the top of the helicopter, I'm going to just confirm what I'm going to do. Then I will stow the checklist. So what I'm going to do is check for pitch change. Boots that there's no leaks. Main rotor hinge bolts, cotter pins are installed. All rod ends are free without loose. All fasteners are secure. Swashplate and scissors. No excessive looseness. So I will stow this away and then just to climb up there. This indicates no step. So you're going to want to put your foot up there. So what I find easiest is putting your right foot up here, using your right hand, grabbing the aft part and then lightly just placing your hand on the forward part of the mask and just kind of standing up. What I like to do is just work from the bottom up. And then once I get to the top, just confirm as I'm coming back down. So just come in here, the control rods, checking all sides. So like I said, make sure that there's no side to side or up and down. Play with these as I work around the helicopter.
So you're doing the do verify method. You're going to do. And then you're going to go back and verify with the checklist.
Confirm that there's no looseness and that they're secure. Moving up, checking the bottom swash plate, that it's secure, not rotating. Checking the pitch links. Same thing. Confirming that one, that they have their safety wire, that this is okay if you were to yank it back and forth. That's not checking it. So just nice and slow and that there's no side movement in it. And then no up and down, so that's secure. And then doing that on the other side as well. Just little movement, no up and down side to side, confirming that it's got its safety wire. Checking the lower swash plate, make sure that there's no cracks here, no oil leakage. Checking the scissors, the bolts are secure. And then as I work up, just checking the boots, running my hand along, making sure that there's no oil leakage. If the helicopter were stowed outside and it gets cold, these can shrink, allowing this oil in here to leak. So when as I'm walking out the helicopter has been stored upside, I'm checking the side of the mast to see if there's been any leakage. Just confirming that there's no leakage. I don't feel any oil or any visible moisture. Checking the boots on both blades as I work up, checking these little rubber pieces. Just feeling and visually inspecting to make sure that the hub hasn't made contact with the center of the mast. And then checking the bolts and that they have their pins and then torque stripes. Doing a visual inspection that all these bolts have all their torque stripes and that nothing's come off and loose. So I'm doing that for both, both rotors. And then like I said, as once I work up, I just confirmed everything that I just did come down, checking that, visually physically inspecting everything on the way back down. And then once I step down, I will regrab the checklist and confirm that I checked everything. So we checked the blades, checked pitch change boots, that there was no leaks. Main rotor hinge bolts, they had their cotter pins and that all the rods are free without looseness. So that's that. Checking that side to side, no up and down or aft. And that all the fasteners were secure. Swash plate and scissors. No excessive loose looseness.
You know, Omniflight, they said when you fall off the helicopter, when you're checking the rotor mast, you better have the checklist in your hand.
Good to know.
But I don't blame people for not wanting to carry it up there. But you did the do verify, you read it, you got up there, you did it, and then you came back down and checked. Did I get everything that's on the checklist?
Yep. Moving on with the R22. Pre flight, the fuselage, left side. Checking the baggage compartment. So obviously if we had any components in here or any items, I want to make sure that it's not over exceeding the weight limit of the seat, make sure that the removable controls, if they are installed, which these are, make sure that they are secure, that they have their pins, and then just checking that the pedals are secure. And fastened collective control is clear that nothing underneath it is obstructing it. That would prevent it from coming up or down. And then just checking the overall condition of the seat belt and make sure that doing the function test that that works. And then it secures as fast and releases as it should. For this example, we've removed the doors, but the door was installed. Just make sure that it locks and secures as it should, that there's no binding preventing the door from shutting if the door was secured. Checking that the hinge safety pins. So there's two on each door. Once the door is secured, we just confirmed that the hinge pins are in. Securing the door. Checking the landing gear. So this one, I like to step back, do a visual inspection, see if the helicopter is leaning to one side or the other. Doing an overall look at the skids, making sure that there's no bending, dents or bends, maybe from a prior flight, if you had a run on landing or a hard landing, that there's some deformity in the skids. So I'm just looking at the overall condition of the skids, making sure that these bolts and everything are still secured on the upper side and the lower side, the forward side as well. Just make sure that's secured and all the bolts and everything there are there as they should be.
I showed up to work one day. First person there was an Enstrom sitting on the dolly and I walked past it and I noticed the whole landing gear was like one skid was four inches further forward than the other. And there was a cross member broke. Last person that flew it didn't bother tell anybody, left the building, went home, damaged the aircraft, busted up the landing gear. So you never know.
Yep.
Check the overall who flew it last and what they did while they were out.
Moving forward with a R22 pre flight, the next section is going to be the nose section. So we're going to start with the pitot tube, make sure it's cleared. So the pitot tube on the R22 is located on the forward of the mast. Make sure that there's no bugs or dirt or debris that's been obstructed. So just visually inspecting that and making sure that that is clear. Next, checking the windshield condition and clean. Make sure that it's clean. So just looking at it, also just looking at its condition, making sure that there's no cracks, major scratches that would prevent you from being able to see outside. So just looking at that, making sure that that's clean. Do that on the right side and then I'm just coming over here, confirming that it's on its left side and why I'm looking at the windshield. I'm making sure that we're not missing any screws or anything, that everything is there as it should be. And like I said, I like to do a visual and physical inspection to make sure that nothing's missing or loose. Next would be checking the landing light. Checking the landing light. I'm going to come in here, pull the circuit breaker for the landing light. So when I engage the clutch, the clutch doesn't start engaging. So I'm going to pull the circuit breaker. Master battery is coming on. I'm going to engage the clutch and then activate the landing light. So I will come up here. Just confirming that both bulbs are working. As soon as those are working, while I've got the battery on real quick, we're just going to go ahead and turn on our nav lights and confirm that there on the right side of the helicopter, the, the green position light on the right side is working. Doing a walk around of the helicopter, making sure that the rear white position light on the telcone is working as it should. Then working my way back around the helicopter and making sure that the left side position light is on. Once I confirm that those are on, just going to shut the landing light off, disengage the clutch, push the circuit breaker back in, make sure that it is in. Leaving shut the nav lights off. Here at hogs, we leave the strobe on, shut the master battery off, continuing on with the checklist. Next thing we're going to check is the yaw strings. Make sure we obviously have both of them. That tells us whether we're in trim and forward flight. So we want to make sure that we have the yaw strings, that one side's not missing, it's been ripped off or whatever. Moving on with the checklist on the right side, same thing. Checking the overall condition of the landing gear. I like to step back, do a visual inspection, making sure that the helicopter is not leaning to one side or the other. I'm doing an overall inspection and again making sure the aft and forward part, that the skids have all their bolts as they should, and just overlooking the helicopter. And once again, as always, doing a visual and physical inspection of the helicopter, just confirming that nothing is missing. Everything feels fine. We check the position light and then once again, for this demonstration, we've removed the doors. But if the doors were secure where you're going to confirm that they open and Close as they should. And that the safety hinge, safety pins, they would be installed two per door. And then again checking the bag of each compartment, making sure that there's any items in there that is not exceeding seat per limit. Checking the seat belt condition, looking at it, it's working as it should functionally. And then just checking the controls and that they're in here. Lastly, during the pre flight we're going to check the overall condition. Just take back, take a step back, look at the helicopter, make sure that there's no loose articles floating around. If there were, we'd want to make sure that they're stowed. And then checking the seat belts again. And then instruments, switches and controls, checking the condition and then the clock is functioning. Looking here, nothing. Just doing overall condition that none of the warning lights are missing any of their covers. All the switches, the toggles are all there. Nothing's broken off. Doesn't look like we're missing any switches there. And the clock is working. So we'll just stop that there and then just like I said, just doing an overall condition and seeing if anything sticks out.
So we were going to cover showing some cautions at the end of that checklist. And it reads exactly the same way from the PoH for helicopters with removable controls, remove left seat controls. If person in that seat is not a rated helicopter pilot. And that's a grand idea because if you got you're going to try to give rides and leave the blades running, which isn't a good idea. You know, the throttle can be moved, somebody climbing in and out, somebody can bind up and get crazy on the cyclic and cause an accident. Same thing with the pedals. So if you're going to go flying by yourself, I'm sorry, you're going to go flying this pic. You're taking a passenger. They are not a pilot. They are not a rated pilot. You can a quick remove that, you can remove the pedals and remove this as well. So if you're going to take a passenger who's not a rated CFI or rated pilot, remove those controls and put them under the seat. Then we got to be sure blades are approximately level to avoid possible tail cone strike. So you can imagine if one blade's low and one's high, you go to start that rotor blade coming around to hit the tail boom and then you're into thousands or hundreds of thousands dollars in damage and no one is happy. Here's a good one. When flying solo, fill left baggage compartment to capacity before using right compartment. It avoid Placing objects in compartments which could injure occupant if seat collapses during a hard landing. So that makes complete sense. You're going to be over there, you're going to add weight to the aircraft, put it on this side. And then again, remember, whatever it is you're putting underneath the seat might end up going right into your insides in the event of a hard landing. So be careful about what you're putting in there in the event you do have a hard landing, because that could happen to any of us anytime. Another one is shorter. Pilots may require a cushion to obtain full travel of all controls. Verify aft cyclic travel is not restricted. Yeah, you could put a pillow behind you if you need it. And I've had people I've flown with an R44 that have done that. Put a short pillow behind them to make sure they're able to reach the pedals, but in turn make sure they have travel here. And this goes for someone with a. One of these. Ever put somebody in there with you and you didn't take these out and they're pretty big up here, that could be a problem. So something else to think about. Aircraft with optional equipment may have modified or additional checklist list items referred appropriate. Pilot's Operating Handbook supplement. Any questions, put them down below. See you in the next video. Peace out. When you feel the pressure to fly, but know the right decision is to stay on the ground, hit the hogs. No, go live to fly another day. Helicopterground. Com.










