Robinson R-22 Start Up & Shut Down- BRAND NEW 🚁🔥
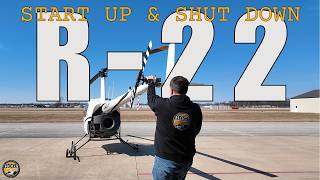
Kenny Keller walks through the complete startup and shutdown sequence for a Robinson R-22 helicopter, covering critical checks like oil pressure, rotor rotation, and staged warm-up targets of 50-60% then 70-75% RPM. He emphasizes guarding the collective with your left hand and using a kneeboard to stay disciplined through each step.
Questions this video answers
Lucky13
March 12, 2025
$48.50 per month (promoted; original monthly noted as $97)
No more than a 7% drop in two seconds on a mag check
Initial engine RPM held at 50–60%; warm up to 70–75%; governor to 100%; avoid the yellow (sympathetic vibration); horn at 97%
Chapters
We are getting ready to shoot a brand new startup and shutdown for the R22 section inside Hogs. We're doing all brand new R22 videos but we wanted to mention we have a special right now, 13 years we're celebrating online. And with Popo Pro Pilot you can get either a hog's bag. I've been carrying one of these for the last year and a half. I use it every single day to take my laptop home and back to work. Super nice backpack. Or you get a choice of the Hogs trucker cap. These have been really, really well received. We don't sell them. These are just for specials. And then we're going to demonstrate and use badass knee board. I say that because the young man that sells these actually is on the web as badass knee boards. These are really nice and we're going to use this to demonstrate the startup and how this can help you keep organized as you do startup. So go down below right now. Code Lucky13 for 50% off any courses. That link is down below. Use Lucky13 in the coupon box during checkout to receive 50% off all courses selling soon. So let's get to the startup. Let's take our time and walk through a startup on the R22. When you first get started doing your startups or your checklist startups, you're going to feel a little out of place in the beginning and it might take you a little while, but don't feel bad. One idea is to use a knee board. By keeping the checklist in place with the knee board, it's a lot easier to follow along. If you're trying to just put it on your leg and hold it and not drop it and then you're setting it down every time you do something and then you're picking it back up, it's harder to keep on track. So one of the reasons we harp on this is we ourselves had recently had an overspeed here and you'll hear about this at your flight school. Overspeeds can be not only costly, but they can be deadly to someone later if something is done wrong in the beginning during a startup and you have an overspeed very costly and could cause a fatal accident. You want to take your time on these startups. And again, I recommend the kneeboard because it just helps you stay organized in the beginning. Start with seat belts. So seat belts are on, passenger seatbelt is latched. Yep. Then we're gonna move up here to this corner and we want to check and make sure that the Fuel valve is on, which it is. Next, we're gonna check cyclic, collective pedals, throttle. We're gonna kind of check everything at the same time here. They're listed in a row, so we're gonna check all of them. So to stay in a good habit, one good habit is once you got the aircraft running, you should always have your hand that collective. Unless you have the collective lock. One key is from the very beginning to get used to guarding the controls. So we're going to reach down here first, release the cyclic friction so that I'll be able to take this and move it all the way around, make sure everything's free, nothing's binding, make sure everything's working right, and you can look out the rotor blades and make sure that they're moving along with it. Then I'm going to turn that back on. Then my reach back here, release the collective friction, and then I'm going to slowly raise it all the way up again, making sure it's free with no binding. Push it all the way back down, and I'm going to lock, get back up, and then we'll go full twist on the throttle, back off to make sure that that's clear. So again, be overprotective, make sure that those frictions are back on. I don't think I did the pedals yet, so just want to make sure you go all the way both directions, left and right with the pedal, make sure that it's free of movement, no binding of any kind. Then next we want to check the rotor brake. So I'm going to reach up here. Rotor brake is locked, so I'm going to go ahead and unlock that. Now, I want to mention that we're going to get ready to move outside here when we actually do the start. But still wintertime, so we wanted to do all this stuff in here nice and slow, so you can really see everything that we're doing for a startup. And we get to the point of starting, we'll actually push it outside. Next, we want to look at the circuit breakers. They're down here on this side, so you want to just kind of reach down, make sure all of them are all the way down. Next, we're going to go to carb heat, and I want to throw in something a little bit extra here for you as you're new to this. When I first started in the R22, one of the senior instructors said, hey, you're struggling on startup. He said, go out there and sit in the aircraft and learn where everything is without looking at it so that you can get used to knowing exactly where your frictions are, exactly where carb heat is, where the mixture is, where the trim knob is, where your frictions are. And get used to finding these and knowing exactly where they're at so you don't have to turn your head every single time to find one of these things. Back to the carb heat, we're going to look and make sure that the carb heat is pushed all the way down. Then we want to check that the mixture is full rich, which I pushed that down here when I was practicing before turning the camera on. So normally this would be up in this position at this point in the checklist. So you're going to look down, you're going to push the mixture full rich and then you're going to make sure that that little mixture guard is installed. And the reason that that is on here is so that you don't get confused during flight. If you reach down and you grab the carb heat, that's a pretty solid knob. If you reach up here, it's like, oh, this feels weird. Oh, yeah, that's the mixture. Because obviously you would never want to pull the mixture in flight because you'd kill the engine and you could kill yourself. So that's the reason we have this mixture guard that must always be in place. So mixture down, mixture guard is on. Okay, next we have primer installed. We do not have a primer. Then we want to check the landing light switch. So right down here is the landing light switch. To the left for us is off. A landing light switch could be in different places, could be on, the cyclic could be there, it could be up here. So individual aircraft that you're going to fly over time, you'll find that buttons and switches can be in different places on different models. So again, part of the reason to be very careful and know the aircraft specific to you and what you're flying at any given time, because again, people get different options put in different places and upgrades over the years. Things can move around a little bit. All right, next on the checklist, avionics switch, if installed off, we do not have an avionics switch on this particular aircraft. The next is clutch disengage. We want to look down here, make sure that this little red floppy do here is up and that that switch is back. So that is disengaged altimeter. So we set our altimeter for any airport specifically. Specifically that we are at. And I already set this just a little bit ago before we turn the camera on, we're around 840, 850@ Warsaw. So that is set. If you needed to set it. There's a little knob right down there you can use to adjust it to the altitude for your airport. So next you want to check, the governor switch down here to the right is on. And for the intents and purposes of the checklist, we leave that governor on all the time. So the governor switch is on. Throttle twist for priming is next. I've already twisted it once and we're in here in a warm hanger, so I'm not going to twist it again because I've done one full twist. So we're going to see if it'll start being a warm engine when we push it outside. One more step in here where it's warm, battery on, strobe on. And we want to explain this to you. Some people do this and some people don't. What we do is we always leave that strobe on. We never turn it off. When we're done at the end of the day, we turn the master off, we leave the strobe on. Some people turn it off. The beauty of leaving the strobe on is if you walk away from the aircraft and you forgot to turn the master off, either you'll notice that light flashing on the tail or somebody's going to go, hey, you left your master on. And you go back, shut the master off. So when you come back to the aircraft five minutes later, hour later, two days later, you don't have a dead battery. So we always leave our strobe on all the time. So then actually, before starting the engine, we'll do this again. When we get outside, you want to clear the area, you want to look left and right. Most people open the door and give a big old clear, clear. That way, anybody around knows that you're getting ready to start the engine and that the blades are going to start spinning. Push the aircraft outside and we'll actually go through the rest of the startup. Inside. We did the air clear area. We'll do it again. Now that we're outside, open the door. Clear. Give people an idea that you're getting ready to start. And I am going to guard the collective with my hand, put the cyclic between my legs, and then we're going to start the engine. As soon as I start, I want to look down there, make sure that the oil pressure comes up and we want to make sure the blades are spinning within five seconds. The first thing to do is get it started, check oil pressure and Then we can go back to our checklist and continue on. And normally we would click this back to zero. We're actually not going to go flying there. It's on zero. We're just going to do the startup and then do a shutdown for you and actually push it back inside. Another note, I don't have a lot of fuel in here. We got about a quarter tank on the main, but we're not going to go fly. All we're going to do is start up and shut down. So just in case you go, oh, he's only got a quarter tank on the fuel. We're not going anywhere. We're just doing startup, and then we're just going to shut back down. All right, let's walk through this on the checklist first, and then I'll do it for real so that you understand exactly what it is we're doing. The area clear, we're gonna start the engine and go back to both. I'm actually gonna do that with my right hand because I'm gonna guard the collector with my left. Use my right hand. I'm gonna start and go to both. And then I'm gonna go alternator on, clutch on, and then. And I'm also, at the same time, gonna be looking right up here and making sure that the oil pressure comes up and that the blades are moving in less than five seconds. And then I'll go back to the checklist and verify that I'm doing everything correct. So once we verify the starter light is out and we have oil pressure, we're going to want to get the engine RPM to 50 to 60%. We don't want to be up in that yellow range right there. They call that sympathetic vibration that puts unnecessary vibrations on the aircraft. So as we're starting up, we're going to get the needles to join here and keep it 50 or 60 until the checklist tells us to start doing the mag check. So by this point, I'll have my Already have my headsets on because that's what I'm going to do when we start. I'm going to wait for the clutch light to go out, and the clutch light is going to be up here. So wait for the clutch light to go out, and then we're going to warm up from 70 to 75% and wait for the engines. Engine gauges to all come into the green down here. Okay. Then once all of the engine gauges are in the green, we're going to do a mag check. So we're going to roll it up to around 75% up here on the needles. And we're going to check each of the mags. We're going to check left mag and we're going to check right mag. And we don't want any more than 7% drop in two seconds on this mag. And you'll see it when we actually do it. And we're also going to check the carb heat. What we'll do is we'll raise the carb heat when it's running and we're going to look down here and make sure that that needle starts to rise. Once it has a rise, we know it's working and then we can push the carb heat back down again and then adjust for what we need for the day. We may have to pull some to keep it out of the yellow, but that is the carb heat check. We're going to do a sprag clutch check after the mag check where we roll the throttle off and make sure that the needle split. So you'll see us do that. We'll check doors and make sure they're latched. Check the limit map chart. So we can do that now instead of having to mess with that while engine's running. And let's just say we're showing 12 degrees Celsius. So let's go down here to beta. So it looks like we'd be around a little over 24 inches as our limit on our 5 minute manifold pressure rating. And we have a video on this that goes in detail on manifold pressure that we really recommend you watch in this section. In the R22 section will help explain what we're doing when we're looking at these manifold pressures and why do we care? So then before we actually pick the helicopter off, we would check that all the frictions are off and we'll roll it up to 104%. Check. Make sure warning and caution lights are out. And then we're going to slightly lift the collective and make sure that the horn goes off at 97%. So we'll do all that and then we'll actually film the shutdown as well for you too, which the shutdown procedure is actually pretty easy. Just a quick rundown. Collective down 70, 75%. Friction on cyclic and pedal pedals. Neutral friction on cylinder head temperature drop throttle closed, clutch switch disengage. Wait 30 seconds. Mixture off. Wait 30 seconds. Apply rotor brake, clutch light extinguishes, avionics, alternator, battery and ignition switches off. But we'll do it. We'll do that. For you and demonstrate it as well. After we do the startup, I'm going to actually start the helicopter with my right hand, keeping my left hand on the collective, and I'm guarding the cyclic with my legs. So I'm going to hit start, make sure oil pressure comes up. Got to go alternator on and clutch engage. And then I'll go back to the checklist and make sure I'm getting everything covered. So we're going to go start and then back to both, make sure oil pressure comes up, make sure the blades are moving in less than five seconds. So here we go.
Pressure is up. So I'm going to go alternator on, clutch engage. Starter light is out. Blades are moving. And so now I can go back to the checklist and make sure I got everything. Ignition switch is on. Both starter lights out. You want to be at 50 to 60% as we warm up. So we're going to bring those needles together at around 50 to 60%. We don't want to let it get up into the yellow. They call that sympathetic vibration. So needles are coming together. We want to hold it there about 55 or so, staying below the yellow. And we'll go back to the checklist. So the clutch switch is engaged, blades are turning, alternator is on. Because I did that right away. Oil pressure is up. Bottom of the grain. I have my headsets on. Now we're going to wait for the clutch light to go out, and once the clutch light goes out, we will check and make sure that all the circuit breakers are in. Okay. So we're still waiting for that clutch light to go out. Once it goes out, we're going to warm up at 70 to 75%. And while we're waiting for that clutch light to go out, I should have turned on the clock to start the timer. We're not leaving because I mentioned earlier we only have a quarter of a tank of gas, and we're just doing a startup and shutdown. But I should have hit the timer button up there, and that way we know how long our flight is. That's how we track our fuel is make sure we start that timer every time we get ready to go fly. Clutch light is out. So now we're going to warm up 70 to 75% as per the checklist. So we want to get through that little yellow range, get past that sympathetic vibration. There's just above the yellow, get about 75%. Now we're going to wait and make sure that all the engine gauges go to the green area. So as soon as those engine gauges, everything gets in the green, we're going to do our mag check. And we're going to check the left mag first. One to two seconds, we're going to turn it to the left, back to both. And then we're going to turn it to right and back to both. And we want to see no more drop than seven seconds or, I'm sorry, 7% in two seconds. And I had a mechanic tell me years ago, a lot of people stay on the mag too long. Just check it. Get it over there. 1 1000, 2 1000, get it back to both. If you leave it too long, you can actually, he said you can grenade.
An engine if you leave it on.
A mag, on just one mag too long. So check it and then get it back to both. Okay, so now our engine gauges are in the green. So I'm going to check the left mag first. I'm going to get right to about 75. We're going to go left mag. One one thousand, two one thousand. Back to both. I was like maybe 3 or 4%. Now we're going to do the other one. One one thousand, two 1,000. Back to both. Small drop. Looking good. Now I'm going to bring it up just a little bit now. I'm going to go and do that sprag clutch now. So I'm going to go throttle off and add right pedal. And I'm making sure that the needles split. So the needles did split. That means the clutch disengagement is working. So now we're going to check the carb heat. So we're going to pull up the carb heat lever. And then we're going to go up here and we're going to watch and make sure that that lever rises and there can see an obvious rise there. So that's working. I'm going to push the carb heat back down so we know it's working. And before we would lift up, we would make sure that that's out of the yellow, but looks like we're good to go.
If we were actually gonna go fly.
We would be good. So car peak is back down. Sprag clutch. I already did that. Once again, I do that just a little bit ahead. Doors closed and latch. You want to check the limit on the map chart, which we're not gonna go fly. And we have a video on that that explains in detail why we care about the manifold pressure and how to interpret that chart easier. Just for you to go see that video inside the R22 section inside hogs. So now we're going to go governor on, which it is on. I'm going to roll up, I'm going to let the governor take over and it's going to take it up to 100%. We check, make sure that all of our warning and caution lights are out. They are. All of our gauges are in the green. They are looking good. And now I'm only going to release the collective because I'm not going to move the cyclic. I'm going to hang on to it, I'm going to release the collective and I'm going to start raising the collective and rolling down so we can make sure the horn works.
So.
So we're going to go up. There's your horn back down, throttle takes over, takes it back up. And we'll do that again so Lindsey can get that on camera. So I'm going to raise collective. As I raise collective, I'm rolling throttle down, There's a horn down, throttle back on. And if we're going to go fly, we would release the cyclic friction. We would do our pre loves up left off checks and we take off and fly. So now that we've gotten through all that, now we'll do the shutdown. So shutdown is our. Let's say we just came in, we landed, we sat down on the ground. We're going to roll back to 70 to 75%. So I'm going to roll it down there. I know the cyclic is still locked because I didn't unlock it again because we didn't fly. We're just showing you. And now I'm going to reach back and lock the collective. Collective's locked. I want to get back on that throttle to get in there to that 65, 70% or 70 to 75. Cyclic and pedals neutral. Now we're going to wait for the cylinder head temperature to drop, which it already is because we didn't take off and go flying and heat the thing all the way up to a normal operating range. Now we can go throttle completely off. We can reach up with our right hand, disengage the clutch. Now we're going to wait 30 seconds. So I'll actually start my timer and going to.
We're.
We can wait 30 seconds and then we can go mixture off. So I really recommend that you learn to keep your left hand on the collective and use your right hand to do all these different things. I know it's kind of awkward when.
You first start learning it, but you're.
Going to be better off if you're always guarding that collective when you're by yourself, hand on that collective at all times. Startup, shut down. Hovering, takeoff, landing at altitude. It's acceptable to take your hand off the collective, but all the stuff on the ground, have your hand on that collective at all times. Learn how to do everything else with your right hand. Alright, well we're well over the 30 seconds. So now I'm going to reach down with my right hand. If I can reach it, go underneath my leg, take off that mixture guard. I'm going to pull the mixture and then make sure the mixture guard is back on. And now we're going to wait another 30 seconds and then we can start applying the rotor brake. And then I'll give you a little hint on the rotor brake. Sometimes people will start pulling the rotor brake and just pull it heavy and just hold it until it stops. That's like a brake up there, just like a brake on your car. And if you just hang on that thing, you're going to make that thing too hot. So when you reach up to start doing the rotor brake, you want to do it like about 5 second intervals. So now the blades are slowing down and I will take my hand off to reach up and do this. So I'm just going to reach up.
There and I'm gonna grab it and I'm gonna pull it down. Do about 5 seconds or so and then I'll let up and then I'll pull it again. Another four or five seconds or so, slowing it down, release again. If you just hang on that thing, you're gonna get it too hot, pull it again, keep some pressure on it. And I'm gonna let up. Maybe another time or two. And we'll have the rotor blade stop, let up one more time. I'm gonna let it come around, try to get the blade right about where it's over the tail. I always like having the blade over the tail for going in and out of the hanger. And I also like it because if somebody, if I walk in the hanger and the blade's not over the tail, I'm like, okay, who was messing around with the helicopters? I always leave the hanger with tail or a blade over the tail. All right, avionics, RNA battery and ignition switch is off and there's your shutdown. If you hung around to the end of this video, we have a 13 year celebration going on right now. Hogs has been online 13 years. So we have a special going in March and this is the end of March. We just decided it's 50% off of all courses. And the beauty is right now, with Propilot, you get this handy, dandy, badass knee board, or you get a Hogs ball cap, or you get the Hogs backpack. Your choice with a professional pilot. Sign up so you can go to helicopterground.com and enter the code Lucky13 in the coupon box during checkout. And that'll show you the 50% off. And that's for the pro pilot. That's for yearly memberships and also for the monthlies. And that's as long as you keep the course. And the monthlies been at $97 since like 2016. With inflation doubling, we haven't doubled our prices. So you can get monthly membership for $48.50 a month for as long as you keep it. It's cheaper than two people going to separate Applebee's. It's pretty cheap for the amount of training that you get with it. Go down below helicopterground.com and just so you know, we're reshooting everything. Total revamp of the R22 section. We'll stay on the R44 section as well. And now that we have both, we're gonna make sure that we get a bunch of good updates and flying videos and all kinds of cool stuff. Okay? Peace out.
When you feel the pressure to fly, but know the right decision is to stay on the ground, hit the Hogs. No go. And live to fly another day. Helicopterground.
Com.










