The Steps To Become A Professional Helicopter Pilot
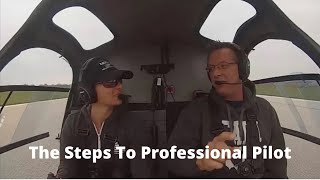
A YouTube instructional video by Kenny Keller describing steps and tips to become a professional helicopter pilot, emphasizing the Certified Flight Instructor (CFI) pathway as a way to build flight time and advance into industry jobs. The video mixes Kenny’s personal story and offerings (online ground school, books, member successes) with in-flight demonstrations and classroom instruction by Holly Gardell covering autorotation practice and slope landing/takeoff procedures and hazards.
Chapters
Hey, are you pursuing the idea of becoming a helicopter pilot or already working on your ratings trying to get to cfi? Start building your time. Well, I want you to grab a pen and paper real quick if you're serious about this. This is for serious inquiries only. This isn't for tire kickers. I want to share a huge tip that will help you attain your dream of becoming a helicopter pilot or several tips I should say. So I'll wait a second, go grab a pe. Okay, we're going to show you a lot of stuff, so I'm going to go through this kind of fast. So I want you to imagine this scenario. What if you're suddenly sitting in the pilot's seat teaching a student with a brand new certified flight instructor license in your pocket. What if you're suddenly building that time to attain your helicopter pilot dream job? And with the CFI job, you learn the skills to advance your career and move on to all the other cool jobs that are out there in the industry. Does this sound like a stretch to you? I used to think so too before I got started many years ago. And I gotta mention, I'm in our hangar now, the Hog Studio, and we got some crazy wind outside. So if you hear some weird noises, it's the wind outside blowing against the hangar doors. So until I learned how to self study after failing my first attempt at passing the dreaded helicopter pilot checkride, my first one, the Private, many years ago, I was pretty devastated, trust me. Which leads to how I got through all this training. And we're going to continue on with the story because it's a part of it is what I did next. After my failure, I had to study super hard and I created a notebook which became a course online. And now we've been online almost nine years helping people all over the world. So I got my dream attained also from learning the best strategies, tips and tricks from some of the some phenomenal instructors in the helicopter training world and then became a certified flight instructor myself. So I had so many great people help me and now we want to help you. In the past 20 years that I've been teaching, I've helped hundreds of people obtain the helicopter rating and I've done this with experience from one on one dual instruction given to students in the helicopter. Also with my helicopter online ground school and Our Amazon Number 1 Best selling books along with other products and services we've created, we're all over YouTube. We've got almost 900 videos on YouTube over 10 years. You can check us out there if you want to learn and see a lot more right now, I jump over to my camera phone and go show you some of our members. So we're going to head over here to what we call the Hogs Wall of Fame and I'm going to show you some teaching styles and what it looks like when you go out in the helicopter and you're out there teaching. The person I'm going to highlight today from one of our many, many members is Holly Gardell up here on the wall and you're going to see her just shortly. And some of our members have become ground school instructors. So we've got Tannen Austin Helicopter line ground school member now appears in our videos. We got Chris Hauser, longtime student of mine, dan Taz Christman, 2018 Flight Instructor of the year. Became a Hogs member and did his helicopter add on because he's already a fixed wing cfi. And we got Austin boa. Up here is in our videos, Sarah Green, Dave Sipes. So right there is a quick look at the helicopter and land Ground School Wall of Fame. So what we're about to show you here is going to be what this is all about. These are all the people that have achieved this dream that we've been trying to show you, or I should say that we are showing you. You're going to learn more about this as we go. Okay, so now we're going out in the helicopter. And this is from our certified flight instructor course. So this is Holly who at the time, I'm teaching her at this moment how to become a certified flight instructor. She's already got her private in her commercial and, and she's working with me for her certified flight instructor course. She came and did her CFI with me after going through our ground school videos. We talked on the phone, she went through all the videos. We came and in two weeks had her all finished up and heading home. And now she's teaching with us and I'm going to show you her teaching style with our members. Absolutely love after we show you this. So this is what you do when you teach people how to land without an engine. So let's go to that video and let you see how it works.
You know, got comfortable doing them and just got the feel, got the look. We know that they're really nice entries. Was giving us the really nice pull down. You nailed a couple of them right to the numbers.
We're clear, right?
Clear on the left. We've had lots of practice enter deciding when to enter, how to enter, how to do A nice entry. How to have a good setup. We'll come around, get a nice setup. Counted off. 1, 2, 3, enter. Once we enter it, if the injury is good, the glide's nice. Do we like it? Then go ahead and just roll your throttle all the way off. Not chop it, but just smoothly roll it the rest of the way off. Maintain your minimum of 60. At TreeTop, we're going to start a gentle flare or a little below treetop, start a gentle flare. As we get closer to the ground, we'll make it bigger, make it bigger, make it bigger. And the wind today, you're going to notice how it's going to happen. Slower, the flare is going to be slower. We're going to have more time to react and we're not going to have the run on that we were having yesterday.
Are we going to go. Where do you want to go to that first intersection?
I want to go to the number nine.
Oh, on the number on the Runway?
Yeah.
Okay.
Unless some airplanes come in, then we can move over to the taxiway. But again, I like to focus. I like it when we have a. We have a solid. We know right smack dab there. That's where. That's where we want to go. That's better for student and instructor. When you're clearly defined spot, you know exactly where you're going.
All right, so let's get everything stabilized here before we make our turn. Going for 1500 and 65 to 70. And I'm going to go out just because I can give myself lots of time. Flick and clear on the right, turn the left.
And I'm going to do my best job, my best job that I can at keeping my hands off the controls, which is hard for me just because.
Understandable.
I'll do my best.
Plenty of people trying to kill you over the years.
Yep. I'm gonna try to be. Lena, let you be as hands on as absolutely possible. So.
Okay, I'm gonna make a radio call here.
All right.
Goshen Traffic helicopter 26 Papa is on final four, Runway nine. Going for engine failure. Practice to the number nine, Goshen. All right, we're at 1500.
Get that VSI stabilized.
We have a good entry because key to a good auto is a good entry.
A little bit of left pedal.
Just a little bit.
RPM's top of the green.
Very nice. Nice setup.
All right. And because we have so much wind, we want to enter a little bit later than we did yesterday. Yep, I'm going to get that nine pretty much. Pretty close to the Black line there.
Yep.
On my wind screen. Visual.
Looking good.
Looking good.
We're still too far. Do you agree?
Yep.
And I'm going to go three, two, one, enter. Collect it down. Right pedal.
Nice. Good entry.
60. All right, there's RPMs.
I'd go and roll the throttle off. What do you think? Okay, go and roll that thing.
Throttle's coming off.
Oh, yeah. Nice. Enter. You decided at a good point.
All right, you got it?
Yep.
A little bit more.
Yep.
Let her sink before you. Before you level. Pull it up.
Yeah.
Look at that, look at that, look at that, look at that.
Yeah.
Woo.
Nice.
That's right.
See the difference in the wind. Oh, man. We perfect that flare a little bit. Go ahead and pick us up and we'll see how far past we are.
All right, I'm gonna roll it up.
All right. So if you take the necessary steps and if you do right, you can be out there like Holly in the world teaching. And she's out there now working in the industry. So next I want to show you some classroom with Holly because learning to fly the helicopter is about 25% of it, 75% of all the work for all these ratings is getting through all the ground school. So Holly ended up doing a really good job on some of the teaching she did for me and I asked her if I could use it and we filmed it and put it in in the ground school. And people really like this material. Inside ground school. I do a lot of it. Our operations manager, Brian, we're out. Just does a lot of it. And our students that have become instructors, online guest instructors for us, they teach inside the courses too. So let's go and watch this video with Holly right now.
That means landing on and taking off from sloping terrain. As helicopter pilots, we are often landing in unimproved areas off airport and many of these areas can have slopes on them. This is a very important procedure maneuver to get right not only for your practical exam and your checkride, you're going to be expected to perform it and explain it and do it well, but also in real world helicopter operations, it's something that we are doing on a regular basis. So good to study it, know it, get proficient at it, and primarily because there are a lot of hazards. Lets start by going over the hazards associated with slope operations. These include dynamic rollover, sliding mass bumping, tail rotor strikes and passenger encounters. Dynamic rollover. This is a perfect scenario for that to occur. You need a rolling motion, a pivot point and meeting or exceeding the critical rollover angle. The aircraft needs to meet or exceed its critical rollover angle. This is a condition that is solely due to pilot error and very difficult to recover from. So you want to make sure that you don't get yourself into this condition. The next is sliding. If you start sliding on a slope, that can lead to a dynamic rollover situation. Because if you're skid sliding on a slope and then just to the downhill side of you, you have rocks or uneven terrain that's going to provide the pivot point that could contribute to that mass bumping. If you try to land on a slope that's too steep and you want to put your downhill skid down and you run out of lateral cyclic authority to make sure that the aircraft doesn't exceed that critical rollover angle, you could then have a situation called mass bumping. If you have an underslung rotor system, mass bumping is also very serious. It could break apart your rotor mast and your rotor system tail rotor strikes. Always want to know where your tail is in any situation. But when you're working around slipping terrain, even more so, and passenger encounters around slipping terrain, when you have passengers getting in and out of your aircraft, that definitely can be very dangerous situation. And we'll talk a little bit about that more toward the end of the talk. Let's just talk about landing on a slope. How steep is too steep? Well, for training and real world operations, typically we say 5 degrees maximum. If you've run out of lateral cyclic, it's too steep. So find another place to land. That's the beauty of being in a helicopter, is you can pick it up and you can move just right over there and you can find another spot that could be much better to land. You don't have to risk it just because that's where your passenger wants to get out. If you're on a job, for instance, and they want to go right there and want you to get as close as possible. Well, if that little spot is not safe, then the next little spot over, that's as close as possible. They can walk. You want to be aware of your wind direction and speed. Of course, if at all possible, you want to have your nose into the wind. You don't want to have tailwind on a maneuver like a slope operation because you don't want to have a twitchy tail. You need to have pretty precise control with your tail rotor pedals. For this. You're going to check your suitability for landing. You could do a little recon like you do for other operations. Just, you know, before you set down, you can hover around this area and find out what looks like the best place to land before you decide to set down there. You want to keep your eyes out on the horizon, on a reference point, like you do when you're in a hover. And you want to keep your RPMs in the green, because if this is not the right situation for you, you're going to pick it up and you're going to go somewhere else. So let's talk about how you approach. And I've got a little visual aid, a Tonka helicopter that's going to help us kind of visualize a couple of these steps that I'm going over. So our Tonka helicopter looks suspiciously like an EC120. Blades look kind of like they would be going in a clockwise fashion. But for the purposes of this demonstration, we're going to simulate it as a counter clockwise rotating system, like many of the training helicopters that we all use in a training situation. So when I talk about approaching the hill at a 45, you want to have your aircraft parallel to the slope and then approaching it at a 45 degree angle. So you know, rather than coming in from this direction and turning your tail in a way, you know, if you're not certain what's over here, you can come in on a 45. So step two here would be to start your descent, you're going to gently lower collective, you're going to touch down your upslope skid and then you're going to hesitate for a moment. You don't want to just lower collective all the way. You want to make sure that you, you're on supportive ground and you want to have slight cyclic input into the slope. So we've come in on a 45. Something I didn't mention is that there are some recommendations that talk about if the direction of your tail rotor thrust, for instance, in this counterclockwise rotating system. So you would want to have your right skid on the slope because that tail rotor thrust that translating tendency can help get, keep you into the slope. So if at all possible, again, nose into the wind and your right skid on the slope in a counterclockwise rotating system. Alright, so now we're ready to actually touch down our downhill skid on the ground. So this would be step three, the landing. We're going to continue to lower the collective gently while applying lateral cyclic toward the slope. So here, you know, up here we have, we're parallel to the horizon again, once we start to set down a little bit Right lateral cyclic input. Now, as we've lowered our collective and simultaneously added right lateral cyclic to hold us into the slope, all of this very slowly and gently, we're going to get our rotor disc now parallel to the horizon, so our aircraft is tilted this way, but our rotor disc is level with the horizon. You don't want to slide here if you start sliding, and this is why you keep your RPMs in the green. If you start sliding gently, pick it up, you know, you don't want to lead to a condition that's going to get you into something more critical. If you have vibrations, any abnormal vibrations or mass bumping, you want to abort again, you can always pick it up, put it somewhere else. So now we're in the uphill skid down scenario, getting ready to lower our downhill skid, simultaneously lower collective while adding right lateral cyclic. And imagine this rotor disc tilting into the hillside. It doesn't actually have a lot of play in this little mine model, but you can imagine that you would have this tilted into the hillside. And so your roto disc is going to be parallel to the horizon. You still want to stay a little bit light on your skids until you feel exactly that you're on the ground firmly. And once you are, you can go collective all the way down. Okay, once you've determined that you feel pretty good about your situation on the slope, how secure and firm your skids are on the ground, that you're not going to slide, and that you can put the weight on the skids, go ahead and lower collective all the way. Probably want to keep those RPMs in the green in case you do decide you still need to take off. But at this point, I think you're pretty comfortable with where you've got the helicopter, both skids on the surface, and now neutral cyclic. So here you had your cyclic into the hillside, so it was parallel with the horizon. Now your cyclic is neutral and your rotor disc is going to be parallel with the slope. So now we're ready to take off. This is kind of where we left off here, where you have full weight on the skids and your rotor disc is level with the slope rather than the horizon. You're going to again note your wind speed and direction. It may have been a few hours since you've been on the ground. Things can change, as you know. Don't assume that it's exactly the same conditions as it was when you got there. You're going to clear your skids in the area, make sure that, you know, no rocks have Rolled down the hill, anything like that. Since you sat down, you want to do your pre takeoff checks. Have your RPMs in the green, so you want to have your eyes outside on a reference point just like you do in a hover when you set down on the ground. I was talking about you'll feel when the skid, your uphill skid touches the ground. You're also going to feel when your downhill skid comes off the ground. So eyes outside on step two, you're going to level your rotor disc. So here the rotor disc is parallel with the slope. Here you're going to start to add right lateral cyclic. Put some pressure against the slope. Now you want to be leveling the disc with the rotor disc with the horizon instead of the slope. So you're going to start to gently raise your collective. The downslope skid is going to start to rise. So this has to be very slow and controlled motion. You don't want to yank on that thing because that's how you're going to get into dynamic rollover situations. So very slow and controlled. Eyes outside at step three, you're going to simultaneously continue to raise the collective while leveling your disc with the cyclic. Here we had rotor disc into the slope. Now that you're coming off the ground, you don't want to do that anymore. You want to have it more level with the horizon. So you're going to have simultaneous collective and cyclic input to make sure you level that disc and gently pick up your skids off the ground. You're going to maintain your RPMs with the throttle and maintain your heading with the pedals. You want to have your helicopter in a level attitude. And you know just before you come off the ground again, hesitate, make sure everything looks good. Done your pre takeoff checks, you don't want to do anything abrupt. Then slowly raise your collective to lift off. So you're getting ready to pick up the helicopter. You want to have your eyes outside RPMs in the green. Going to add some right lateral cyclic so you can get a little bit of pressure into the slope. Gently start pulling on collective. It's going to be a simultaneous cyclic and collective input here. Very gently. You don't want to do anything quickly just to get the helicopter level. Once you're stable, you're going to hesitate. And now you can, with your rotor disc level with the horizon, start to pick it up off the ground. So now you're going to be in a hover. All right, once you've gotten light on the skids, you're Going to pull into a three foot hover, do your pre takeoff checks, clear your area, note your hover power and then depart. So what you want to be sure to do is always move away from the slope. You can do just a sideways hover, move away from the slope until you're well clear of your tail rotor before you turn and you know, same kind of thing, depart at a 45 just like you came in. So from this hover you're going to do your pre take off checks. Make sure you look both ways, clear yourself. What you don't want to do is turn the tail and fly off this way. So step four, after you get into the hover, you're going to slide to the left and be well clear of the slope before you turn your tail and start to fly away. Alright, so let's just talk a little bit about the situation with having passengers on a slope. When you're in a situation with sloping terrain, you're on the ground. So let's use this for example. Number two, you're on the ground, you've got a passenger in the right seat. They want to get out and do something on the ground. That's why you landed there in the first place. They have to go check on something so they want to get out. Keep in mind that the distance between the rotor blade and the ground is a lot less on that uphill side. You have to be really aware of that. And in certain kinds of helicopters, like the instrument, for instance, those rotor blades are very low, there's not a lot of clearance there. So you need to make sure your passengers are really aware of the fact that they're low. When they exit. They need to be in full view of you, the pilot. Make sure that they never go toward the rear, they never go where you can't see them and they stay down. Because a rotor strike to the head is a very real threat here for a passenger. You don't want to have a safe landing and then have some to get out and get knocked in the head by a rotor blade. So you want to be very clear with your passengers in this situation because it can be very dangerous. It's a real threat. It happens, it happens to experienced pilots. You need to make sure that your passengers understand that there's a difference here and they don't have a lot of rotor clearance. A rotor strike to the head can be fatal. And it's important that you relay that in your safety briefing if you have passengers.
Okay. So we'd already mentioned if you take the necessary steps and if you do them right, you can get to where you want to be. In order to do them right, you need a proven formula. And here it is, it's called helicopter online ground school. If you're already going the path and you already kind of know how this works, if you're brand new to this, you start with the private pilot. First you have to become a private pilot. Then the next best option is to do the instrument course. Because while you're building your time and training doing the instrument course, you're actually building time for your next step, which is commercial pilot. And if you're going to be a professional pilot, you'll need that instrument pilot rating later on. So it's best to do it in between private and commercial. And then you go to certified flight instructor, so it's private, instrument, commercial, and then do certified flight instructor. So you can actually get out there and start building your time and experience. Most people pick this route. It's hard to get a job at the commercial level, but it's much easier to get a job as an instructor. Start building your time. So the professional pilot membership you see right there in the center, that combines all four courses, Private pilot, instrument pilot, commercial pilot, and certified flight instructor, is all included in the professional pilot membership. So I just gave you as an overview of the exact same system that our HOGS members have used, like Holly and others that we've showed you up on the board on the HOGS wall of fame. And now that you know what to do, I'm going to show you exactly how to do it. So it's all about learning the knowledge. And it doesn't matter what you use. There are so many different forms of studying. Studying on your own, studying one on with an instructor. There's all types of different ways that you can learn this information, but we've combined it all together into helicopter and ground school so that we're walking you through step by step to get through all these ratings. Because at the end of the day, it's about learning the knowledge. Like I mentioned, you know, I feel your pain if you're already trying to work through this and do a majority of it on your own. I remember back when I got started, I wish there was a program like this. You can benefit from all of the failures that I've had over the years and all the trials and tribulations, taken the hard route because there was nothing to use back when I got started over 20 years ago. There was just nothing out there. So this membership is going to almost double January 1, 20, 21 and most importantly, above all, there's zero risk because we have a 30 day money back guarantee that I'm going to talk a little bit more about in a minute. But I want to give you an idea of what this could cost you as you're going through these ratings. For each rating you could have approximately 30 hours and you could do more, you could do less. We're just picking 30 as the example. So the ground time is the one on one with your instructor to prepare. So if you took each rating at 30 hours, which again is reasonable, that's 120 hours of ground instruction with a CFI preparing for all these ratings. And 75 an hour is not unreasonable. And at 120 hours, at 75 per hour, that's $9,000. Right now I go do videos locally with one of my past students and guest instructor, Chris Hauser, and we fly the cab helicopter. I'm paying 395 an hour for that helicopter and I pay Chris 75 an hour to go out and help me teach and instruct. There's people that charge even more than that. There's people charging 95 and higher. You might find a cheaper instructor somewhere, but you're still going to be in the area of close to probably 50 an hour. You're not going to get a whole lot lower than that. So there gives you an idea of where, what it could cost you. At those rates, our price for the professional pilot program is only 977. When you look at the money that you could save, let's say you cut that 9,000 in half or you set it down, got it down to a quarter of the cost. This saves you a lot of money because a lot of instructors just want to fly, fly, fly and they don't really care about the ground knowledge. You know, I just mentioned how I pay 395 an hour for the cabaret. You know, if you're going through your ratings, you're going to need 150 hours to get all the way through route for to commercial pilot and then some additional time for CFI. And the rate of 350 an hour, that's pretty average right now. There's people charge maybe a little less, but there's people charge a whole lot more. So you're going to spend 50,000 at least for your aircraft time or more. And when you look at what you're going to spend on the ground, you know, it's minimal compared to the aircraft time, but it's still saving money to go with our helicopter line ground school and help you learn this information. So I'm going to encourage you to click the button below and get started today. And here's the beauty with our 30 day money back ironclad, no hassle, 100% money back guarantee. You have nothing to lose. We've had this in place for almost nine years now. We went live 3-1-2012 and we have stood behind this 100%. You have a full 30 days to go and evaluate the training and if it's not right for you, just ask for a simple refund through email or contact the HOGS customer support. Just ask for a refund. It's that easy. We don't question you, we don't hassle you. We just refund your money and you're always welcome back. We part as friends and you're welcome back at any point in time. So remember, rates are going up for sure. 1-1-2021. We know that they are going to go up. We have had this at the same price for about three years now. And as once we got doing the numbers and figuring, you know what, this is a great package that's going to save you a lot of money. So click that button below, get started. We'll see you on the inside of helicopter ground school.










