My Audio Setup for Podcasts, Online Courses and Videos
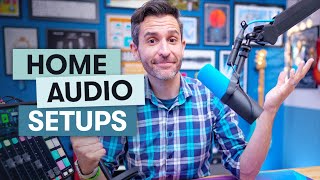
Kyle Ford shows three audio setups for creators: an on-mic broadcast rig with a Shure SM7B and Rodecaster Pro 2, a boom mic setup using a Sennheiser MKH 50, and wireless lavalier options like the Sennheiser EW-DP. He covers positioning, monitoring workflows, and budget alternatives for podcasts, videos, and live streams.
Chapters
As part of the content I create, I make a lot of videos. And when it comes to video, something you might not expect is that the audio side of things is just as important, if not even more important than the video itself. For example, now you're listening to me on the built in microphone for my camera and this is what that sounds like versus this microphone here, which is a dedicated audio setup for this video. So to level things up, I have a few different audio setups for whether I'm recording videos, podcasts, online courses, or live streaming on YouTube or in my mighty network. And today I'll walk you through my three main audio setups and I hope that you'll find some useful tips and ideas for your own content. By far my most common audio setup is this right here. A microphone in front of my face, sometimes just called a traditional broadcast setup. I'm an audio production nerd, so I don't mind a little bit of complexity in my setup. So I usually use a microphone like this. This is the Shure SM7B on a boom arm with an XLR cable that's running into my my Rodecaster Pro 2, which is an interface mixer that lets me connect multiple microphones, adjust the audio and EQ it however I want and then either record in here or send it into the computer to be used in streams and stuff. But really quickly, I do wanna remind you that there are so many different ways to approach a setup like this, including something very simple and budget friendly like just basing it around a USB microphone. So I did put together a separate video all about podcasting basics that covers all of the gear options if you do wanna learn a little bit more. Now, like I said, I do have my microphone positioned on this Elgato wave arm which gives me a ton of opt for versatility in terms of how I position the microphone. It's a really nice arm and it's not crazy expensive. I really like this arm a lot. And since I am using an XLR microphone right now, I do use these Rode XLR cables which I really like because they're not crazy expensive, they're really high quality and they come in amazing, vibrant, awesome colors. You can get them in black if you just want to keep it, you know, subtle and discreet. But if you want to add a pop of color into your setup, these Rode XLR cables are absolutely awesome. And my headphones are the Rode Nth one hundreds, which I really like because they are super comfortable and they give me a really neutral sound. So what I'm hearing in My headphones is exactly what will be recorded or sent out to a stream, and it just helps me get the best audio quality in my finished project versus using a pair of headphones that might artificially, like, boost the bass or change the way things sound. And then I'm not hearing an accurate representation of the audio I'm recording. Now, sometimes if I'm doing something like a live stream, where I don't want a big pair of headphones on the whole time, I will use these, which is a pair of Sennheiser IE 100 pros. These are in ear monitors, so they just wrap around your ears like this, and then the cable goes in the back, and that way they're a little more discreet on camera. But what I really like about these ones specifically is not only do they sound good, but they don't move around or fall out when I start talking. A lot of cheaper. In ear monitors, when you start talking, they start to come loose and they start falling out. And then the whole time you're doing a live stream or you're talking to someone, you're kind of fiddling with your ear, which is very distracting. These ones just stay put, and they're super comfortable. Now, sometimes it's not convenient or visually appealing to have a microphone in front of your face. So my next most common audio setup is this right here, which is a microphone boomed out of frame. I really love this setup because you can hear me, I can move my hands, but there's no microphone taking up any space or getting in the way. It's really convenient, but it can be a little tough to find the right boom microphone and to position it properly. So I'm actually really proud of this little rig that I've put together here. My manfrotto tripod head has a mount on the side of it that lets me attach this ifootage support rod, which then brings the microphone out, and then I can position it exactly where I want, just out of frame. It's just a inch out of frame. You would see it if the camera just tilted up a little bit. But because the microphone is attached to the tripod head with the camera, if I move the camera, the microphone stays out of the shot. It's really convenient. Now, of course, this isn't the only way to position a boom microphone. I like it because it saves floor space since it's just one stand for the camera, the microphone. But you could put the mic on its own separate boom stand. Or you could even use an arm like I was using before, but have it positioned elsewhere and then use that as your boom arm. So there's all kinds of different ways to get microphones positioned how you want them to be. The microphone I use is the Sennheiser MKH 50, which is my all time favorite microphone. It's really magical because it has this not only great sound quality, but a great ability to kind of zero in and pick up sound in a way that almost sounds like the microphone is really close to me, even though it's out of frame. And when I have the microphone positioned out of frame, I usually point it towards my chest. I think a lot of people, myself included, initially start pointing the microphones right at your mouth because that makes sense. But when you do that, oftentimes you end up speaking past the microphone and it picks up sort of the wrong frequencies. I have found that if I point it at my chest, it seems to get the best overall sound quality and just the best sounding results. The only downside with this Sennheiser MKH50 microphone, as much as I love it, is that it is very expensive. It's definitely worth it if you make a lot of videos and you have the budget. But if you're looking for a more cost effective alternative, this microphone right here, the audio Technica at 897 is significantly less expensive and sounds almost every bit as good. So I don't want you to think you have to get a really expensive microphone to have a good boom mic setup. And then I just run the microphone either into the Rodecaster Pro, like I'm doing right now, or directly into my camera, which is the Sony FX3 that has built in XLR inputs. And, and I really like that workflow because then I don't have to sync audio during editing. Everything is just recorded on the fly and then I'm done and good to go. Now this last audio setup is definitely the trickiest, but it really is essential. And that is a lavalier microphone like this. Because now I've got the microphone pinned to my shirt, which means I can be picked up crystal clear no matter which direction I face, how far away I go from the camera. And it doesn't change because the microphone is physically attached to me. But the reason I say this can be a little bit of a pain is because it sometimes can be tough to get the microphone positioned well where it sounds good, to get the signal going into the camera in a way that sounds good and just to get everything up and running. So I use this the least. But it's definitely something I couldn't do what I do if I didn't have it. Now. Speaking generally, something I've learned when it comes to positioning a lavalier microphone is that it's usually best to have it kind of in the middle of your chest. Sometimes people will like to pin these sort of up on their collars. And the problem with this is that then my head would be blocking out the sound from getting to the microphone and it starts to sound a little bit muffled and strange. I have found that attaching the microphone right to the middle of my chest gives the most natural sound. Having a microphone like this is my favorite sound quality. So anything I can do using a boom mic or a lavalier microphone to get close to that level of sound quality, I think is a good thing. Now, even though you can just get a lavalier microphone that has a long cable and just run that directly into your camera, I don't like using wired lavalier microphones because it's so easy to forget that you're wearing one because they're so lightweight. And then I have found myself, like, walking away with it, which then pulls equipment down or I trip on cables. It's just. It's been something that has caused me to be really clumsy. So I much prefer to use a wireless lavalier system. Right now I'm using a sennheiser ewdp. I have a microphone that's going into this transmitter, and then there is a receiver sitting on top of my camera going into my camera, and that way there's no cables to trip on in between me and the camera, just like my boom mic. It is a more expensive option, but it also comes with significantly improved reliability and stability because it's designed to be used in professional applications, and it just gives me a lot of peace of mind. But I do also have some more budget friendly wireless systems that I use, like this Rode wireless pro. These are little transmitters and receivers. They're pretty neat because you have a receiver that you can clip onto a camera or phone even, or a tablet. And then you have a transmitter that can be its own microphone. So since this transmitter is its own microphone, I can even take this, clip it onto my shirt. And now this is just my wireless thing. I don't need to run a separate microphone. I do think it looks a little bit distracting to have this big black square here. So I do like to connect a lavalier microphone to the transmitter and then use a lavalier microphone. So that way you don't see this on camera. But these are really fun, really handy, and a lot more affordable. The downside to these types of wireless microphone systems is that they are much more prone to interference. And I have found that even just being in an environment with a lot of electronics like my computer and my audio recording stuff and a cell phone can also cause interference. And a downside with these is if you lose direct line of sight with the receiver, you can then have the audio signal cut out. So you always want to be very conscious of what is in between you and the receiver to get the best audio quality possible. But having not only a lavalier microphone, but also a wireless lavalier microphone has been a really integral part of my setup. These lower cost, more consumer friendly wireless setups are great if you only use it once in a while, and then the more professional setups are great if you're going to use it very, very often. So those are my three main audio setups. And I have been an audio video creator nerd for many, many years. So I didn't buy all this equipment at once. It was accumulated over a long period of time. You might not necessarily need everything that I have, but I thought I would just show you what I have and then you might get some ideas of what would work best in your specific setup. Check out more of our videos to learn about creating with Mighty. And if you want to see an entire live streaming studio setup from start to finish, check out this video right here.