My Livestream Video Setup From Start to Finish
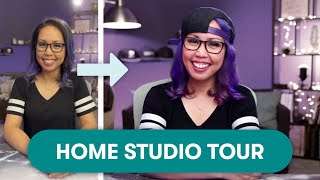
Heather, a six-year YouTube creator, walks through her 144 sq ft home studio setup. She uses a Canon 6D Mark II with a 35mm lens, Shure MV7 mic, and Elgato Cam Link to stream and record through ECAMM Live. Her lighting rig includes reflective lights, a hair light, LED tubes, and Philips Hue bulbs against purple and pink walls.
Questions this video answers
About 144 square feet.
Canon 6D Mark II.
Canon 35mm f/1.2.
Elgato Cam Link.
ECAMM Live.
Chapters
Hey everyone.
I'm Heather and I've been using Mighty Networks for two years now. And in my Mighty network I have online courses and I do webinars, live streams, all kinds of events on Zoom. Basically I do a lot with online video, but regardless of the video I'm creating, I use the same setup for everything. And in this video I'm going to take you on a tour and walk you through my entire video setup from start to finish. Keep in mind that I have been.
A YouTube creator for six years, so.
This wasn't something I built overnight. It's definitely been a work in progress, but hopefully this will give you some inspiration for your own video setup or home studio. Feel free to use the timestamps in the video description below if you want to jump around. And with that said, let's get started.
Welcome to my office. This space is about 144 square feet. This is my desk and this is what I'm looking at when I'm working on my desk or recording any video. Hello. This is what I see and on this side, this is what you see or what the camera sees. This is the background. So the reason why I have my room set up corner to corner instead of wall to wall is because it gives me a little bit more depth when it comes to the foreground and the background, which I think looks more interesting on camera. It kind of makes the background look blurrier. Now one thing that was an absolute non negotiable for me was was that I only wanted one setup regardless if I'm live, streaming, recording video content for whatever, jumping on a Zoom meeting, even just writing at my desk, brainstorming, working on stuff. I only wanted one chair to sit in and I didn't want to have to set anything up. I didn't want to have to set up cameras or plug anything in or anything. I just wanted to be able to sit and go. One thing that's kind of weird is that the camera is in the middle of two monitors. So if I'm having to look at my notes or if I need to look at the live chat or something like that, I do have to turn my head to actually see like the other people in the Zoom meeting and stuff like that.
I guess just over the years I.
Have trained myself to look at the camera lens whenever I'm talking and then whenever I'm listening, I just turn my head and look at this. And then when it comes to recording content like recording this video, I just have an outline right here in my notes app and it's just bullet points, and I kind of just memorize the.
Next couple lines that I have to do.
And then I look at the camera as I'm delivering the lines and then.
Turn my head and look again. So I think the most eye catching aspect of my background that you see is the wall, which I actually painted purple. And there are different things, different lights that I use to kind of cast shadows and showcase different aspects of purple. But this entire wall is just the same color purple. And then this wall right here behind the bookshelf is actually a white wall. But there's a pink light that flushes the wall and gives it that pinkish tint. So you might not be able to actually paint a wall in your room or your office, but you can do a lot.
Now, for lighting, I think I have about three lights that are functional in terms of lighting me up in the video, and then the rest are just decorative. So the first things are these two lights. This is what lights my face up. There are actually no lights pointing directly at my face. I think when you have lighting pointed directly at your face, like this is right now, it can kind of make it look really harsh. And then there's like shadows and stuff. Plus, I get really oily, so it looks super shiny. So I have my two main lights reflecting off the white wall. The other functional light is this light right here. So this is called a hair light. And it actually lights up the back of my head. I just think it looks cool.
Like this part right here.
Right, that's what that does. And if you turn it off, you actually will see a difference. I'll turn everything on and off one.
At a time to show you.
Now, in terms of decorative, we have a floodlight, LED floodlight. You can just find these on Amazon right here. And that's just pointing up against the wall. And again here, this is all the same color wall, but depending on what light is hitting it, you see a lot of dimension. I have Christmas lights because I think they look really cool on camera. This light is also pointing out the wall. That's that pink light. This is an LED light that you can change to all kinds of colors. And then there's a tube light down here, which is also reflecting off that way. And then that is the same floodlight reflecting off that way. This is a Philips hue bulb that I could also change to whatever color.
Okay. So I've recruited my husband to help me show you how all the lights in my studio build off of each other. So we are going to start with all of the lights off now. And here's what it looks like with all the lights off. But we are going to turn on the foreground lights first. So here's the main light. This is what it looks like. And then the other foreground light is this one. Awesome. And we could just leave it at that if this is all you wanted to light. But you can see that the decorative lighting really makes a difference. Okay, those are two back there. There's one there. And I'm going to turn on the big dome light. And there you go. So that's the whole thing. Thank you.
So the video part is actually probably the most simple part of my video setup. Here is my camera. This is a Canon 6D Mark II. And if you like how my videos look, do not go out and buy this camera.
It's actually relatively old, but I keep.
Using it because it works. So if you want to achieve the same look, I'm sure there are a ton of newer models that'll probably do the same thing, if not better. Also, that lens is a Canon 35 millimeter 1.2. Now the magic when it comes to this camera is actually in the this cord right here. This is an HDMI cable which connects to this thing right here. This is the Elgato cam link. And that's what connects directly to my computer. So when it comes to video, I actually don't use memory cards. I record straight into my computer or the video feed go straight to my computer. And it all goes through a program called ECAMM Live. So I don't have to deal with taking out memory cards, Keeping track. So sorting footage, importing, all of that, they all just get recorded as video files onto my computer. The other key component of this, I don't know if you can see it. There's this like black cord right here that plugs into the battery compartment of this camera. And that cord actually plugs in for power because sometimes I live stream for several hours and the battery would just die. So with this, I could leave it on all day, all night.
For audio, I use the Shure MV7 microphone. This is actually a custom colored one that I got on colorware.com and that is mounted onto the Elgato low profile boom arm. I used to have a boom arm that came over. I think the more common ones come over on top, but it would cover my face a lot. So I really liked the low profile arm one because it comes out just like this. So I could push it away when I need to just write stuff down or you know, Brainstorm, I use an XLR cable to connect that to the Scarlett 2i2 interface. And then this interface plugs directly into my computer. And then whatever program that I'm using to record or stream, I just select my audio source to either be the Shore MV7 or the Scarlett 2i2. It changes depending on what program I'm using, but it's referring to the same thing. And I'll show you in the software section. When it comes to monitoring sound, as in what I'm hearing, I do have a little speaker on my desk. But if I'm doing a live stream, I want to avoid that feedback echo loop that sometimes happens. So I do like to have headphones and these are great because they're in ear headphones and the go behind me so there's no like, you know, wires or cords in the shot. So it just goes like this and then I hook them into my ears and then I just plug this into my computer. So both my video setup and my audio setup connect directly to my computer. So whether I'm recording or streaming, and regardless of what program I'm using, all I have to do is select my video source and my audio source and I'm good to go. For example, I have Zoom open so I can select my video source by going to the Start video button here. And right now it's on ECAMM Live virtual cam. But I'm going to change this to the cam link and then I'll turn the video on. So here's the video source and then I can click this button as well to select my audio source, which you can see my Scarlett 2i2, which is my audio interface that this microphone plugs into, is already selected. And you can see as I'm talking the, the green levels are showing, which means that my audio is being picked up. So I'm good to go. Now, my program of choice for all things video is ECAMM Live. ECAMM Live is what I use to record any video live stream. Anything that has to do with video or audio, I use ECAMM Live. And the reason why I do is because one, it allows me to record directly to my computer. Secondly, I can do really cool things with live streaming, like pop up comments, help have guests on stream. So for example, I can show you some of the customizations that I've built. Here is when I had my live stream where I would do interviews. Let's see, it'd be something like this or like this.
This is where I would have the.
Guest on one of these cameras and then myself. And then I had some space here to pop up comments. But yeah, you can do things like this or I can have myself on one side of the screen and then share my screen so people can see what I'm looking at. And I only have to build these once, right?
Like all this, the graphics here, I.
Just make all these graphics in Canva and then I import them into ECAMM Live and then everything is saved. And what's awesome is that I do have a stream deck, which is this thing right here. And I can program my stream deck to basically switch scenes with just a push of a button like this. I can do all that just by pushing buttons. So you can imagine just how you can have a one person live production and then whatever program I'm using, like Zoom, in Zoom, I'll select ECAMM Live as the video source so that when I'm in Zoom, I can do these things where things are popping up and I can move this and I can add like graphics and stuff like that. So thanks for coming along with me on this tour of my studio. I hope you found this helpful. And as I mentioned before, regardless of the content that I'm creating, whether it's live streaming in my Mighty network, or creating content from my online courses, doing webinars, jumping in on Zoom meetings, or just brainstorming at my desk, this is my video setup and I don't think I've changed it in like two years. I'm really happy with it. I don't plan to upgrade, but if you have any questions, feel free to leave them in the comments and I will try to respond. With that said, if you want to learn more about Building on Mighty, you could check out this video next and I'll see you over there. Bye.