Accessories Every Guitarist NEEDS | Great GIFTS for Guitar Players 2024
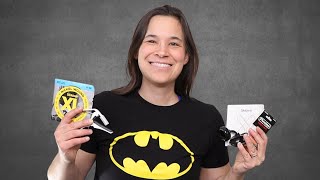
YouTube video (Lauren Bateman) giving a buyer’s-guide-style walkthrough of essential guitar accessories for beginners. Covers picks (recommends thin ~0.5 mm and Dunlop Max Grip variety packs), clip-on tuners (Snark), keeping a practice journal, using a metronome to track beats-per-minute progress, music stands, guitar straps (ergonomics, wider for heavy guitars), spare strings (D'Addario phosphor bronze 11s for acoustic; hybrid 9s/10s EXL125 for electric), capo (Kaiser), and a Fender Champion practice amp. Includes practical tips (have multiple picks, tune before every session, write down BPM and chord-change timing) and product-model examples to help beginners choose gear.
Questions this video answers
About 0.5 millimeters or thinner.
Snark (clip-on) tuner.
D'Addario phosphor bronze, 11s (custom light).
D'Addario EXL125 hybrid set (nines on bottom, tens on top).
Fender Champion practice amp.
Chapters
Hey, guitar enthusiast. Congratulations on learning the guitar. I'm going to talk about some must have accessories. You need these to be able to be successful at learning the guitar. And the first thing we're going to start with is the guitar pick. Now, any of these products I go over today. I'll put a link in the description below for you to go and check out if you don't have them yet. So you're going to see here I have a bunch of different guitar picks. And that's the thing with guitar picks. There's so many different varieties of picks. So I'm going to give you the top two I recommend for beginners. And that is usually a very thin pick. This one here is a Dunlop tortex. This is 0.5 millimeters. They do make some that are even thinner than this. But look at this. I can almost bend this pick in half. And what's the benefit of that? The benefit is if you took a really thick pick and you have a stiff arm like most beginner guitar players do. All right, you're not relaxed yet because you're learning something new. And you go and strum a chord, it's going to sound like this.
And it's not going to sound the greatest because you are digging into the strings. And these thicker picks do not have a lot of give versus this thinner pick. I'm going to play with the exact same pressure I just played with. Here it is.
You can see it already sounds a lot better. So because your hand is so stiff, the flex should be. The pick should be a little bit more flexible so that it takes away some of that harshness from your playing. So if you're a beginner and your strumming sounds really, really stiff and hard, try using a thinner pick, 0.5 millimeters or thinner. Another one that I really recommend and like for beginners is the Max grip picks. And they come in various sizes. This one's a Little bit thicker, 0.88, but it feels like sandpaper on the back of the pick. Because I have a lot of students, you know, they lose the pick, it falls on the floor. Listen, that's never gonna stop. I've been playing guitar almost 20 years now, actually more than 20 years, and I still drop the pick on the floor sometimes it happens. Not as frequently, but it's something that's gonna happen. And these Dunlop Max Grip picks are really, really great. Something I recommend for students, and I'll put a link for these in the below is, is to get a variety pack. So Dunlop makes These really great variety packs. This one's an acoustic one. They have acoustic and electric and I believe they have various thicknesses so you could get one that's maybe a light pack or a medium pack. But there's about a dozen picks in here and they're all different thicknesses and varieties. I actually see one of those Dunlop Max grips in here that is a half a millimeter thick. So it's a good variety of different types of picks because they have different feels. Some are made of nylon, which have a small smoother feel. Some of the axe grip, which is more of like that sandpaper feel. So getting a pick pack is a great way to start figuring out what pick you like to play with. Because it's a very personal thing once you get into the guitar. So what I like you may not love. Alright, so that's why it's very, very personal. But in the beginning, definitely use a very, very thin pick. And on a side note, before we get into the next accessory that you need, get a number of picks. I'd probably get a couple of those packs. I have a little container over here that's just full of like hundreds of picks. I lose these things all the time. You're going to lose them too. They're small, they end up on the floor, you never see them again, they fall inside the guitar. So make sure you have at least a dozen or so picks at your disposal. So this right here is a guitar tuner. I'm not going to show you how to use it here. If you're interested in learning how to tune your guitar and I highly recommend you go check out my free guitar crash course, put a link in the description below. But I show you how to hold the pick, how to tune the guitar and all that fun stuff. So this is a really great one. These clip on. This is a Snark tuner and they just clip on the top of the guitar like this and there's a little LED screen, okay. That lights up and it will help you tune the guitar to the proper pitch. Because the thing is, if your guitar is out of tune. So my guitar is in tune right now. If you play a chord, it sounds great, but if I put the guitar out of tune and then I play that same chord.
It doesn't sound so good. So you always want to make sure before you start practicing that you tune up your guitar. Even if you just tuned your guitar, you put it in the case and then you go outside and travel somewhere. If it's cold, like it's 20 degrees outside in Boston right now, if I take my guitar in a case, take it outside, take it back inside, it's probably going to go out of tune. So before you play your guitar, so every time, just pop on your tuner, get it in tune and you will always sound great. So now that I put my guitar back in tune, I want to talk about an accessory that most people overlook. And I'm old school. I still like an old fashioned pen and paper. It is a practice journal. This is something I go over in my seven level guitar system. We have what's called the perfect practice routine. And all it is is we want to keep track of of what we're practicing week to week and we want to keep track of our progress. And I'm going to show you a tool next that you can use with your practice journal to ensure that week to week you are making progress. But I don't want to underestimate how important it is to keep track of your progress. Because a lot of students, they give up because progress is very subjective unless you write it down. So for example, if I can do a C to G chord change and I can do it 5 seconds per chord change, but then next week I can do it 2 seconds per chord change, I got faster. That's progress and that's motivating and that will keep pushing you forward. When you see progress, you're like, okay, this is working. If we don't write it down and we don't see progress, we're going to question whether the process is working or not. And that's more likely to make us give up and quit. So first thing, if you don't have a practice journal, get one right now to write down your goals and how you are doing week to week, month to month. So this is going to be one of the most important tools you can use. And it'll go hand in hand with your practice journal. It's this.
We call this clicking track a metronome. And what it does is it helps you track how fast you are doing things. So I'm going to put this metronome at 100 beats per minute. Now think of beats per minute. That's how we measure music. So a car, it's miles per hour or it's kilometers per hour. In music, it's beats per minute, it's the heartbeat, it's the pulse of the music. And let's say I'm able, I'm practicing chord changes, alright? And I'm doing 100 beats per minute. It would sound like this 2, 3, 4.
Okay? And for a lot of people, 100 beats per minute is pretty quick. But now I practice, and I practice, and then next week or, you know, in a few weeks, I can do it at 120.
Okay. And then I keep practicing, and a few weeks later, I can do it at 150. 2, 3, 4. Like a pump rock song.
Okay? So you can see by using this metronome one, it helps me work on timing. And timing is one of the most important things you can work on in music. So, you know, you can do chords, you can play parts, but if you are out of time, it's always going to sound bad. And playing music with others, you have to be in time, because if one person's playing at 100 beats per minute and the other person's playing at 120, it's just not going to gel together. It's going to sound bad, and you're going to wonder why. So timing is super, super important. But also the number that you see on here will be able to be written in your practice journal. And. And you can see, week one. Oh, I did 25. Which a lot of my students, when they get started with chord changes, they could be in the teens. I've had students start as low as the teens. They can be in the 20s, they could be in the 30s. But every week you're like, week one, I did 20. Okay, week two, I did 25. Week three, I did 40. Wow, I had a big jump there. Okay, week five, maybe I did 43. I'm like, oh, I'm getting a little bit stuck. But then you keep working on it, and the next week it's 60. But you can slowly see, even if it's only going 40 to 43 or 40 to 45, that is improvement. And again, it's just that visual motivation to keep going with this that you are making progress. Remember, learning the guitar takes years. It's not easy. And you do need a good process. And this is part of my process that I teach students. You have to be methodical. You have to write things down, because if you don't know where you came from, you. You're not going to be able to compare yourself today to what you were a month ago, three months ago, a year ago. Okay? So when you get into those ruts, we hit those plateaus, you can pop back in your journal and be like, wow, I remember I couldn't even play a C chord. And now I can play all the chords. That's really great. Now this next one is not really essential, especially if you're using a computer a lot. But I have one right here. I got all my notes on it. It's a simple music stand. Now if you're someone who wants to print out sheet music, it's great to have a music stand. So I can look here. Instead of looking down at the ground, you're going to put yourself in a really bad position looking at the ground like that. So you want a music stand that you can either look straight forward at or if you're using a computer and a computer screen, that's great. A lot of my students, when they go through my course, they put it on a big screen tv. I never thought I'd be on a big tv, but I have a lot of students who use their TV and they sit with the guitar and they watch the tv. They're not looking down at the ground. All right. You want to be able to look forward to because it's better posture wise for you. Because if you're looking down like that, you're going to put a creek on your neck. You're going to put a lot of tension up here and tension in your shoulders. And speaking of tension, this next accessory will help you with reducing that. I'm wearing it, it's called the guitar strap. Okay. Very important accessory. I think it's overlooked by a lot of students. And the great thing about the strap is it not only holds the guitar in place so that you don't drop it on the floor, you don't want to be dropping your expensive guitar on the floor, trust me. Okay. But the other thing that it does is it helps keep my guitar in a good ergonomic position. What do I mean by that? It means that my guitar neck is pointed up. We never want to play with the guitar neck flat or pointed down. Puts a lot of pressure on our wrist. Alright, so a lot of students, some students like playing what's called classical position. Really see the neck going up. But it's much healthier for your wrist. It also gives you a lot more stretch to be able to play, play your chords. All right. But number one, it takes so much pressure off your wrist. So definitely get a guitar strap as soon as possible. And the wider the guitar strap, the less pressure on your shoulder. I know a lot of people have really, really heavy Gibson Les Pauls. You might want to get a three inch wide strap. Okay. Because those guitars are very, very heavy. My acoustic is lighter. This Gretch is actually very light because it's hollow inside. But those solid body Les Paul type electrics can be very, very heavy. That's why I don't play one just because it puts too much pressure on my shoulder. These guys right here, these are strings. These ones are electric strings. These ones are acoustic strings. Listen, you are going to break a string on your guitar. So I recommend having a couple extra set of strings. Why a couple? Because when you. The first time you go to change your strings, chances are you're probably going to break one of them. It happens. It's very common. So have an extra set so that when you break the string, you don't have to run back to the store. What I like to use, these are my preferences. And again, I'll put links below for you to go. Check that out. I use on my acoustics, I like to use lighter strings and I recommend that for beginners because they require less pressure on my acoustic. I use D' Addario 11s. These are phosphor bronze. I like phosphor bronze because it gives the acoustic a nice warm, balanced tone. So, so these are what we call 11's they are custom light strings. And then this one here, the electric guitar strings. Light strings would be nines. That's what I like to use. This string set is actually a hybrid string set. It's light strings on the bottom because it makes it easier when I'm playing lead guitar to do bends if I'm doing a solo. And then it has slightly thicker strings on the top, which makes the guitar sound better when you're playing power chords and doing rhythms. So this is what I like. They're the nickel Wound d' Adore EXL125. It's called a hybrid string set, but it is still light strings. I would consider nines and tens, light strings for the electric. And these are nines on the bottom, tens on top. So you get a nice set of strings right here. Now this here is a nifty little tool. It's called a capo or capo, depending on where you are in the world. But I call them a capo. This is a kaiser capo. These are my favorite that I like to use. All it does is a little clamp that you put on the guitar. So if you learn four chords, the ones I like to teach people, G, E minor, C, D. If I put a capo on and I play those somewhere else.
Okay. With my out of tune guitar, it's still slightly out of tune from earlier. If you put the capo on, you can play more songs with just four chords. It's a very, very valuable tool for beginners. I use them a lot of times in songs and if they have bar chords, sometimes I will add a capo to make it easier to play for a beginner. So not really necessary, but a great, amazing tool to have, especially if you're an acoustic guitar player and if you're an electric guitar player. Again, not necessary, but having a really great practice amp would be super, super helpful. And you're going to want to get what we call a quarter inch cable to plug your guitar in to the amp. This is my favorite. This is a Fender champion amp. It's just a basic Fender practice amp and it doesn't have a ton of bells and whistles, but you can actually get some really great sounds out of this amp. So now that you have all the accessories that you need for your guitar, why don't you go to that lesson there? We're going to show you the first four chords you should learn on guitar to play thousands of songs.










