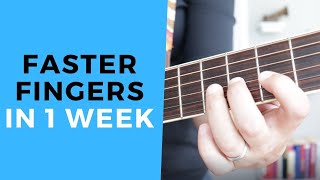
Lauren Bateman demonstrates a short guitar finger exercise she calls the "up and down" exercise to improve finger independence and speed for chord changes. Each finger is assigned to a single fret (example: 5th–8th frets) and the student does 'ups and downs' (lifting and placing a finger between top and bottom strings) 20 times per finger daily, with special troubleshooting and tips focused on loosening the third (ring) finger. The lesson warns against over-practicing and links the exercise to easier C→G chord movement; a second-level course expands to multiple-finger movement.
Chapters
Hey, guitar enthusiast Lauren Bateman here. We're going to be talking about a way to get those pesky fingers to move faster so that you can actually change your chords faster. So let's talk about the exercise in this lesson.
So this finger exercise, I just call it the up and down exercise. And with a lot of students, the problem they have is that they can't get their cords to. To change fast enough. And a lot of times, you know, students get in the habit of forming chords one finger at a time because they haven't developed enough independence in their hands to get multiple fingers moving at once. So that's what this exercise does. And what we're going to be doing is we're going to be focusing on a lot on this third finger, which is the problem finger for almost every single guitar player out there. And I didn't learn this exercise until I've been playing guitar for kind of 10 years. I was learning on my own for 10 years, and I actually got a guitar teacher, and they showed me this exercise, and it made a huge difference in my guitar playing and my chord changes. So let's talk about the exercise here. Each finger is going to own its own fret, and you can start this anywhere. I'm going to start it at the fifth, sixth, seventh, and eighth frets. The stretch might be too much for you. You might need to start at 7, 8, 9, 10. Or if you need more of a stretch, you can start on the third fret. But I'm going to be doing 5, 6, 7, and 8. Okay, so the first finger gets the fifth fret, second finger gets the sixth, third finger gets the seventh, and the pinky gets the eighth fret. Now we're going to go to the third string, so our G string. And we're going to put the first finger down, the second finger down, the third finger and the pinky. So all the fingers are going to be down on the guitar at the same time. Now, something that. Something to keep in mind. Make sure don't tweak your wrist. Don't do this with your wrist. Try and relax. This is about getting. Also relaxing your hand as a whole. All right, so. So we have all of our fingers in place here. And what we're going to do is we're going to start with the first finger, and we're going to do ups and downs on the guitar. I kind of call them like finger push ups on the guitar. And we're going to go to the top string, bottom string, top string, bottom string. And try not to Rock your wrist back and forth. In the beginning, it's going to be tough because your. Your hand is probably still very stiff, but as your hand loosens up, it won't need to move as much. So, first finger, you're just going to go top string. This finger is probably going to be pretty easy for you to do. Okay? And another tip. Don't forget to breathe. Don't hold your breath when you're doing this, all right? So you probably do that like 10 to 20 times. And then we're going to switch to the second finger. Same thing, top and bottom. This one might be a little bit more difficult, but probably still going to be fairly easy. All right, now, if you're an older player and you have older hands, this might go a little bit slower. Don't worry about it. Just work on it one by one. And I have some tips that I'll give you after I show you the exercise for working through this. We're going to skip the third finger for now because that's going to be our most difficult finger, and we're going to talk about that. We're going to go to the pinky first. Now, the pinky can sometimes be tricky. Try and reach up as high as you can, all right? And if you can't make it to the top string, try and get the fifth string, you know, but do as much as you can. The pinky won't be too bad because it's actually pretty independent of the other tendons in your hand. The one that's going to be tricky is the next finger, and I want to give you a little reason why. Just real quick, if you guys are finding the information in this video helpful, please give me a thumbs up. Really appreciate it. Let's get back into the lesson. So what I want you to do, I want you to bend your pinky. Okay? Look what happens to my third finger. When you bend your pinky, your third finger automatically. These two fingers are intertwined. All right? Bend your second finger. Look what happens. See the third finger. Bend your first finger. First finger, nothing. Okay, so the pinky and the second finger, you cannot bend those without the third finger wanting to move. The tendons are very interconnected, so we're going to try and loosen that up. And that's why your third finger is the trickiest finger of them all. So we're going to take the third finger, and we're going to go to the top string, the bottom string. Top, bottom, top, bottom. Now you can see my finger. You know, when I first learned this Exercise it was. I could not move my finger this fast. Actually, what happened and might be happening to some of you, I couldn't even get my finger. Once I went to the top string, going up was fine. Coming back down, I felt like I had to, like, force the finger down. We don't want to force the finger. So I'm going to give you a couple tips here now for this exercise in regards more to this third finger. So for some of you, this might be really hard. Again, don't forget to breathe when you come up. Relax your finger down. If you can't get it to come and relax down, you might have to use your other hand to assist you in relaxing that finger down. It's all part of the process. I had to do this, too. Okay. The other thing that might be happening is we want these fingers to stay in their frets, okay? So your other fingers might be coming up. You can also hold the other fingers down with the your other hand while you move your third finger up and down. Eventually, you'll be able to. To take that away and not have so much tension in your fingers. Now, an important thing about this exercise, you don't want to do this for, like, 10 minutes, 20 minutes. This is an exercise where a little goes a long way. So usually I recommend doing each finger up and down 20 times once a day. That's it. So it might take you a minute, it might take you two minutes. Don't overdo this exercise, because you could develop, like, carpal tunnel if you overdo it. We just want to work on starting to relax the fingers. I guarantee if you do this, you know, you do 20 ups and downs. So, you know, one up and down is more. One, two, three, four. You do 20 of those a day for each finger, I promise you're gonna see a lot more flexibility and relaxation in your hand overall. Now, this is just the first level of this exercise. I do have the second level in my full guitar course where we get into moving multiple fingers at once, which. Which just kind of like, reinforces what we're doing here. But this is a great starter exercise for all students to get into. Really, really building finger flexibility for these chords, particularly going to C to G, because what is C to G? We're moving the third finger up and down, right up and down. So work on this up and down exercise, and hopefully it will help you guys get your chords to move a little bit more fluid. I hope you guys enjoyed this lesson video. Make sure to, like, comment below whether you thought this was helpful and don't forget to subscribe to the channel because you'll get to see more of my lesson videos and see what's coming up.