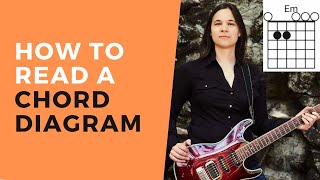
Lauren Bateman teaches how to read guitar chord diagrams, using E minor and C major as examples. The video includes a downloadable PDF to help you practice identifying finger positions and string placements on the fretboard.
Chapters
Welcome back. In this video, we're going to talk about how to read a chord diagram, which is going to be very important for you to know because you'll come across these quite often in guitar. So what we're going to do is we're going to start with the first chord. I'll show you in this course, which is an E minor chord. And I'm also going to show you an example of a C major chord so that you can see all the symbols that we need. So let's start with the E minor chord. You'll see here that there's a box. And this box has a bunch of lines. And the lines that go up and down are your strings. And the lines that go across the horizontal lines, those are your frets. So each white square equals a fret. And at the top, you're going to see on this E minor chord, a bunch of little circles. Those circles mean that you play the string open, meaning that there's not going to be any fingers on those strings. Now, if we look to the A string, which would be the second string over from the left, you'll see that there's a black dot, and that black dot has the number one. So in your course book, your chord charts are going to have finger numbers. And this number one represents the first finger. So what this chord chart is telling you to do is to go up to the second fret on the A string and put your first finger down. And directly below that, or directly to the right, you will see the number two. And this is telling you to take your second finger. And your second finger is going to go on your D string on the second fret. And then if you strum, all the other strings will be open. And that's why there's the circle, the top. Now let's do that again. So the first row of blocks that you see is the first fret of the guitar. And the second row of blocks is your second fret. And both of our fingers for this E minor chord fall within that second block. And our first finger is going to go on the second fret of the A string or the fifth string. And our second finger is going to go right below on the D string or the fourth string of the guitar, also in the second fret. And that is how you play an E minor chord. What we're going to do now is we're going to go over to a C major chord. This is the simple C that I teach you. And you'll notice that there's a couple extra Symbols up top. Here we have two X's, and when you see X's at the top of a chord chart, it means do not play those strings. So those strings should remain silent. If you can do that. You'll also notice here that we have a couple open strings on the first string and the third string, your G and your E string. And you'll notice that we're also using the first and second fingers. So let's start with the first finger. The first finger is found in the first block and it is found on the second string or the B string, while your second finger is found in the second row of blocks. So that would be your second fret, and it is found on the D string or fourth string. So if I go through from the sixth string, the E string, which is the line up and down the vertical line all the way to the left above that is an X. So you play that string. Well, actually, you don't play that string. That one's silent. If you go to the fifth string, which is your A string, that also has an X. So don't play that one either. If we go to the fourth string, your D string, we have the second finger at the second fret. When we go to the third string or the G string, we have an open symbol. So we're just going to play that string open. There's no fingers there. If we go to the second string or the B string, we have the number one. And that's just saying play the first finger in the fourth first fret, because it's in the first row of blocks. And then the very, very last string, all the way to the right is your high E string, the skinniest string on your guitar. That's also a circle. So we're going to play that open. So this is how you go through a chord chart to figure out how to play all the different chords that you're going to learn in this course. There's also a PDF that goes along with this that discusses how to read a chord chart using the D major chord. So if you need some review or are better with written material, can go and check that out as well. So I'll see you guys in your next lesson.